Creating a Plan
Sorry, your browser is unable to play this type of file.
You can still
download it
It's now time to create your first plan. Creating your first plan will make more sense if you have watched our previous help videos which were the overview video and get to know the “Planner” settings. “Planner” settings are very important because they help you understand items, item types and creating your item library. We strongly recommend you watch those videos first before creating your first plan.
To create your first plan,
-
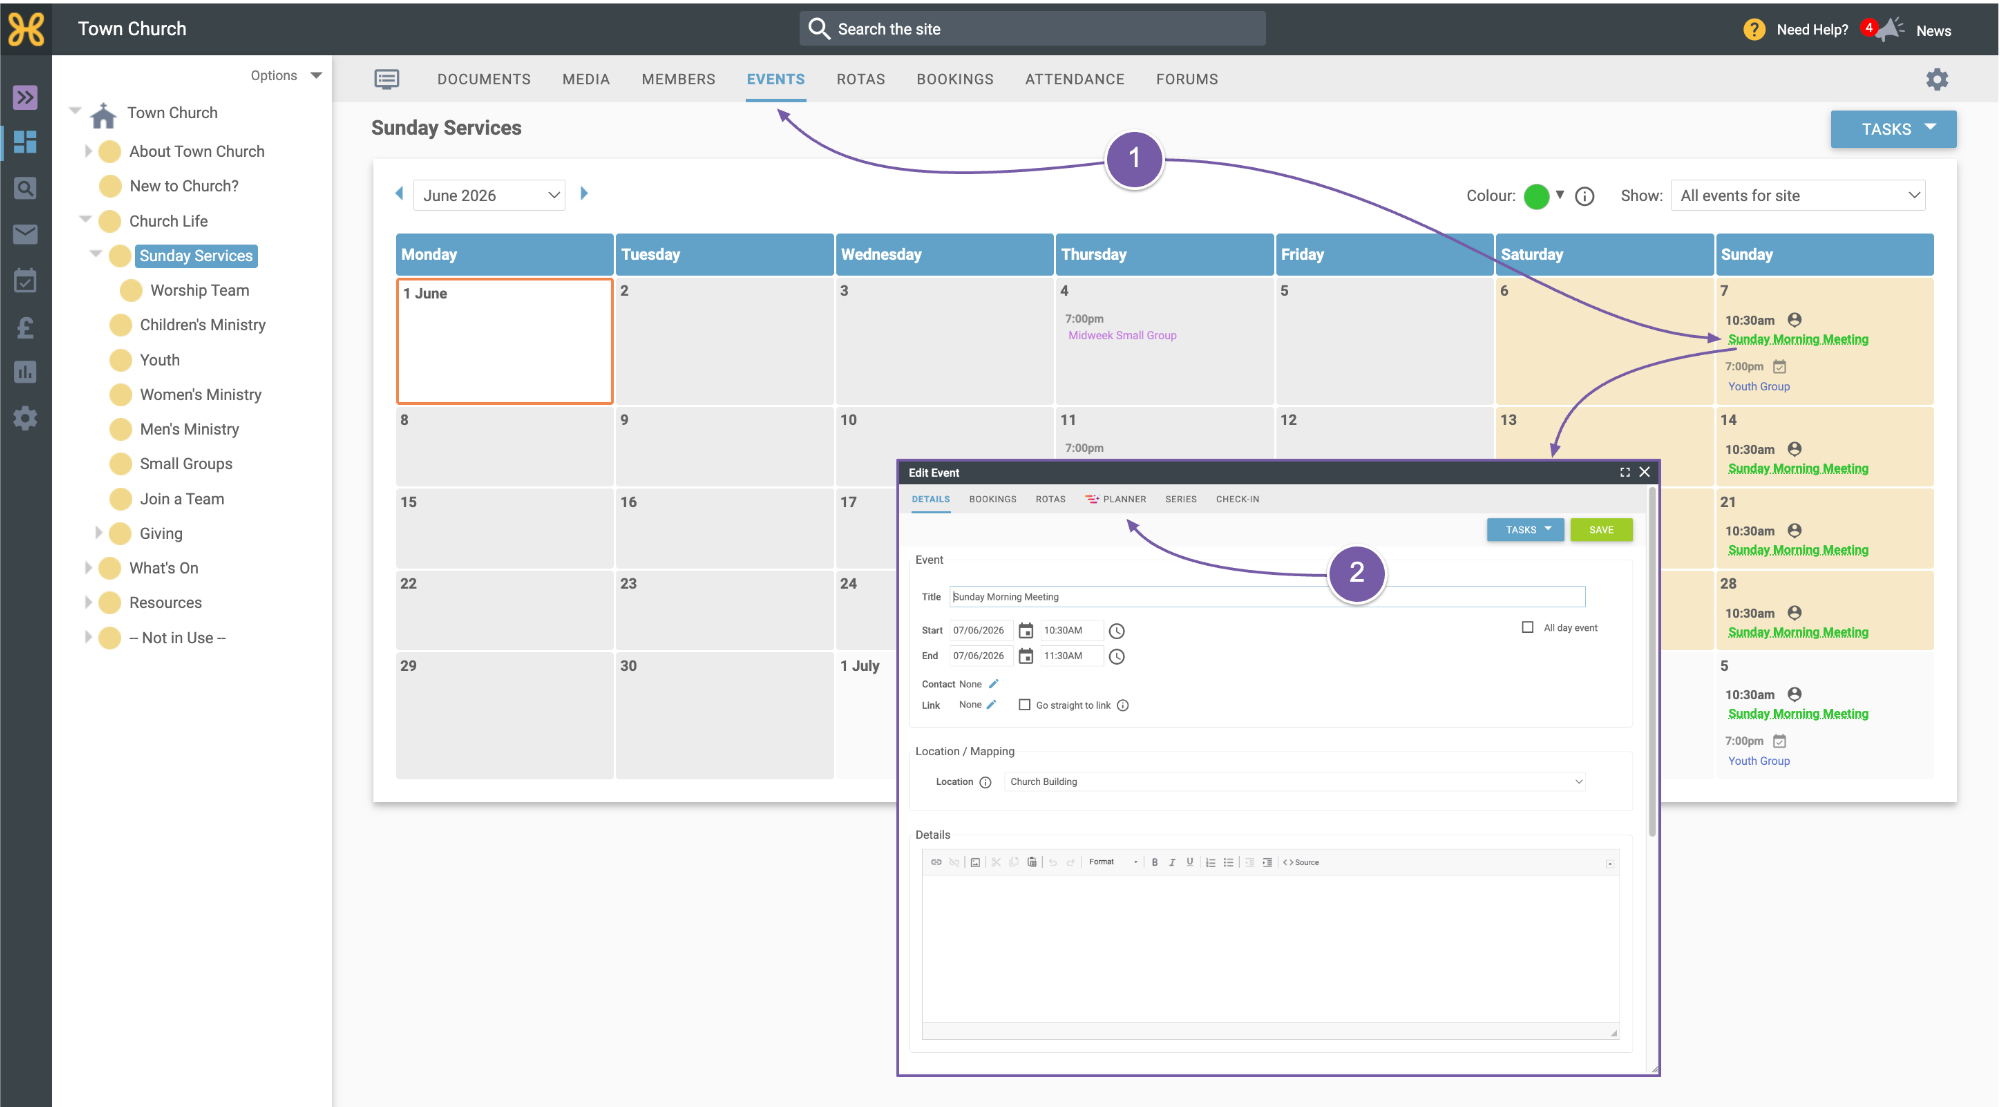
Find the event to which you wish to add the plan and click on it.
-
Then click on the “Planner” icon.
-
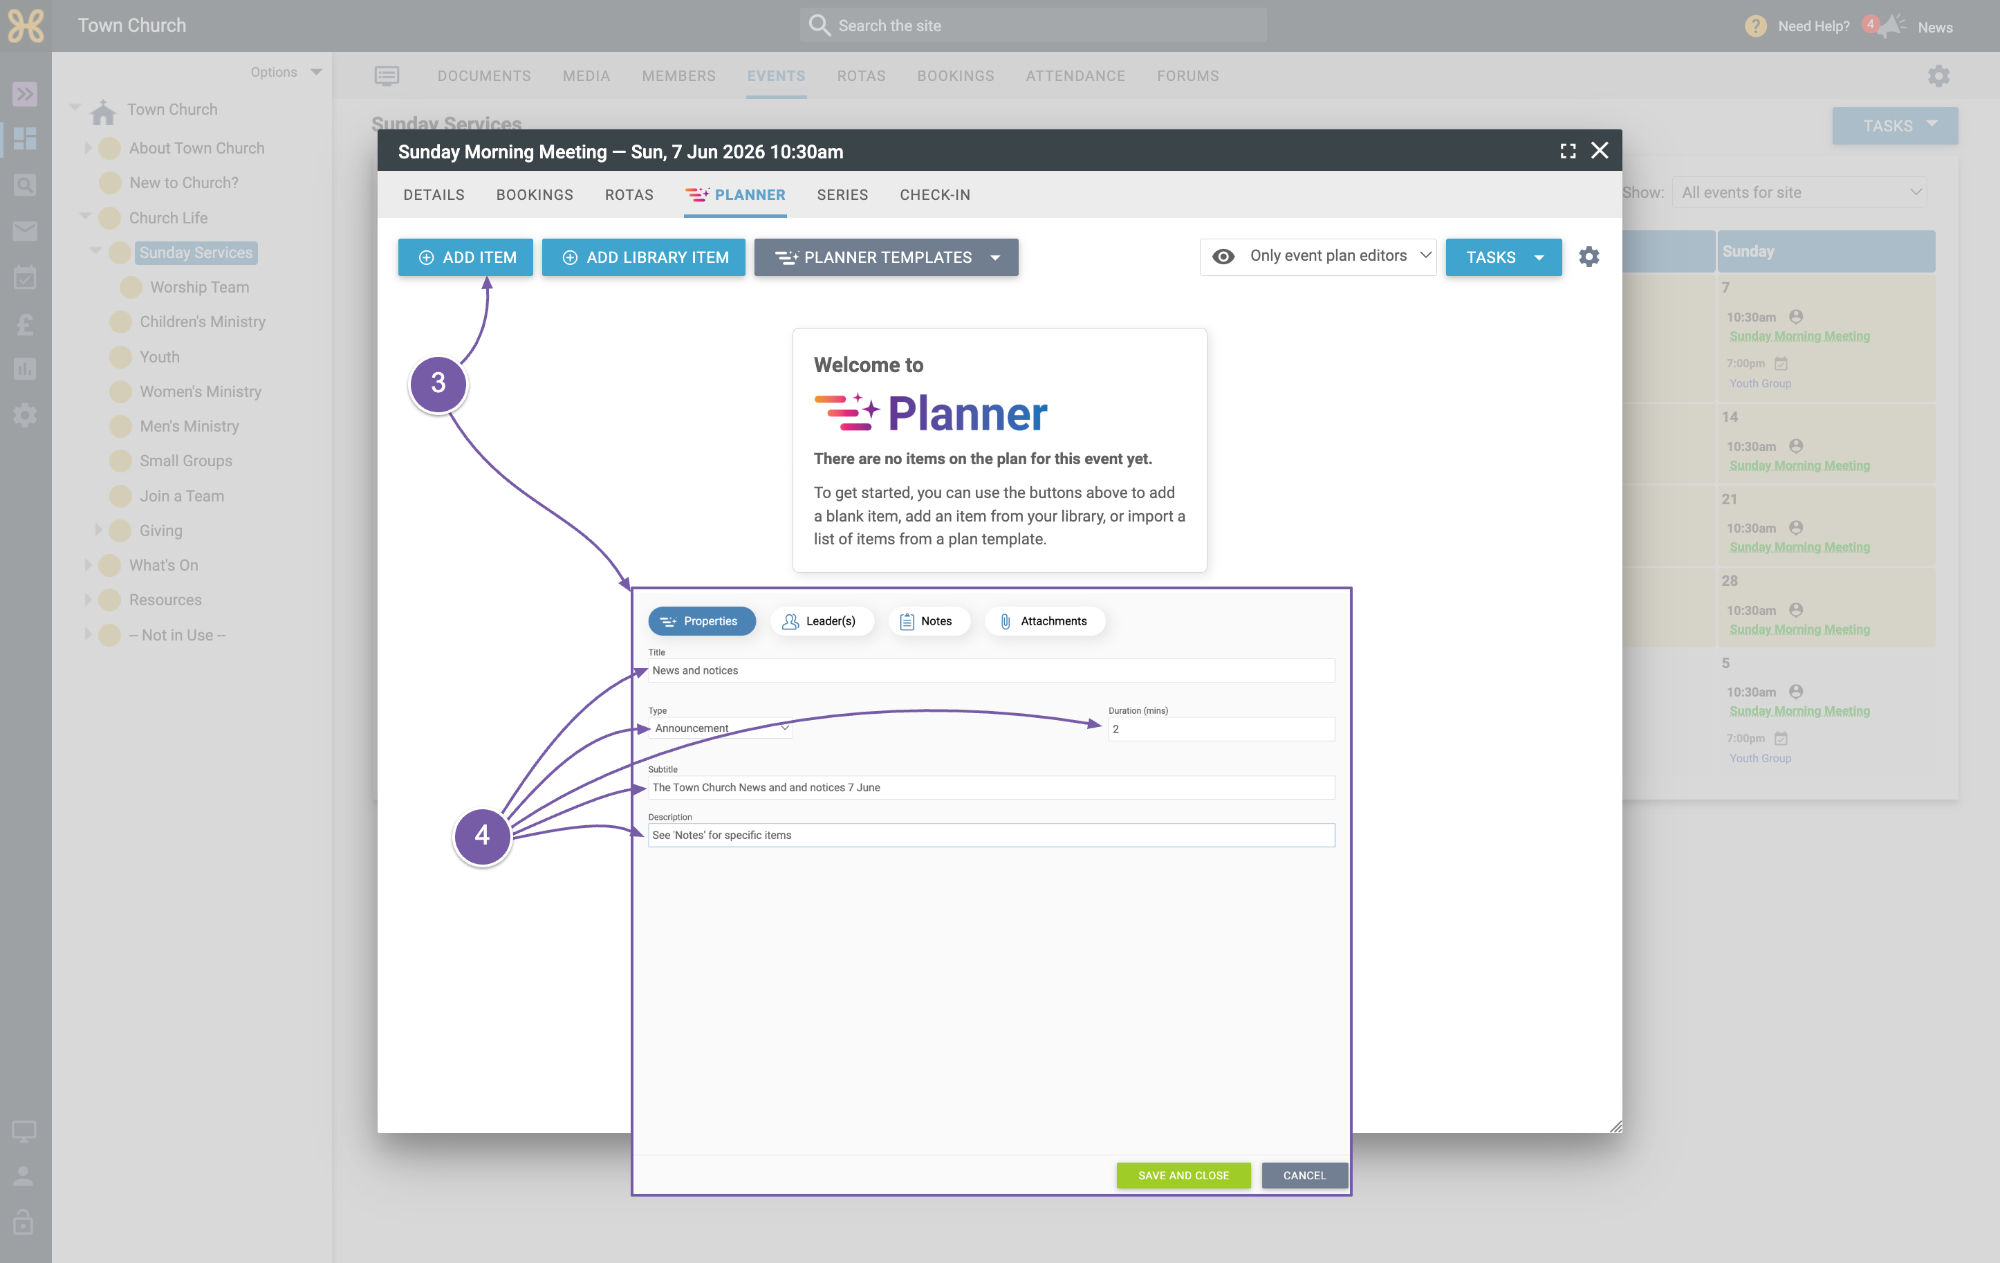
Let's first add a new item. Click on “Add Item”
-
Add the title, choose the type, set how long it will roughly last for. If needed you can add a subtitle and description. The subtitle will be displayed on the plan but the description won't, that is just for your admin purposes.
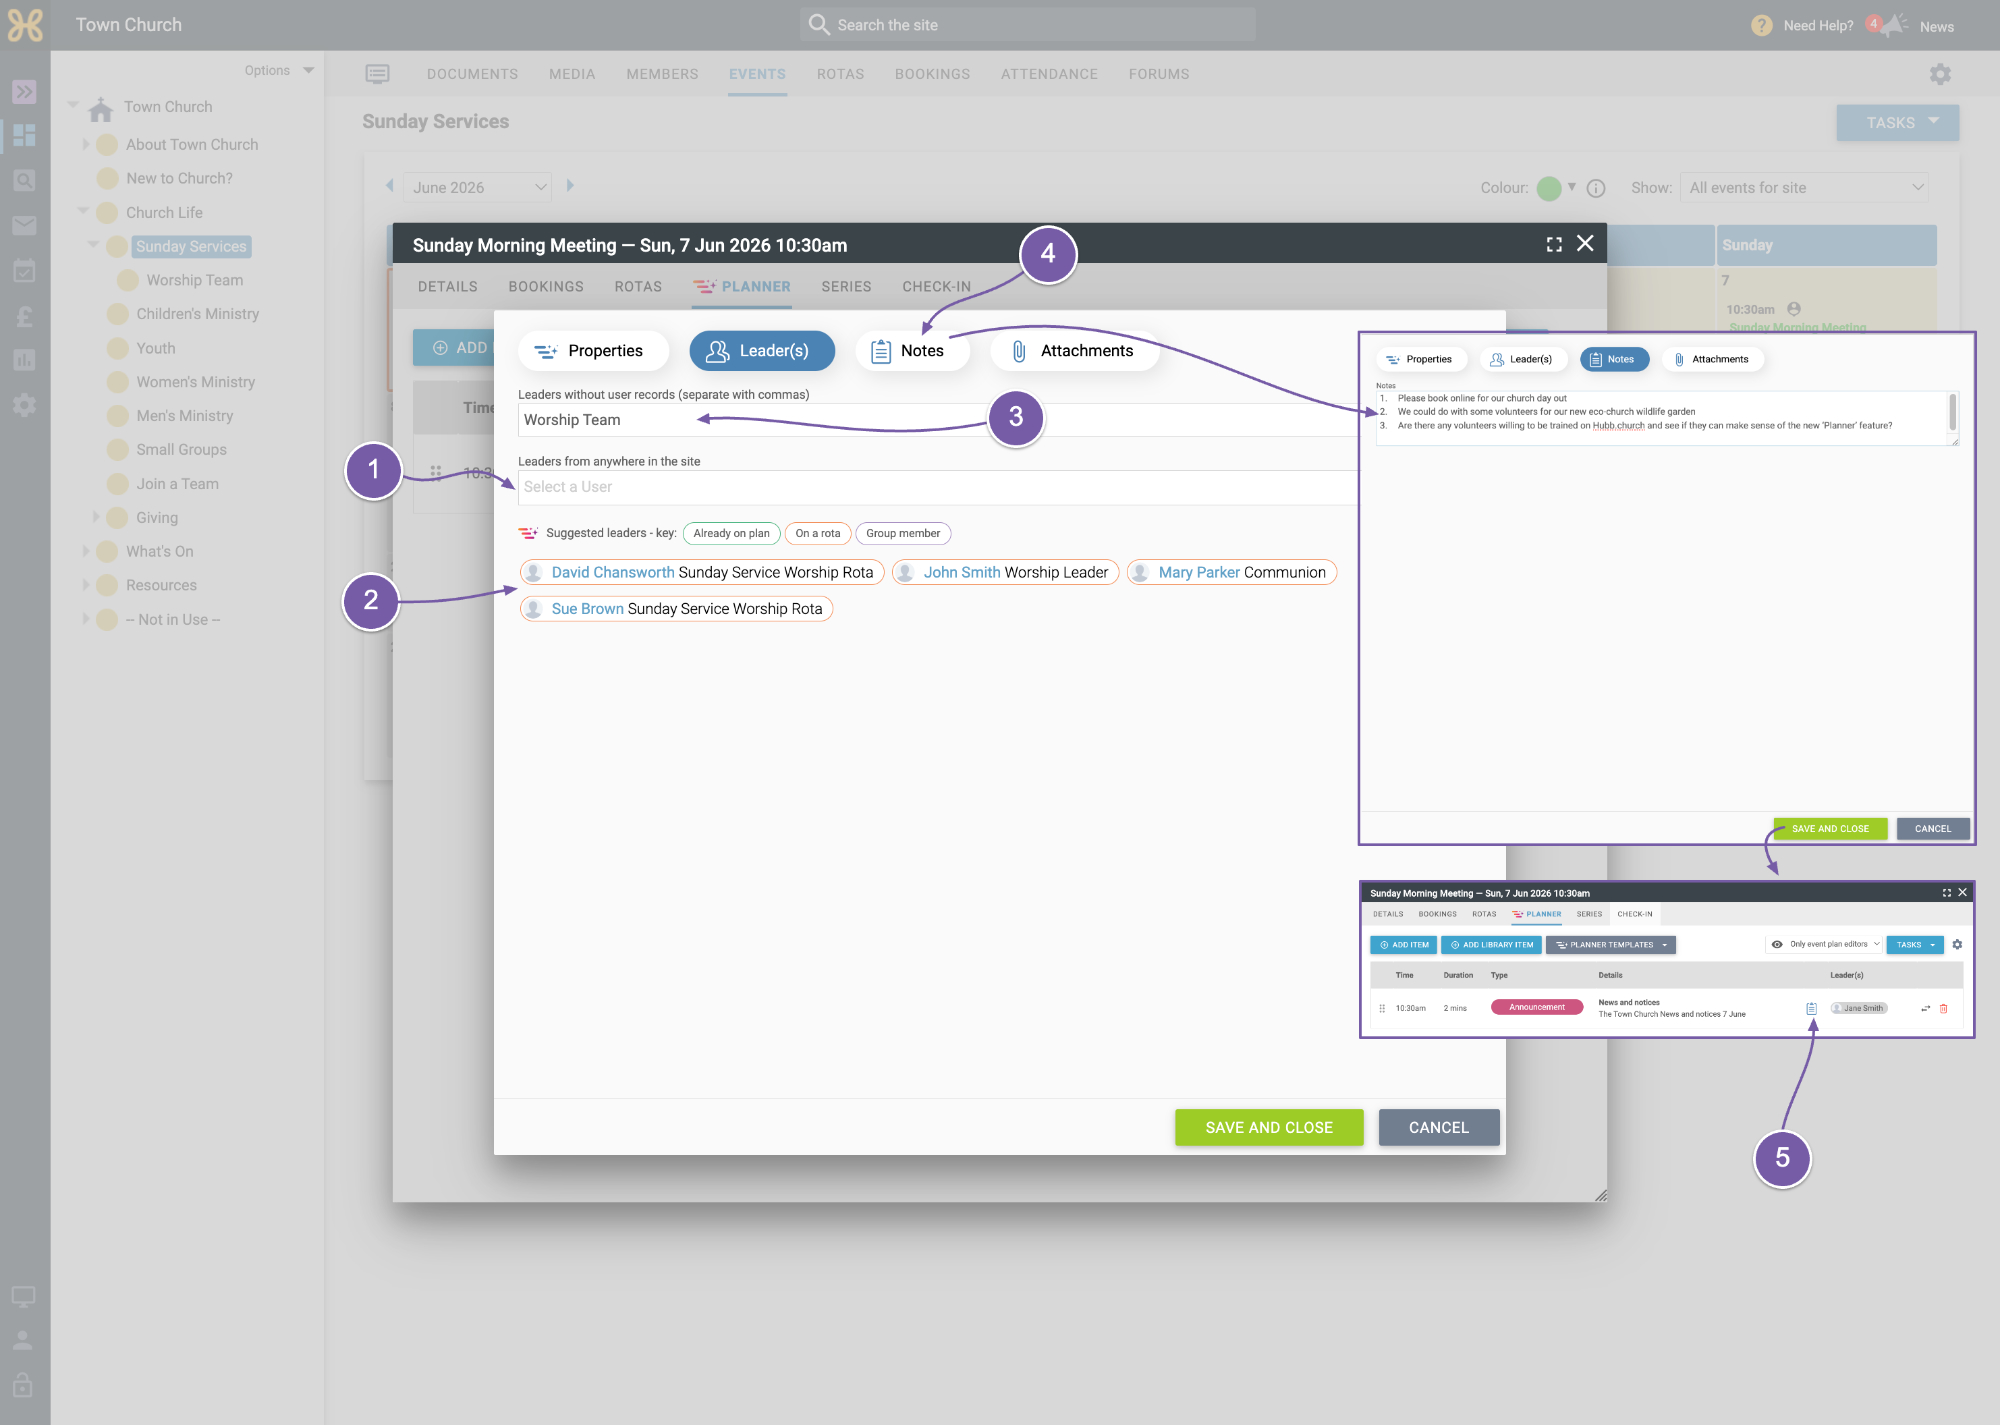
You can move to the next tab to add your “Leaders”. You have two choices here:
-
If the person is in Hubb, you can search for them at the bottom
-
Or pick them from our suggestions. The suggestions have a key so you can see why people have been suggested and if they are on a Rota linked with this event, we can show you their role.
-
If this item was for a song, you could manually type in "worship team". This shows everyone who is responsible without linking it to a certain person.
-
If there are any notes you can add them to the notes tab.
-
If you add notes a note icon will appear on the planner and when clicked the notes will display. This can be a helpful reminder for announcements.
-
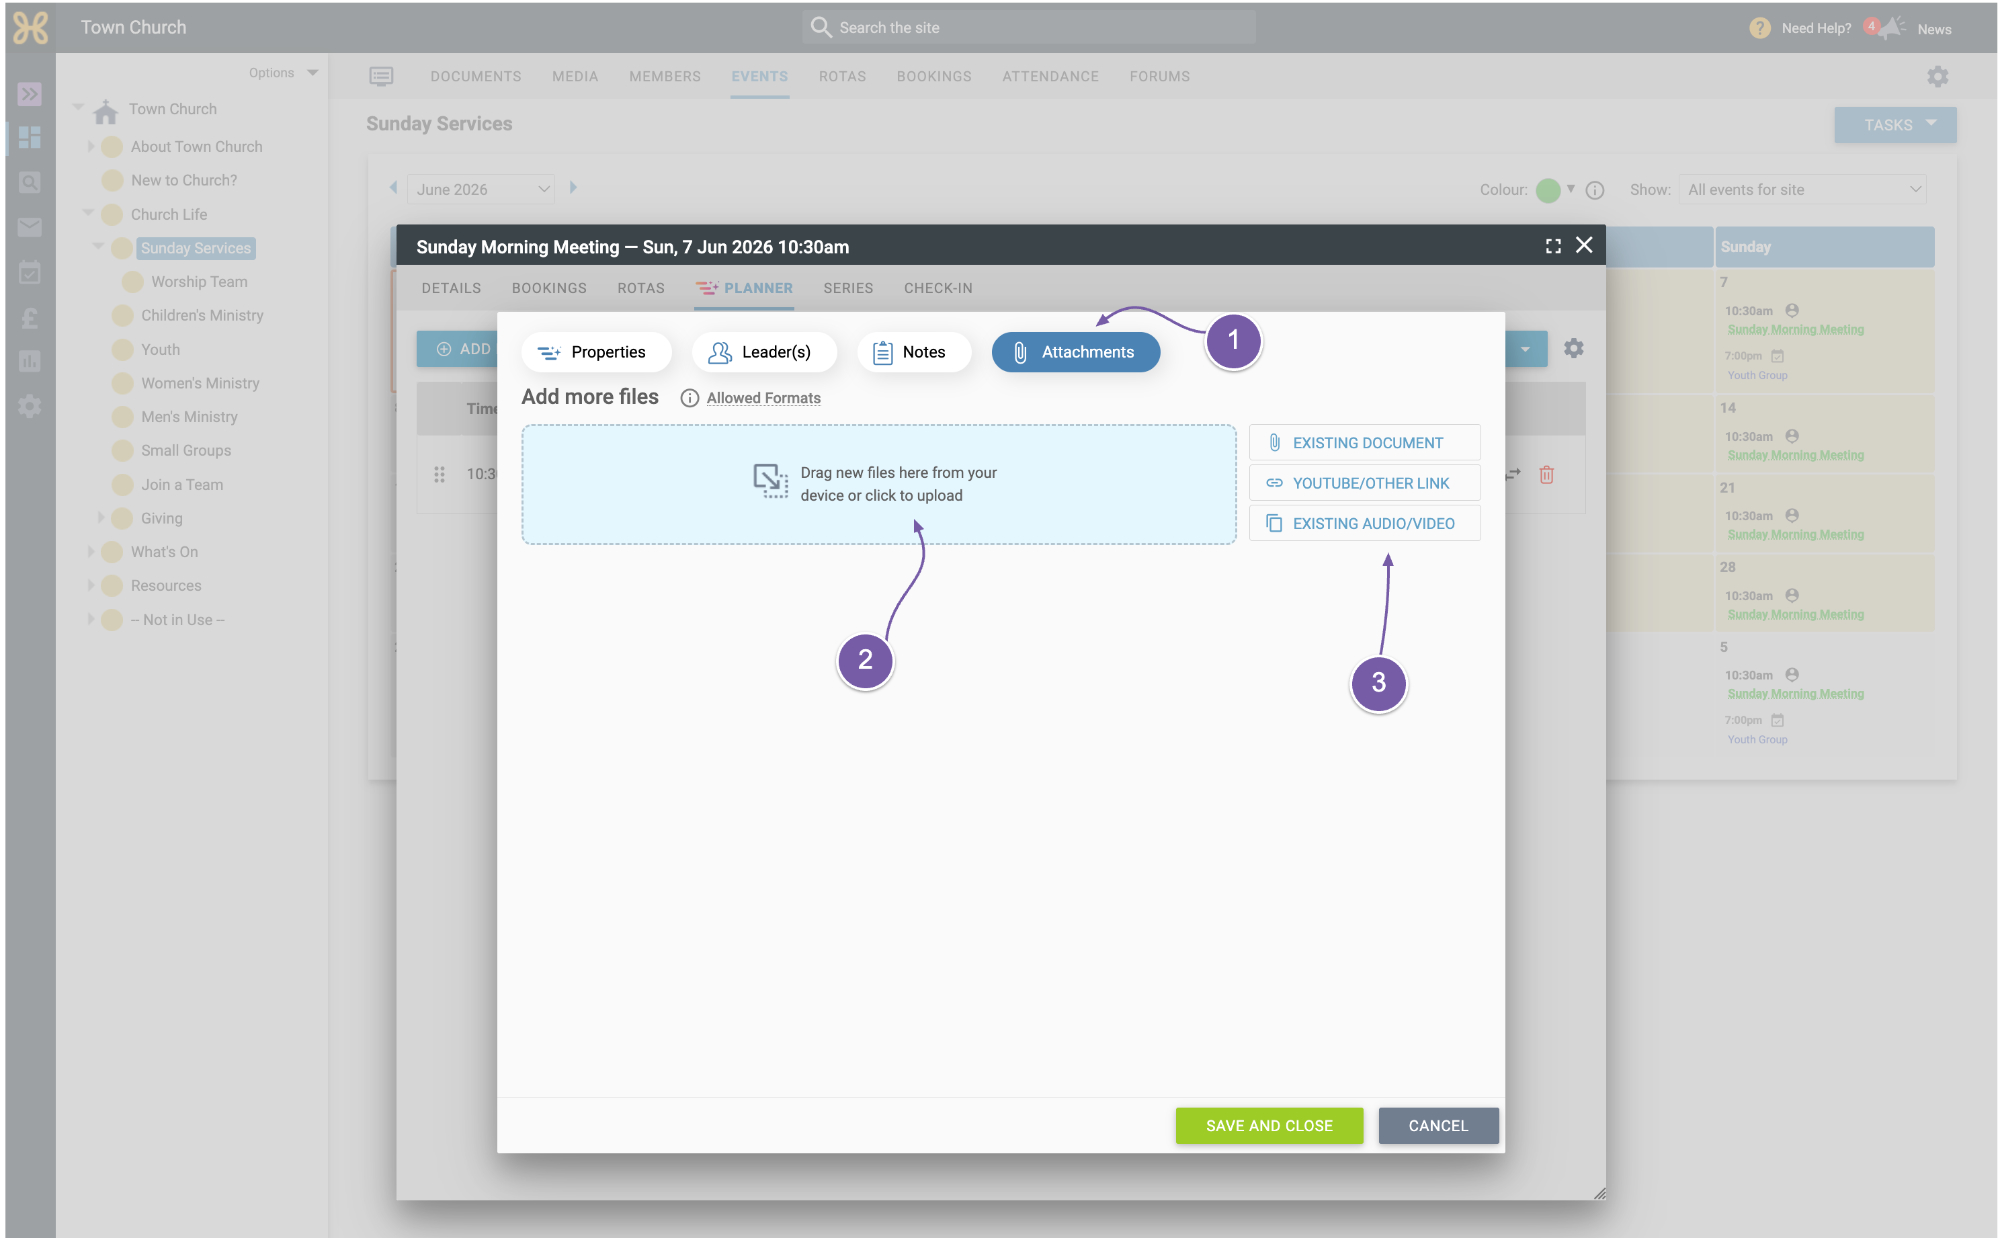
Lastly, you can add attachments to the item.
-
You can drag or click to upload a file to your item
-
Or you can use the tools to link to an existing document, link to something else online, or choose an existing audio video file on your Hubb site.
-
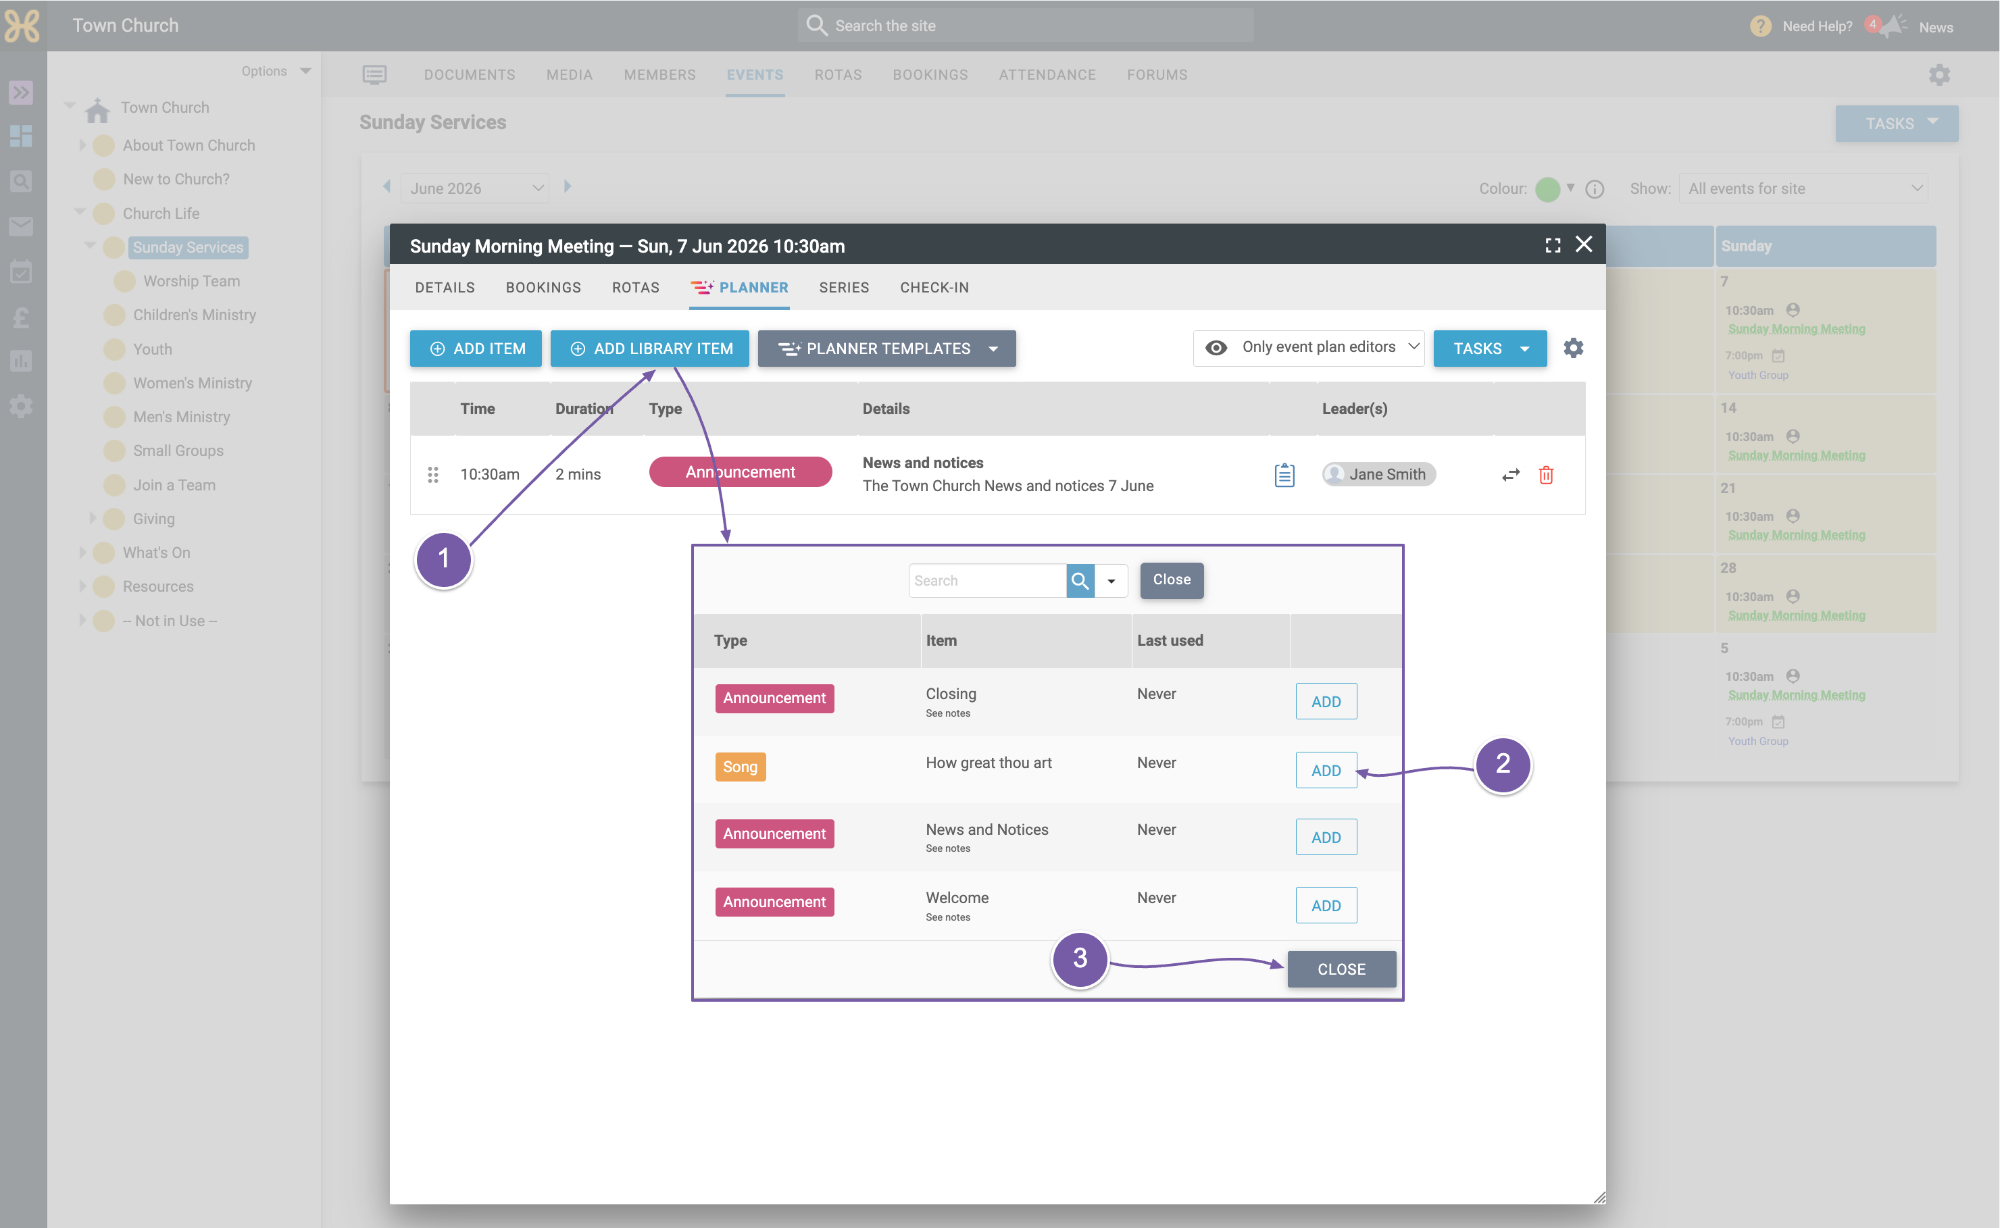
The other way to quickly add one or more items to your plan is to click the “Add Library Item” button. This will bring up a dialogue box with all your library items.
-
You can click “Add” which will immediately add the item to your plan. This way you can click add on multiple items without saving every time.
-
When you have added the items, you want click close.
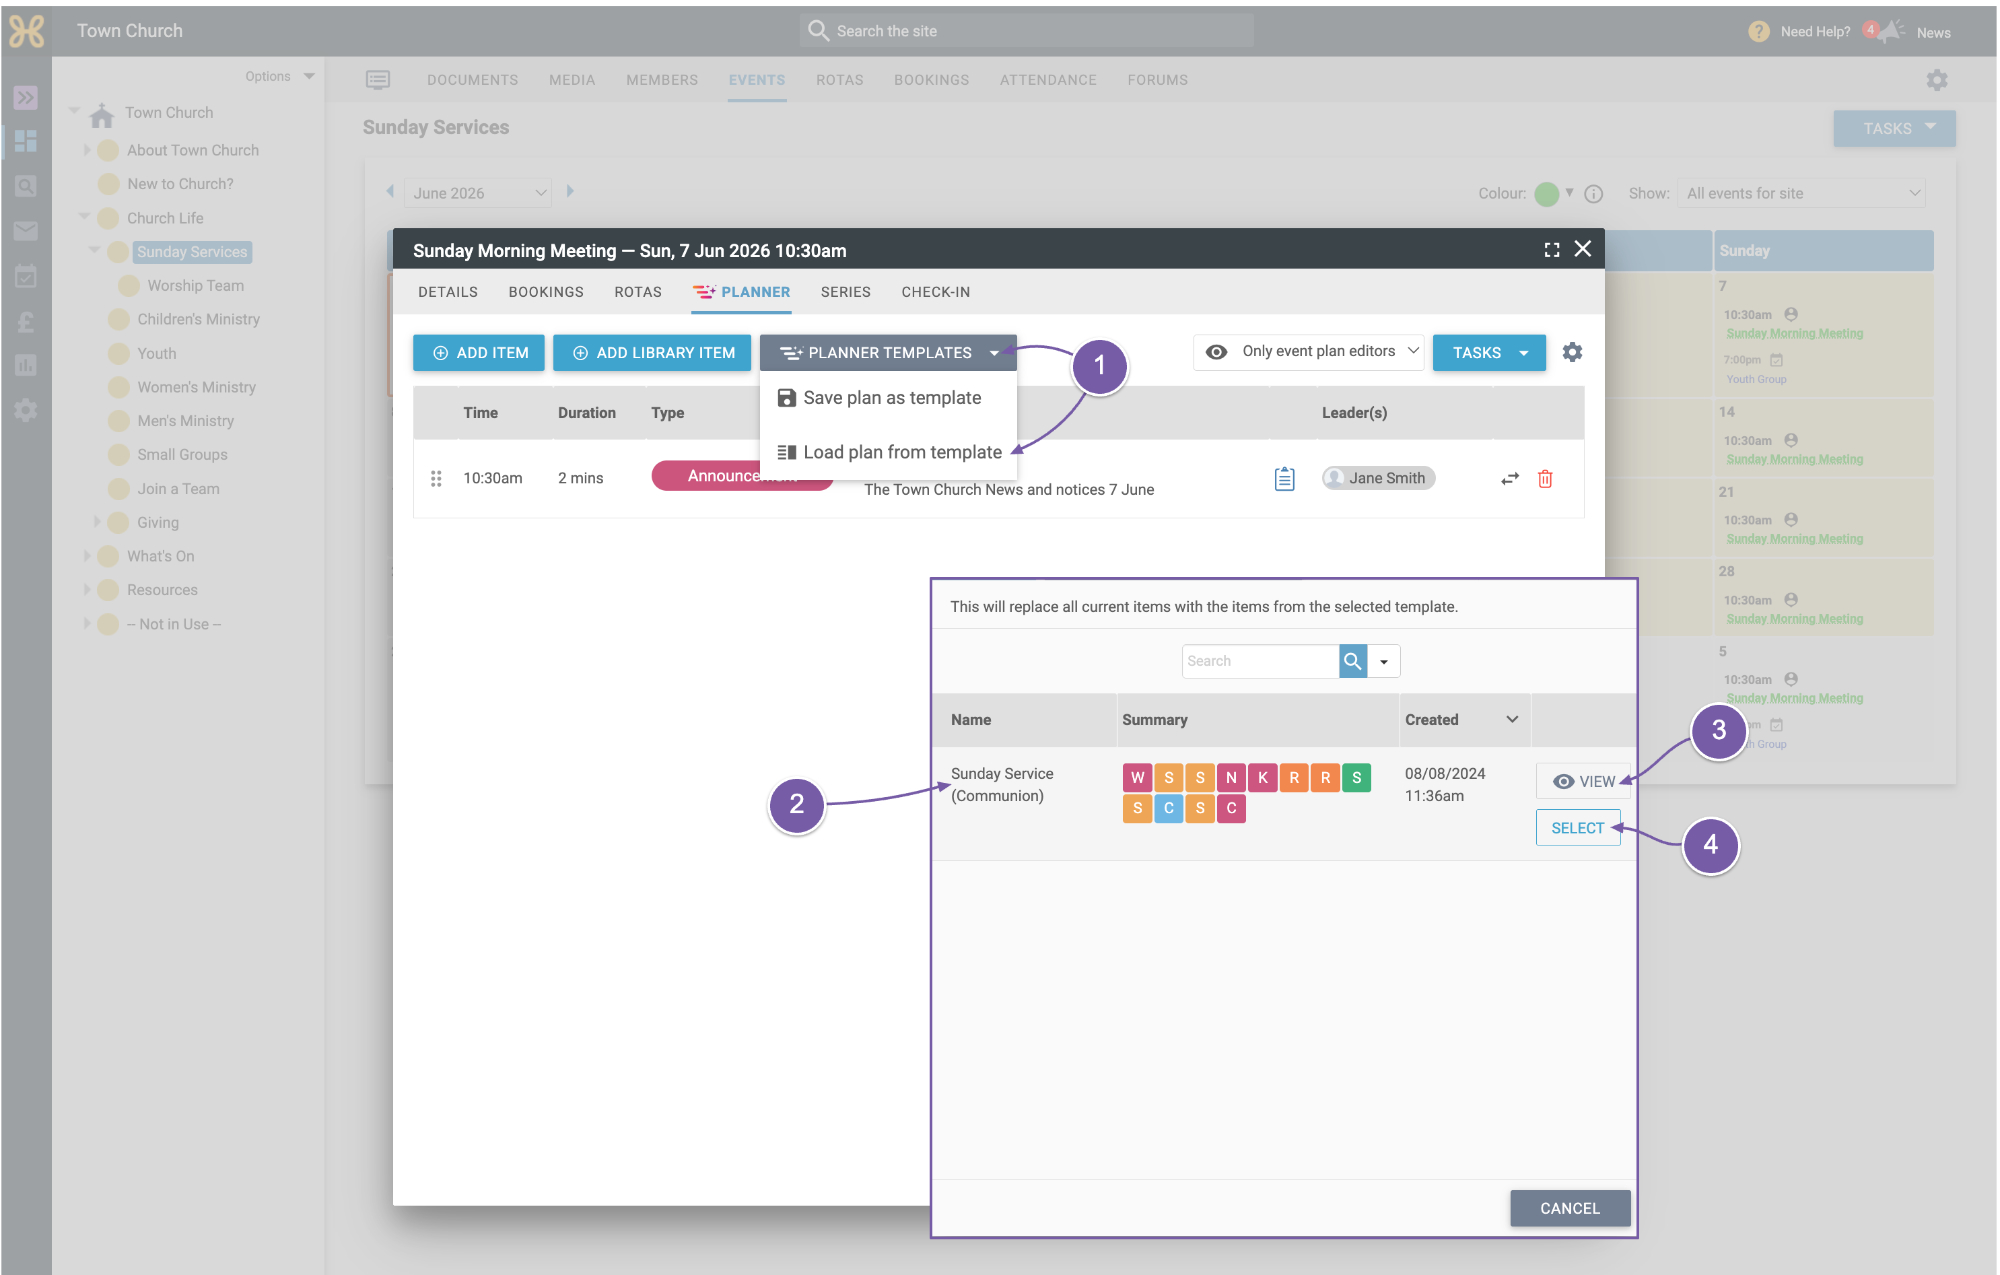
The quickest way to create a plan is to import a template. To do this,
-
Click on “Planner Templates” and load plan from template.
-
You can see all of your templates.
-
If you need more information about a template before you import it just click on the “View” button.
-
Click “Select to import a template”.
You just need to review any items you need to update to finish your plan. Let's now look at reordering, removing or swapping items.
-
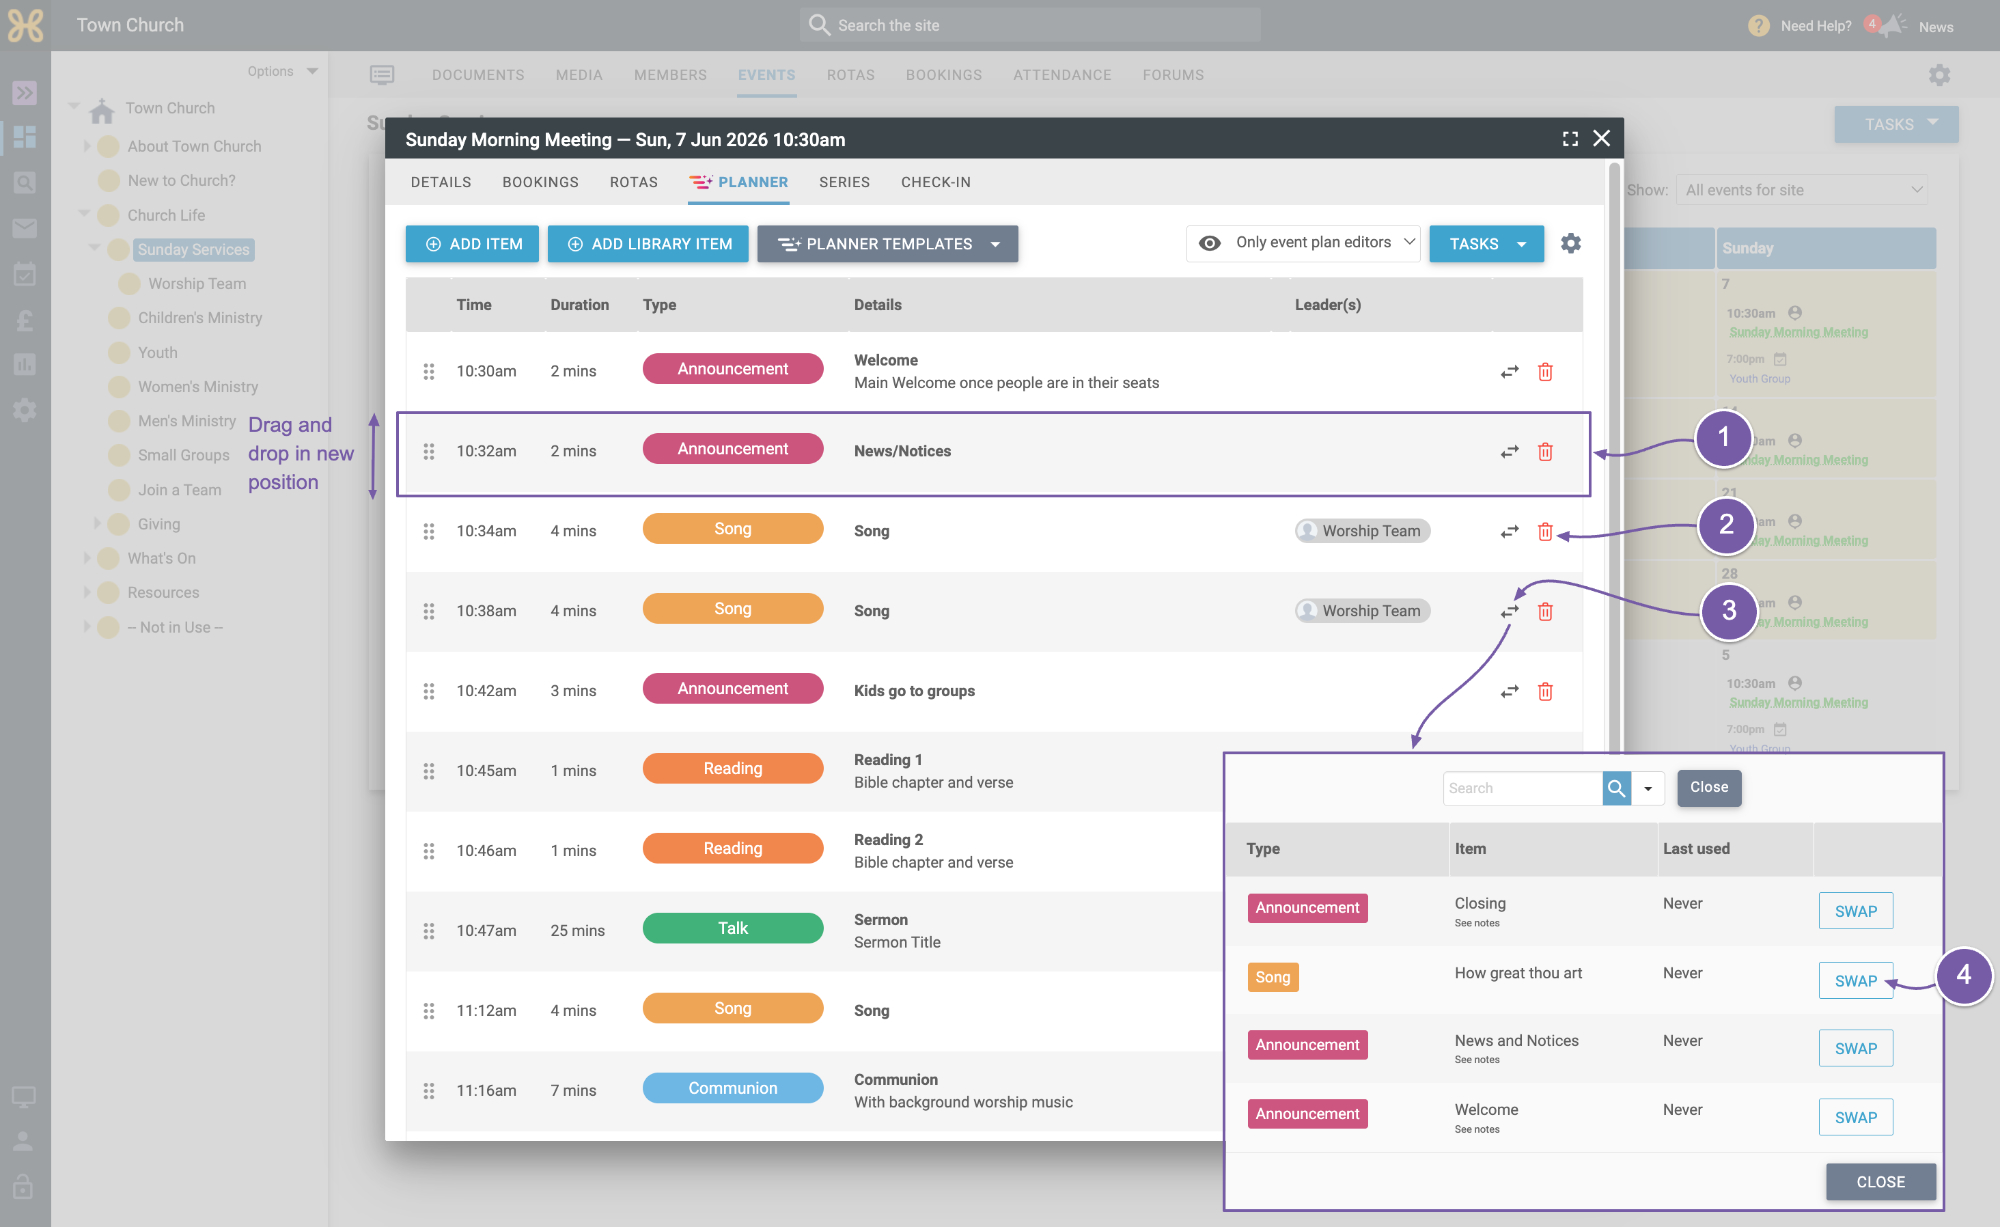
If you want to reorder the items in your plan you can drag and drop them in the correct order.
-
To delete an item from the plan, click on the red bin icon to the right.
-
Lastly, you can swap an item for any item in your library by clicking on the swap icon and bringing up the library list.
-
Just click on the item you wish to swap to.
Next, we'll look at
Plan tasks and settings.