Planner System Settings
Sorry, your browser is unable to play this type of file.
You can still
download it
Before starting to build your first plan, it's important to understand what item types are. Think of them as categories for your items. Each type has its name and colour and it's a good way to group similar things that go on at your service or event. We give you some helpful item types by default but you may want to add your own. Every item on a plan has a name and colour. Each item type is part of an item type, so it's good to have your item types ready before you start to build your first plan.
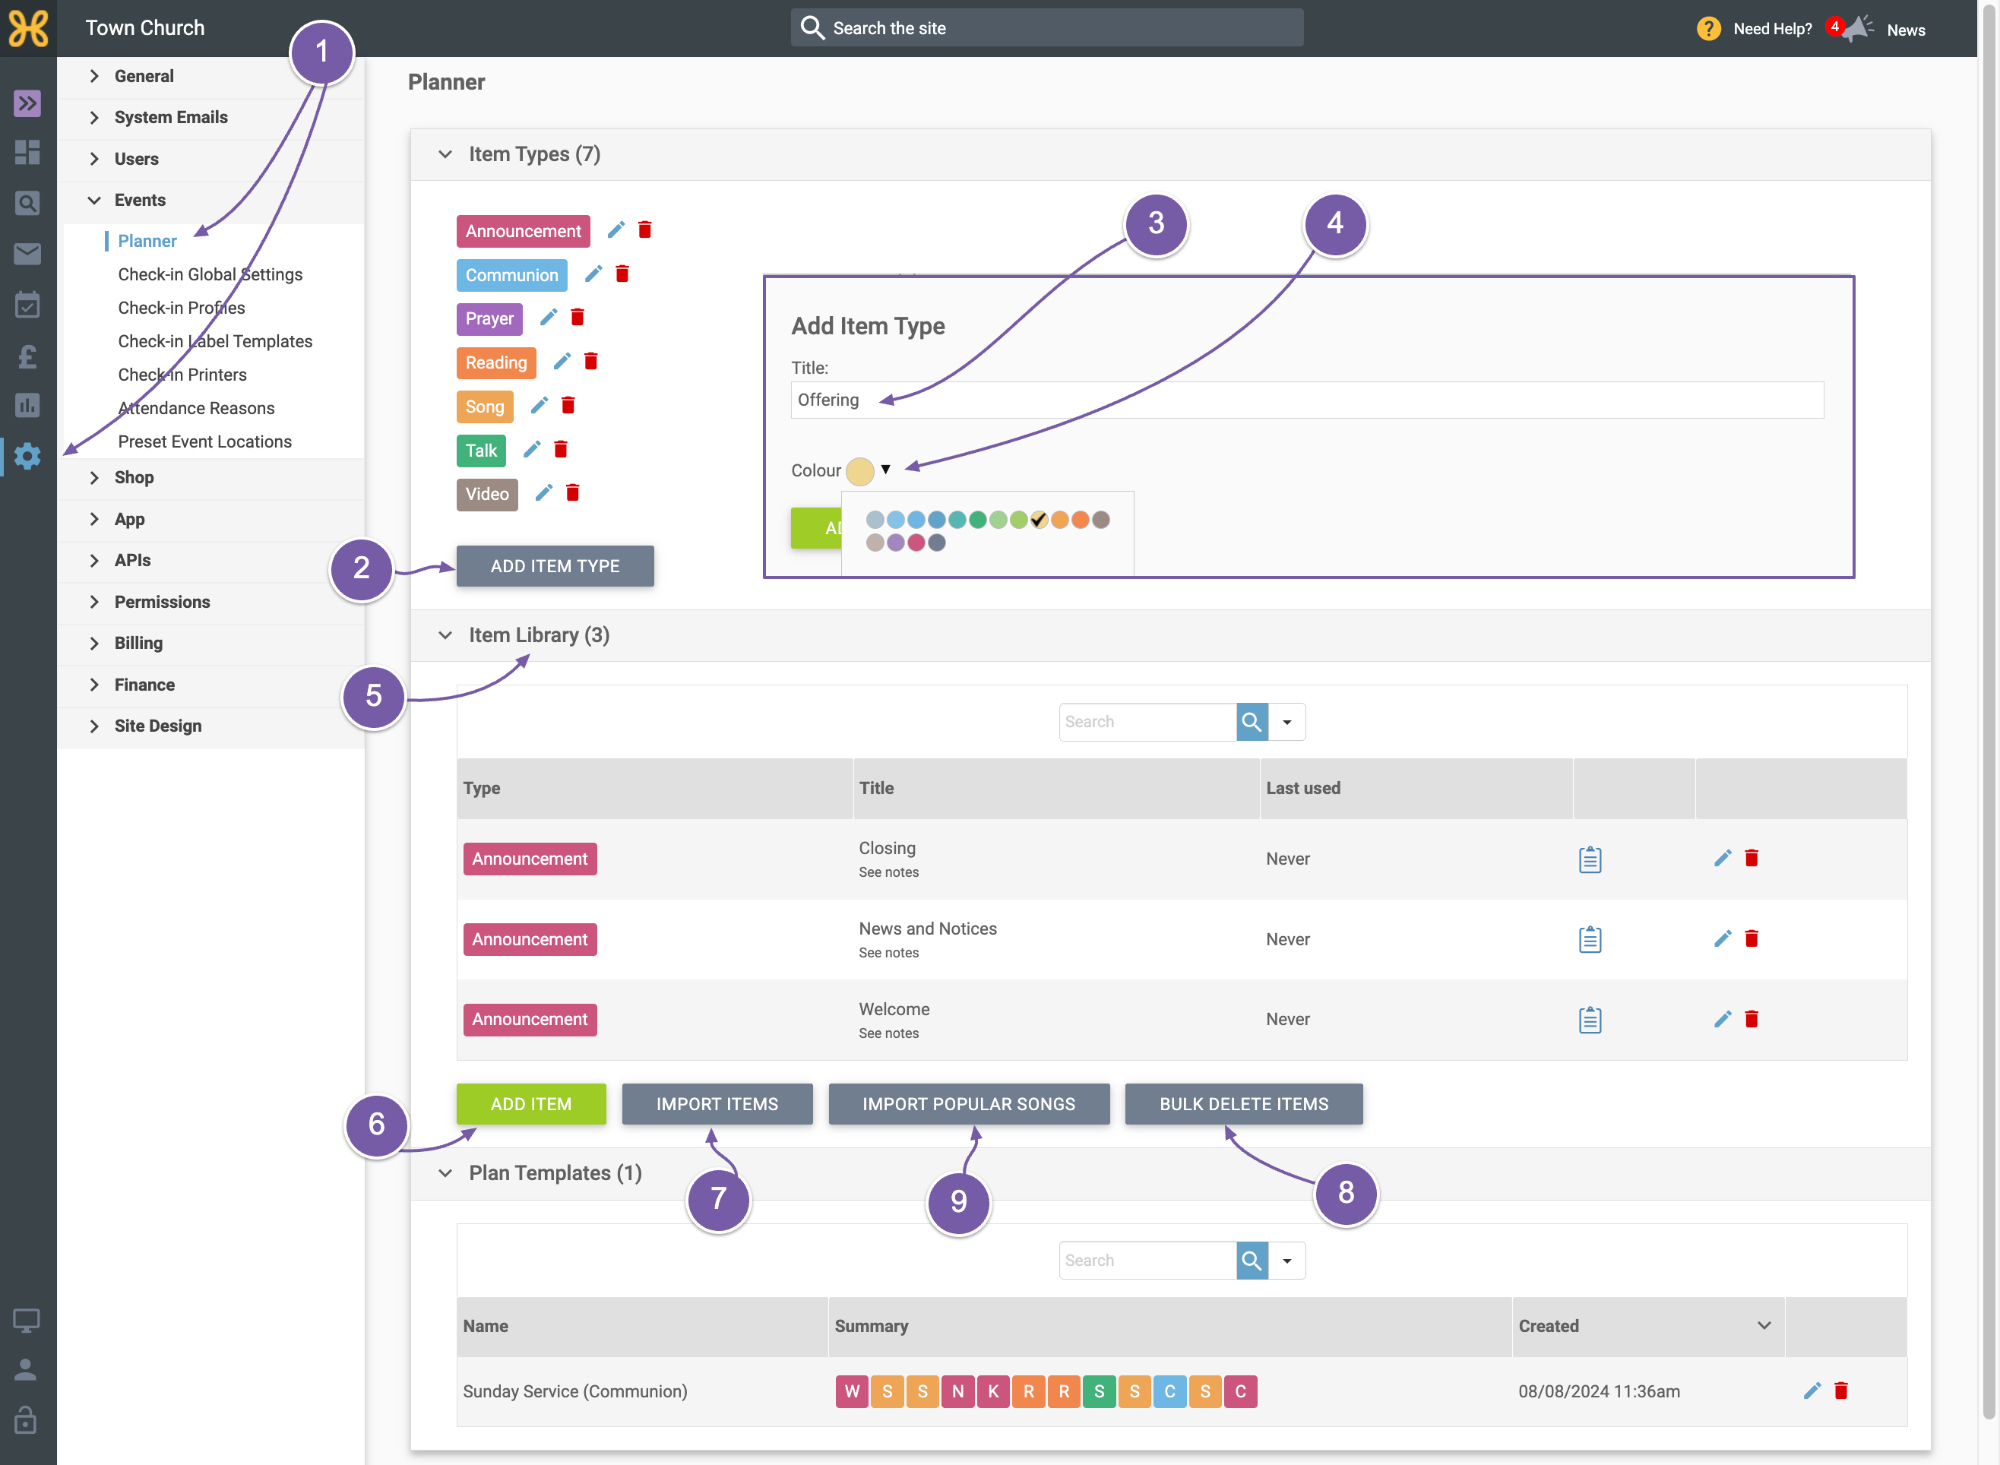
It's simple to add an item type.
-
In the 'Site settings" go to the Planner tab within "Events"
-
Just click on the “add Item Type” button.
-
Add the name. such as “Offering”...
-
and then the colour.
-
Now that we have our item types created, we can look at adding items to our library. Within “Planner” settings you can create a library of items to save you time creating the same item for every event. In this section you have four options:
-
Add an item.
-
Import items. This is handy if you have lots of items or would rather create them in a spreadsheet and import them in one go.
-
Bulk delete items in your library.
-
Import the 200 most popular worship songs.
To be helpful we've added some library items and a plan template to help you get started. Feel free to edit or remove as you like.
Let's first look at adding an item to your library.
-
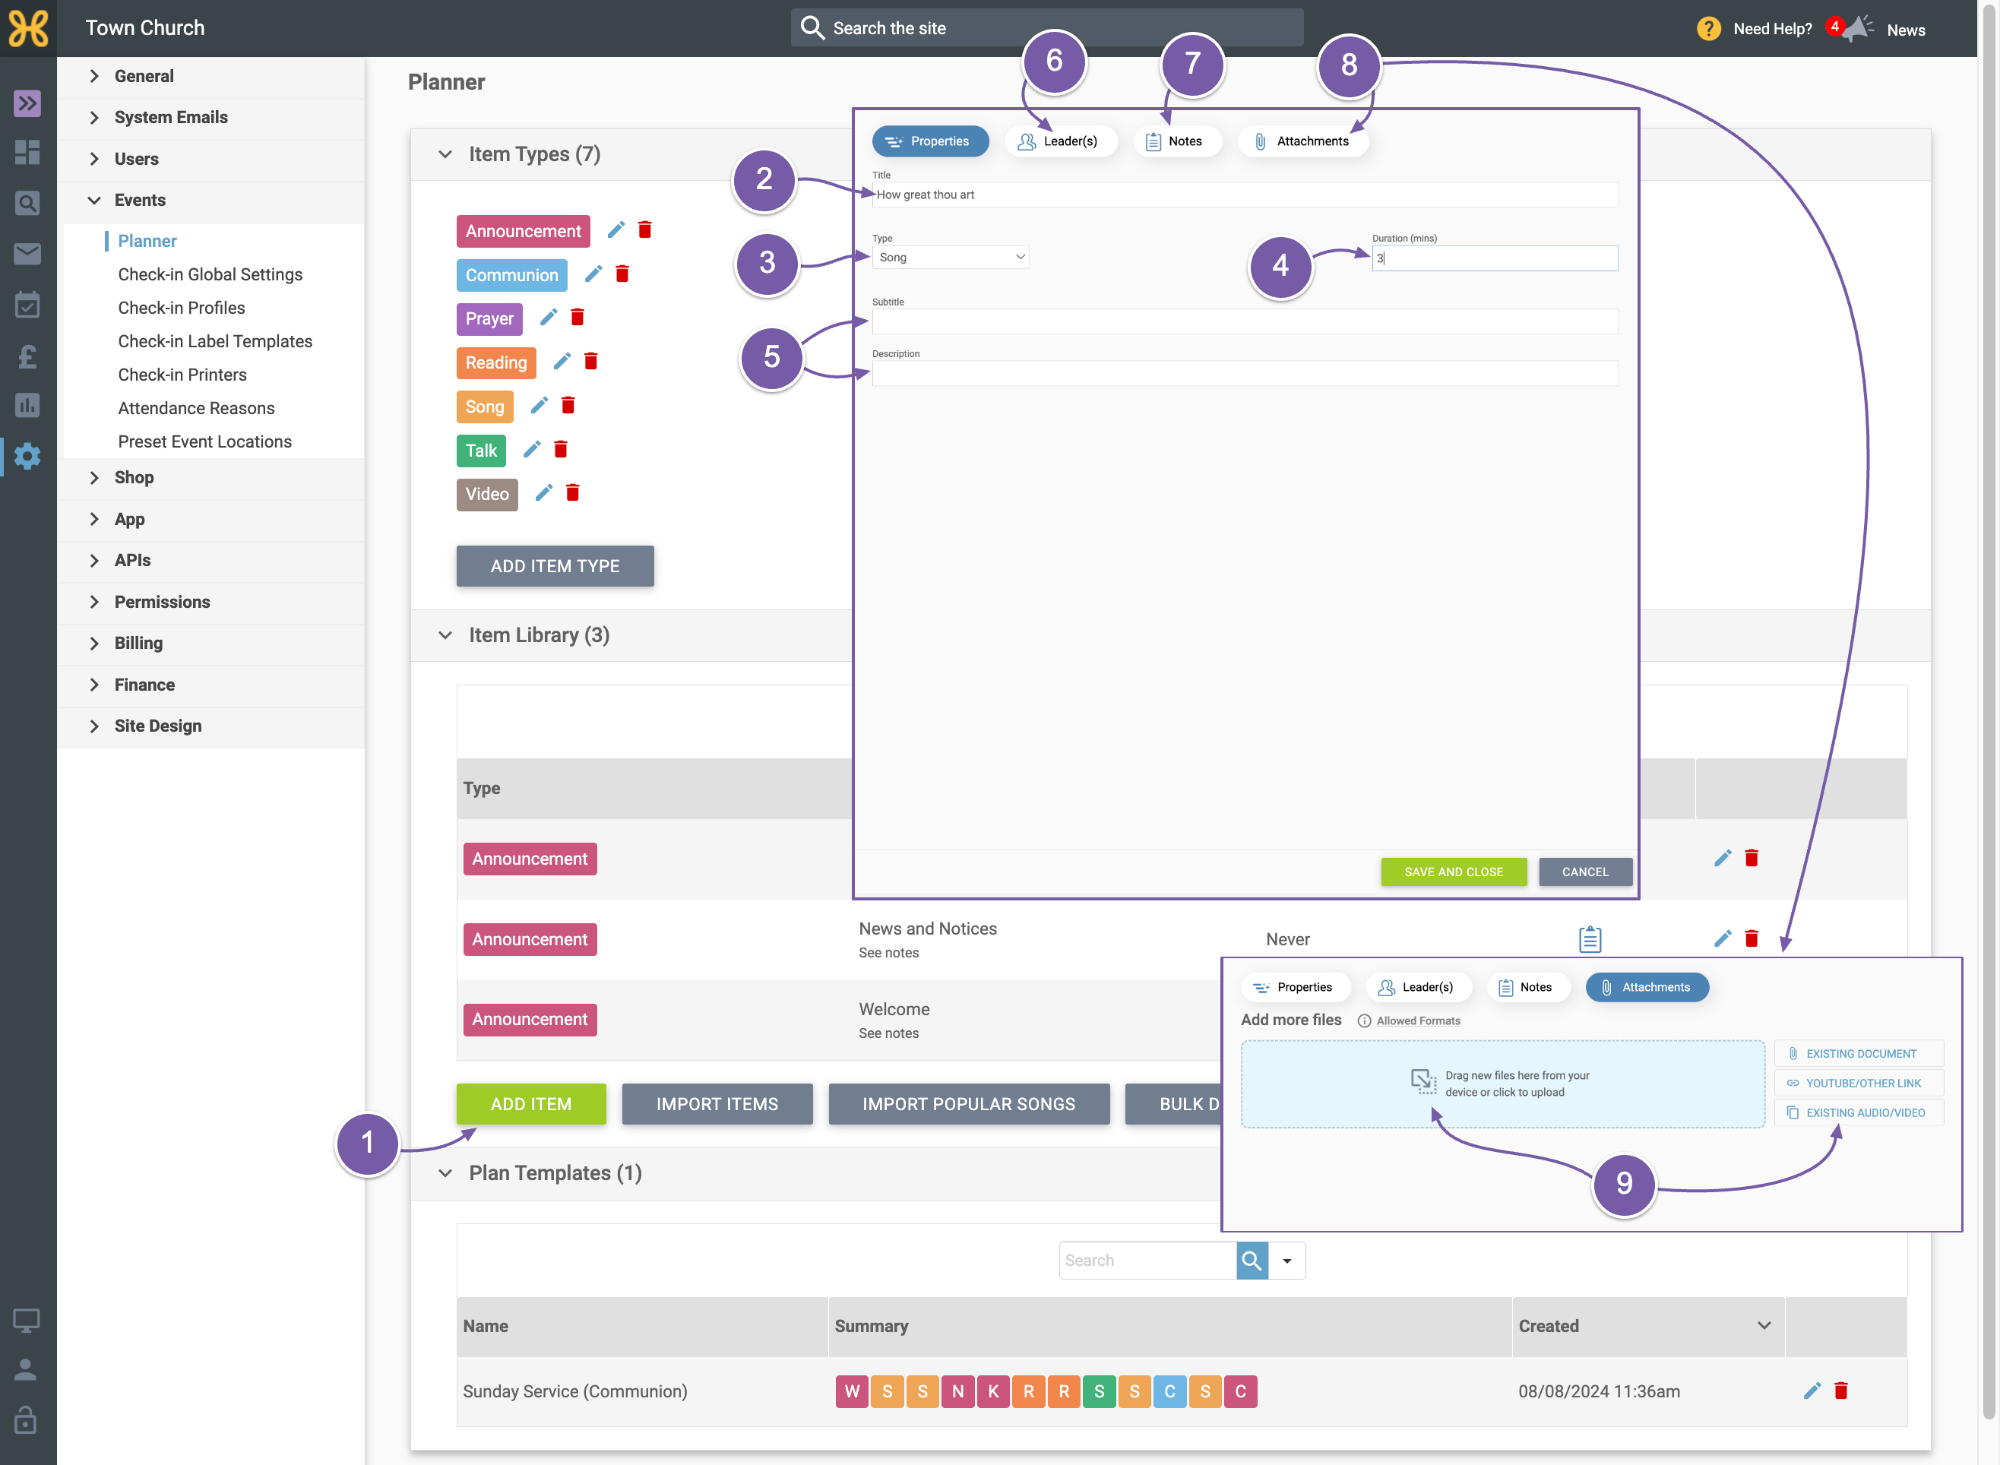
Click on “Add Item”
-
Add the title
-
Choose the type
-
Set how long it will roughly last for
-
If needed, you can add a subtitle and description. The subtitle will be displayed on the plan but the description won't. That's just for your admin purposes.
-
You can move to the next tab to add your leaders but we expect this to change at each event so it may be worth leaving it blank in the library. However, if it's a song you could manually add the leader to be "Worship Team" to save time each week.
-
If there are any notes you can add them to the “Notes” tab. If you add notes a note icon will appear on the planner and when clicked the notes will display. This can be a helpful reminder for announcements.
-
Lastly, you can add “Attachments” to the item.
-
You can drag or click to upload a file to your item or you can use the tools to link an existing document file, link to something else online or choose an existing audio video file on your Hubb site.
One of the most helpful and time-saving features of “Planner” is the ability to create full plan templates that you can quickly add to an event. You can see and edit any existing plan templates you have.
To create your first plan template, you need to create a plan and that's what we'll look at in our following video.