Planner Overview and Permissons
I've been busy creating my event plan and I want to show you how a completed plan looks so you can consider creating your own.
Sorry, your browser is unable to play this type of file.
You can still
download it
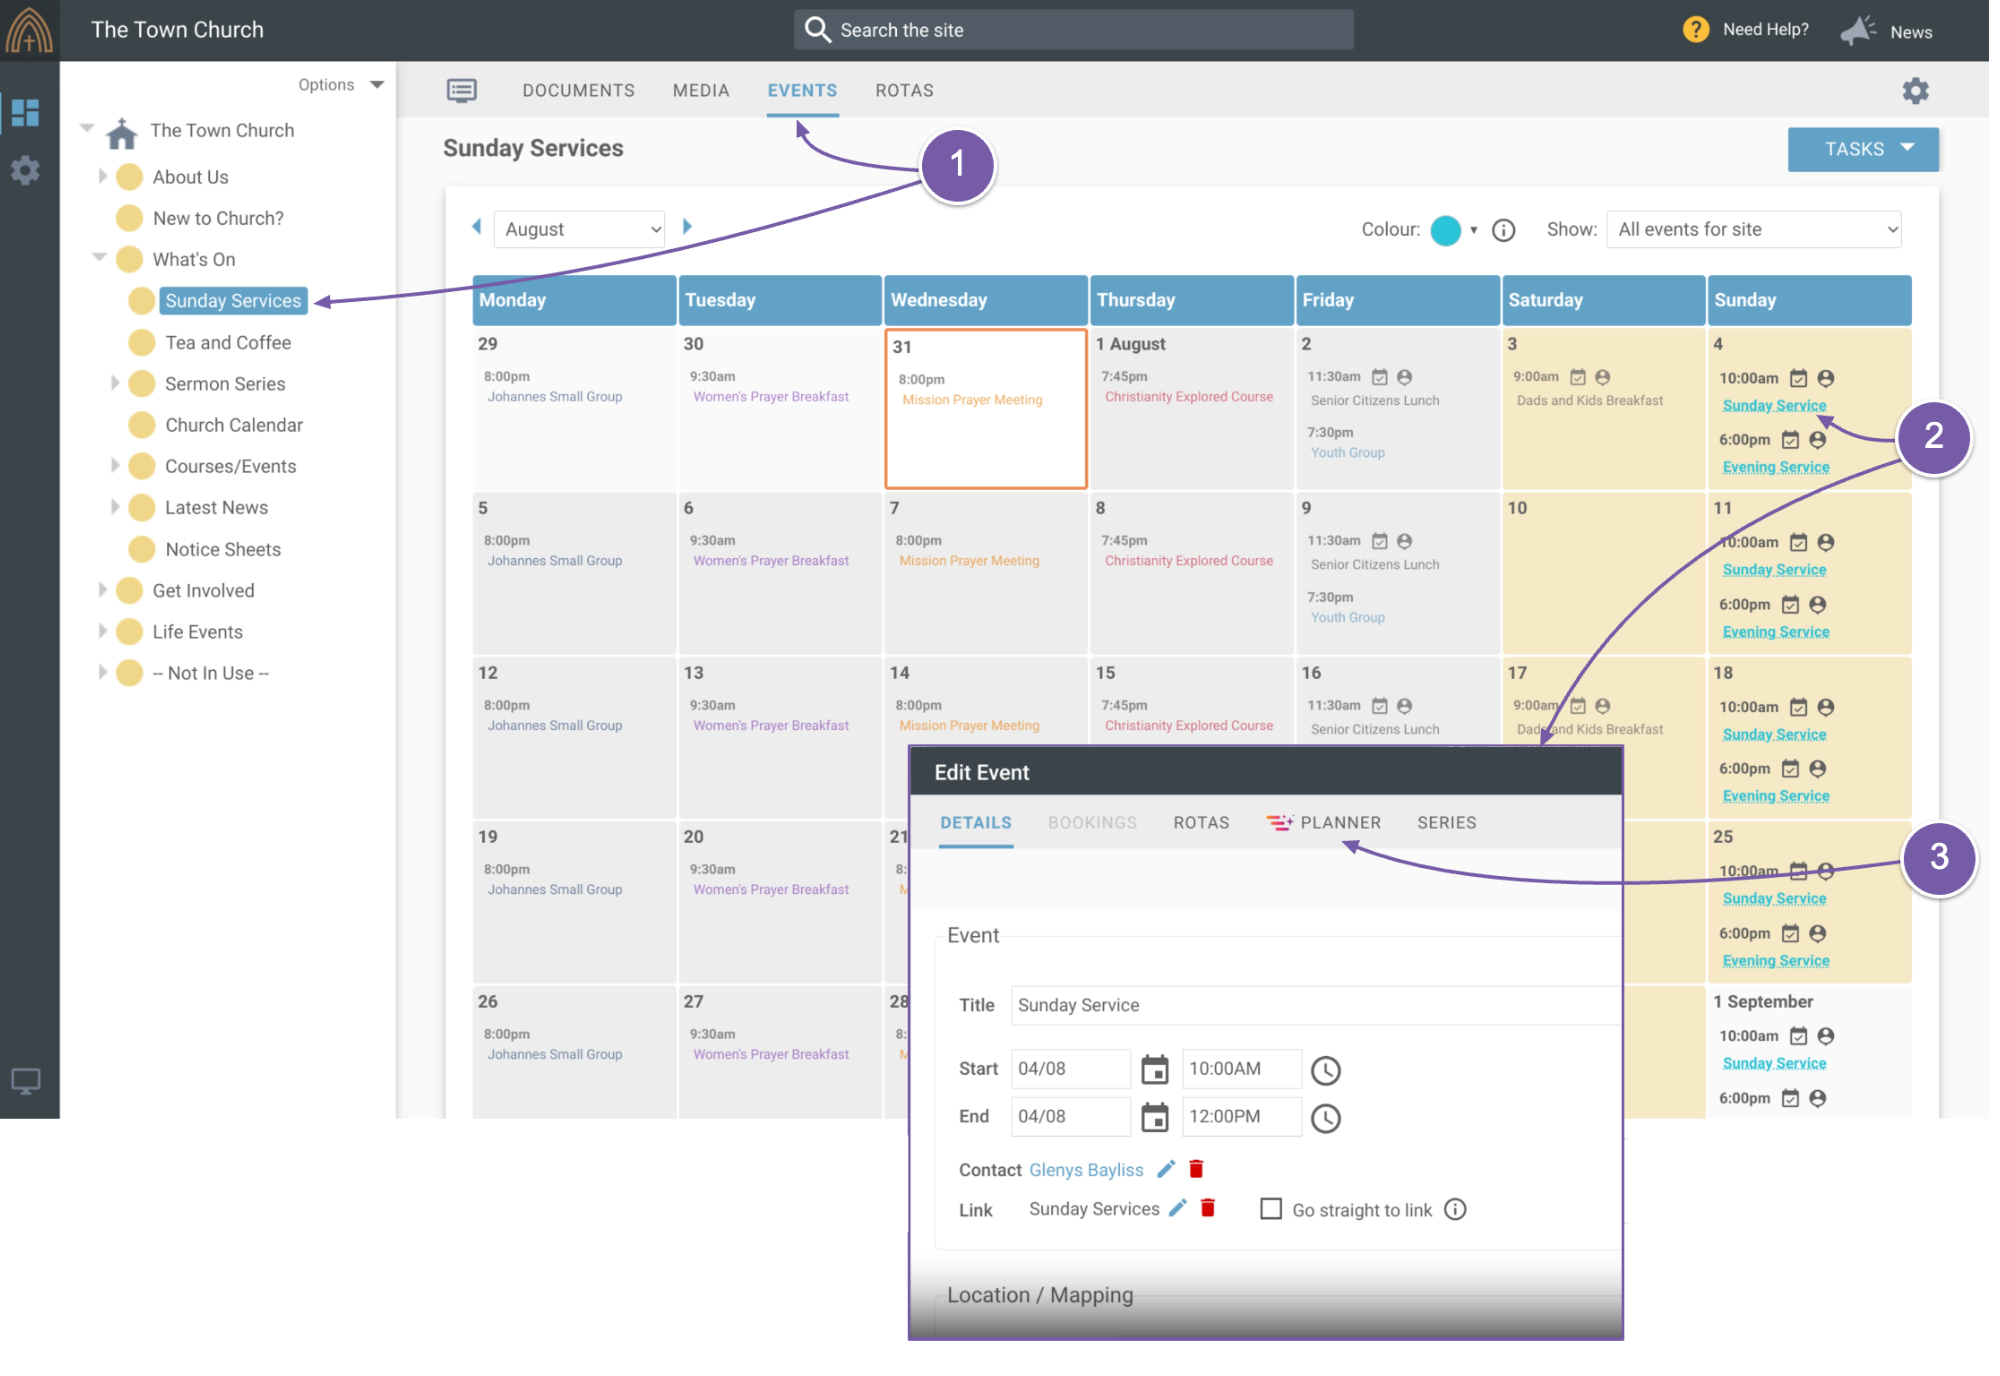
To access “Planner”:
-
Go to any event
-
Click on the event and see the new “Planner” tab next to Rotas.
-
Click on this to open “Planner”.
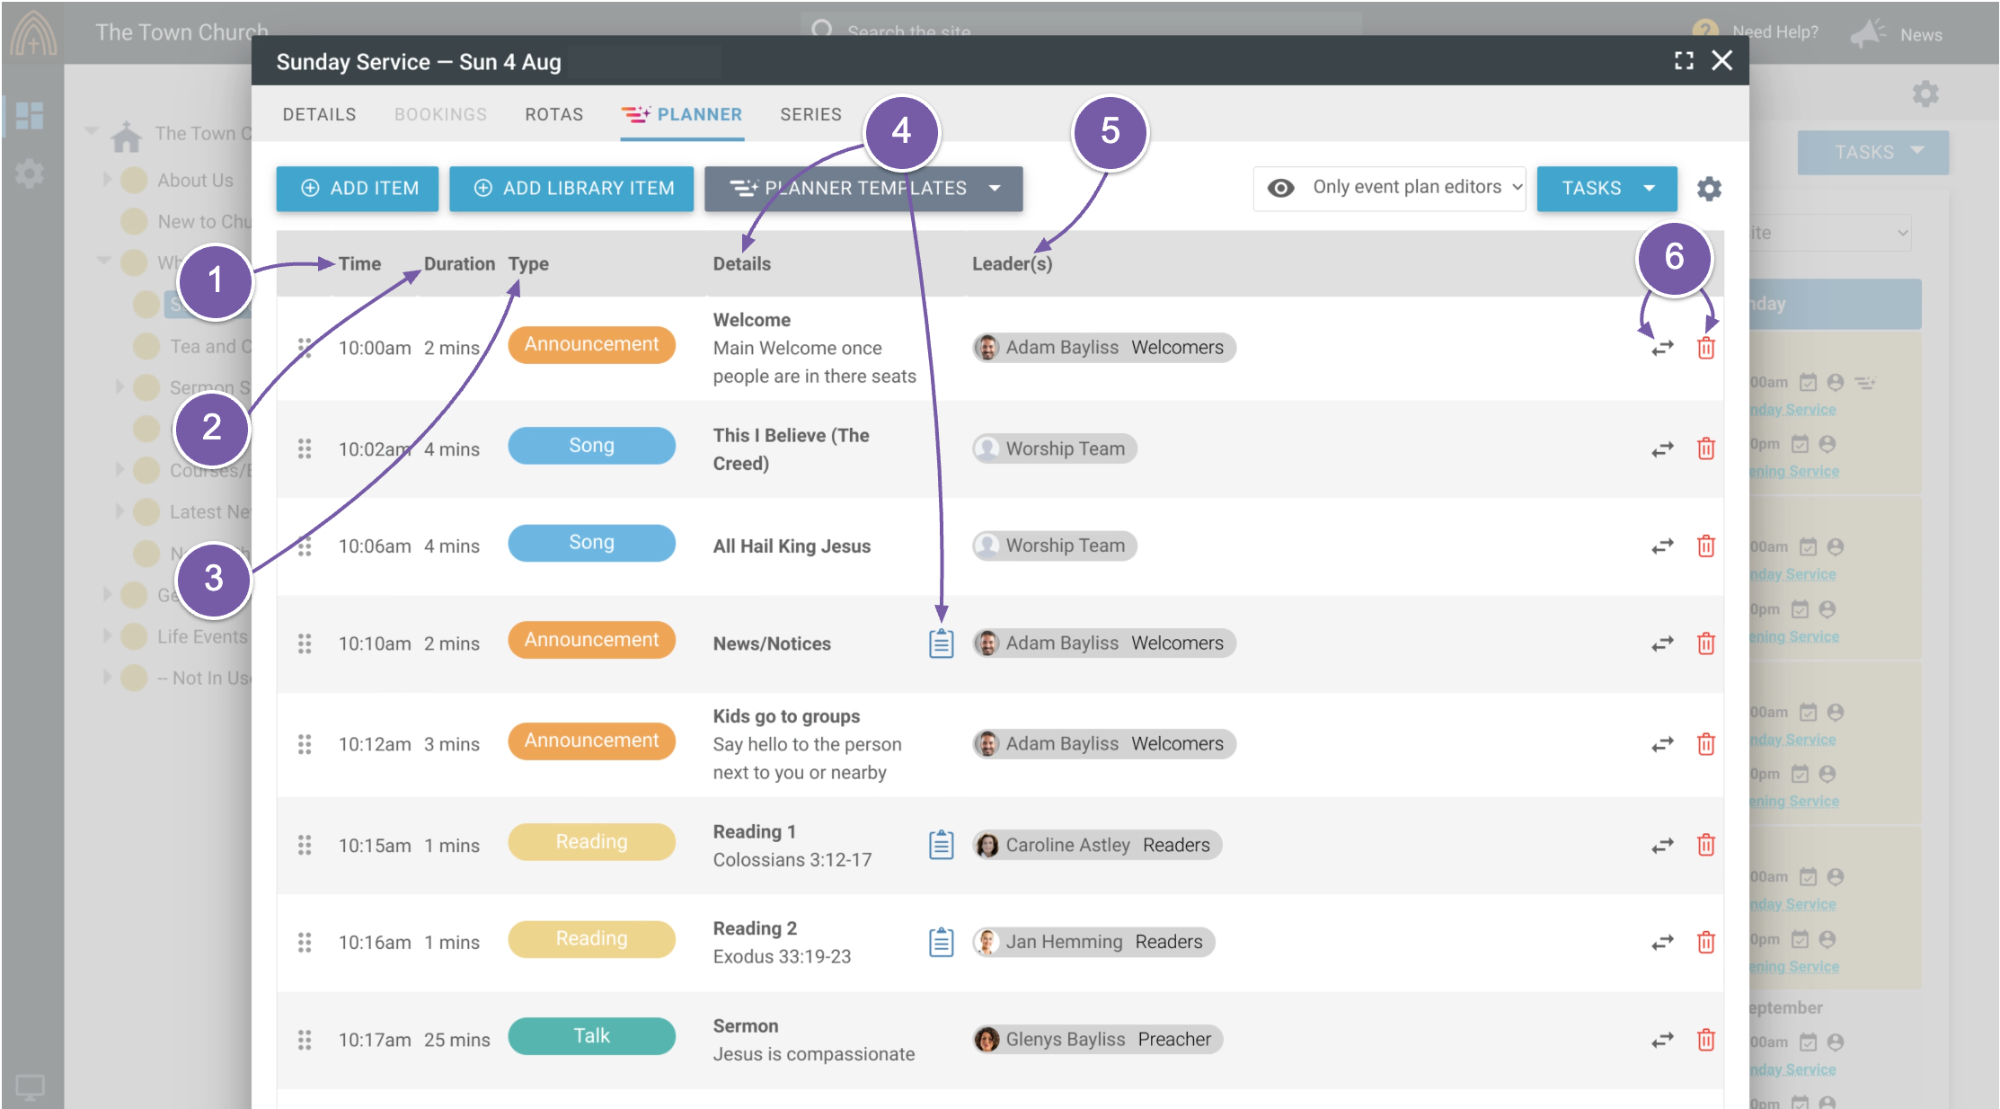
Here we can see the list of items in my plan. Each item shows:
-
the time it starts
-
how long it lasts
-
the type of item it is
-
any details and links to notes and attachments
-
who the leader of the item is
-
two controls on the right, which let you swap or remove the item.
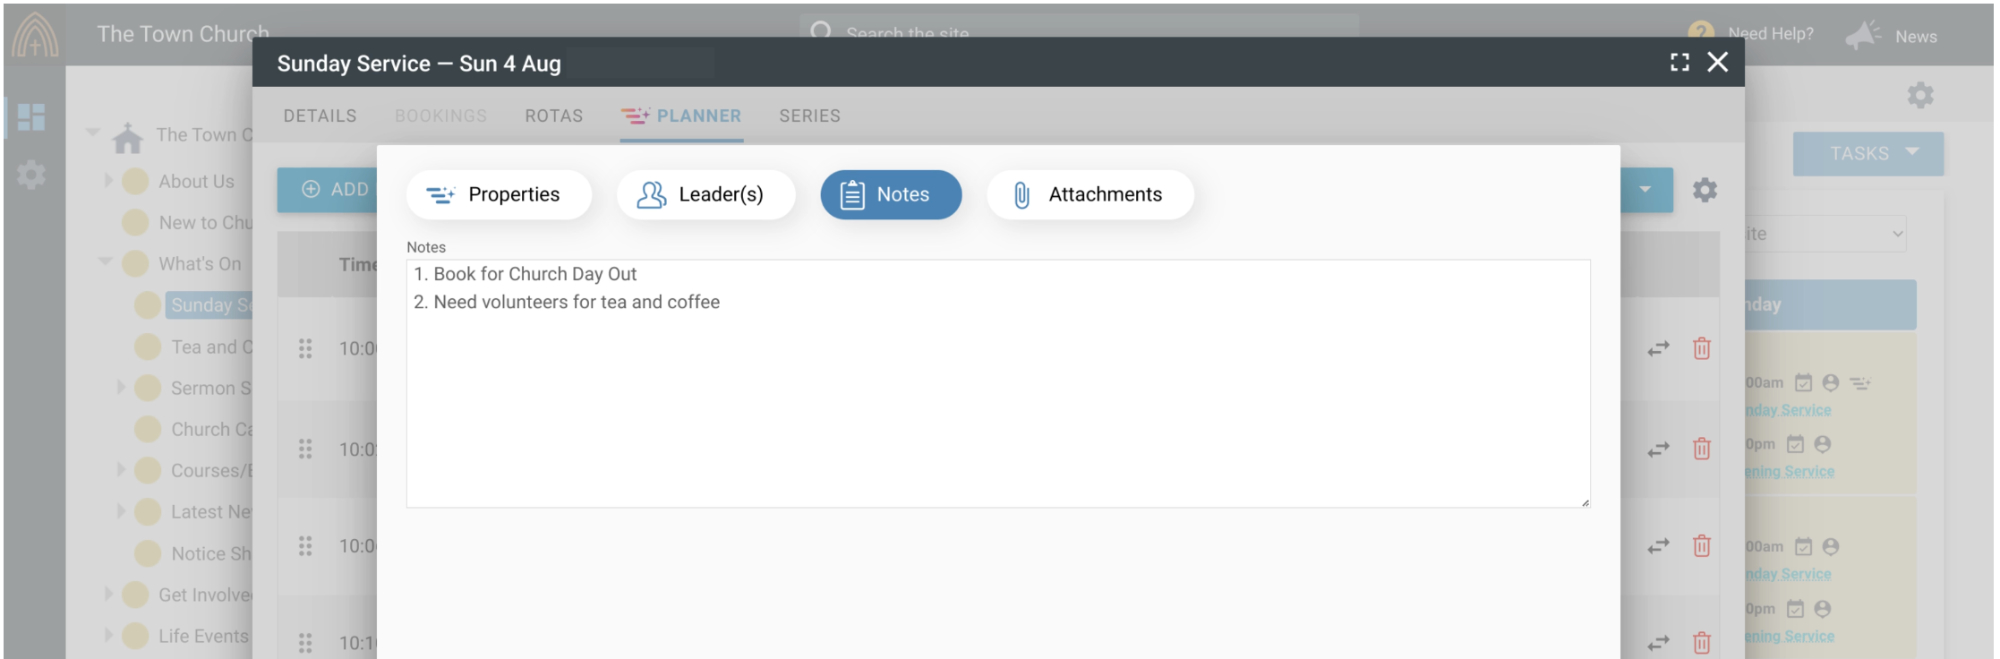
Adding notes is a great idea for any announcements that are read out. You can add your notes to prompt the person reading the announcements.
-
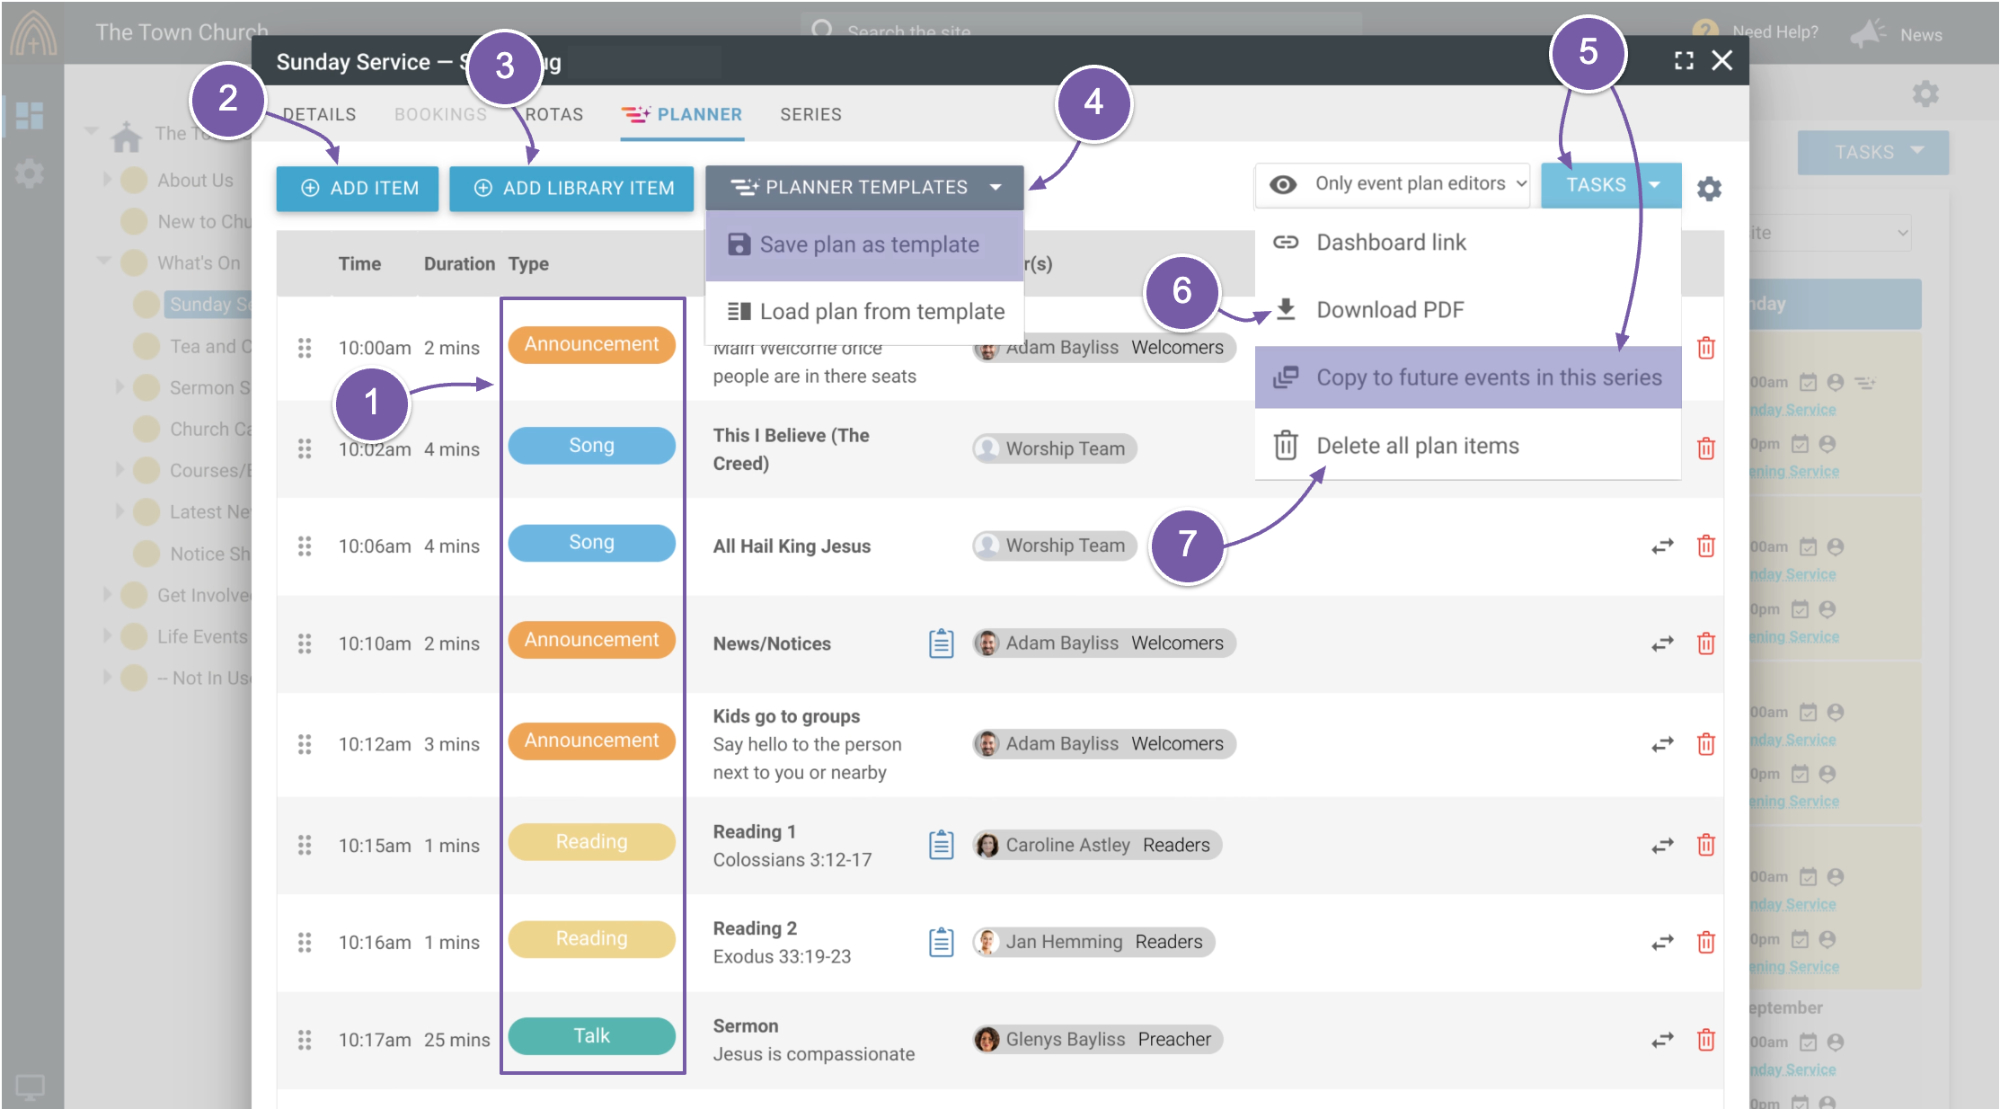
We have some presets for the item types but you can manage all of them in “Planner” settings.
-
The items in the list can be added from scratch...
-
or a library item. You can create your own library of items. These library items can save you a lot of time.
-
To make things even easier you can create event plans and save the whole plan as a template to reuse.
-
You can also copy this plan to all future events in the series to save more time.
-
We have a download to PDF option to create a printable PDF of your plan instantly.
-
We also have a task for deleting all of the items in the plan and starting afresh.
-
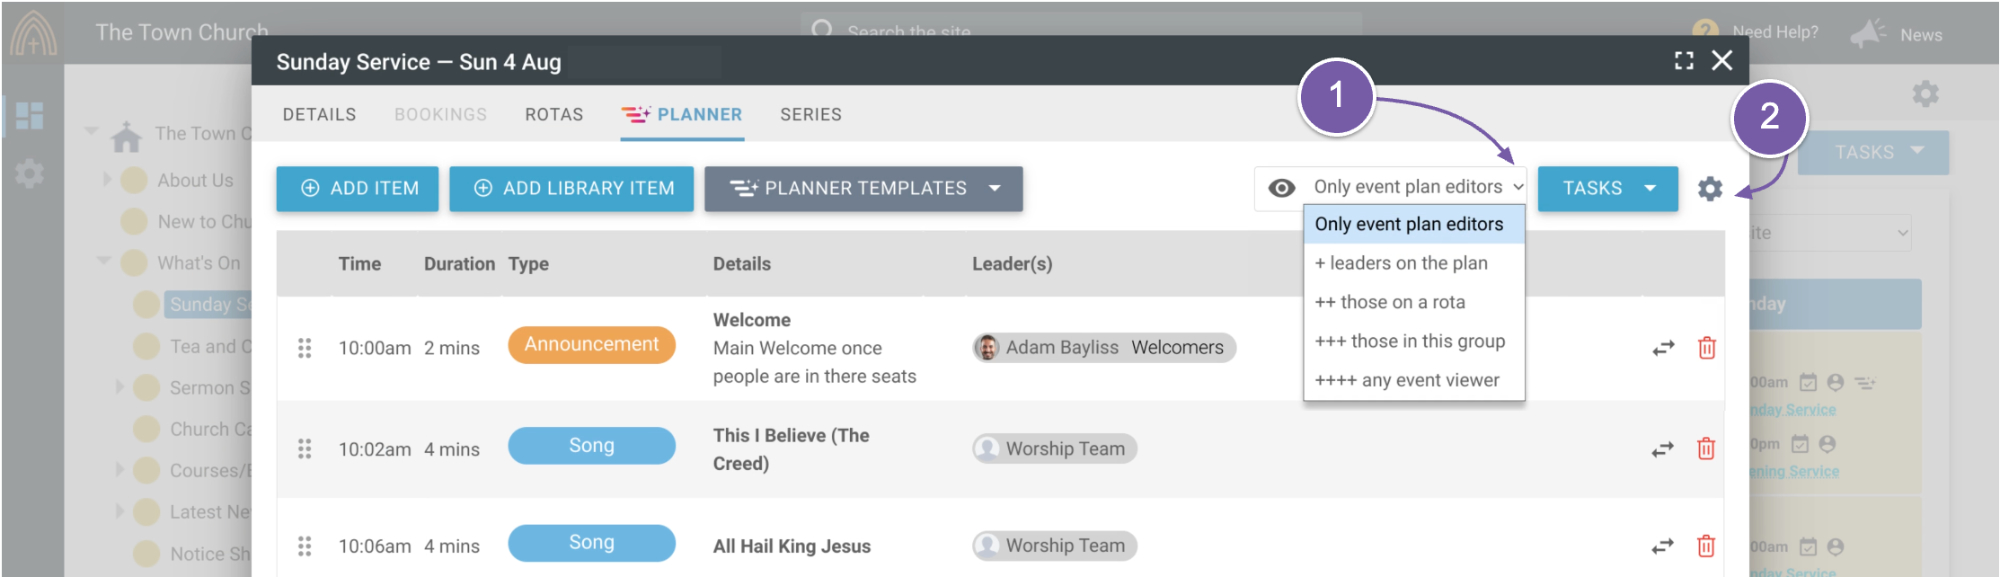
Every plan can have its own visibility settings.
-
On this page we have a quick link to the site settings that take you to the main “Planner” settings just in case you need to change these while working on a plan.
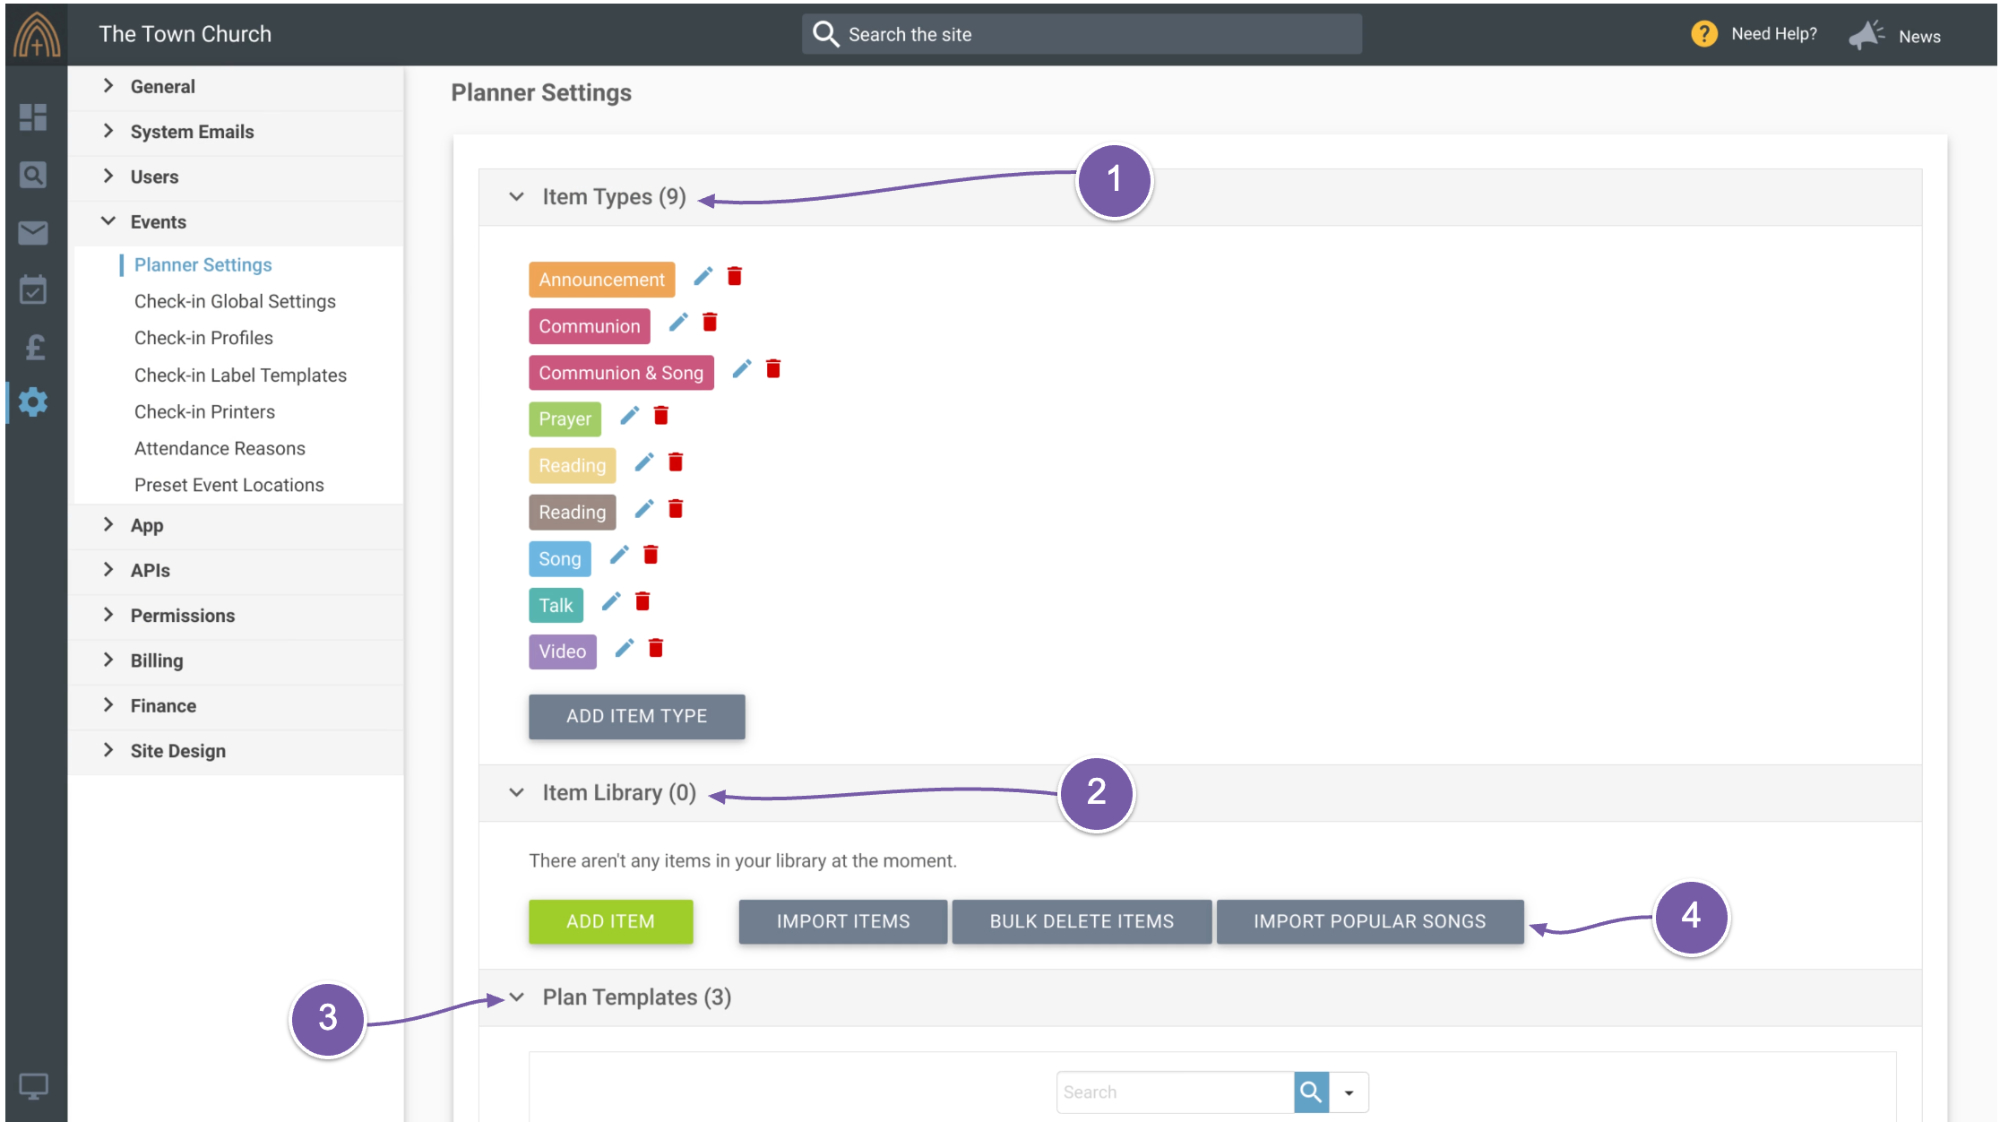
In the site settings for “Planner” you can manage:
-
your item types
-
item library
-
and plan templates.
-
One helpful part of the “Planner” is the ability to quickly import the 200 most popular worship songs as library items.
So that's a quick guide to how Planner looks in the web office.
Let's now look at how “Planner” looks in the dashboard.
-
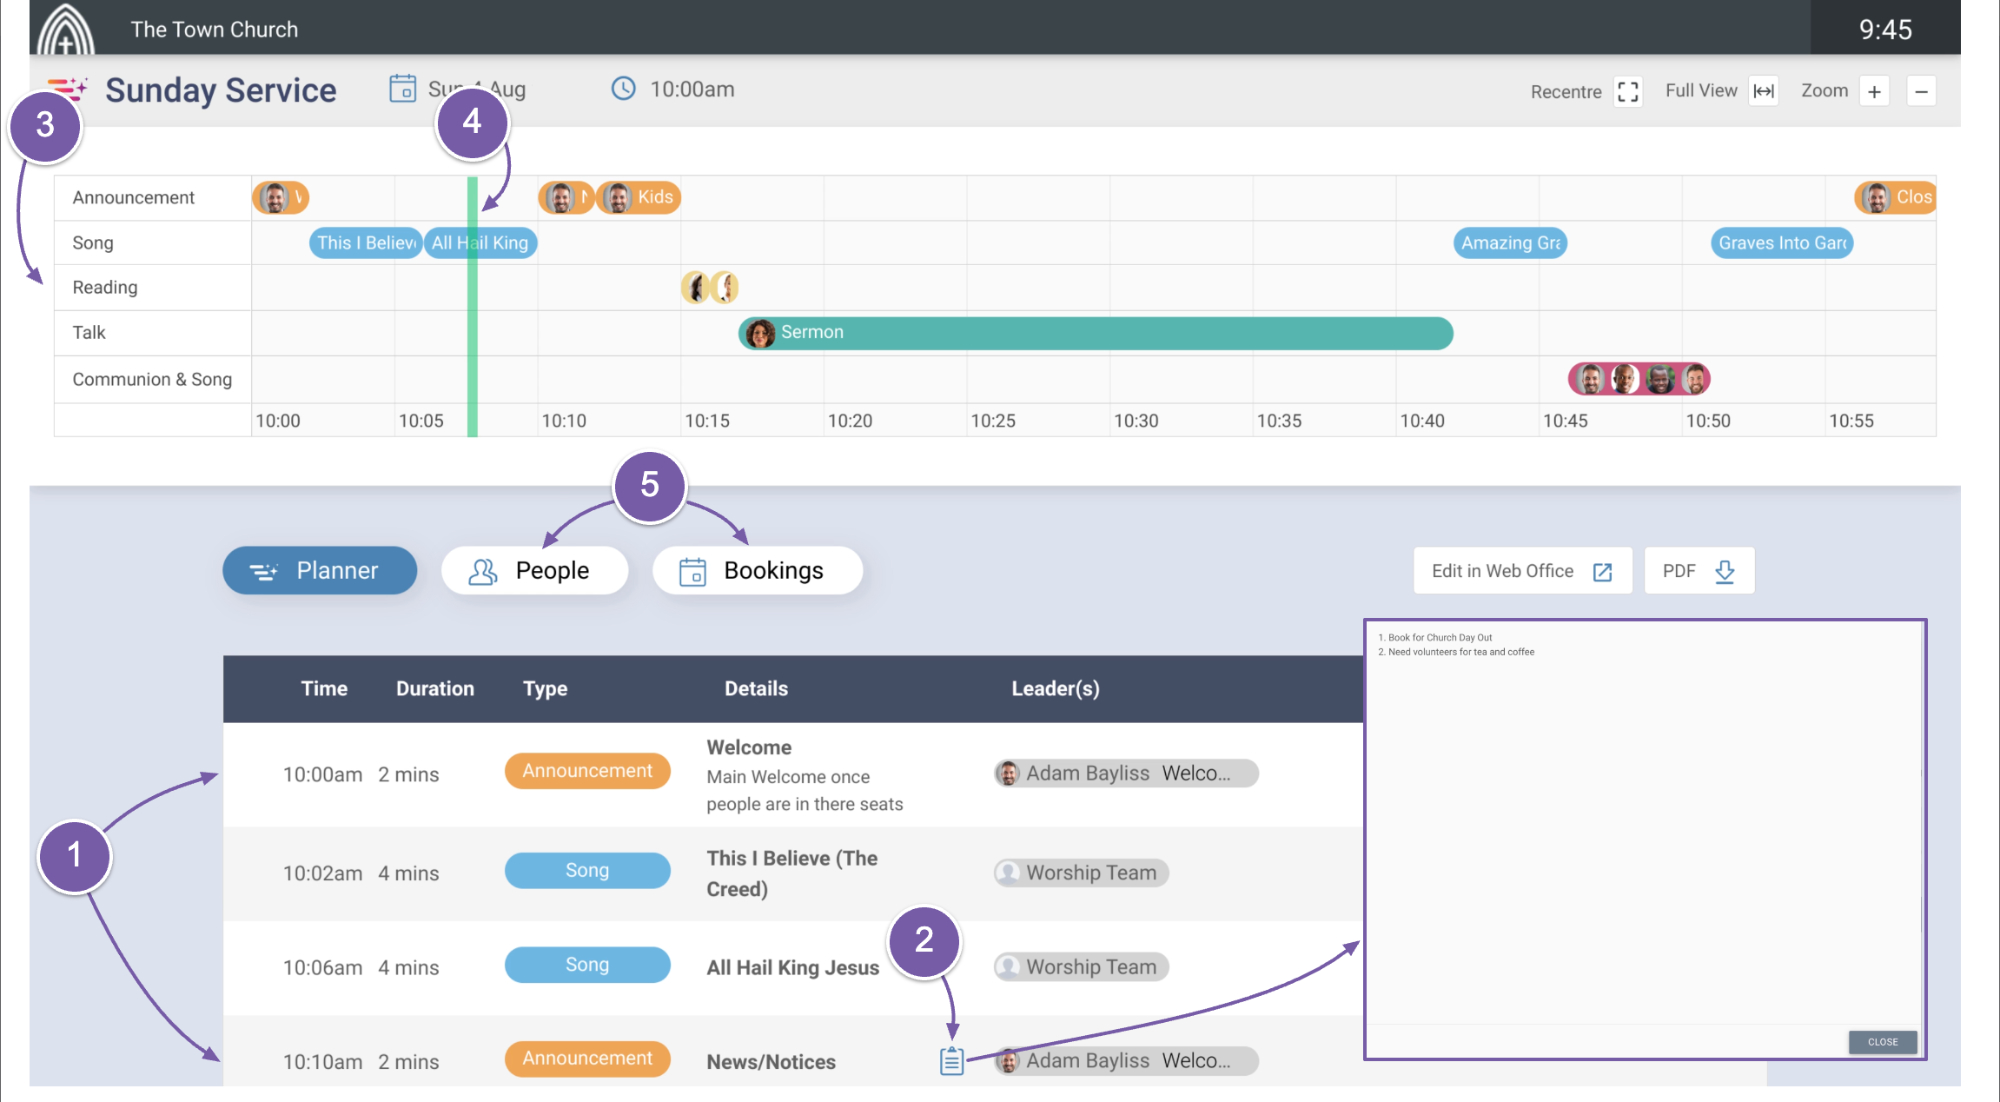
The first thing to note is the live view below the timeline.
-
This mirrors the plan from the web office and if you click on any of the notes or attachment links they will open for you.
-
Now to the timeline. Before the event the timeline defaults to showing all of the items in your plan.
-
When the event is running you will see a green line to indicate the actual time and it will show you which item is live. The page will update for you as time goes on.
-
If the event has a Rota or resource bookings attached you will see those tabs available to click on and access that information.
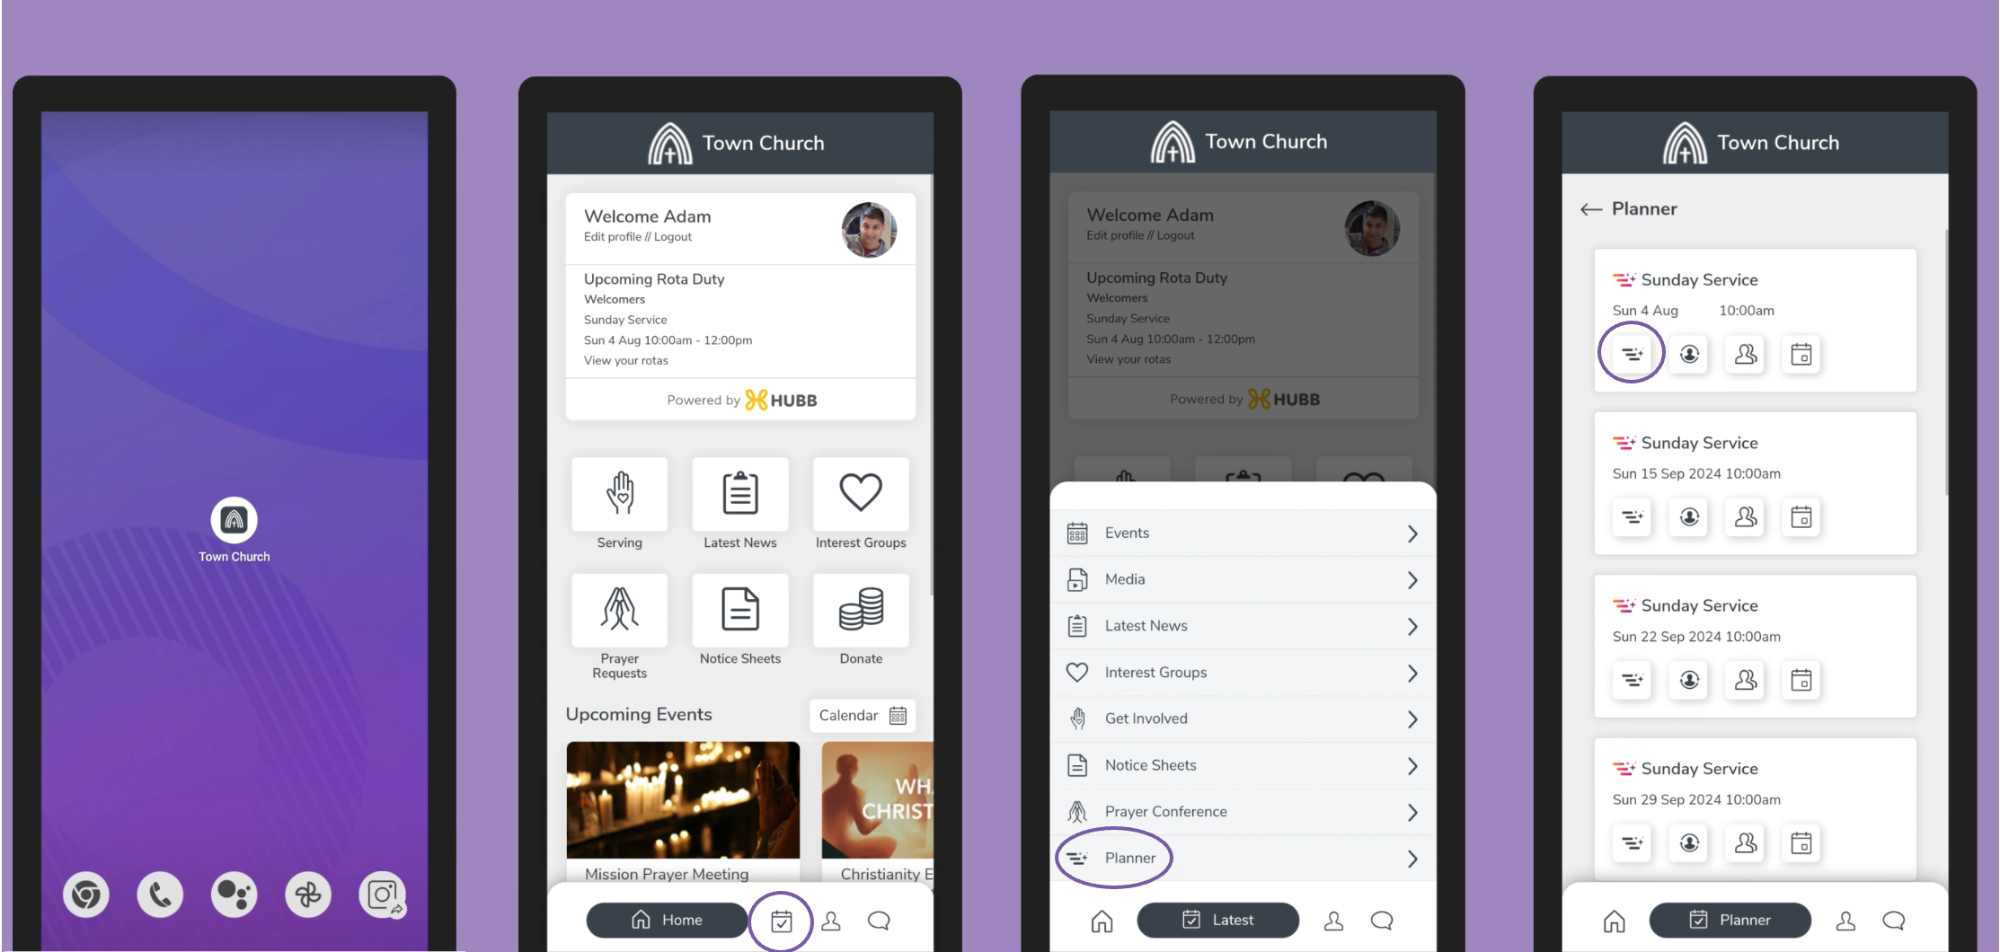
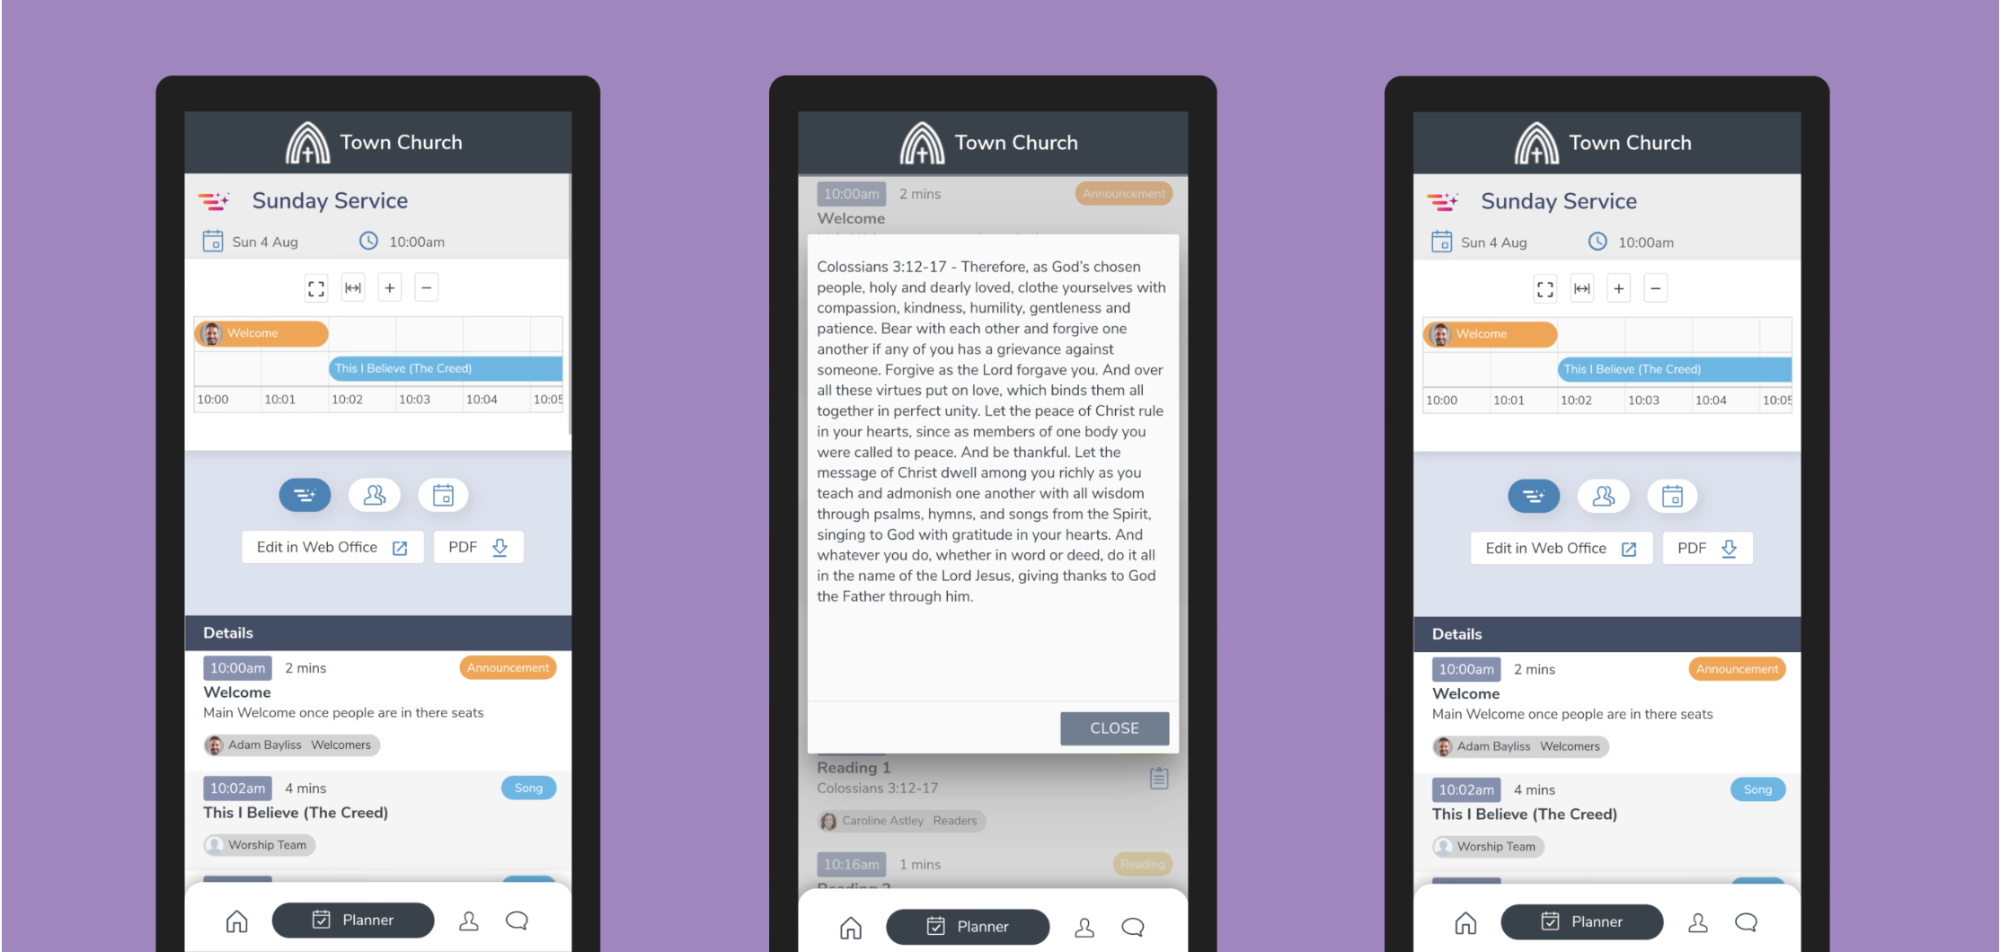
Lastly let's show you how it looks in your app. We wanted to make sure that anyone involved in helping out at your event can access the “Planner” to see what's happening now or what's coming up next as well as the whole plan.
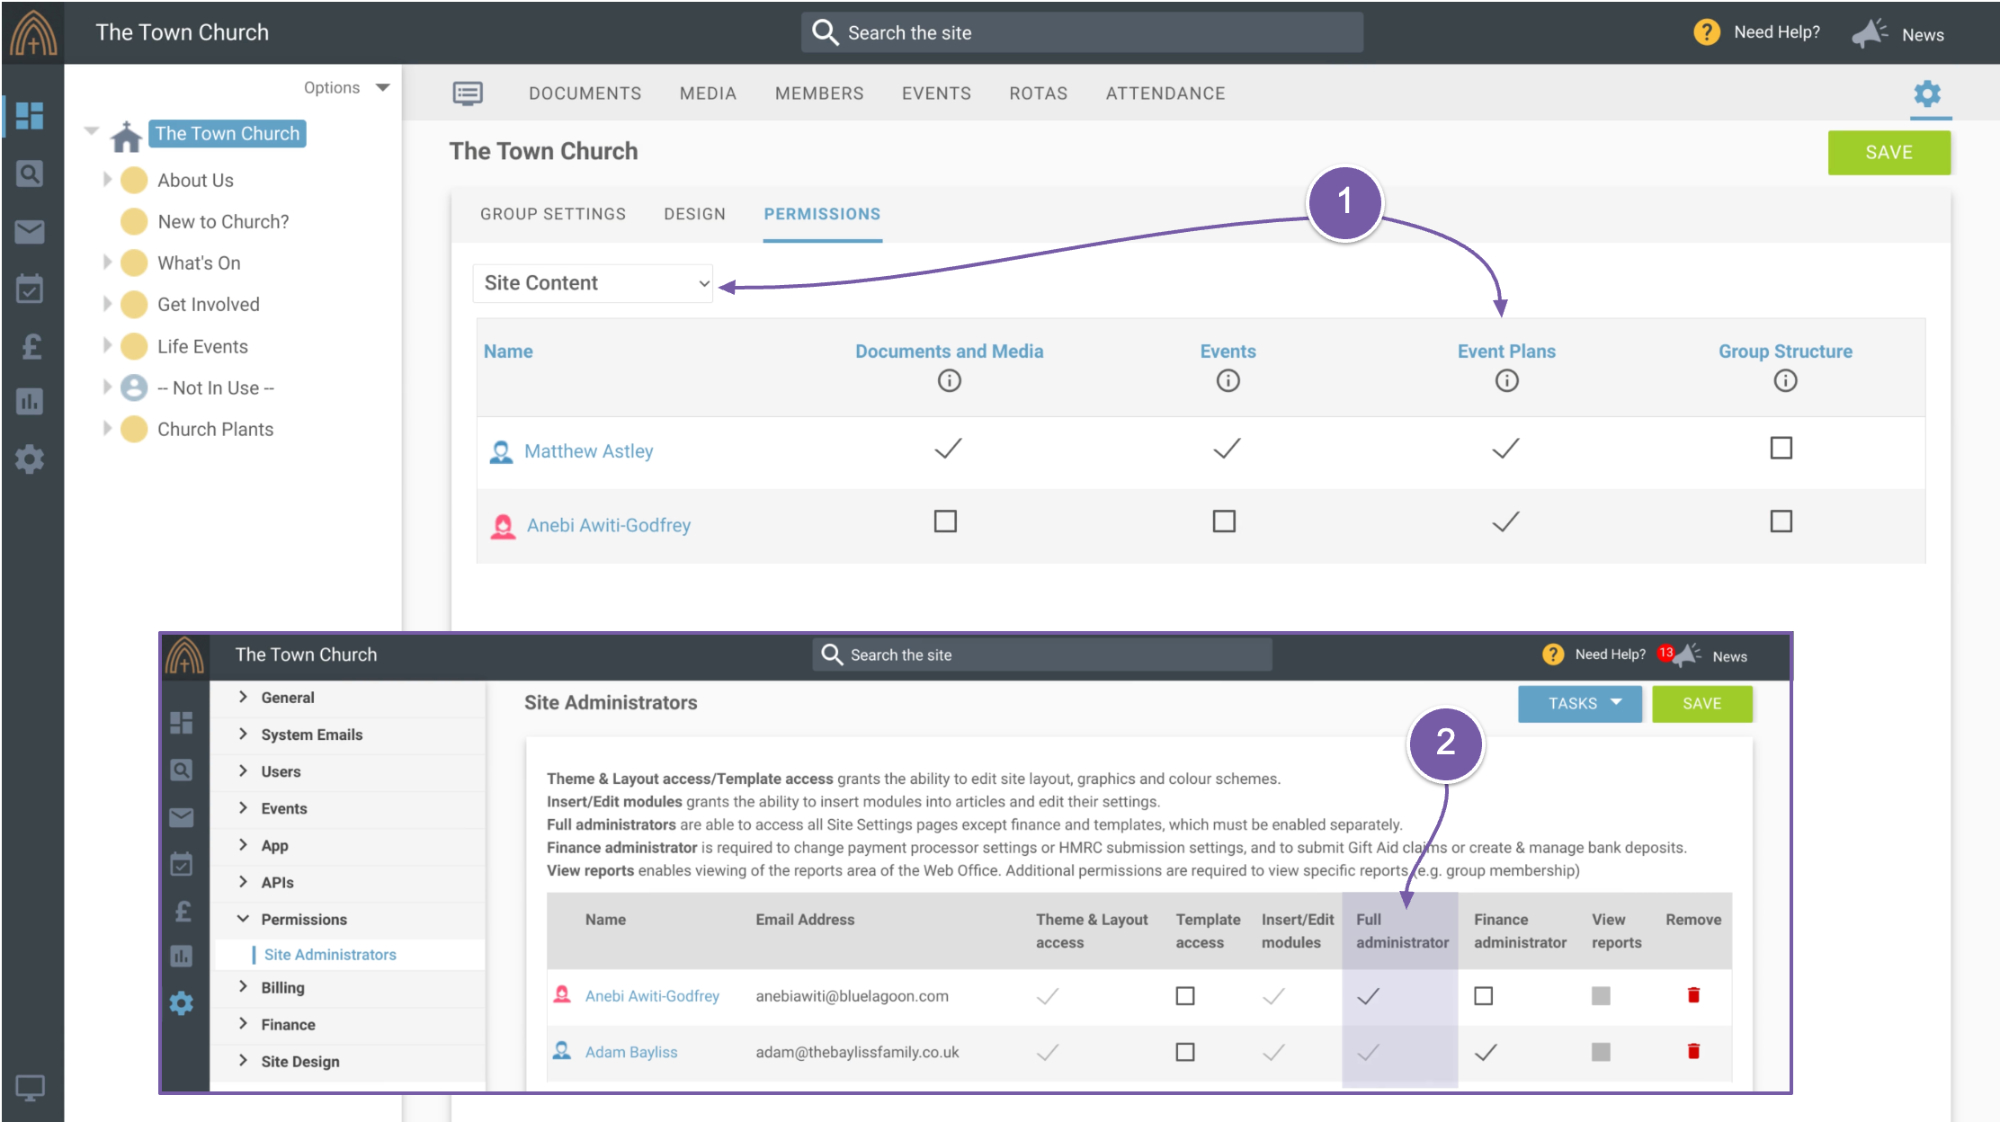
Planner comes with a new permission.
-
You can give people the event plans permission on the site manager under site content.
-
By default, everyone who has got the full administrator permission in site administrators will get the event plans feature at the top group in your site manager.
We hope you will try “Planner” and check out our more detailed help guides. Thanks for watching.