Adding your first rota
(5 minutes)
This video will show you how to add your first rota to your website
Sorry, your browser is unable to play this type of file.
You can still
download it
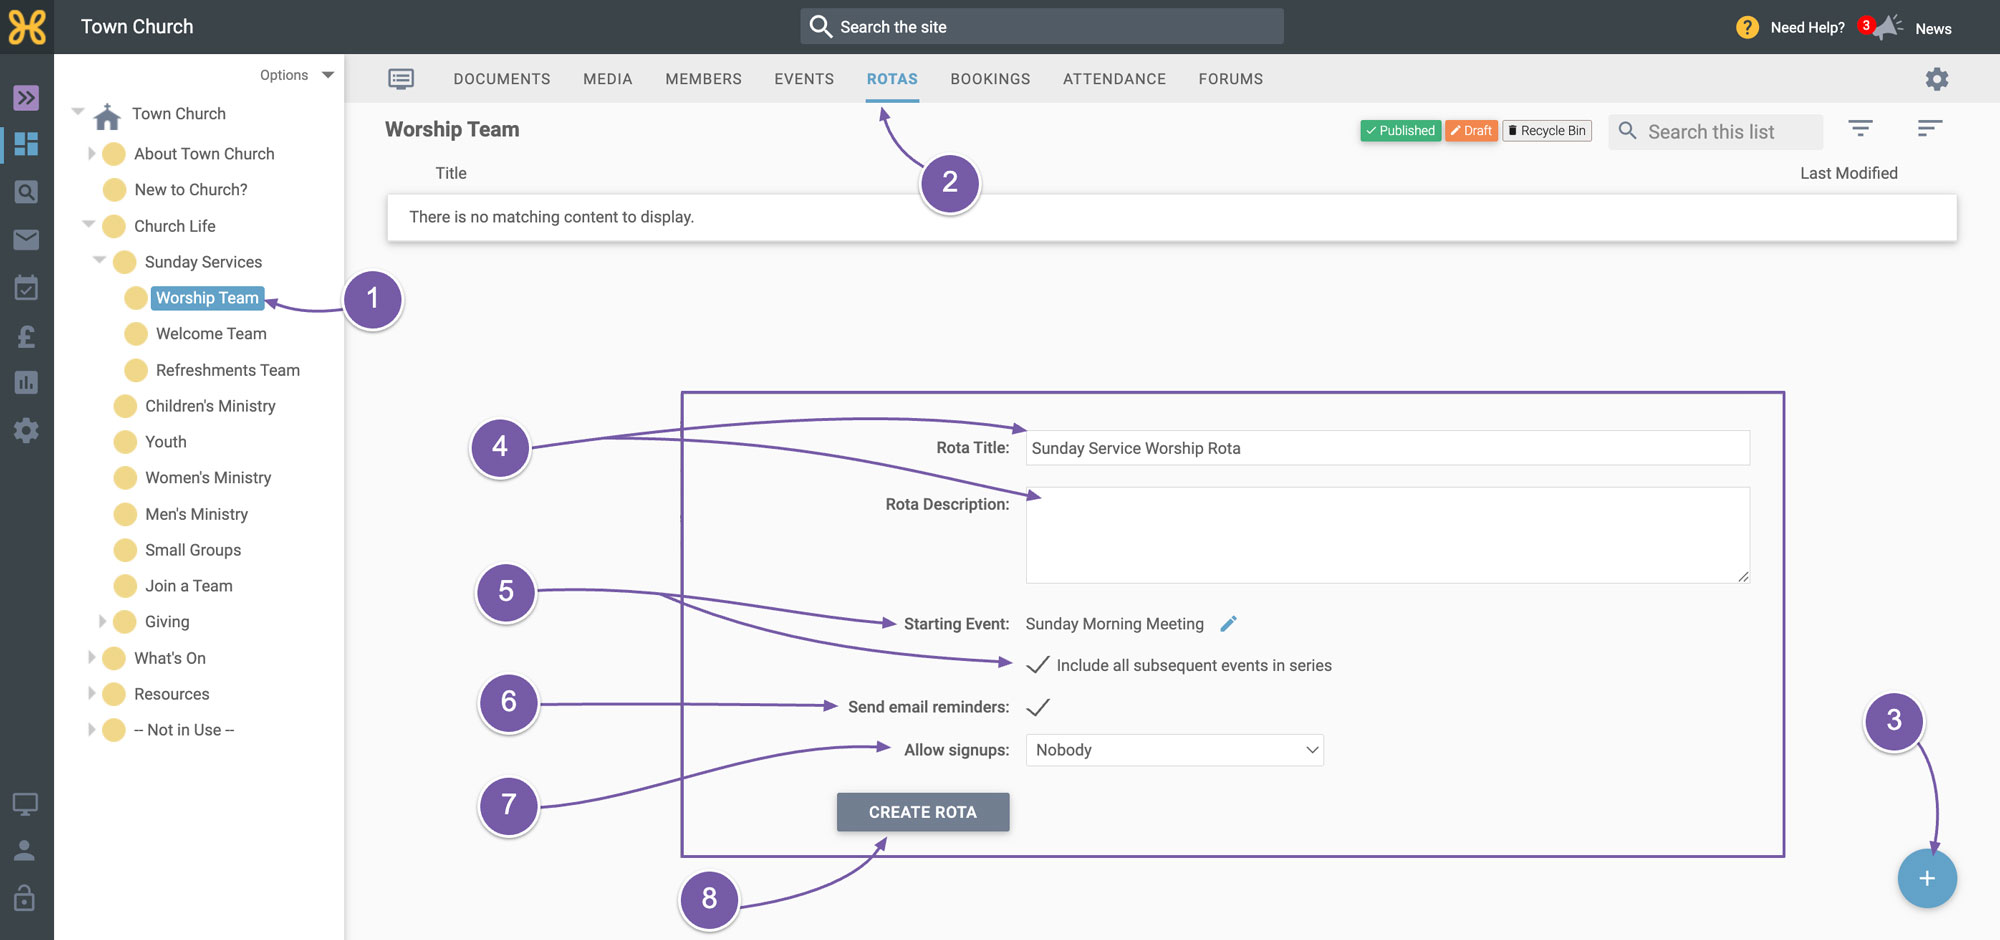
For these help videos, we are looking at setting up Rotas for the Sunday service. We recommend creating subgroups for your teams and storing their Rotas in their own group, so that anyone you give permissions to does not get permissions to edit content that they shouldn't. For this guide we'll create a new Rota in the “Worship Teams” group. To do this, let's:
-
Find that group
-
Go to its “Rotas” tab
-
Click on the blue plus icon and we will be given some information to fill in about the Rota
-
Fill in the name of the Rota and if you want to, a brief description
-
Next, pick the starting event - and a good tip here is to make sure that the tick below is checked, which it is by default, to include all subsequent events in the series. This means that all of your Sunday service events that are in a recurring event series will be added in one go.
-
Leave the tick box for sending email reminders, so your volunteers will get email reminders a few days before they are due to serve. They can even add the feed of serving reminders to their personal calendars in Outlook or Gmail for example.
-
The last option is to choose if we want to allow people to sign up to the Rota themselves. We have another video on that feature, and for now we'll leave this to "nobody"
-
Click "Create Rota". The Rota is not live, it's only in draft, so any changes you make will not affect anyone.
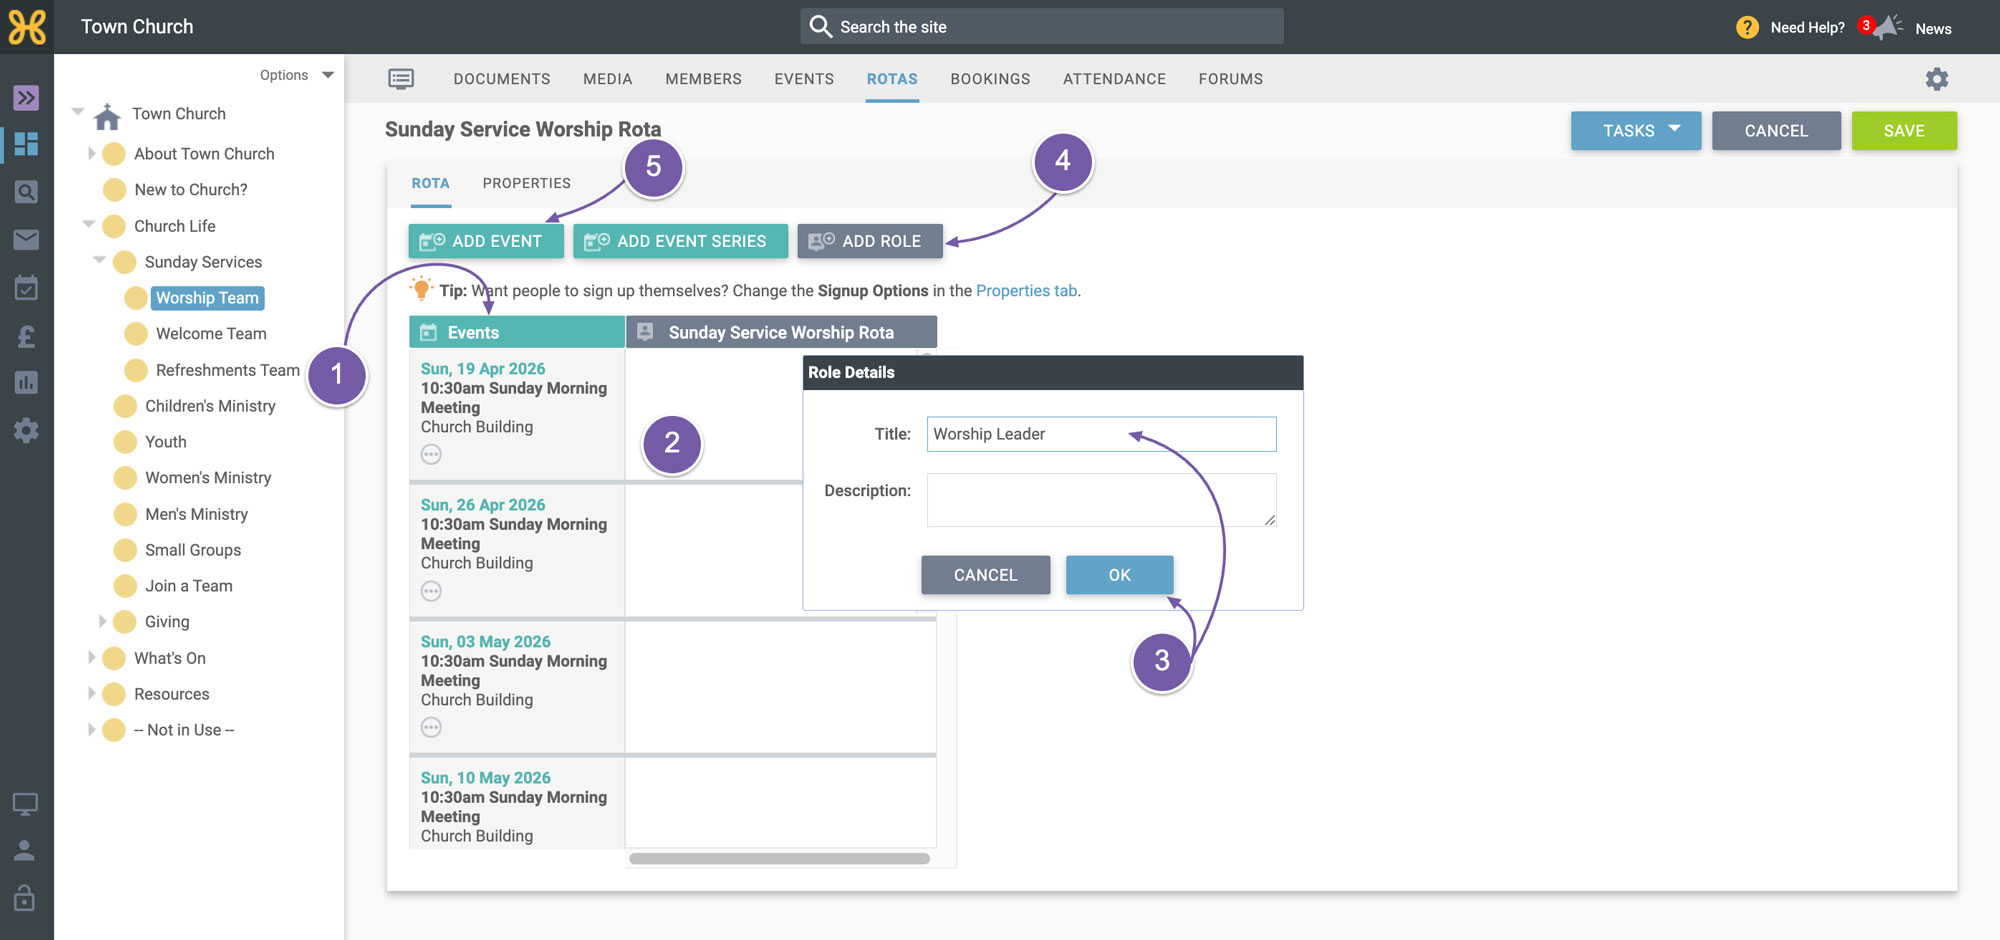
Here is the Rota interface.
-
You can see that the events are down the left-hand side
-
Roles people will do on the events are on the right
-
At the moment there is just one role which we need to change the name of. Click on the title and change it to “Worship Leader”, and click “OK”
-
To add another role, such as "Guitar" you just need to click on the “Add Role” button, add “Guitar” for the name of this role, and click “OK”.
-
If you need to add other events, just click on the “Add Event” button and select your event from the calendar.
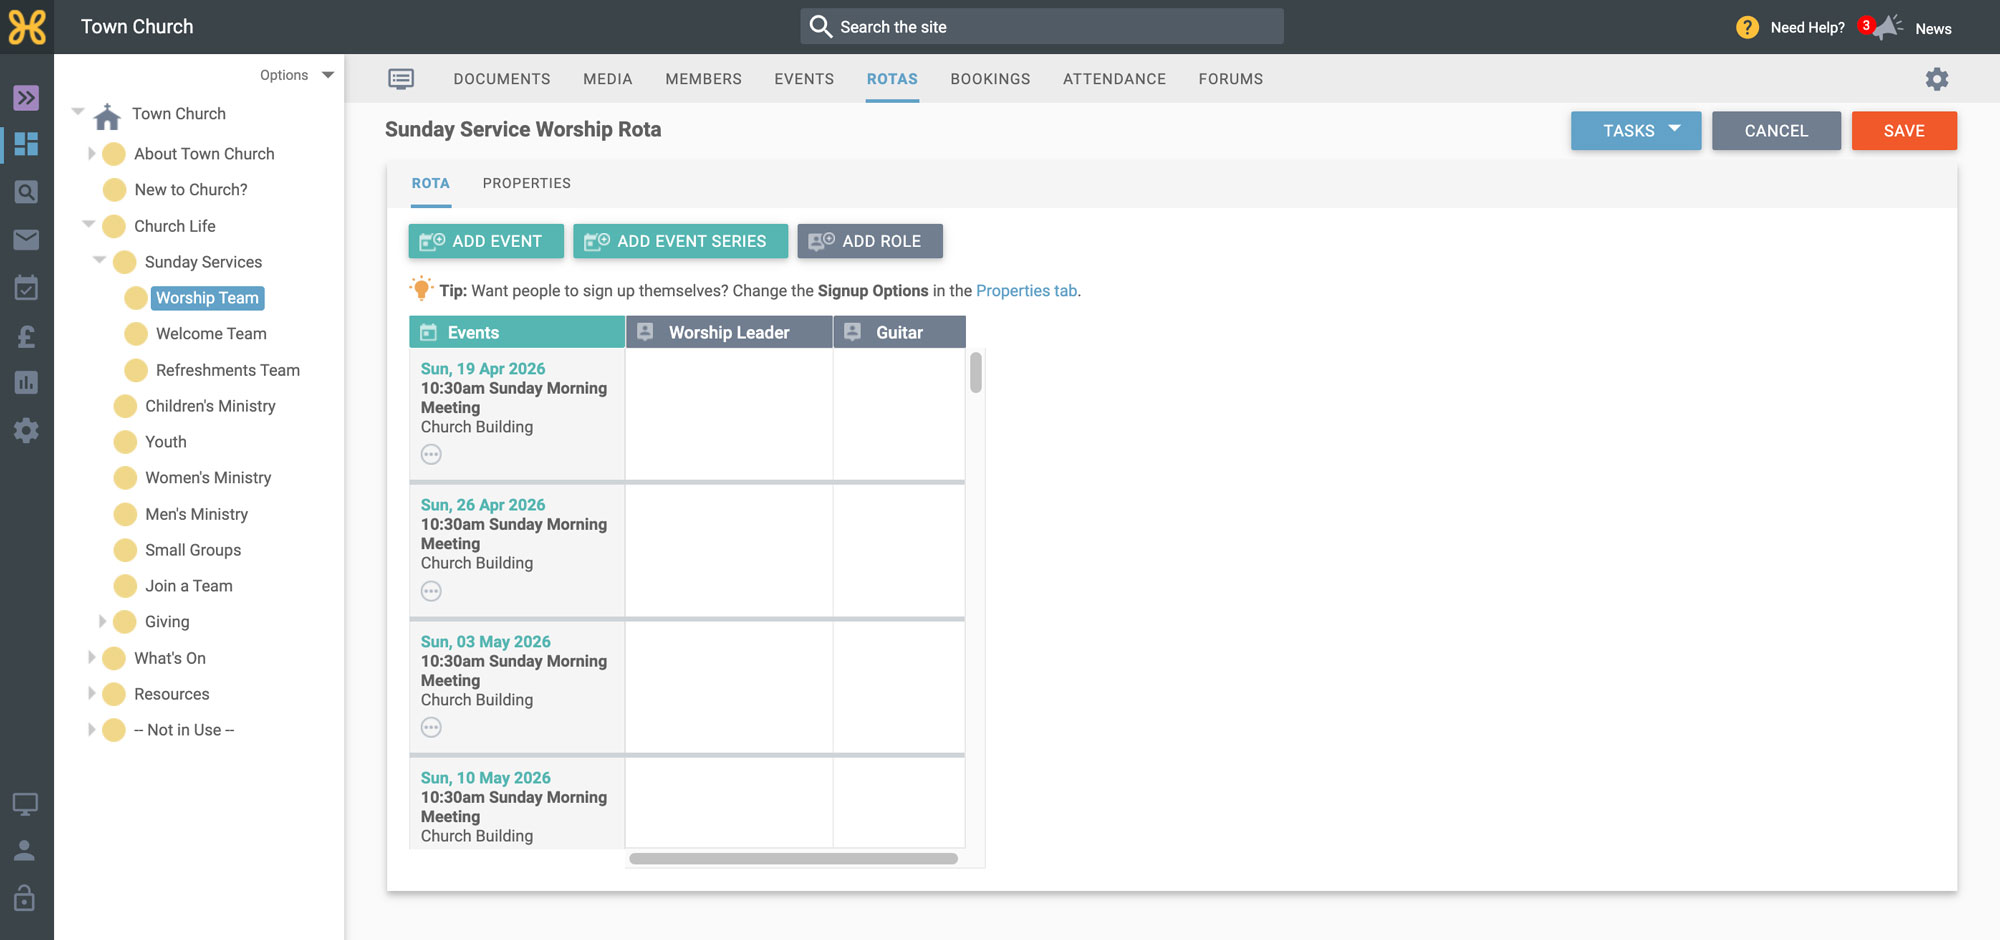
As we have added a whole series of events, we won't go and add any individual events. So, you will now be able to add more roles to suit how you run your church, and when you are done, you need to add people to the roles on the dates they are serving. This is really simple. All you need to do is:
-
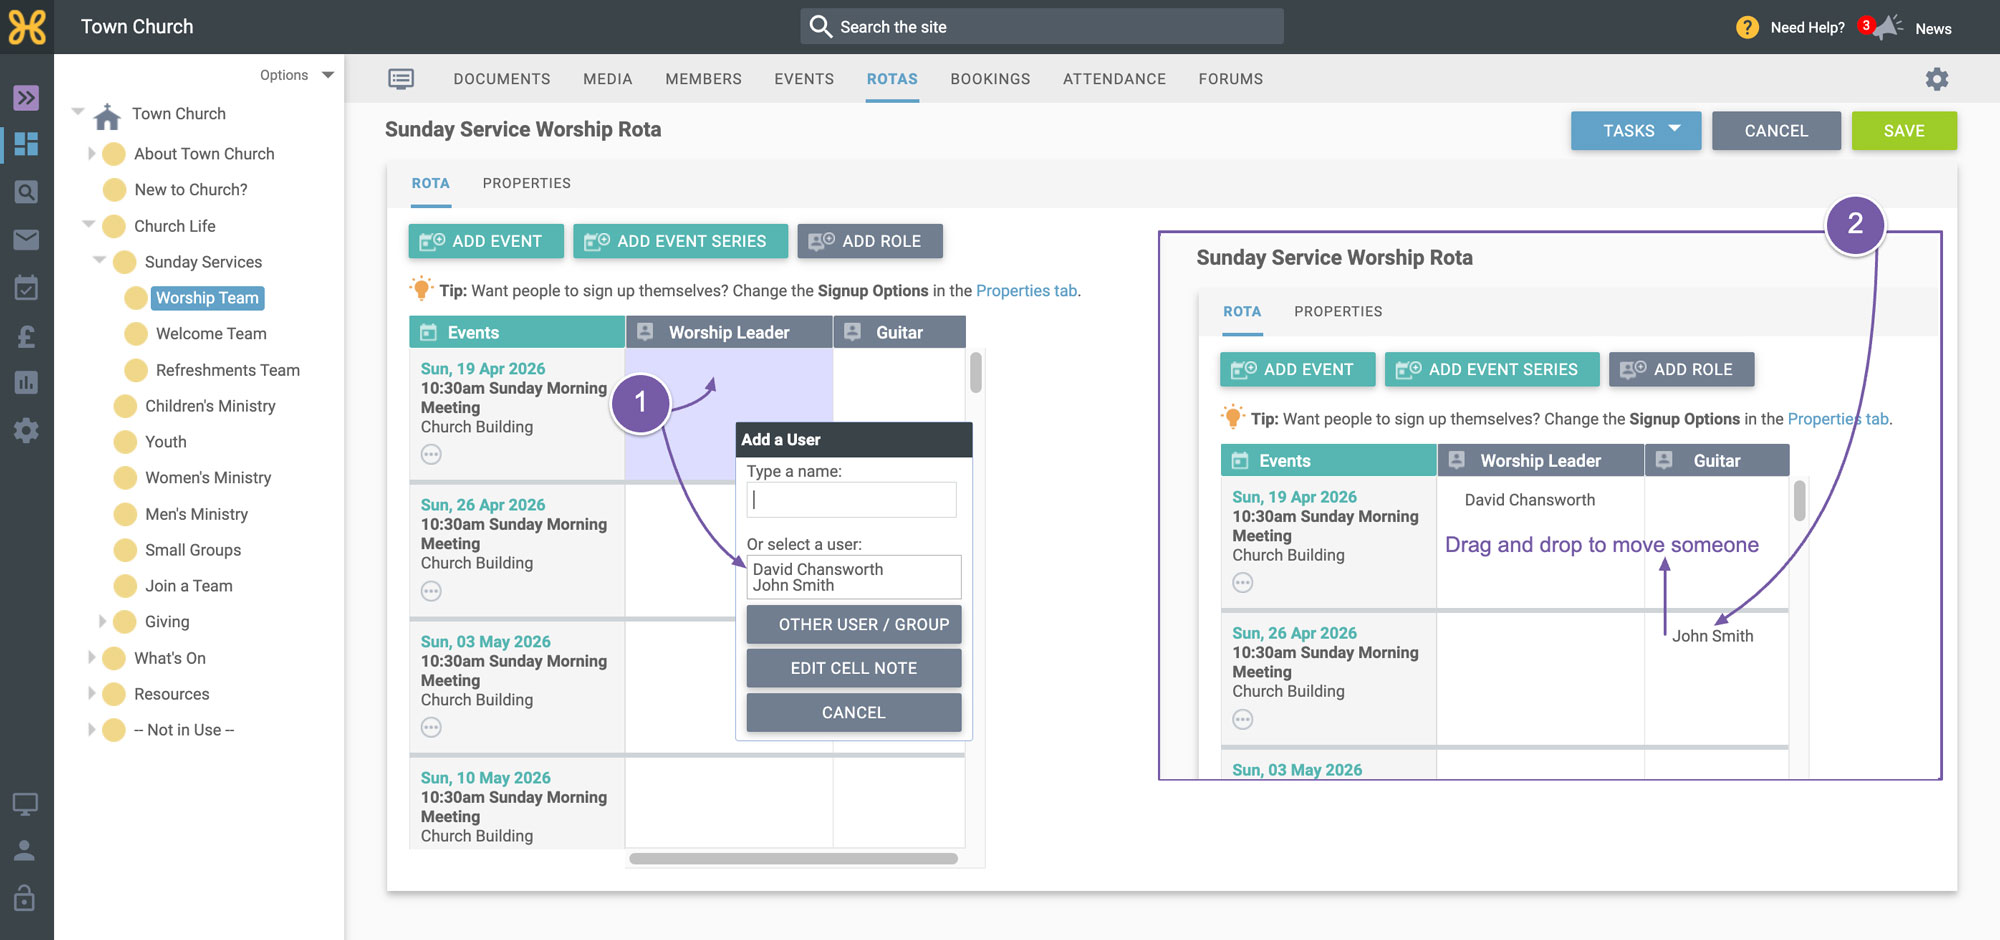
Click on the role you want them to serve on, and pick them from the list. The list of people is generated from the members of this group.
-
You can then add someone else to another role. If you make a mistake, don't worry. If you need to move someone, just drag and drop them to the right role.
-
If you add someone to an event that they are already serving on, you will get a helpful clash warning. You can choose to click “OK” and add them anyway, or click “Cancel” to not add them.
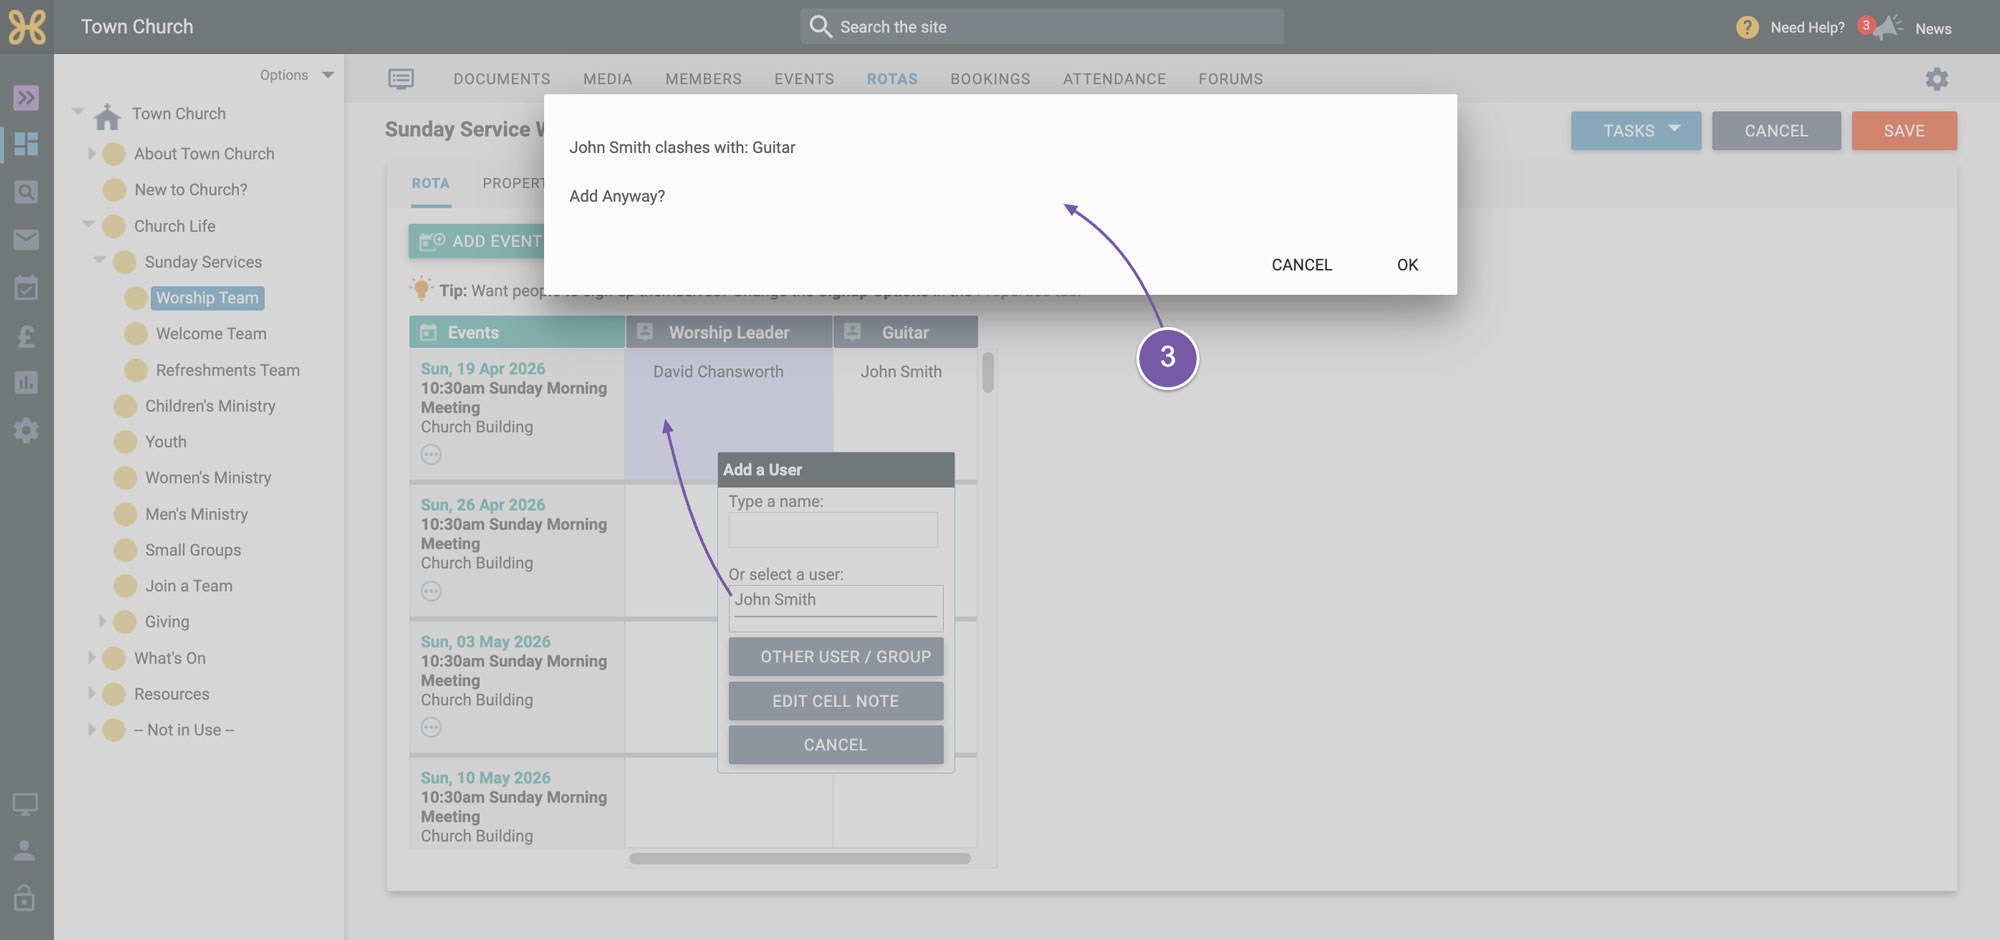
Rota clashes appear system-wide, so if someone is on the tea and coffee Rota on this event, it would also bring up a clash warning. The reason we let you add people even if there is a clash, because it may be possible for someone to serve in two roles at one event. For example, setting up the building may happen early in the morning, and helping with tea and coffee can be done after the service.
One really important tip to tell you about, is about not needing to create this Rota again when your event series runs out.
-
You can simply just add more future events to the Rota, and keep adding people to those future events. This means you only need to set up the Rota once.
-
When you do a large update to the Rota, you can simply use "Tasks" to email the Rota to your volunteers, and we'll show you how to do that in our upcoming videos.
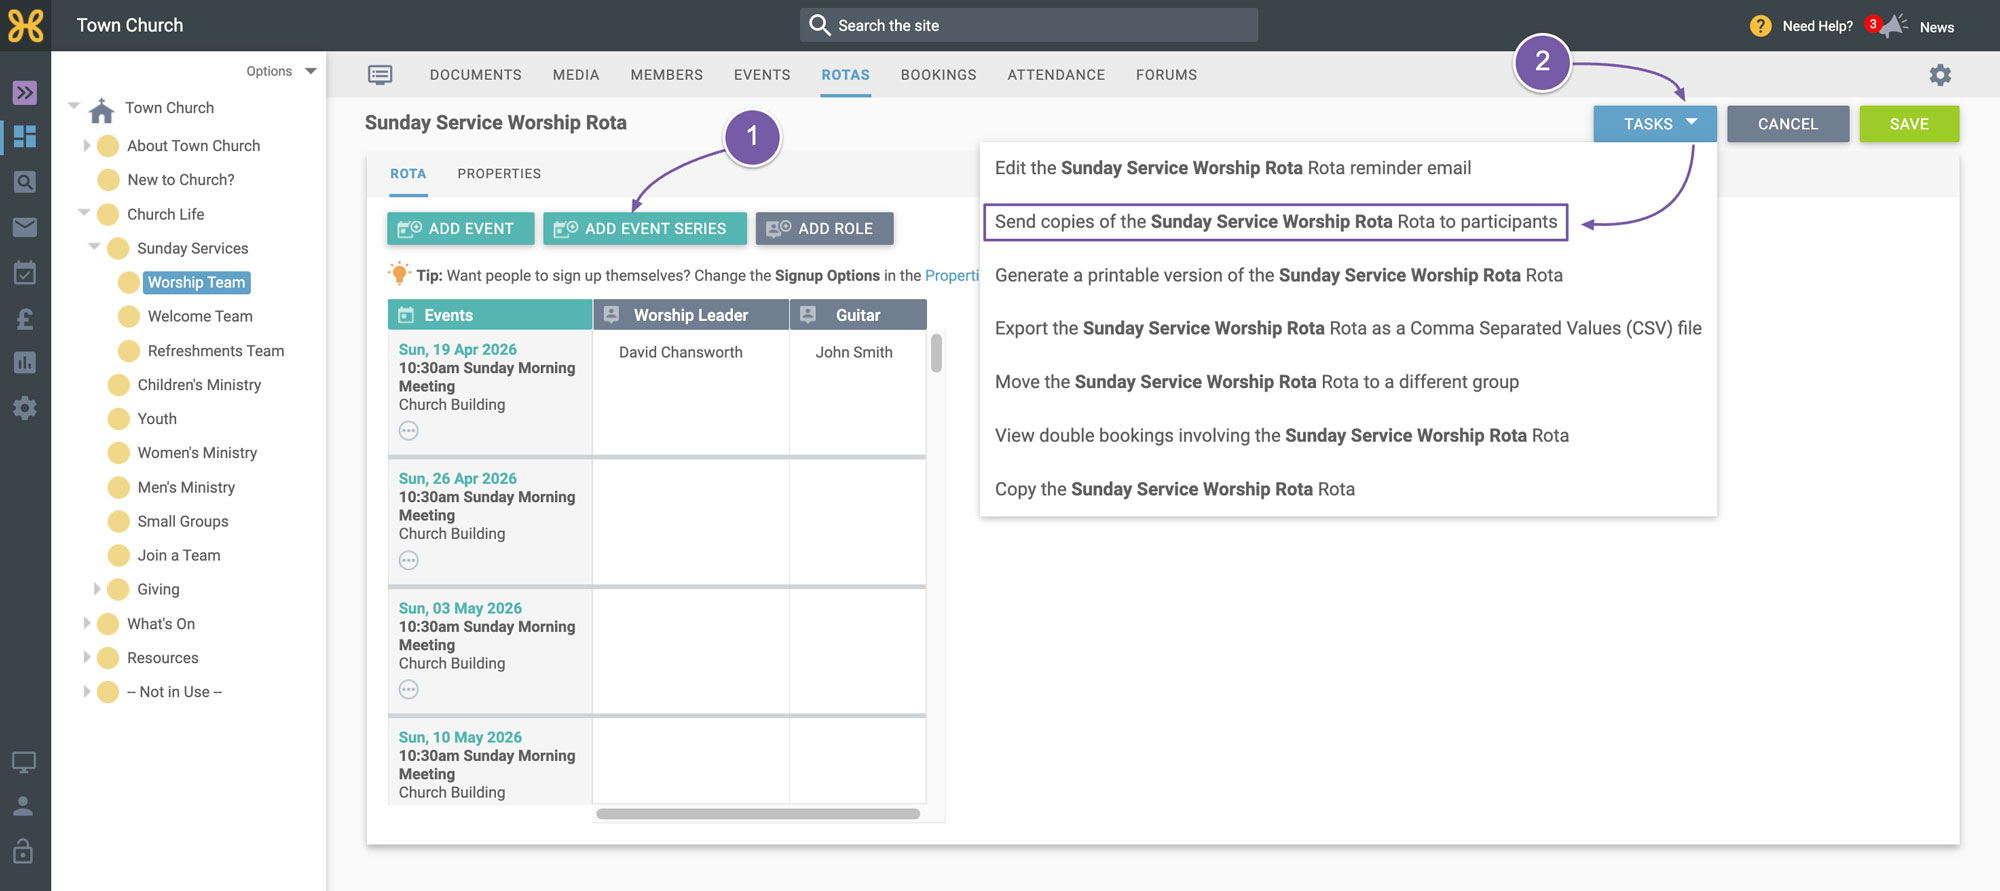
So that's how to create a Rota, add events, roles, and people. This should give you a good foundation for adding your own groups and Rotas to your site. The next videos are based on the
Rota properties, and the tasks that will
help you communicate with your members.