An important introduction to your homepage images
(5 minutes)
Watch this video to get a good grasp on how the homepage images are easily changed by you.
Sorry, your browser is unable to play this type of file.
You can still
download it
If you have just received your trial site or you have just switched to the Aspire template and would like to update the images that appear on your home page then you can follow this guide and make the changes to your own site. In earlier help videos we have given information on
how to take and select good pictures to use on your site and
how to use our built-in image editor to make sure the images you upload are the correct size to work in our templates. If you have not watched those videos then we strongly recommend that you go and watch them and then come back to this page, as that knowledge will make these next tasks much easier. To help you manage your images we have chosen to have some standard sizes for the images that you use on your website. A good thing to point out is that we have built quick shortcuts to make your images the right size for your website so it's very easy for you.
The following information shows you which images you can change, the size they need to be and where they are stored in the web office.
Let's start at the top of the website.
-
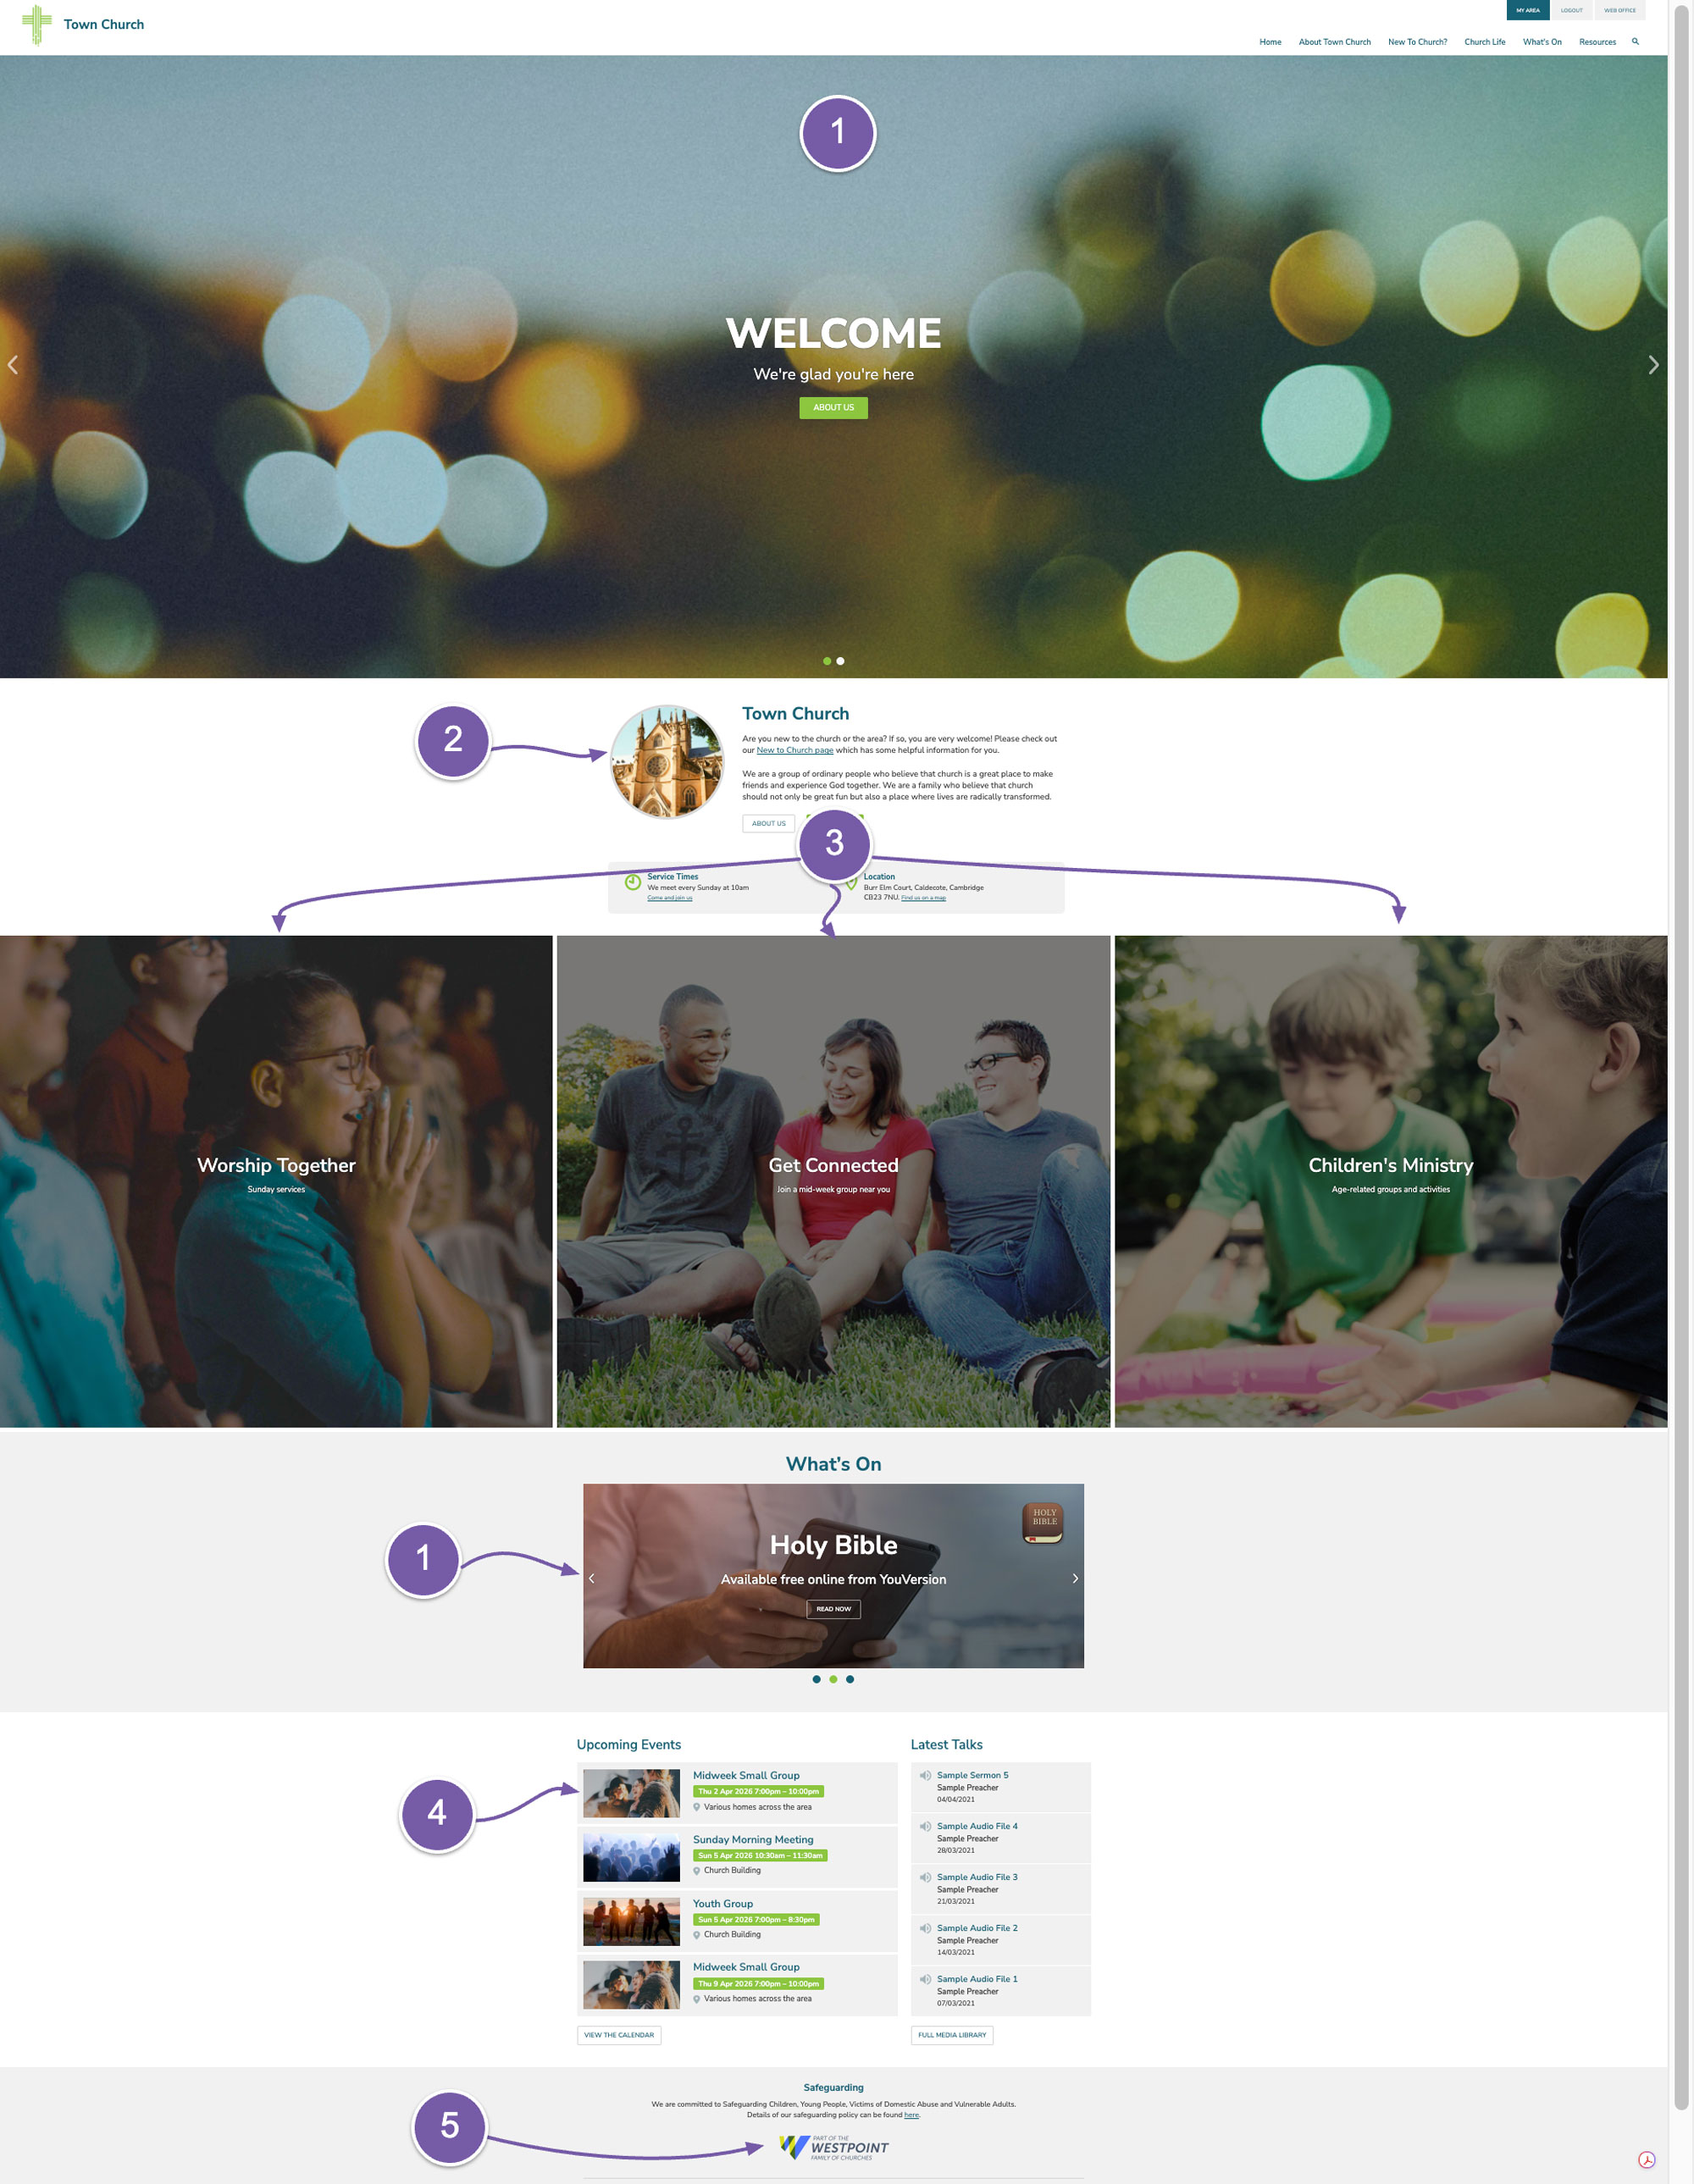
The slideshow at the top of the site is called the "Main Slideshow" and the images need to be 2000 pixels wide and 750 pixels high. We have another slideshow lower down the page in the what's on section. We call this the “What's On” slideshow and again the images need to be 2000 pixels wide and 750 pixels high just like the main slideshow at the top of the page. For both slideshows you add the text and the link for the button in the image settings.
-
The next image is the "Welcome Image" - you can see this in the welcome section of the site. The image you upload is a square image that needs to be 262x262 pixels and the template automatically crops it into a circle and adds the grey border.
-
Just under the welcome section are what we call the “Block Images”, and the fact there are three makes this the gallery of 3 block images. Each of these images are 665 pixels wide and 592 pixels high. For these images you add the text and the link in the image settings.
-
Where used, the images used in the events feed are set in the event settings as the Summary Image and they need to be 800 pixels wide and 400 pixels high.
-
Lastly, there is a space in the footer to show a logo of a denomination or group that you are part of. You can add more than one image to this area and we already have some of the more common logos if this is a new trial site that you are editing. We call this area “Footer Logos”.
Now we will go and look at where these images are stored in the web office.
-
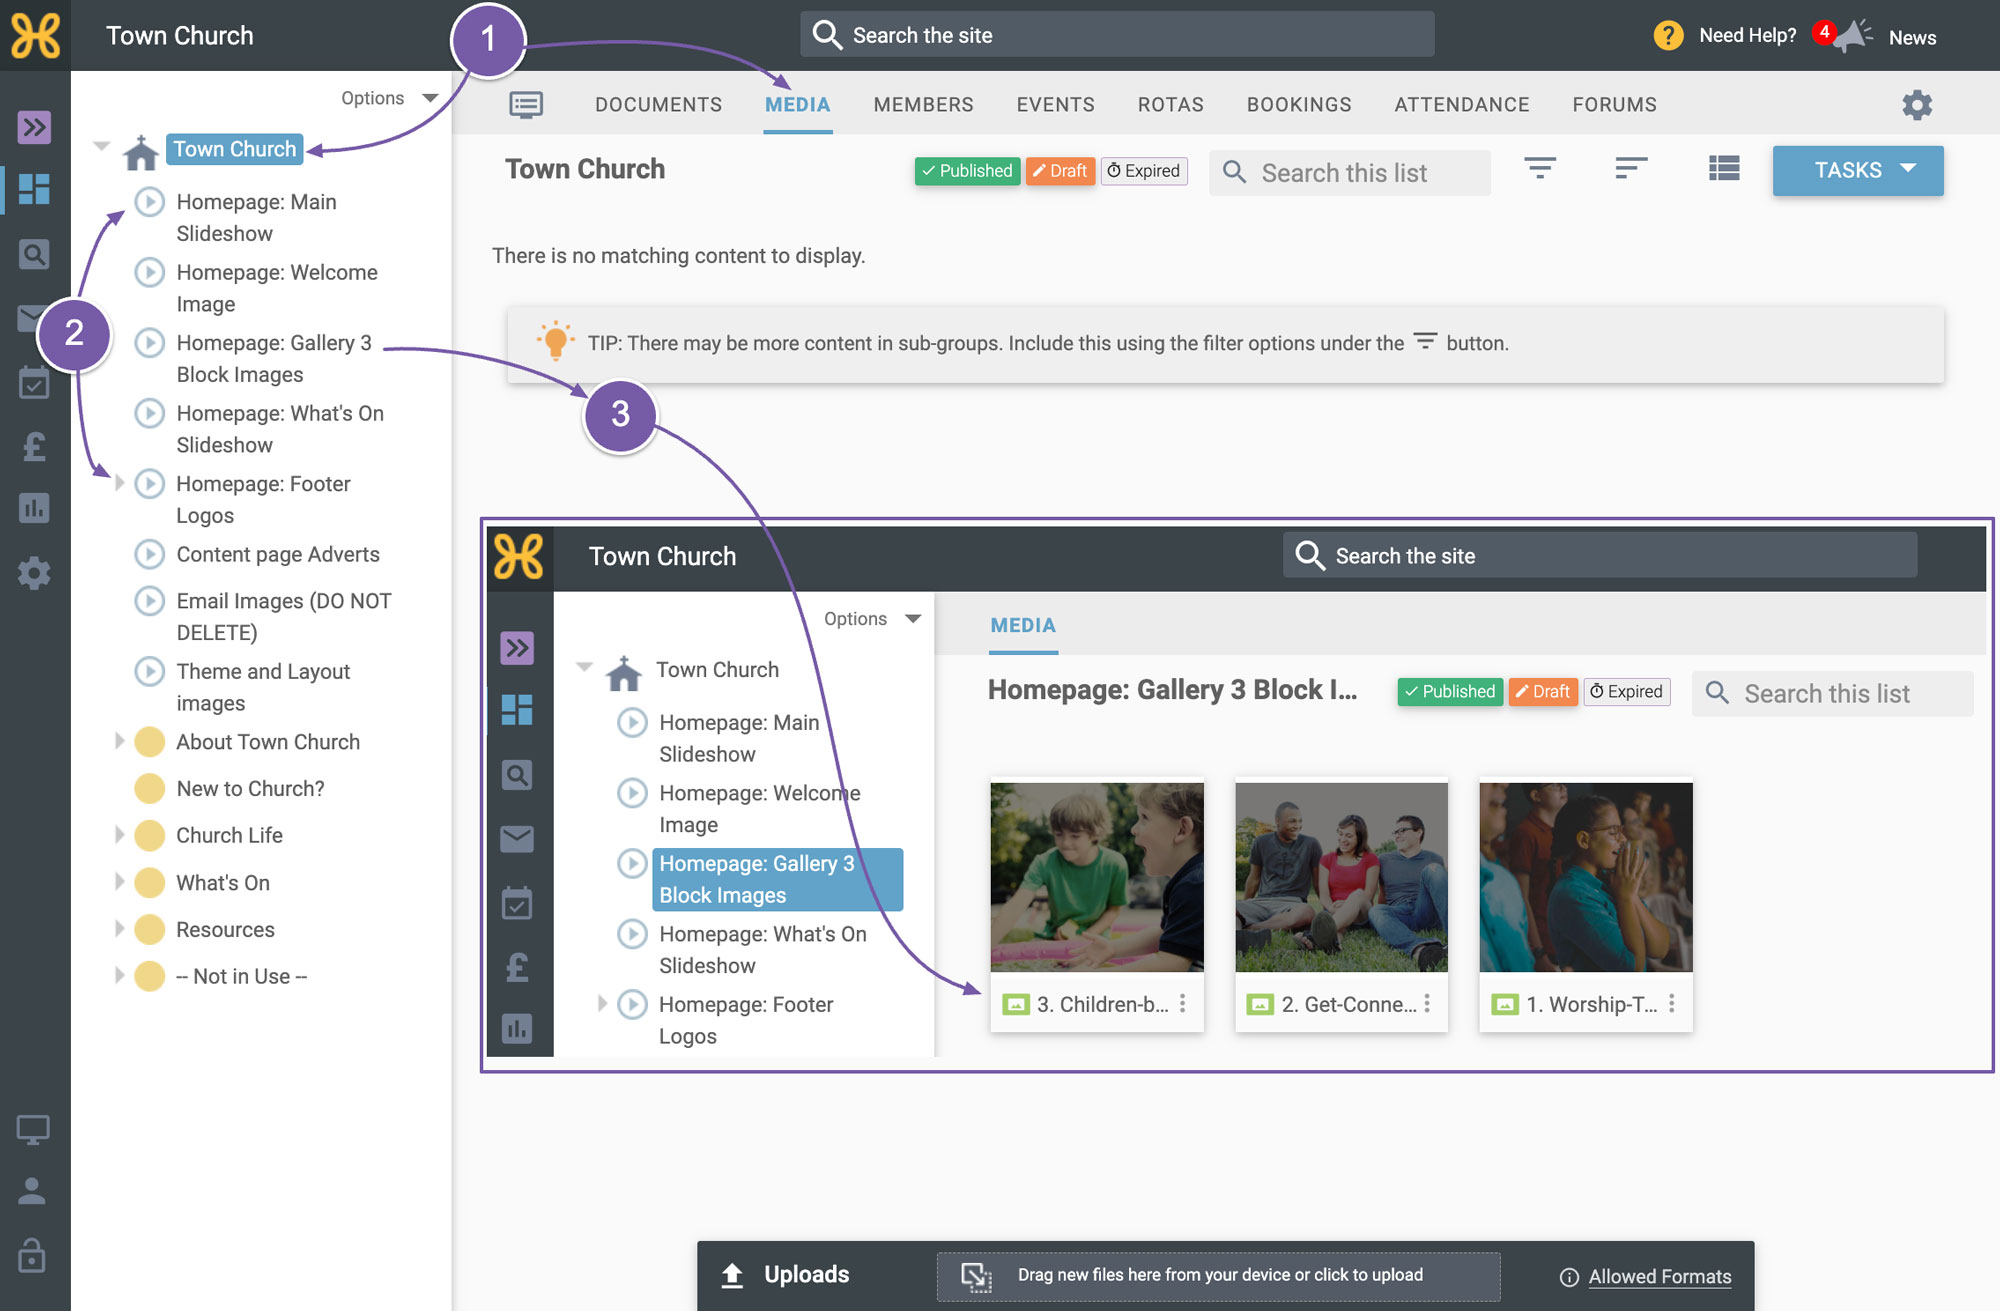
If we go to the top group in the site manager then click on the “Media” tab we can now see quite a few media groups on the left.
-
Media groups are a useful way of storing media in your site. We use them for organising the images that are used on your homepage. We have added the word “Homepage” to the name of the media groups to help you identify which groups contain images for the various sections on the homepage. You can see the groups for the images we have been talking about and we have put them in the order they appear from top to bottom. Main slideshow, welcome image, gallery 3 block images, what's on slideshow and footer logos.
-
The ordering of the images is shown in alphanumeric order on the front of your website so you need to take that into consideration when giving your images titles.
Now you understand a bit more about which homepage images you can change and where to change them in the web office you can move on to our next videos to see how to update them to personalise your site.