Using the built-in image editor
Using the built-in image editor
(5 minutes)
We have a nice tool to help you edit your images inside your Hubb website. It comes with preset sizing to make it easy to resize your images to work best in your website.
Sorry, your browser is unable to play this type of file.
You can still
download it
O
ur built-in image editor will help you to quickly crop your images to be the right size to use on your website. We have a video later on in our launch guide to help you specifically update all of the images on your homepage, but right now it would be good for you to know the right sizes you need for the images.
To help you manage your images, we have chosen to have some standard sizes for the images that you use for your website. A good thing to point out at this stage is that we have built quick shortcuts to make your images the right size for your website, so it is very easy for you.
-
The main slideshow at the top of the site and the "What's on" slideshow lower down on the Aspire template are 2000 pixels wide and 750 pixels high.
-
The image in the welcome section is a square image which is 262 by 262 pixels.
-
The gallery of three block images underneath the welcome section are 665 pixels wide and 592 pixels high.
-
Where used, the images used in the events feed are 800 pixels wide and 400 pixels high.
-
We also recommend using 800x400 size photos for the content pages of your website.
To
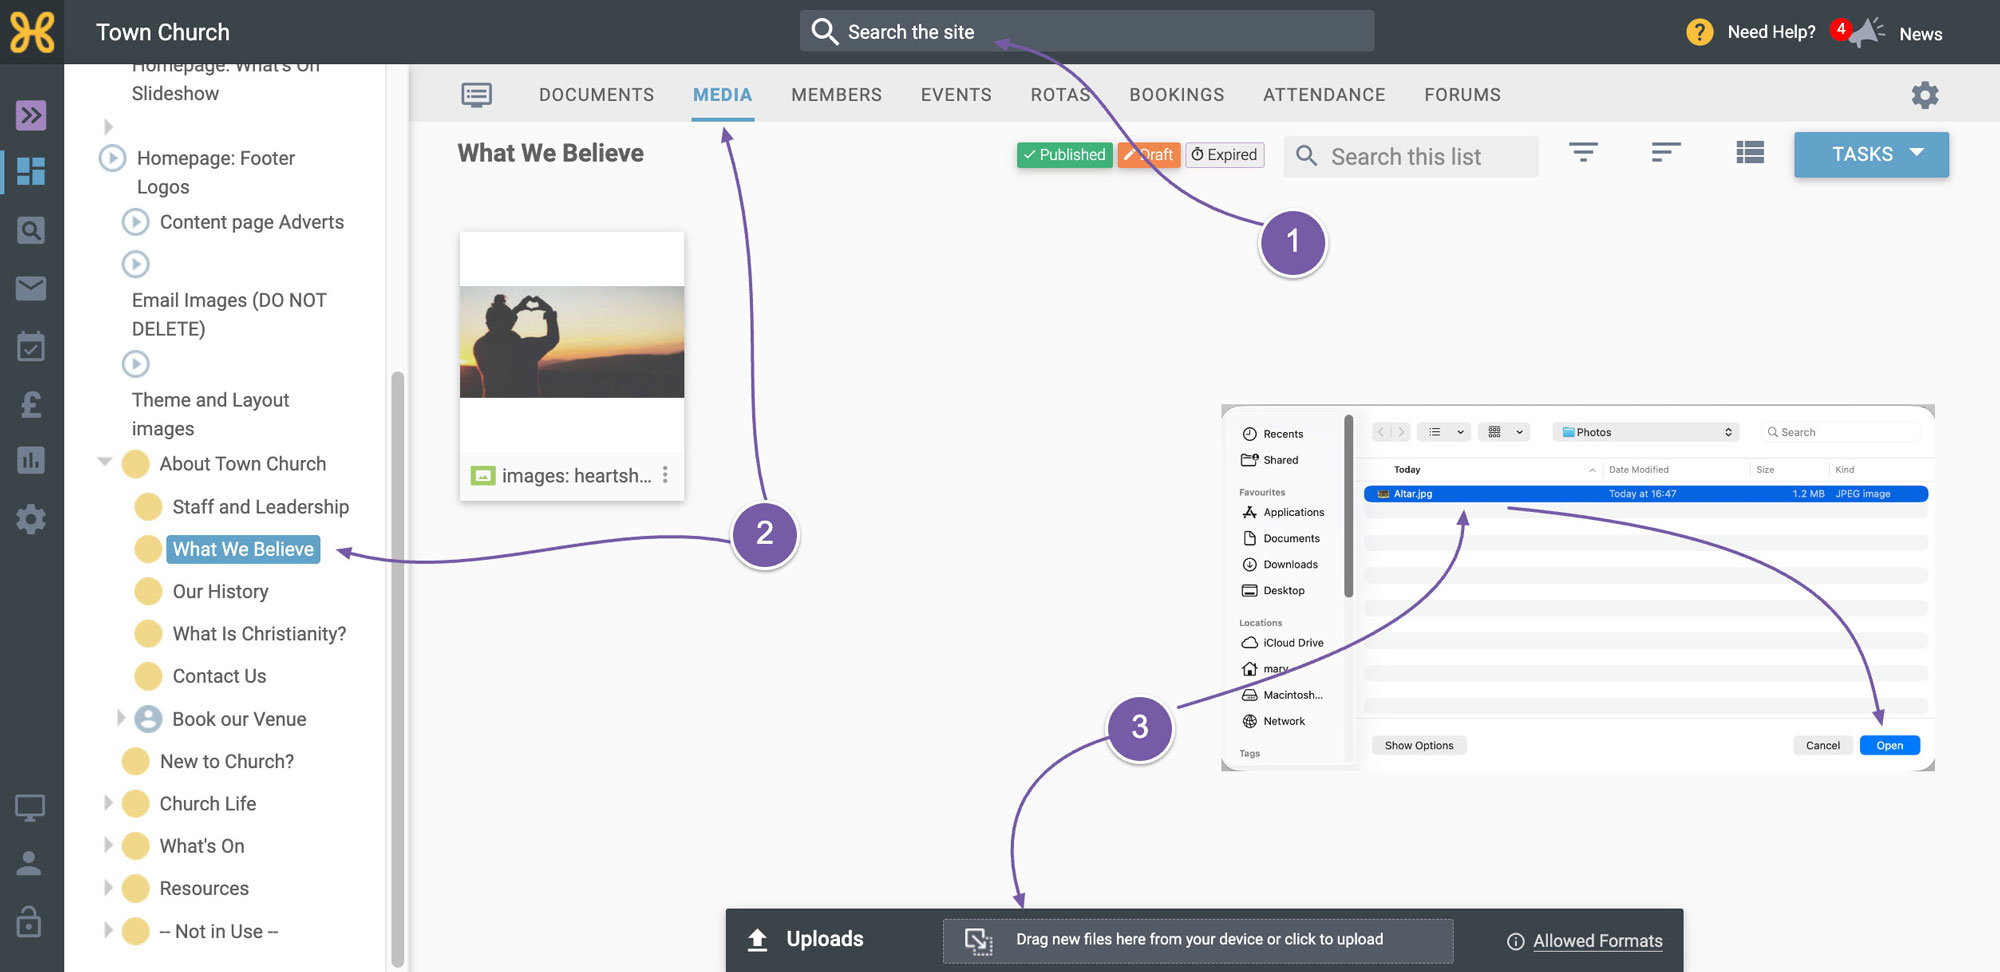
use our image editor, find the image you would like to edit by:
-
Using the quick find at the top of the screen if you know the name of the image
-
Go to a Group's "Media” tab where the image is stored
-
Or upload a new image to the “Media” tab of the relevant group in the site. Click on the upload area, browse to find it from your computer files, select the image and then click "Open" to upload it.
-
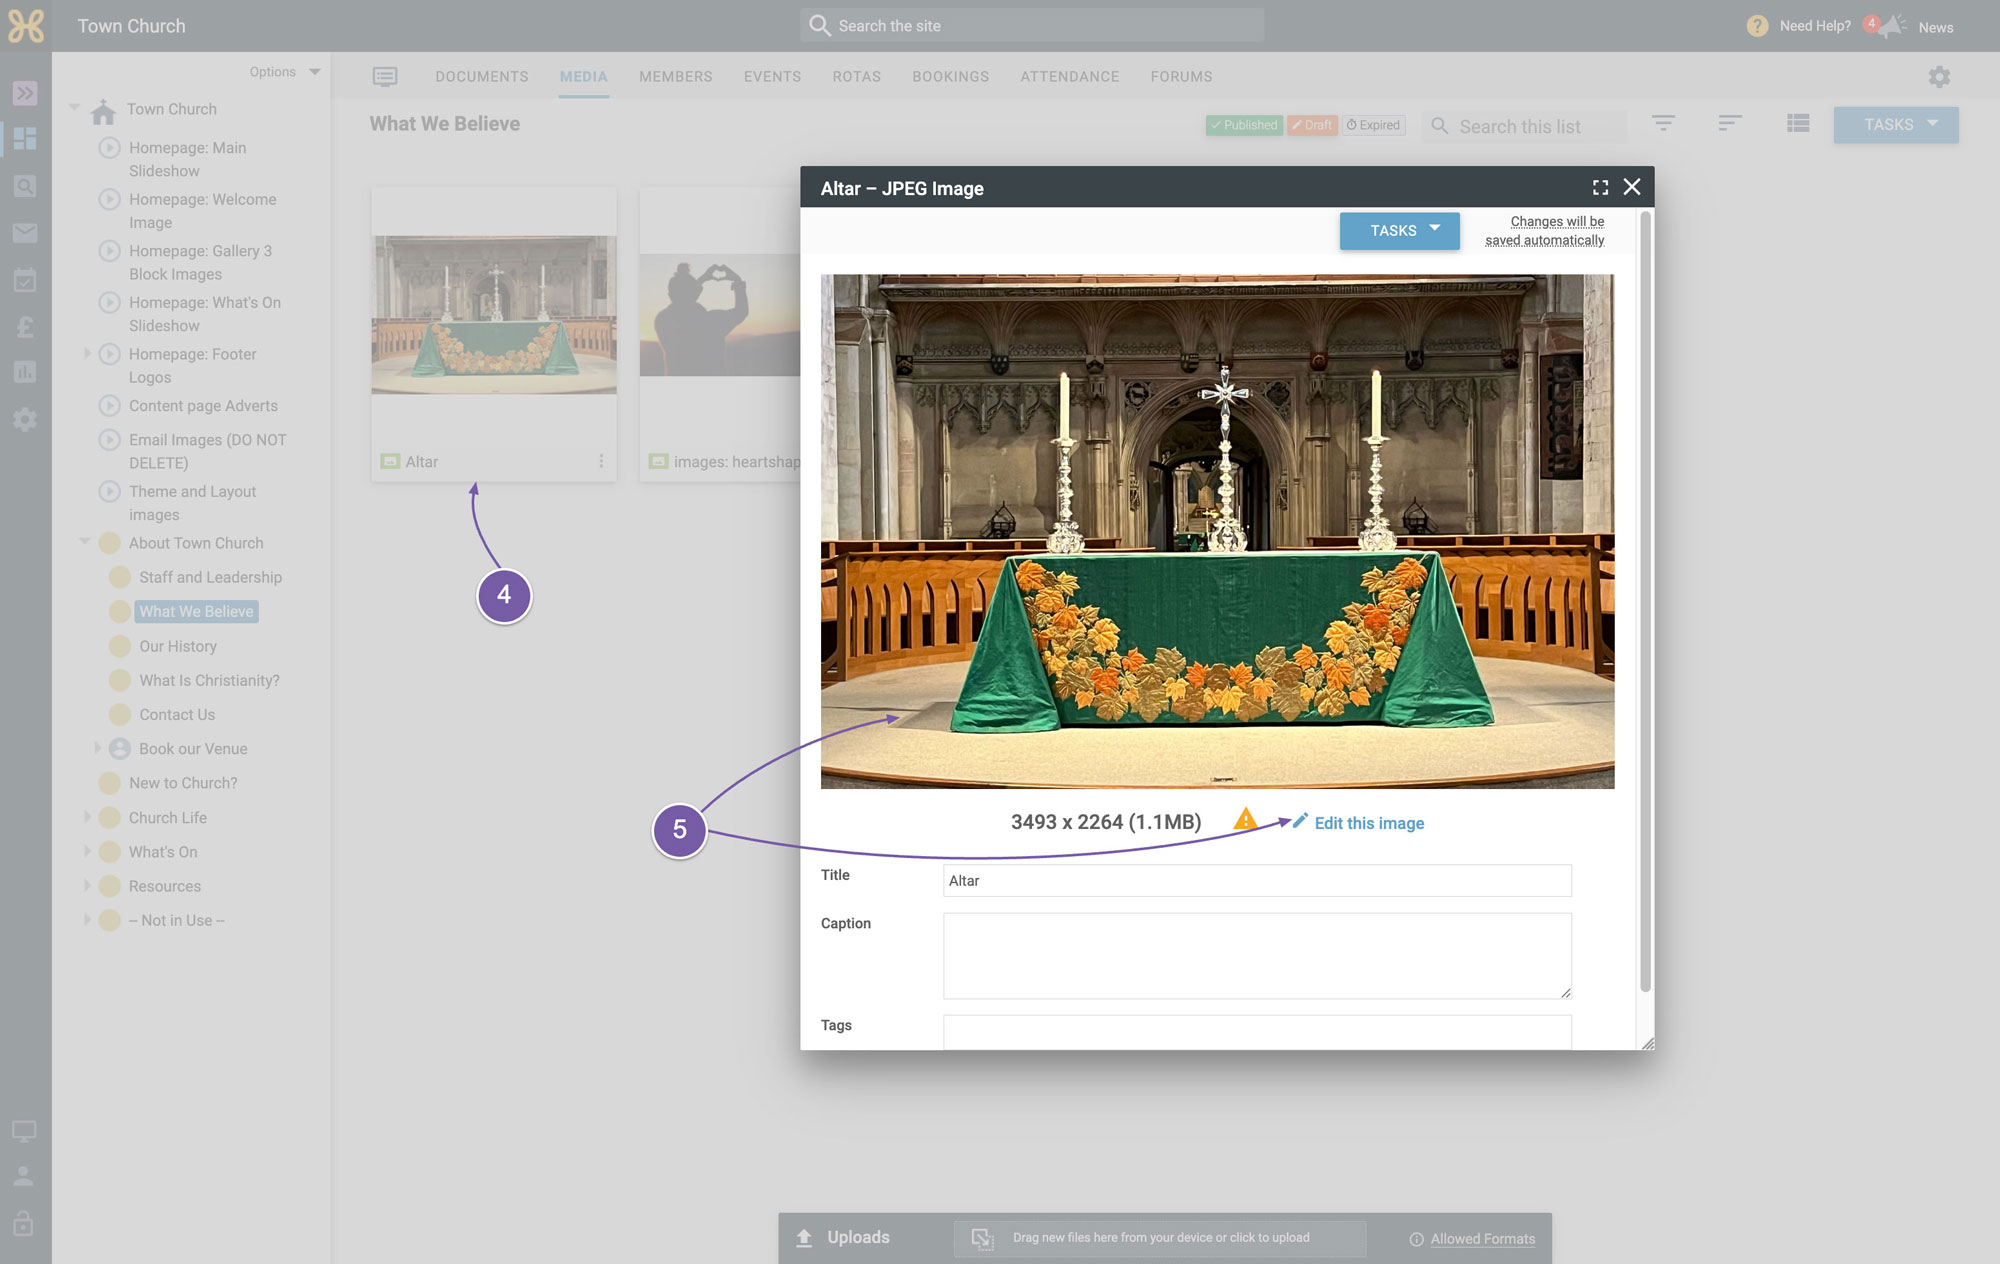
Once it is uploaded, you can see it in your view of images in this group. Click on it to open its properties
-
Then either click on the image or on the “Edit this Image” link. Now you are in our built-in image editor.
-
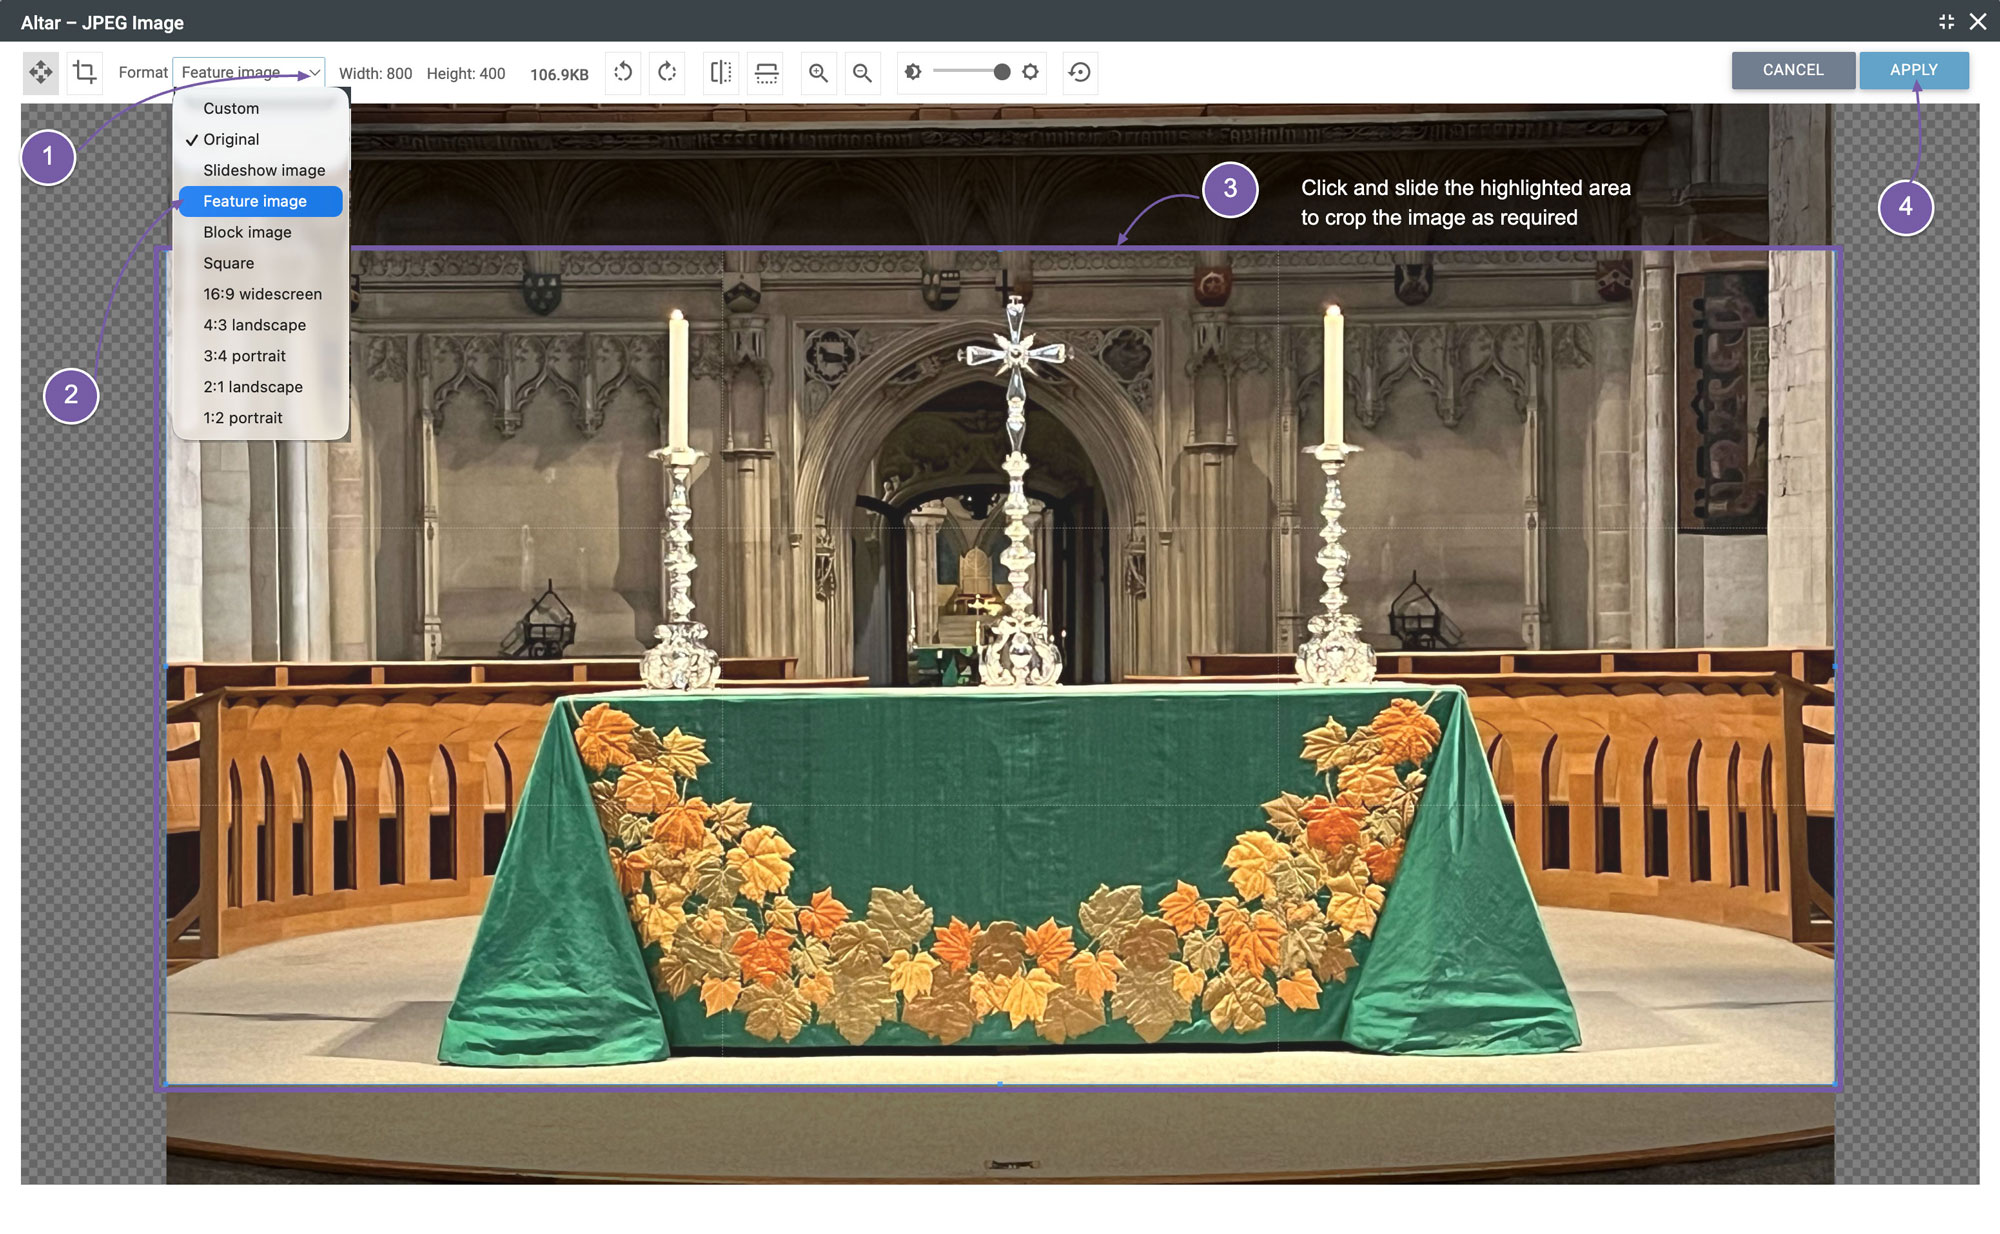
To help you crop the images to be the standard sizes we use throughout Hubb, we have the "Format" dropdown at the top left of the screen. If you click on that, you can see the options: “Custom, Original, Slideshow image, Feature image, Block image and Square”. We also have other options, but our advice is to stick with the standard options we use on the Aspire template.
-
To use this image on a content page, use the format option “Feature image”.
-
What you can now see is a light area (highlighted below in purple) that is the correct size for the feature image of 800 by 400 pixels. The dark area is what will be lost when you save the change. Click on the light area and drag it where you want.
-
When you are happy with the position, click on the “Apply” button at the top right of the editor. You will then get a warning that this change will take effect everywhere on the site where this image is being used, which is a helpful warning if it's being used in other places. But if you have just uploaded it and it's not being used anywhere else, go ahead and click “OK”, which takes you back out to the image properties.
Within the image editor you can also use the:
-
“rotate image left or right” buttons to rotate the image to be the correct orientation.
-
“flip” buttons to flip the image horizontally or vertically.
-
“zoom in and out” buttons to get the part of the image you want to be in the light area to be kept.
-
... and you can click on the reset image button to get it back to what it was like before you played around with the settings.

We hope this has helped you to see how easy uploading and editing images can be, so you can keep your site looking good and consistent.