Adding a new recurring event
(6 minutes)
Save time and effort managing your calendar by setting up your recurring events, and learn how to easily extend them.
Sorry, your browser is unable to play this type of file.
You can still
download it
We will now look at creating a new recurring event in your calendar. To add a new recurring event you need to navigate to the “Events” tab of the group where you would like your event to be stored.
-
For this example we will go to the “Youth” group in "Church Life".
-
Hover your mouse over the date you would like to start the new event on and you will see two icons appear. The orange “Add Event” icon is to create an event that uses an existing event as a template. This is useful if you have a similar event that you wish to copy. The blue icon is to create a new event with no preset details.
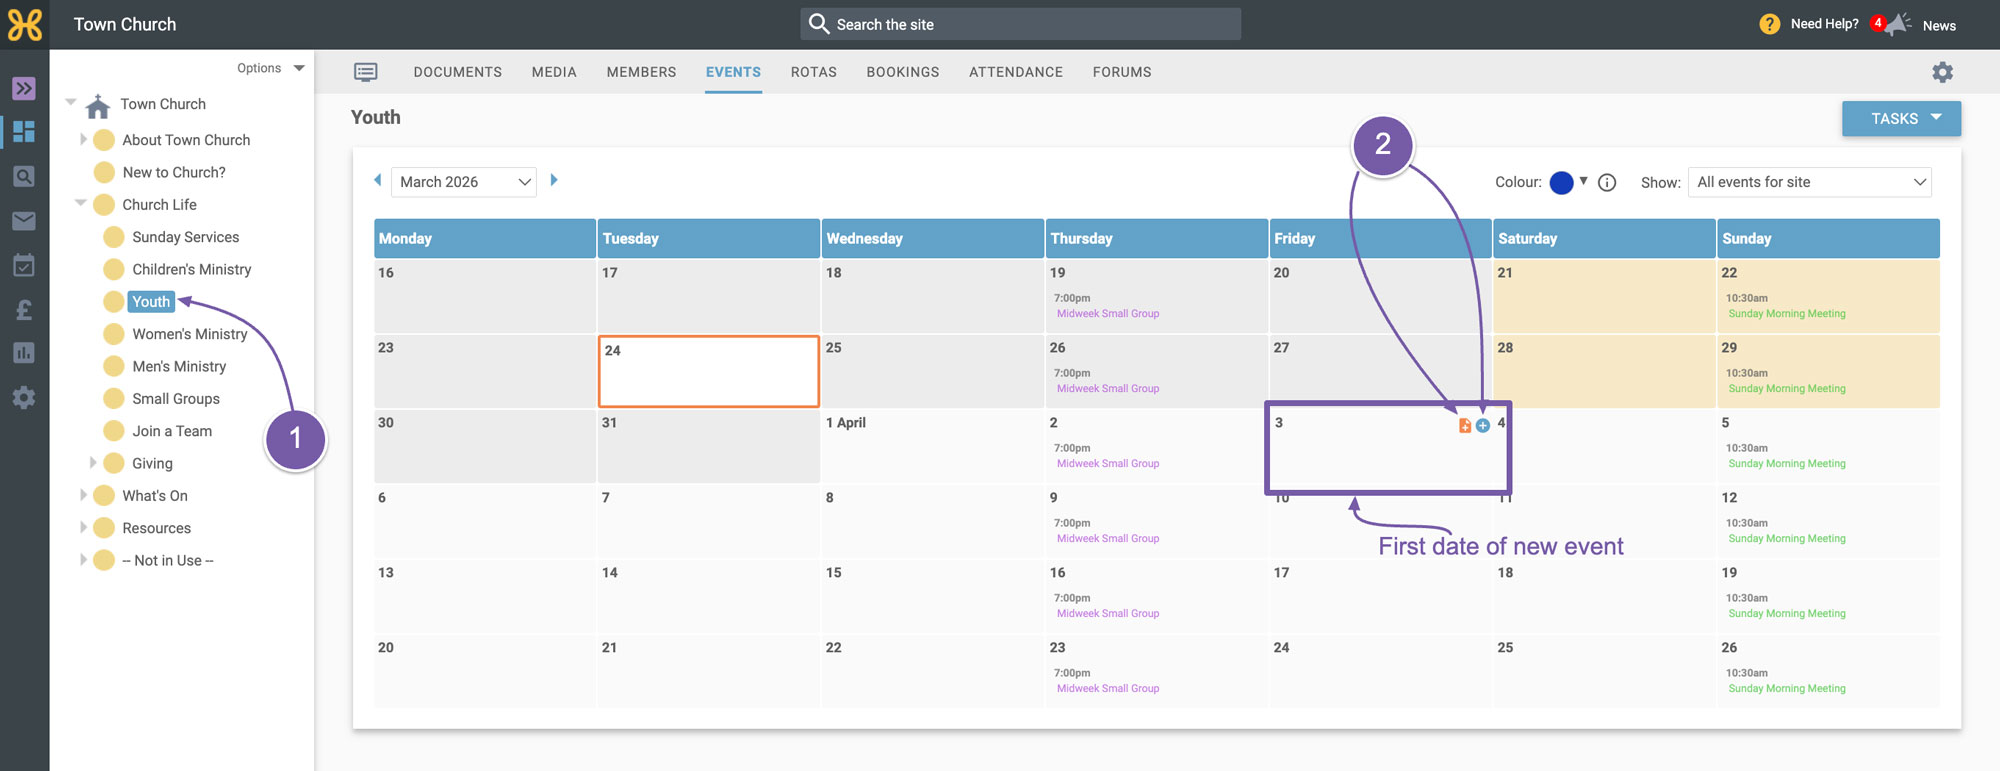
For this example we will use the blue icon to create a brand-new event and start adding the details of the event.
-
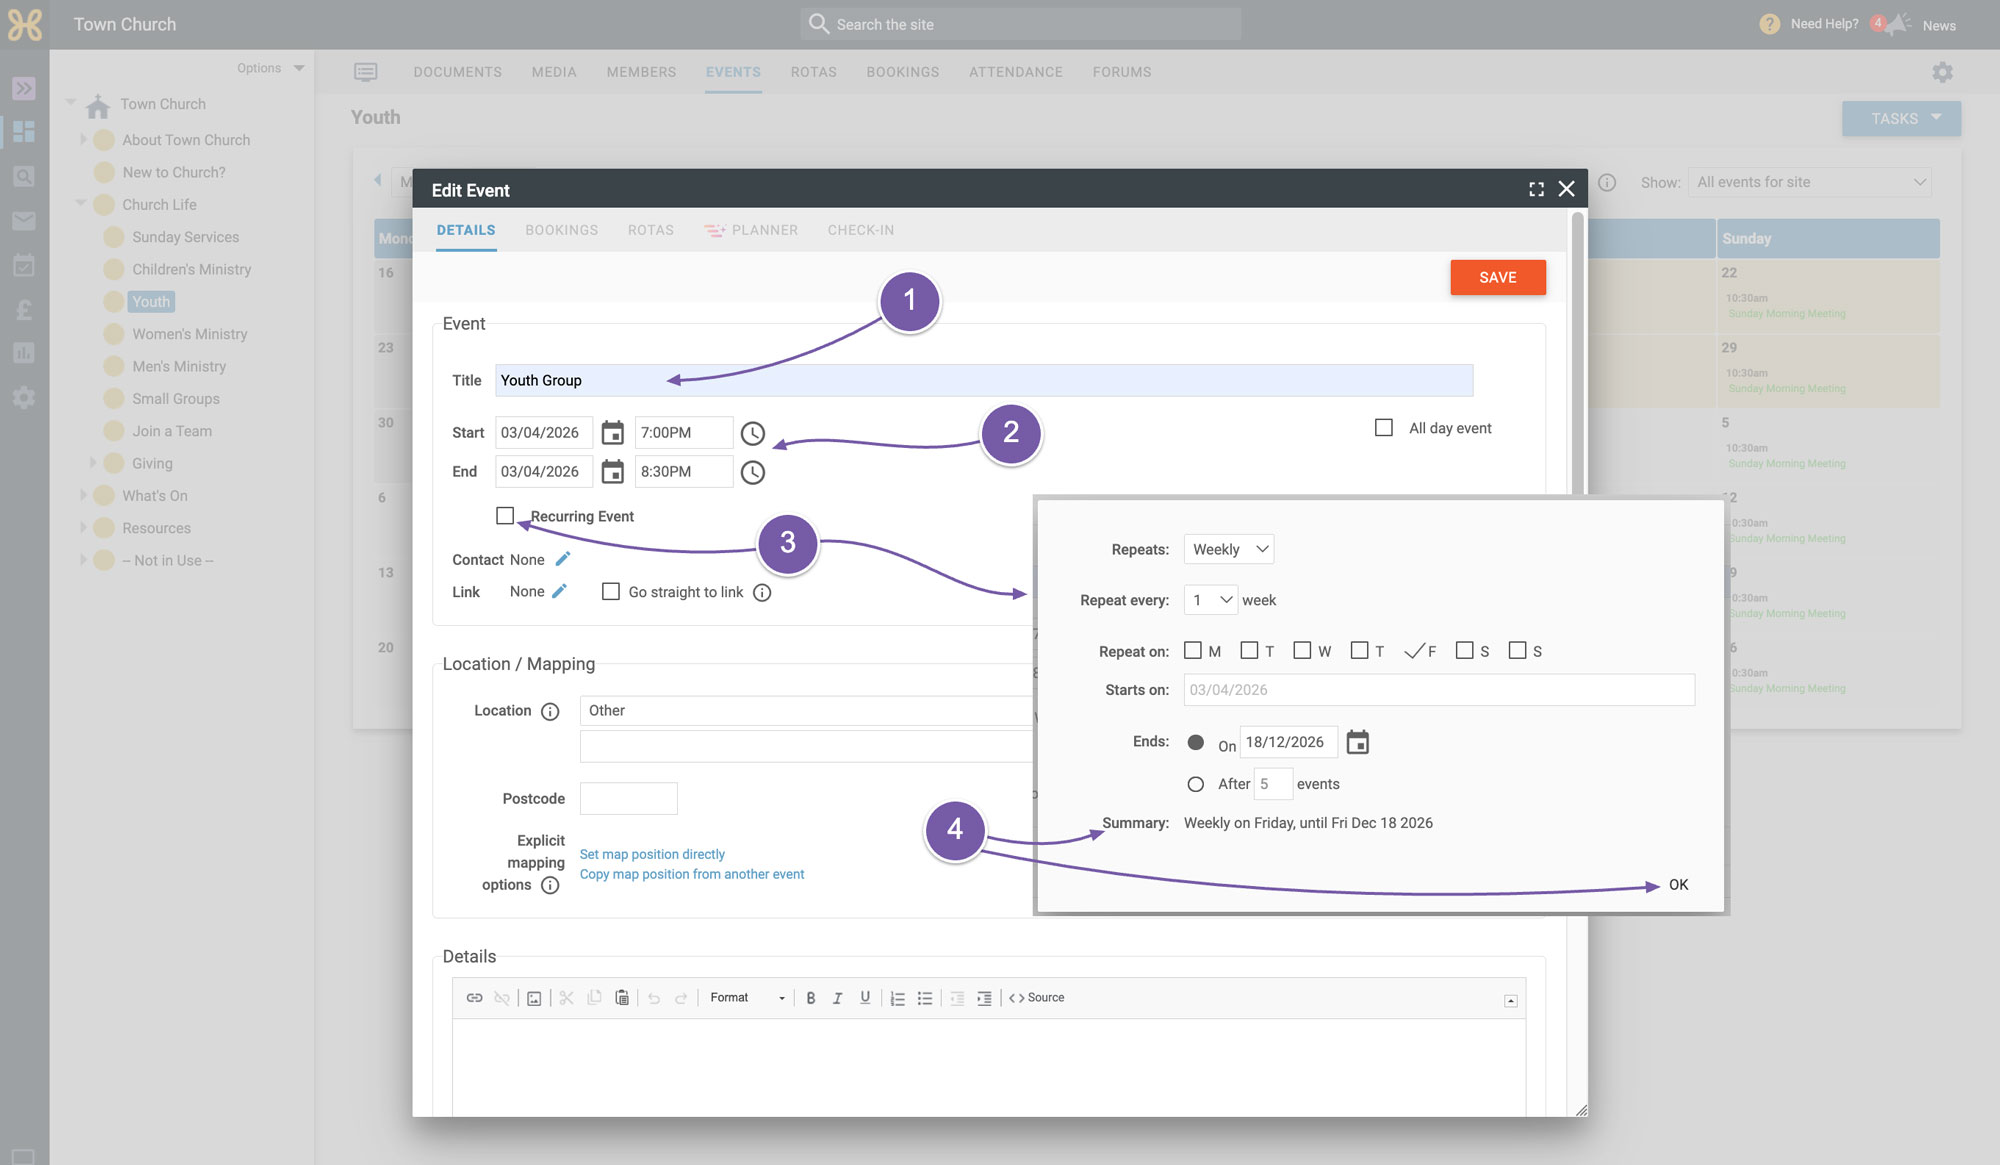
Change the event title (in this example, to “Youth Group”).
-
Set the start time to 7:00 pm and the end time to 8:30 pm.
-
Click on the tick box to indicate this is a recurring event. I would like this event to recur weekly every Friday until the end of the year so I will choose repeats weekly. I'll leave it to repeat every one week. I will leave the day to repeat on Fridays and I'll then set it to end on the last Friday of the year.
-
You can check the settings by reading the summary at the bottom of the settings and then click on “OK” to save.
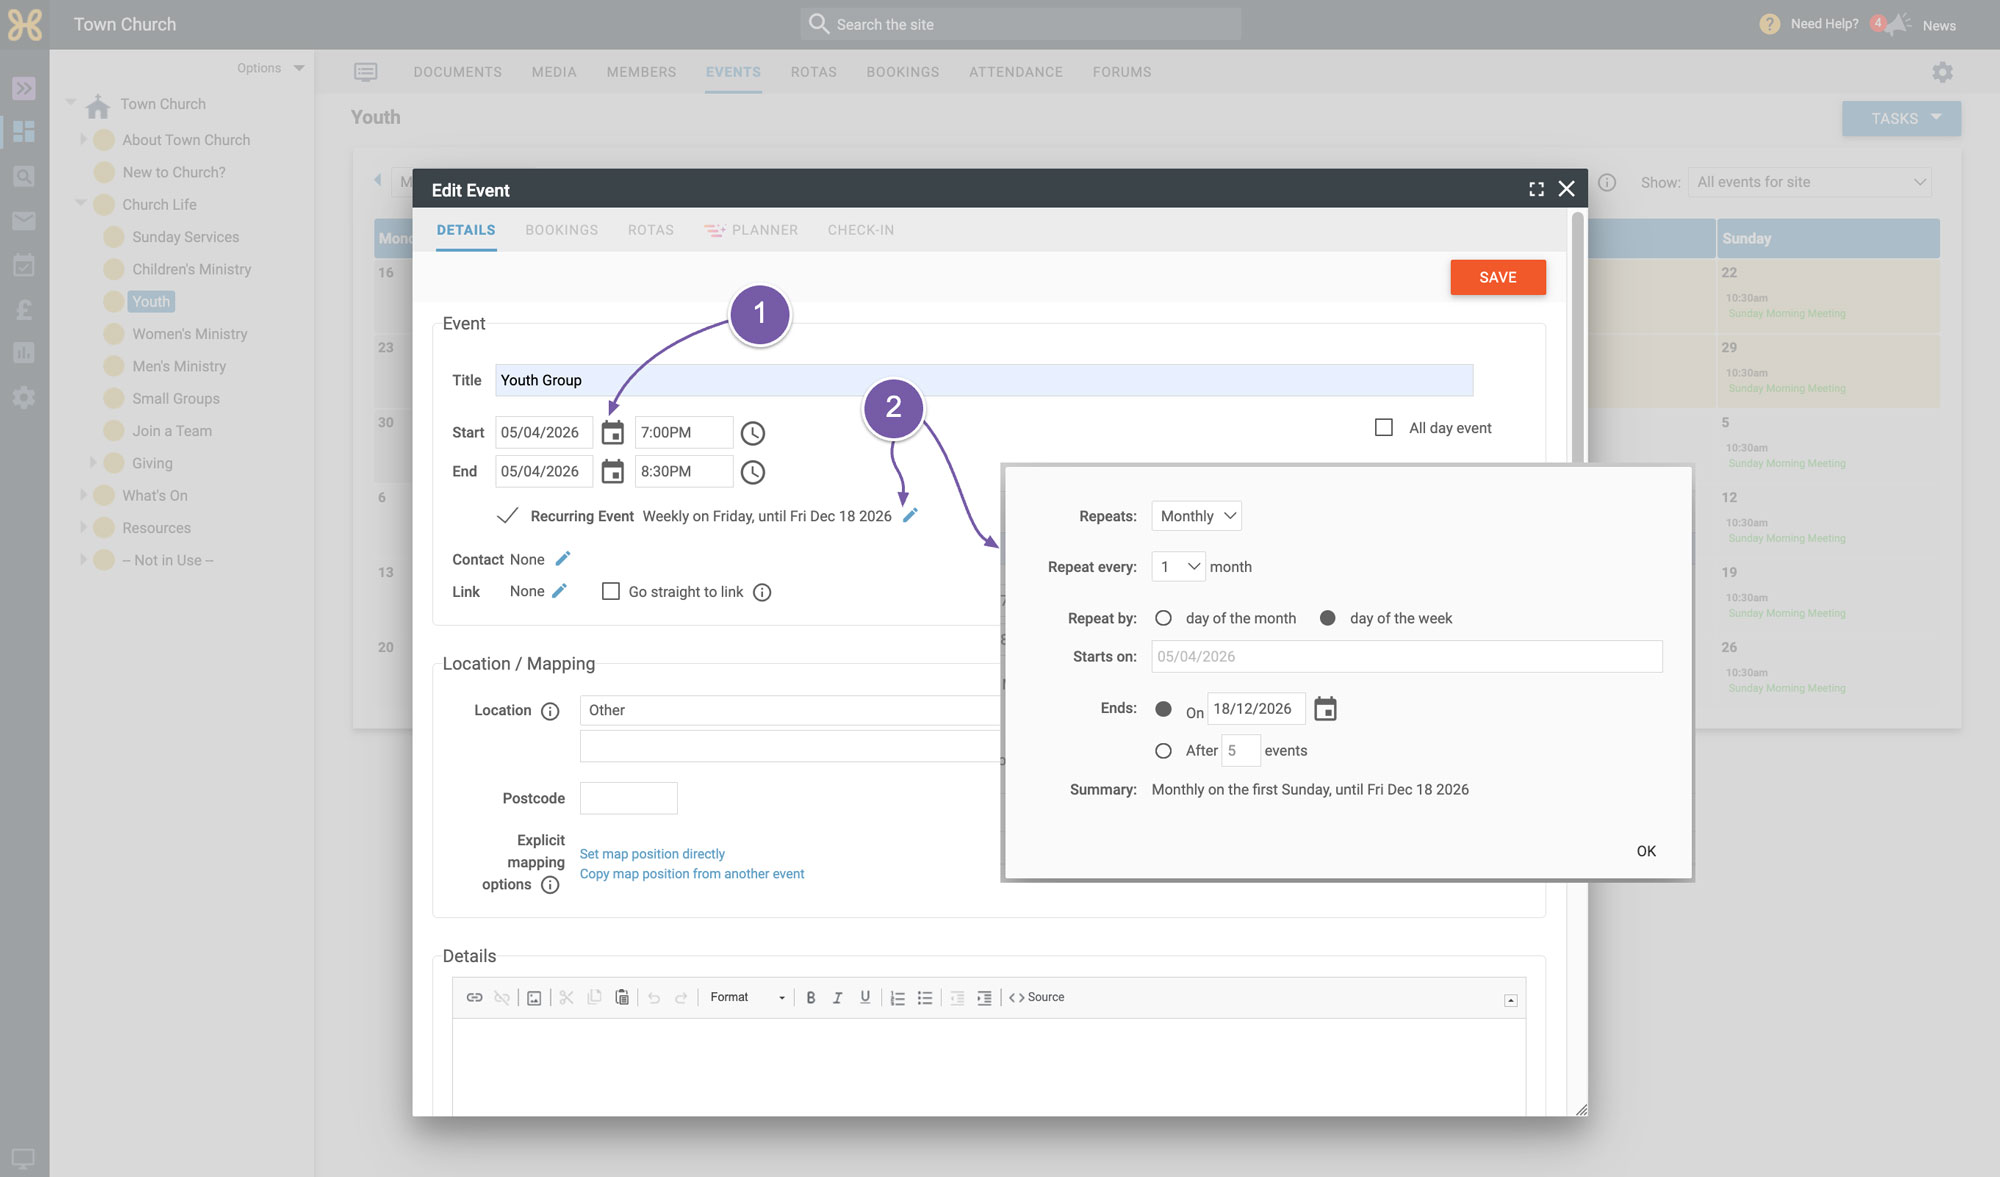
The following example shows you how to change these options to have this youth event only occur monthly on the first Sunday of each month.
-
Firstly, change the date of the event to be a Sunday.
-
Then I will click on the “Edit” icon and change the recurrence options to repeats monthly, repeat every one month and choose to repeat on the day of the week. Now this event will repeat monthly on the first Sunday until Friday the 18th of December. Click on “OK” to save these changes
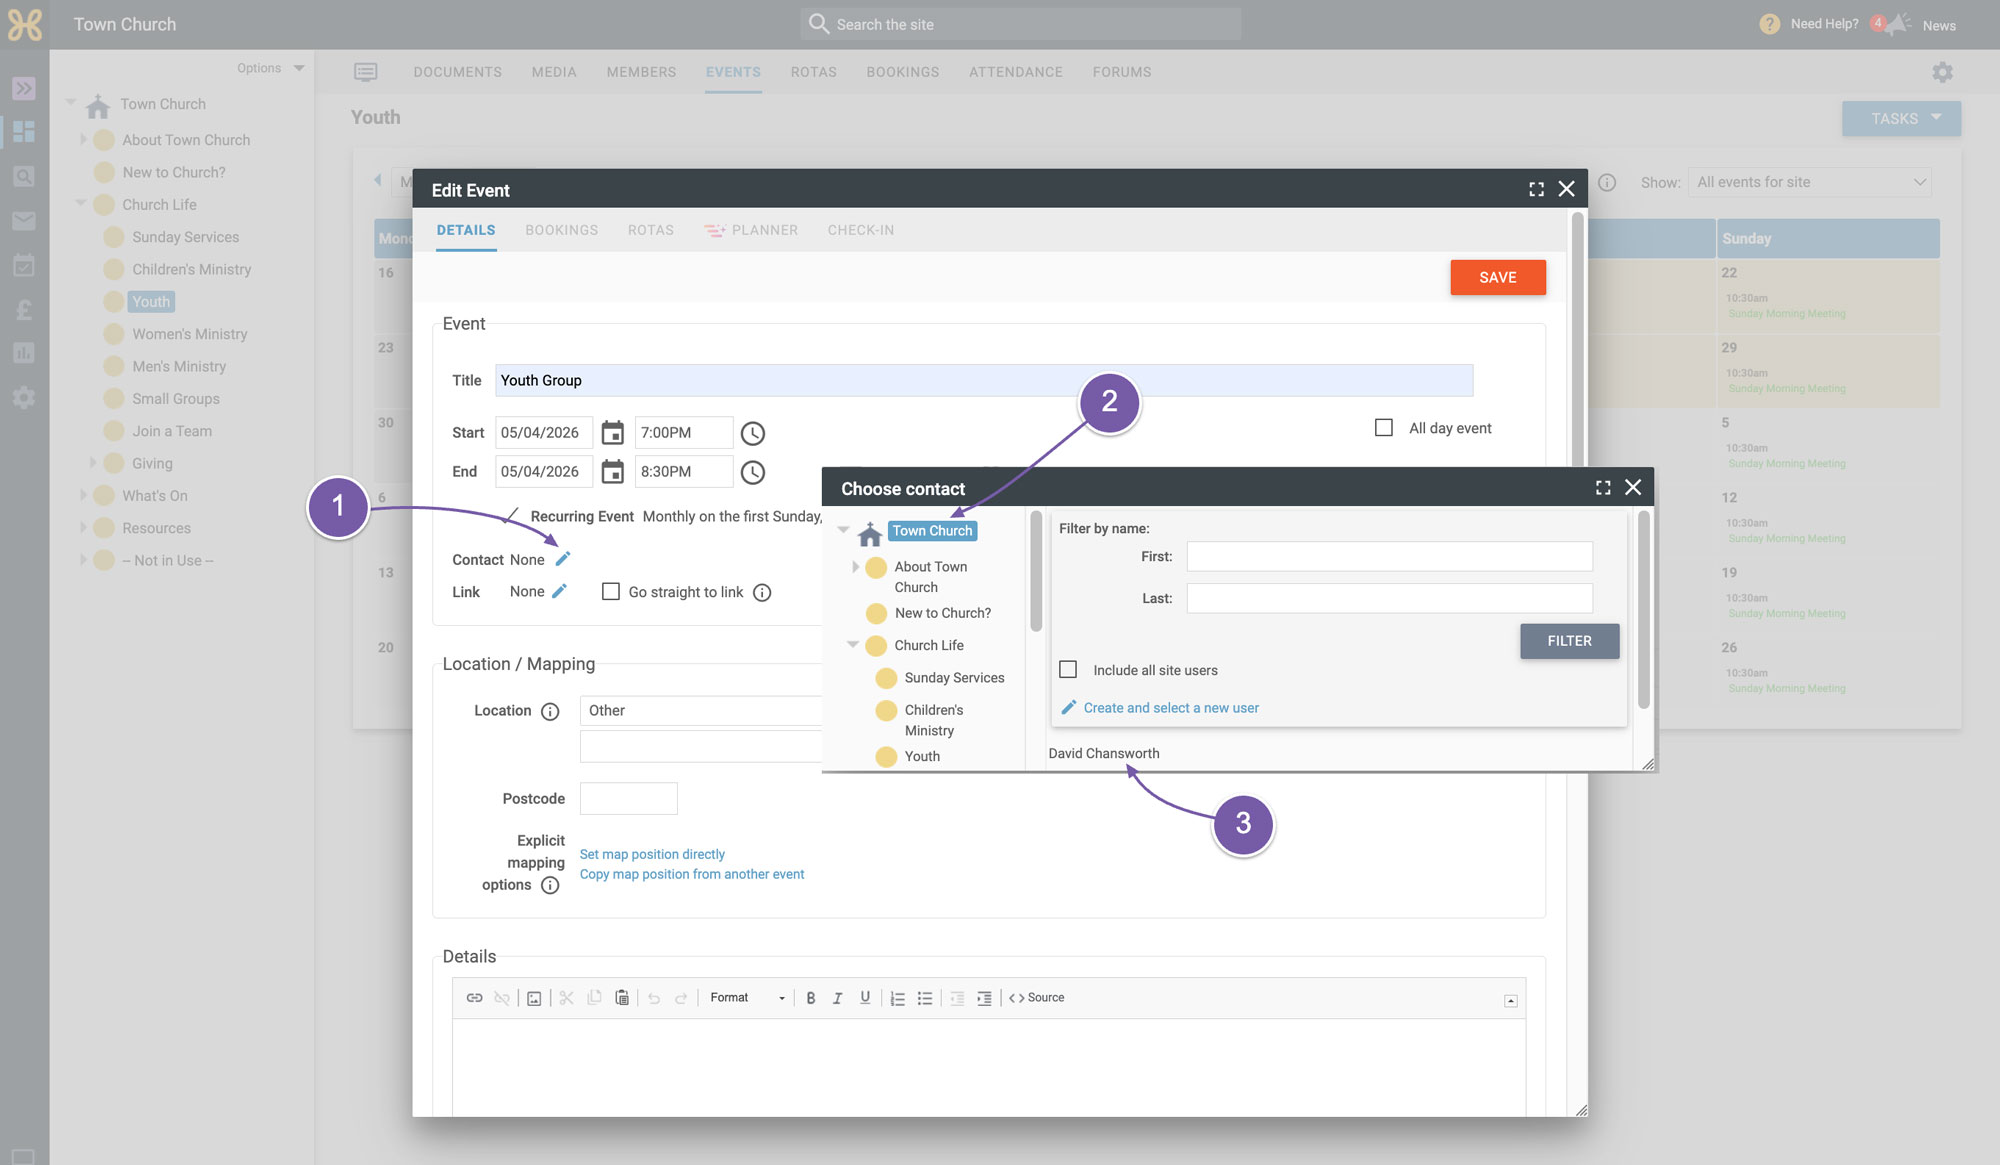
Go back to the event details and complete the rest of the event, including selecting a contact for the event and setting a link for people to access more information about it.
-
Click on the “Edit Contact” icon
-
Select the top group from the group tree
-
Select a user from the list. If you are just starting out with your trial and you have not added anyone to the system yet then there are further videos on how to do this. It may be worth waiting to get permission from the person before adding them to the system for data protection purposes. (As the user we are using in this example is not real there is no problem selecting them for this example to show you how it's done.)
-
Click on the “Link” icon and select a "Group Homepage" to link to.
-
For this example we will go to “Church Life” and select the “Youth" group
-
Confirm by clicking “Select”.
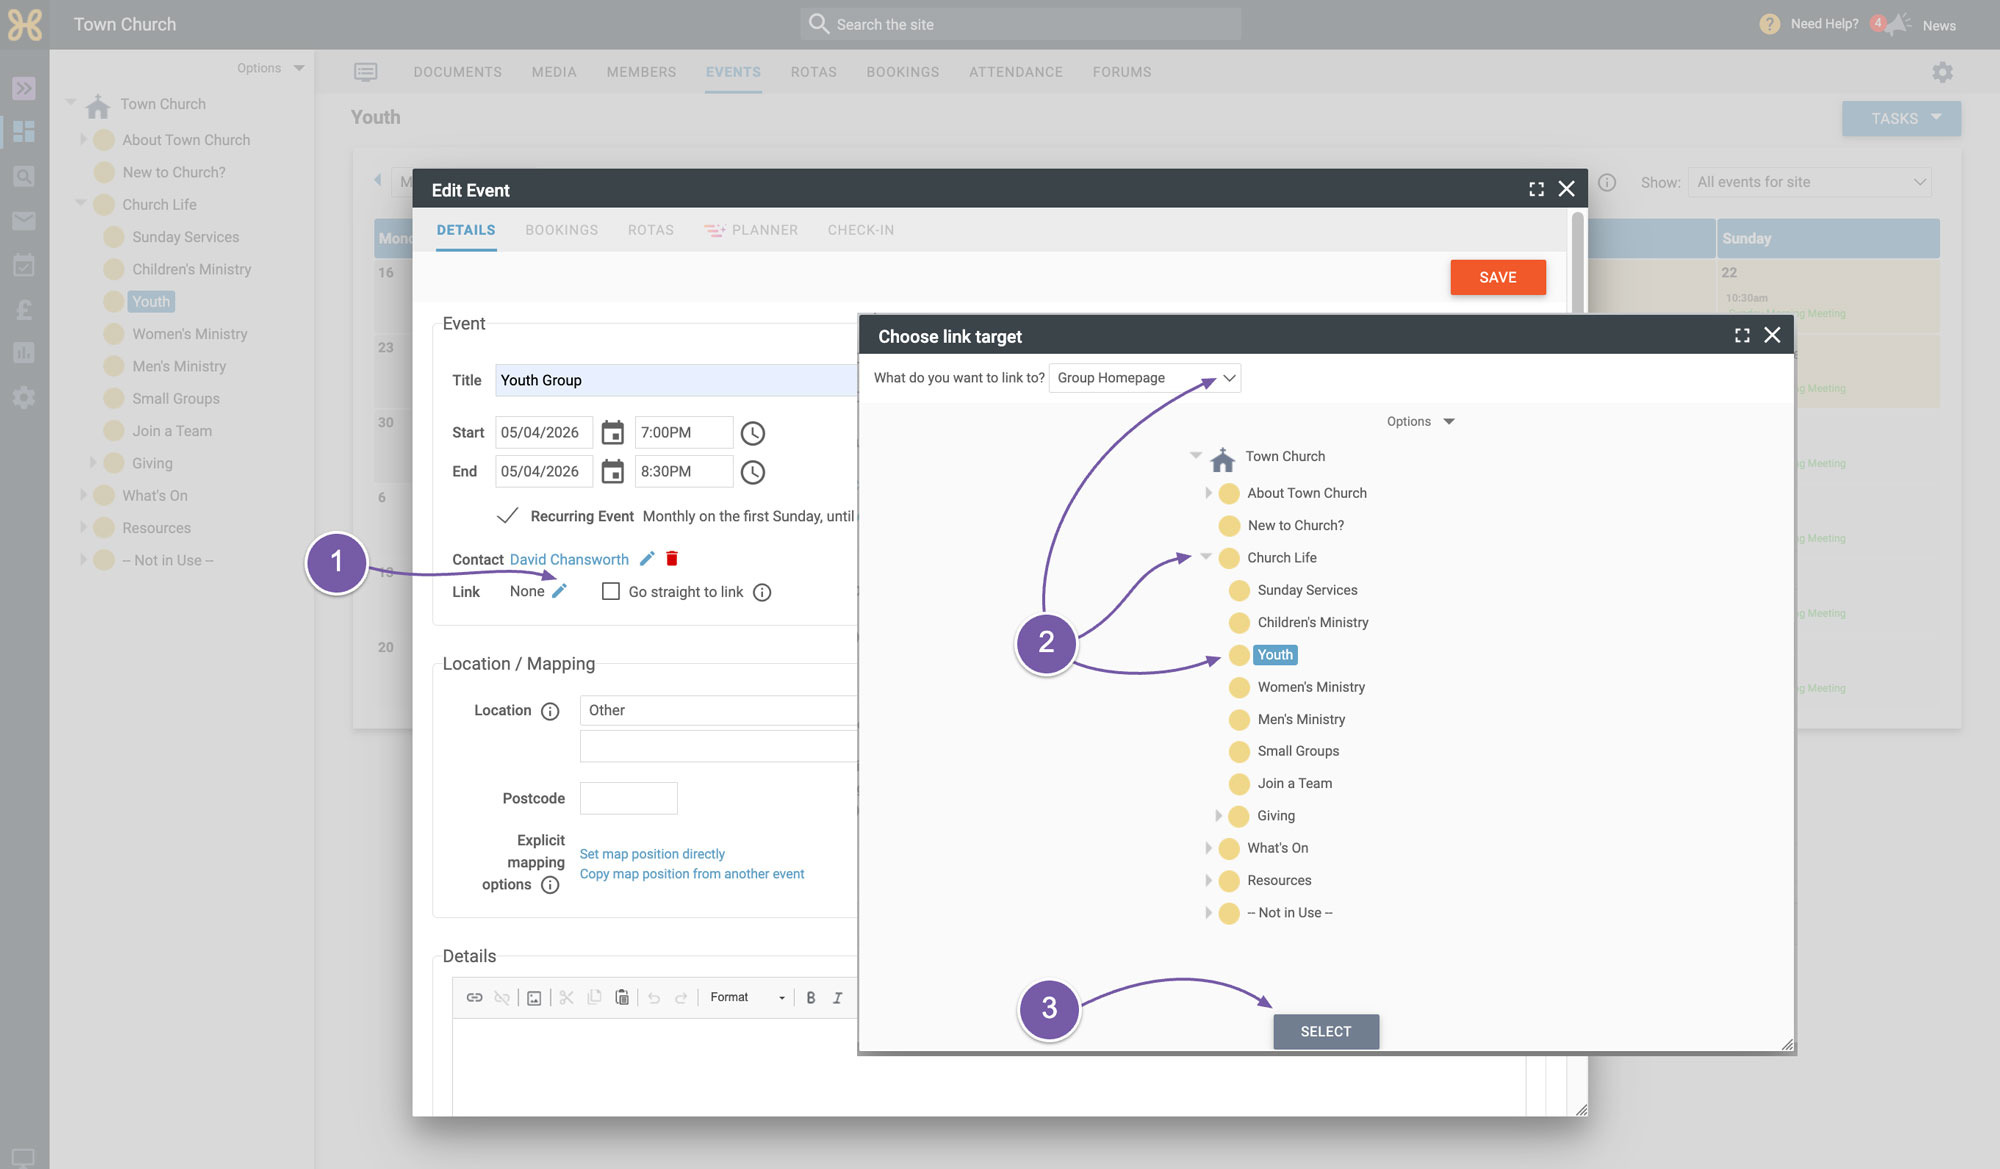
-
Next, you need to set a location for the event. For this event we have selected the “Church Building”.
-
You can enter some details about the youth group and we recommend creating an informative piece of text that will really help potential visitors know what the event or group is about and give them all of the key information.
-
We also want to set an image to show when someone is looking at the event. Click on the "Edit" pencil icon and select the image already in the "Youth" group, or upload a new image or browse the groups to find another image. We recommend that you use an image that has been cropped to the feature image size of 800x400 pixels so the website and app look nice and tidy.
-
Then save this event.
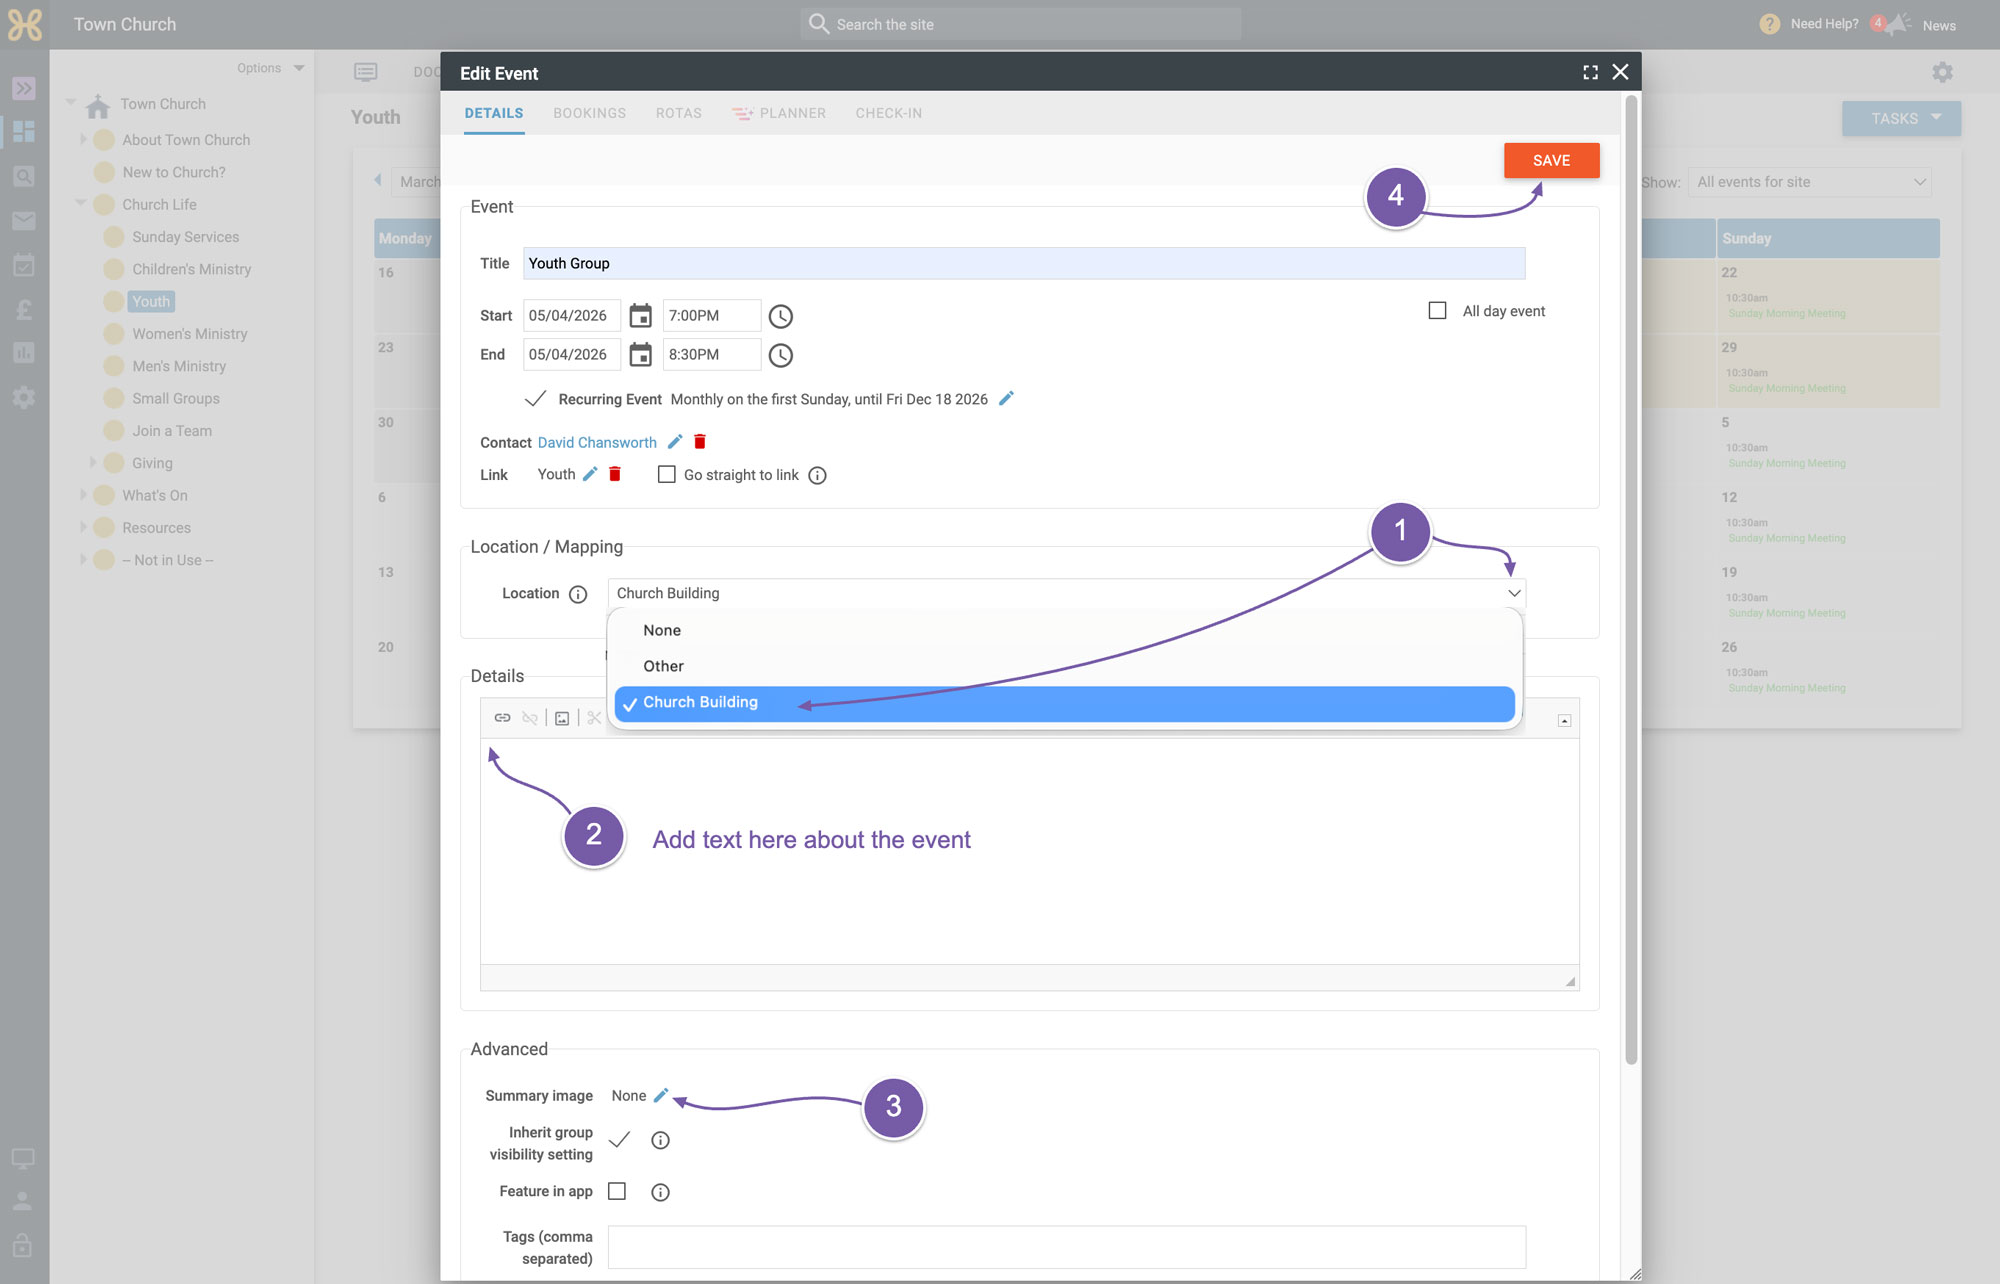
Lastly
a good tip for recurring events. When you set up a series of events you will set how long you would like the series to run for. When that runs out, you don't have to create a new recurring event - you can simply use our helpful task to extend the series of events.
-
Open an event in a recurring series and use the "Tasks" button
-
Select "Extend this series of events"
-
In the dialogue you are able to recreate the recurrence options to suit your event
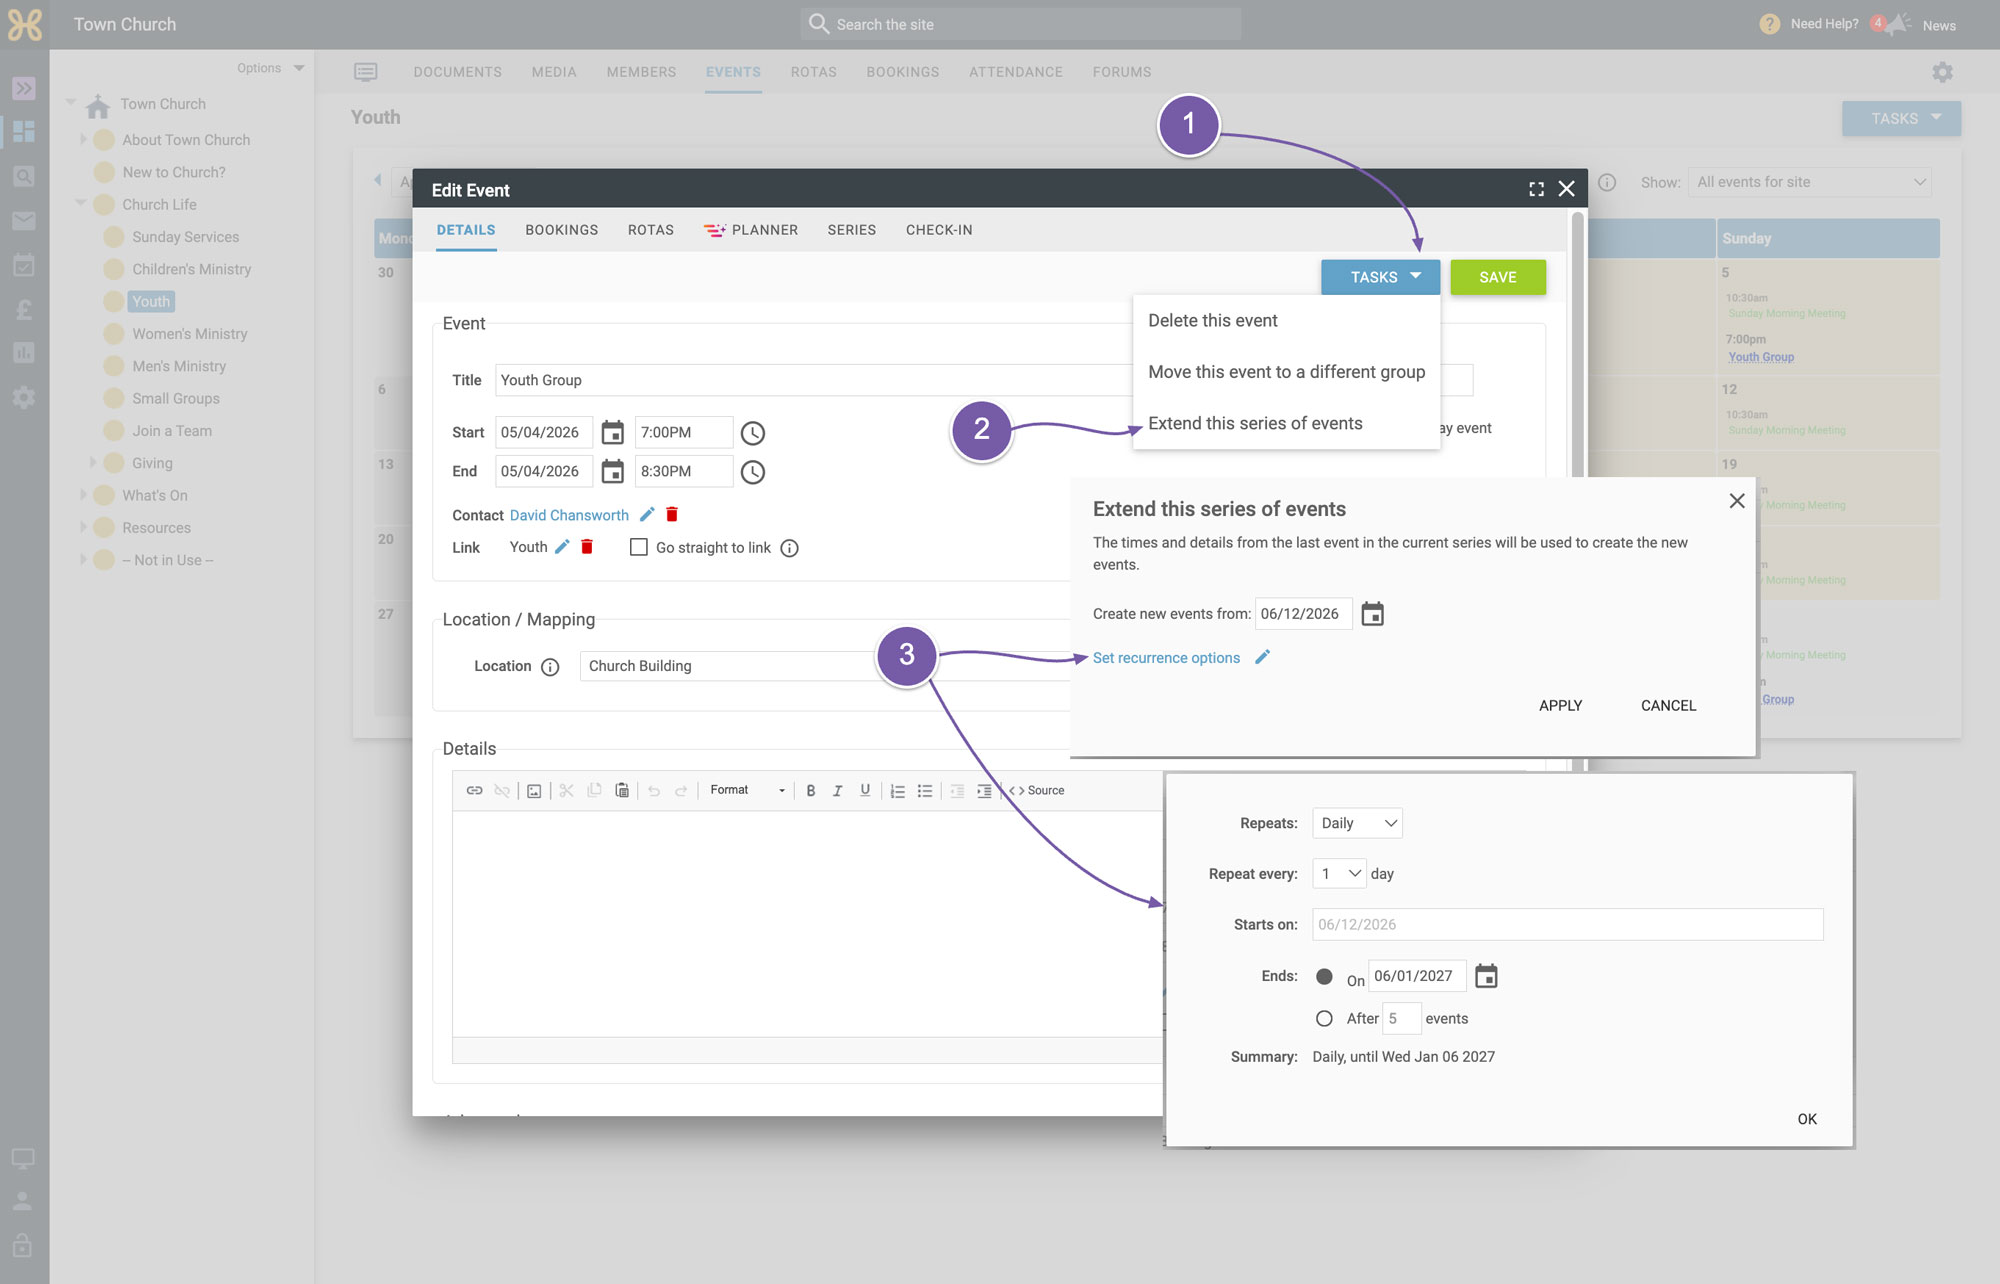
You can now watch our next video to understand all of the
advanced settings in events.