How to change the name of a group
Groups are the building blocks of your site. Each one holds its own pages, members, events and media, and the group’s name is what shows in your website menu. This guide walks you through renaming a group.
Renaming a group
-
Log in to your web office.
-
Find the group you want to rename. Use the group structure on the left to navigate to it, then click the group so it’s selected.
-
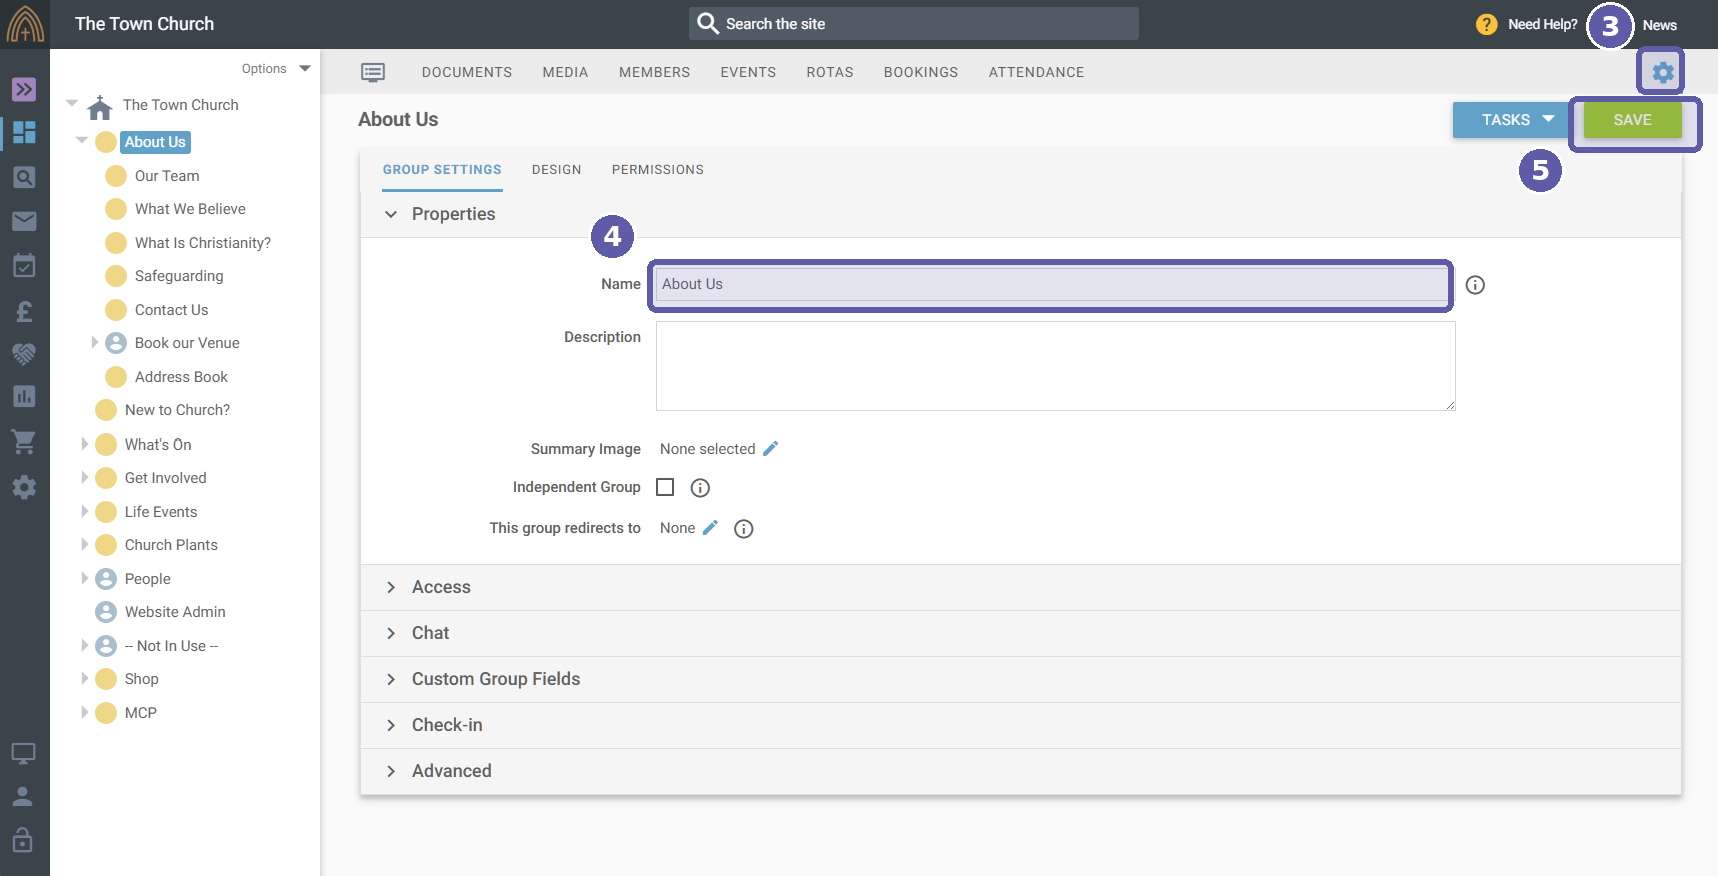
Open the group’s settings by clicking the settings cog near the top right of the web office. You’ll land on the Group Settings tab.
-
In the ‘Name’ field under Properties, replace the existing text with your new group name. Keep it short and clear, as this is the label visitors see in your menu.
-
Click ‘Save’, near the top right. The new name is applied straight away.
The screenshot below shows where each one lives: the settings cog (3), the Name field (4) and Save (5).
Good to know
-
Renaming a group doesn’t change anything else about it. The members, content, events and permissions all stay as they were; only the name updates.
-
If the group shows in your website navigation, the menu will pick up the new name as soon as you save.
-
If the group’s web address is based on its name, any links you’ve already shared (in emails or printed notices, say) might need updating.
Still stuck? We’re real people.
Raise a support ticket and our UK team will get back to you.
Contact support