Changing the group structure and adding a new page
Sorry, your browser is unable to play this type of file.
You can still
download it
Let's start to look at the structure of the webpages on your site and show you how to modify it to suit you. If we look at your website, you can see that we give you a sensible starting place for the content of your site. All of the pages have some content to get you started, but you will want to change each page to be specific to your church.
-
Let's look at changing the “About Us” group name to About Town Church.
-
All we need to do is go back into the web office and go to the settings for that group.
-
Straight away you see the group “name” field. We just need to change the text,
-
Click “save” and the group tree on the left updates, as will the menus on the website.
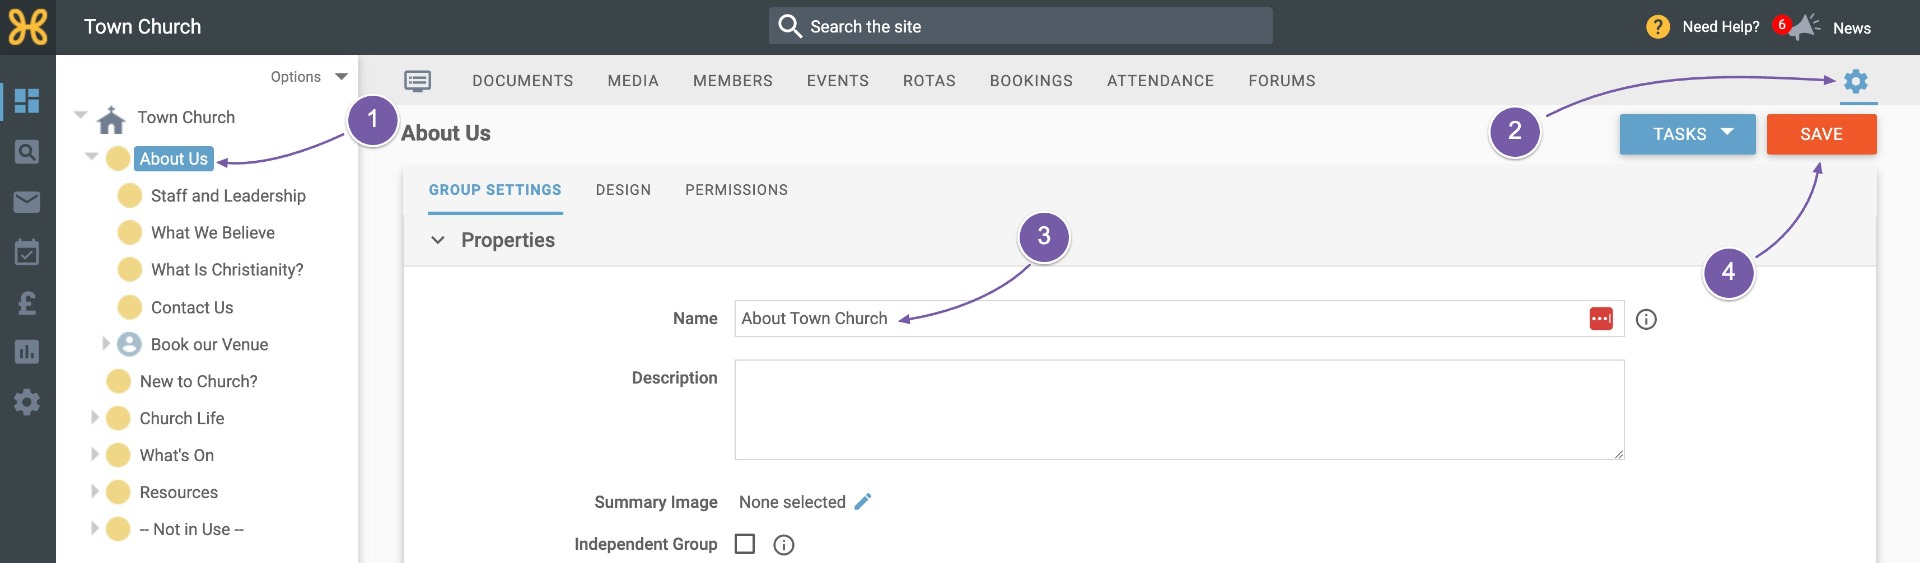
Let's now look at removing a group.
-
Let's say the Town Church is a church in a town where there are no universities close by and we don't have a student ministry. So, let's delete that page.
-
Just go to that group settings page
-
Use the tasks to delete the group.
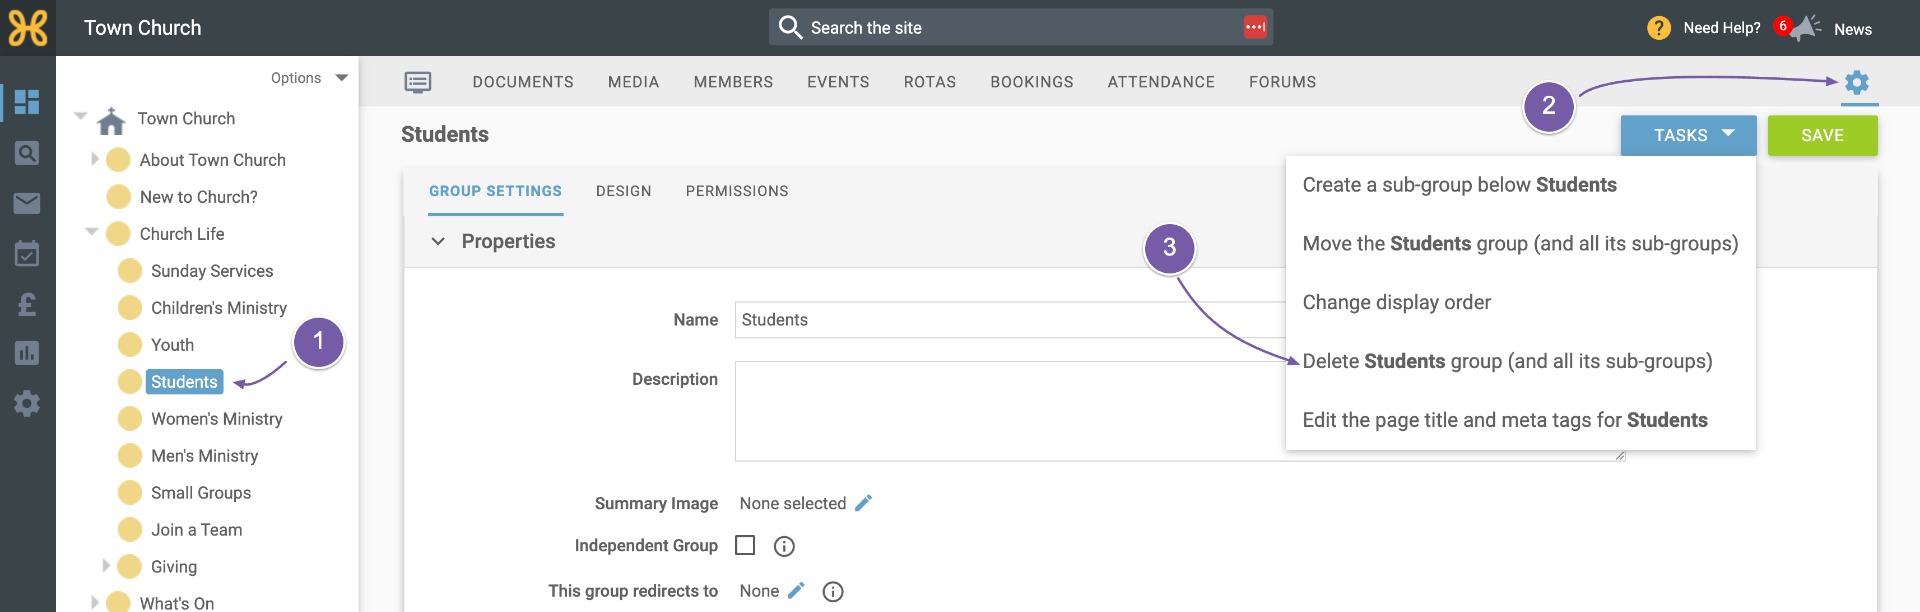
Add a new group
So, we've changed the name of a group and deleted one, but now let's add a new one and change the order it appears on the group tree.
-
Let's add a group under About Town Church called “Our History”.
-
To do this, we go to the group settings tab of the About Town Church group
-
Use the tasks button to add a subgroup.
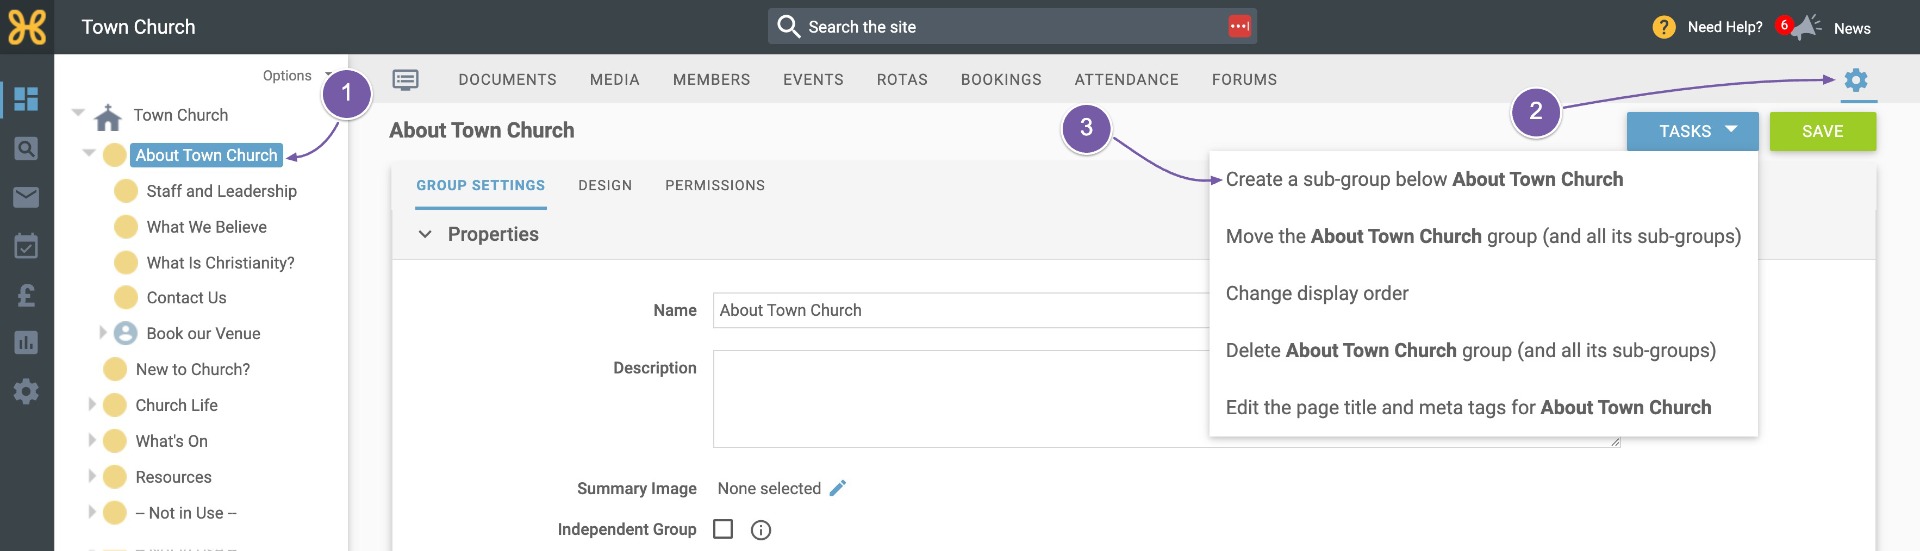
-
Name the group
-
Click 'Create' to confirm. We can see that this group now appears on the group tree at the bottom of About Town Church.
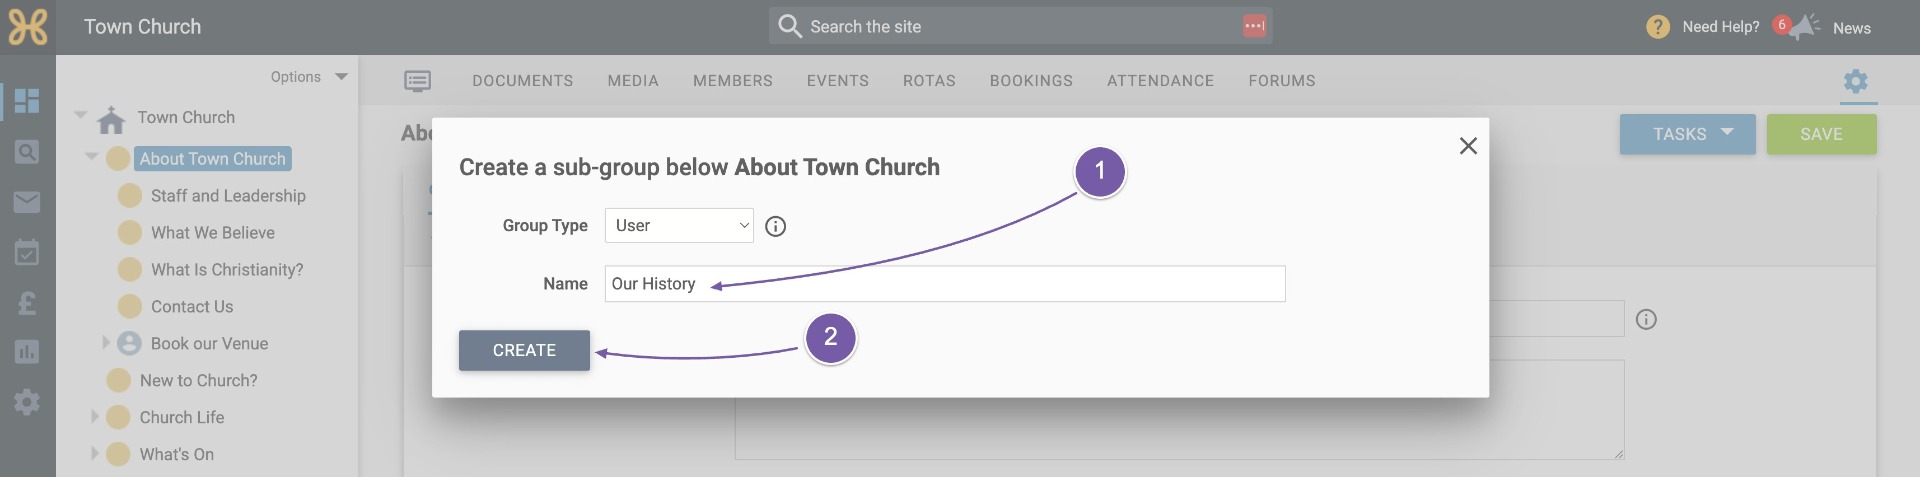
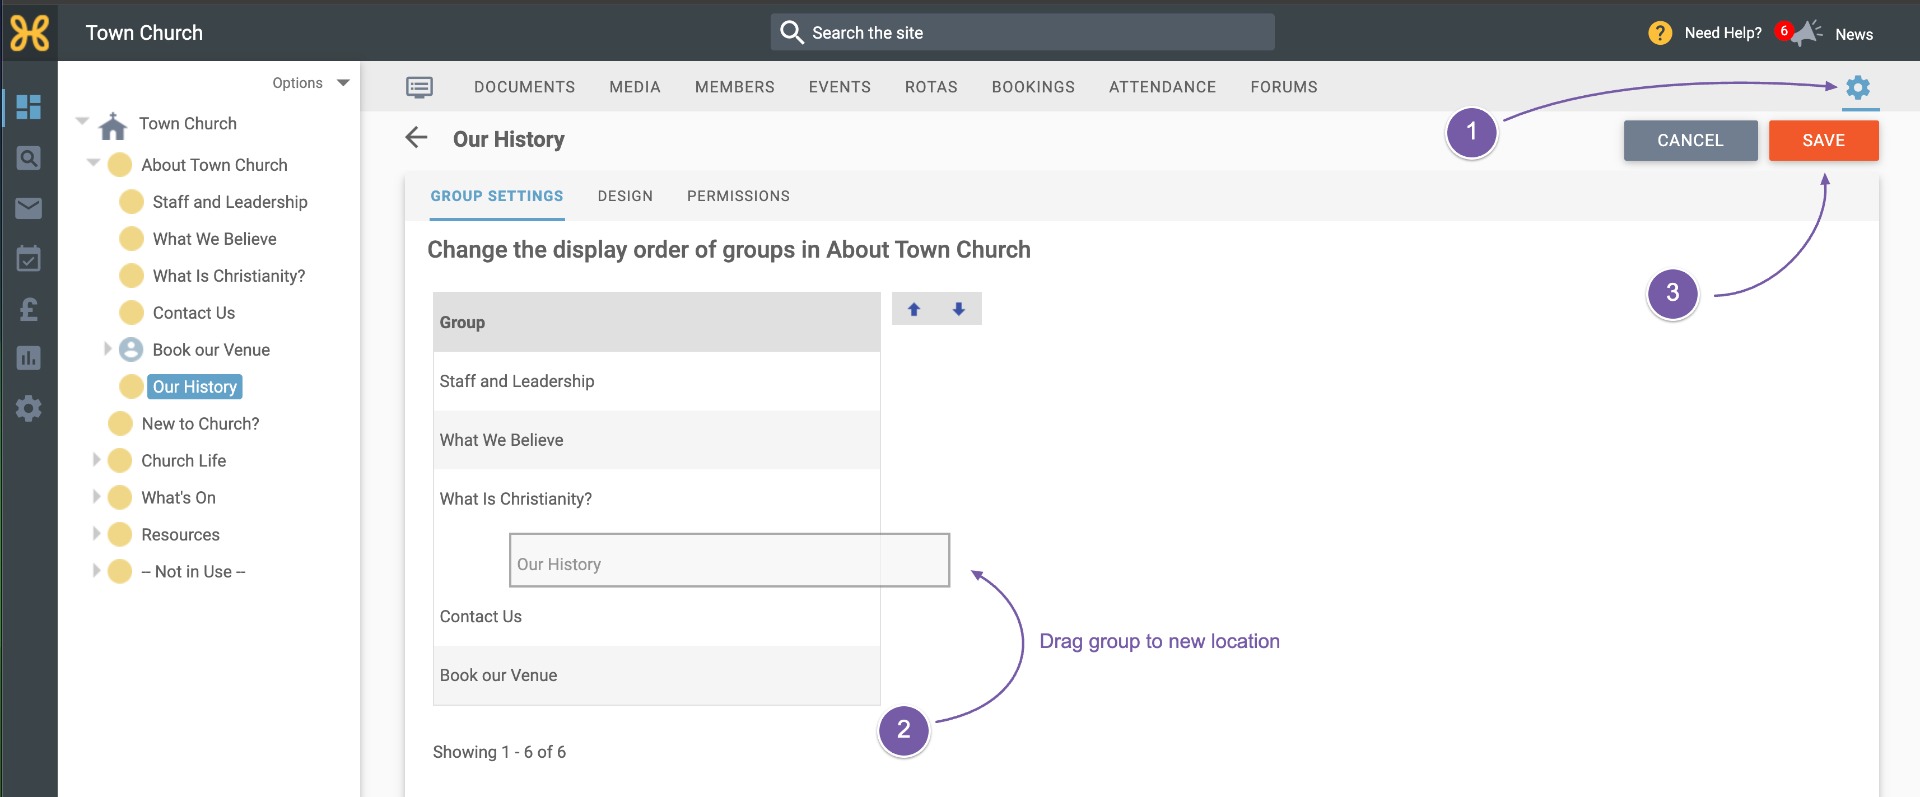
Let's change the order of those groups.
-
Make sure you are on the settings tab for the group you want to change the order of, and then choose the task to change display order.
-
Here you can just drag and drop the groups to be in the order that you want.
-
Click Save
To get our new history group to appear as a page on the site, it needs a published article that is set to be the article that will appear when a user clicks to view that group. Let's go ahead and give it a go.
-
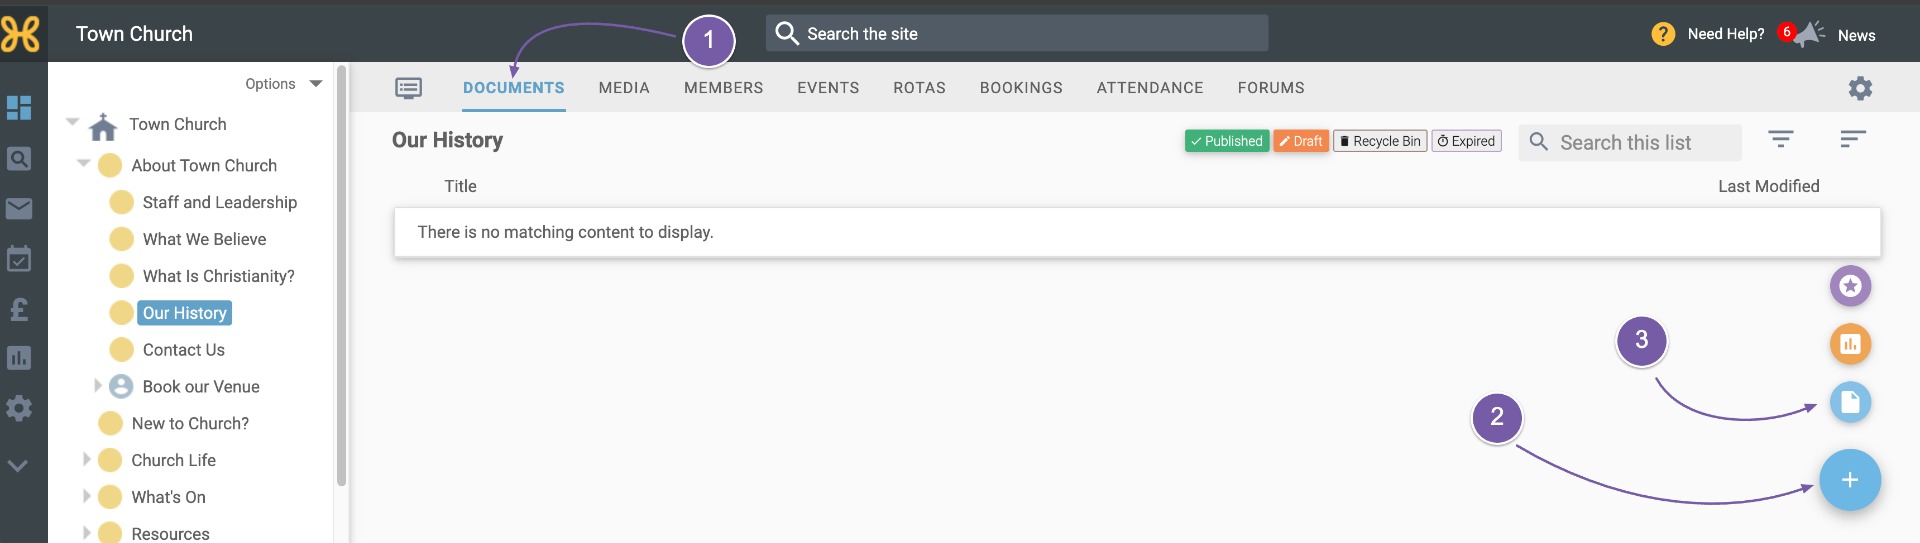
On the “Our History” group, click on the “Documents” tab
-
Click on the “plus” button at the bottom right of the screen
-
Select “Article”.
-
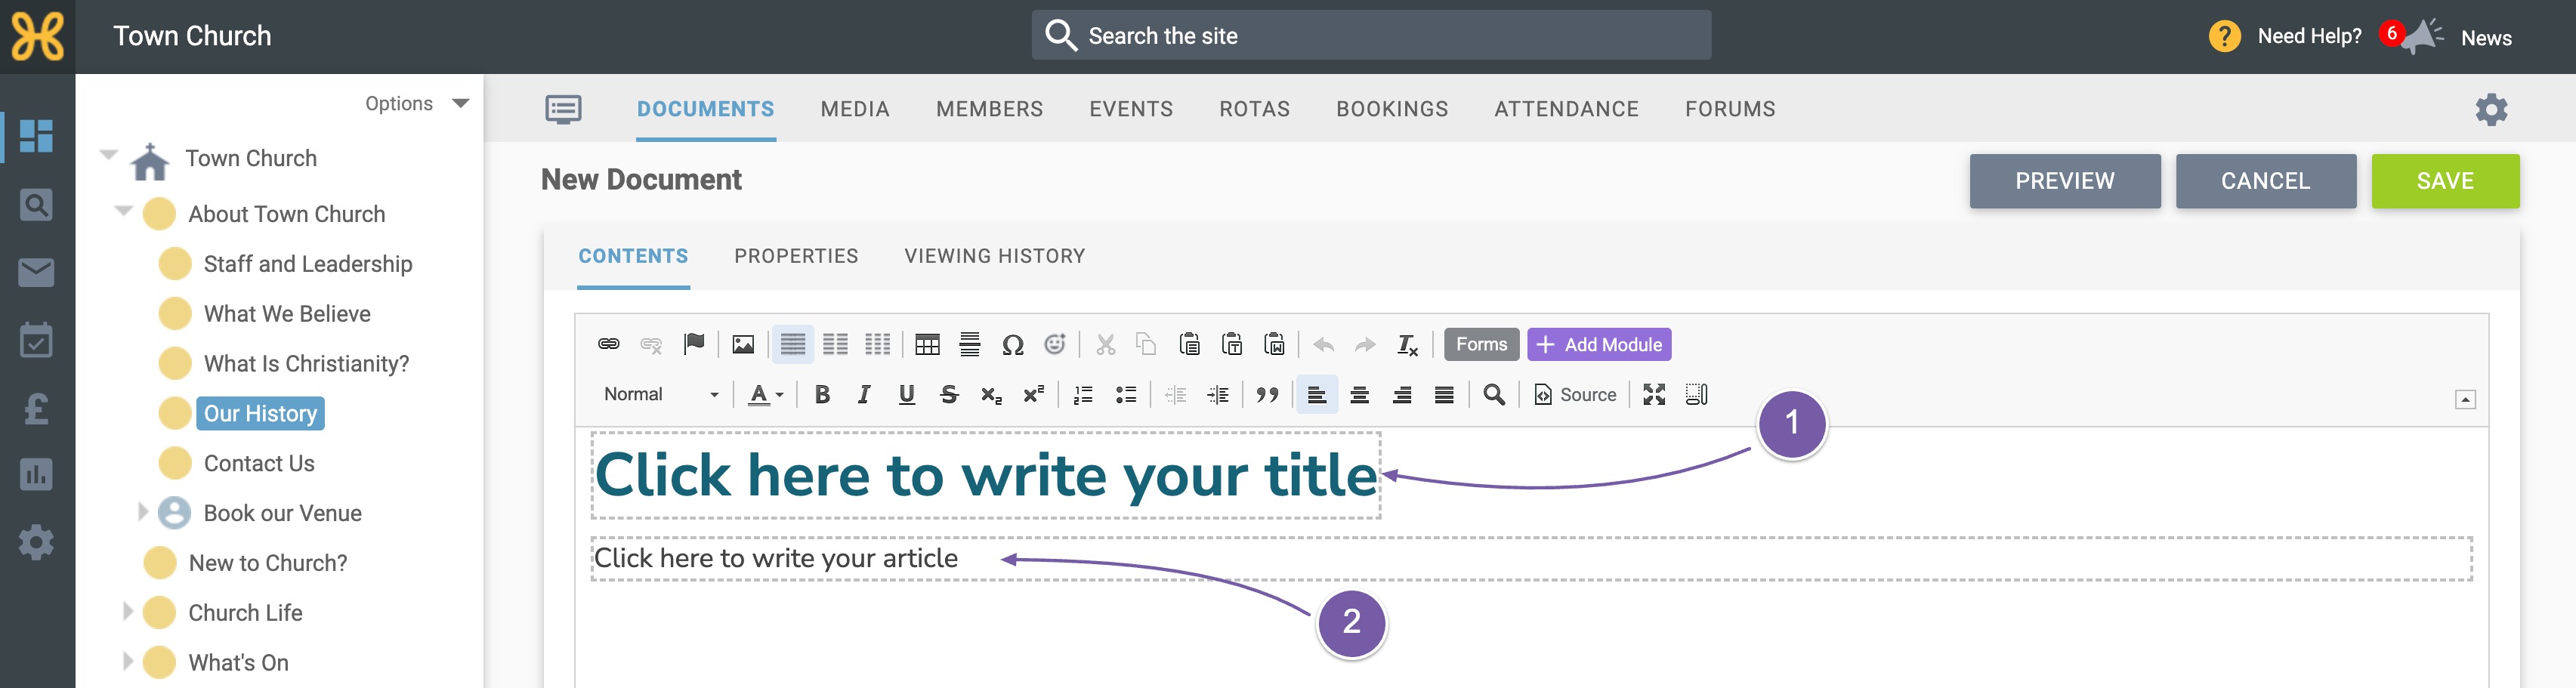
This is the editor. We have more videos to show you more detail about how to use the editor, but for now we're just going to add a title
-
and type a bit of text to show you how to get a new page live on the site.
-
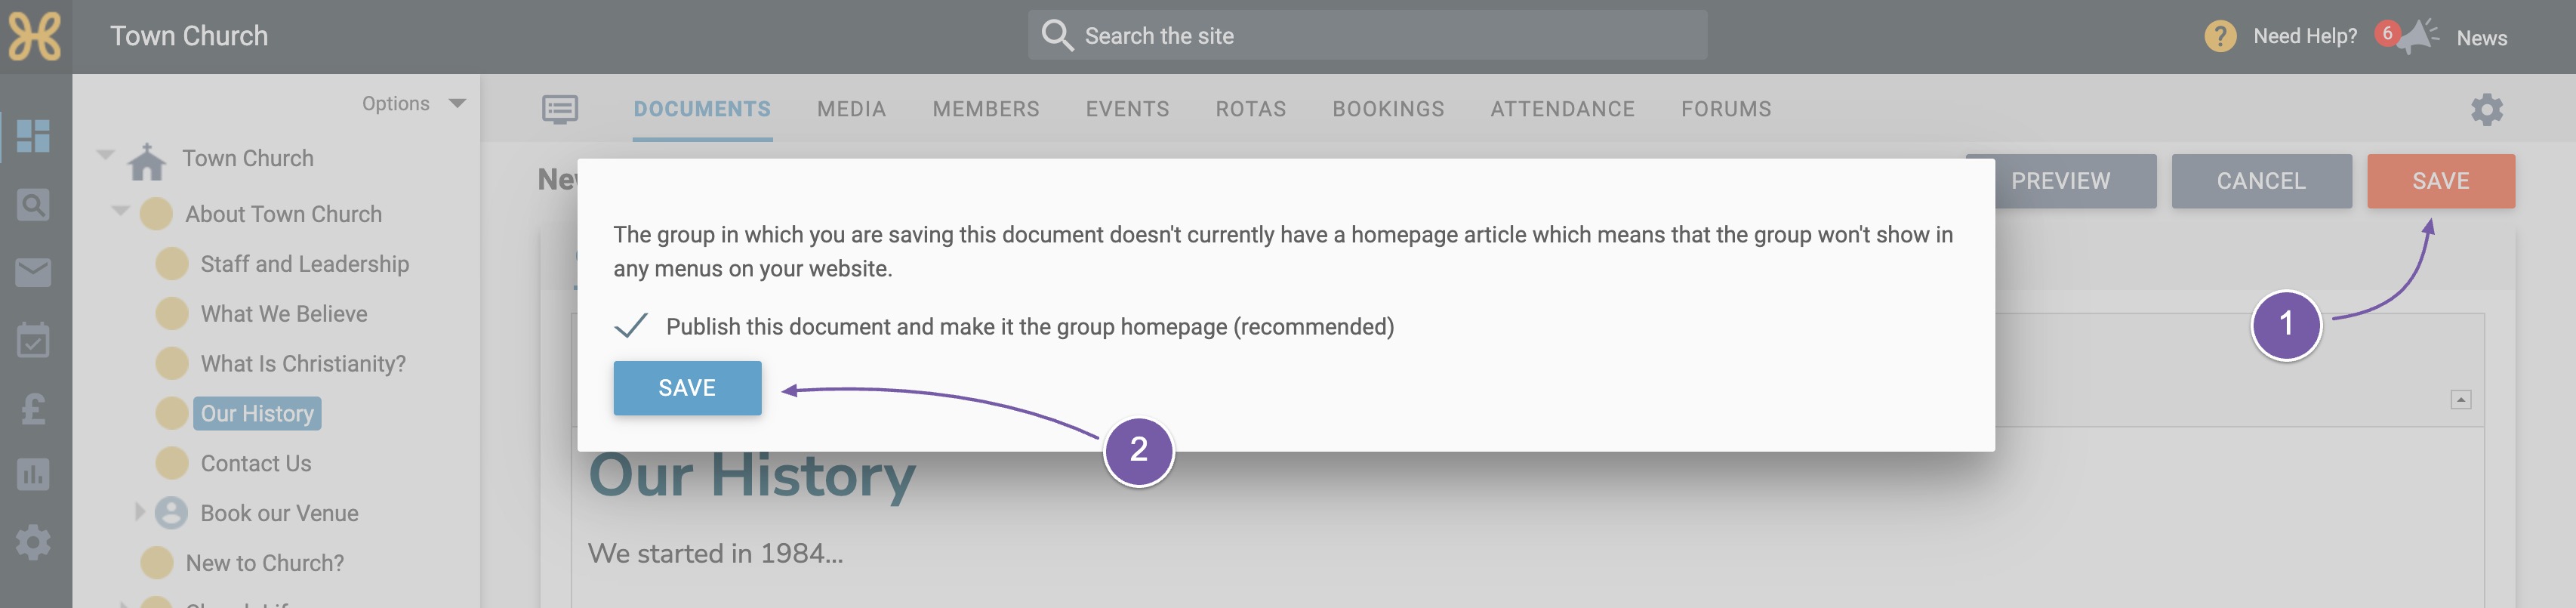
When we've finished editing the page, just click the “Save” button at the top right of the screen
-
Then confirm that you wish to have this article published and be the group's homepage article. That means when someone clicks on that group, this is the article that will be displayed. We set this because there can be many articles in any group and we need to specify which is the article we want to be the main one.
If we click on the “View Website” in “New” tab icon at the bottom left of the screen, we can go and check what we have done. You can see the page in the menu in the order we set it and you can go to the page when you click on the menu item.
So, you now know how to change the name of a group, delete a group, change the order of your groups and create a new group and make it live with an article. We encourage you to take a look at our other videos to learn more about editing pages and make them more engaging and informative.