Preparation and set up
Sorry, your browser is unable to play this type of file.
You can still
download it
To use the digital electoral roll in Hubb, please let our support team know on support@hubb.church.
Before you can get people to apply or sign up to the roll, you must add your members to your site. Please ensure you are on one of our church management plans. If you have any questions at any point, please get in touch with our helpful support team. We advise enabling member logins and let them update their profile first. This is so that any issue with logging in can be dealt with early and they do not have to work on logging in and signing up for the electoral roll in one go.
The choice is yours and you can judge this based on the confidence of your users in using digital tools. However, you can enable logins and get them to enrol immediately. You can also have people sign a paper form and then manually add their details yourself to the digital electoral roll.
-
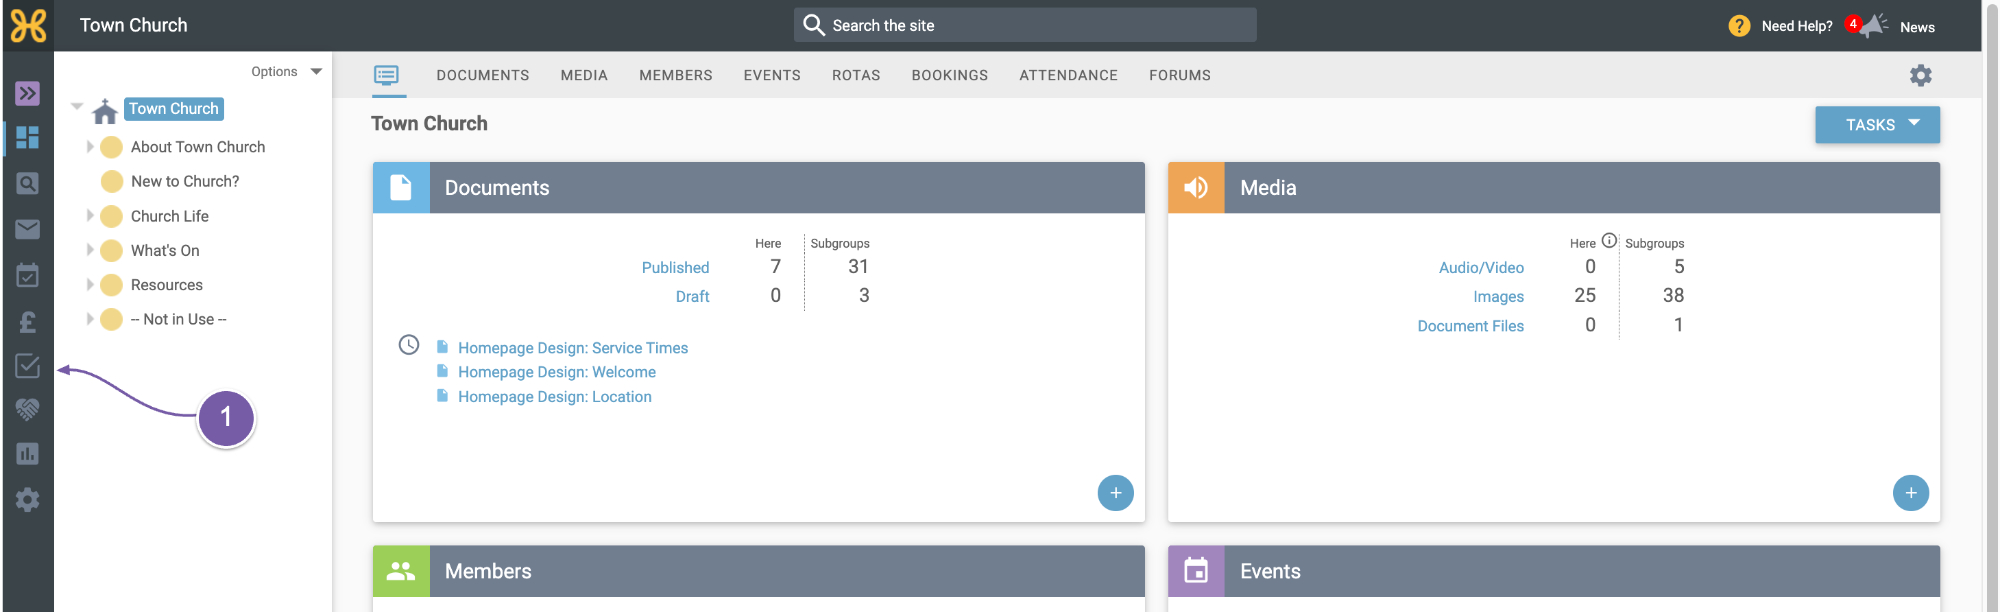
When we have enabled the electoral roll for you, you will see it on the left-hand menu.
-
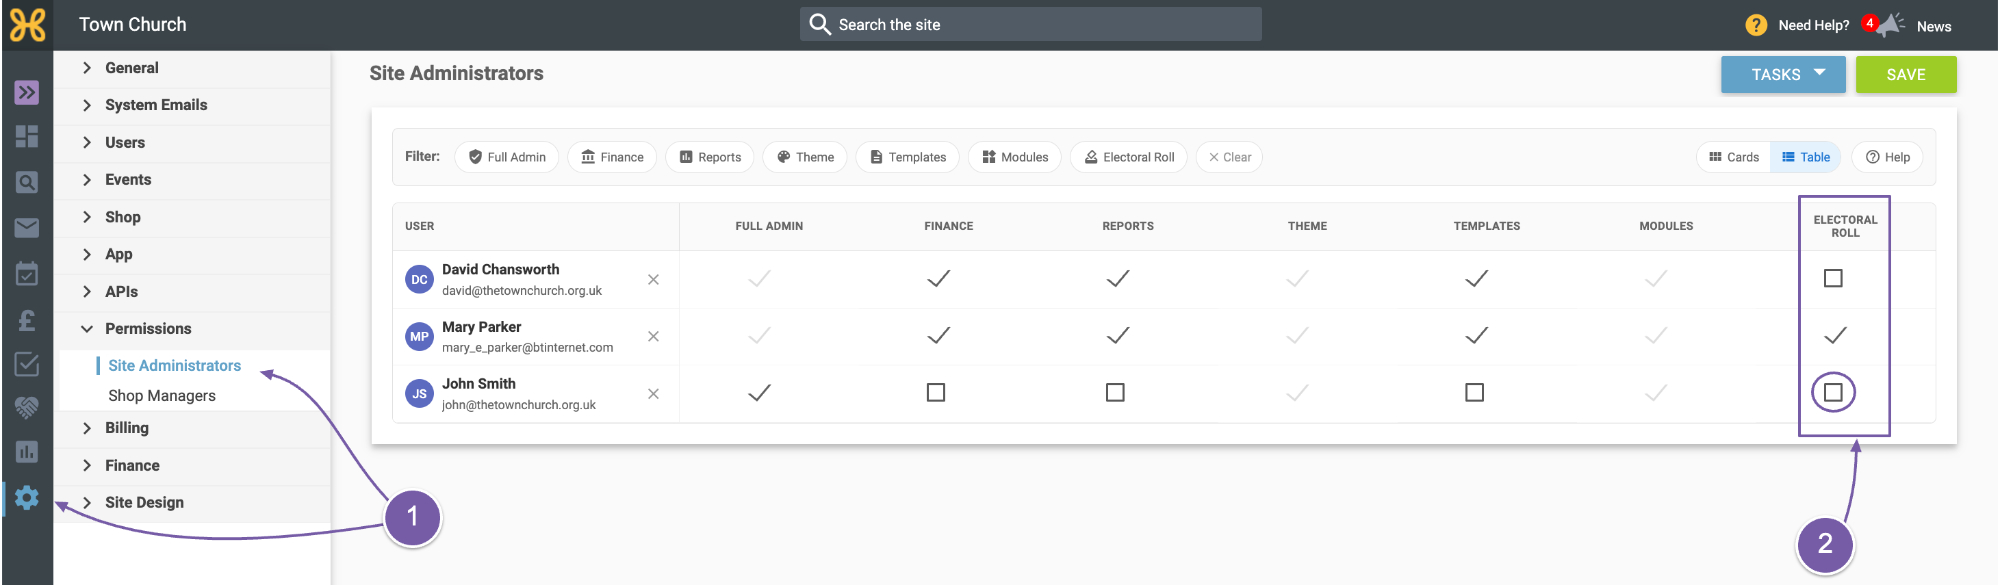
We can give the permission for electoral roll to anyone who is a site administrator already
-
They can give the permission to others.
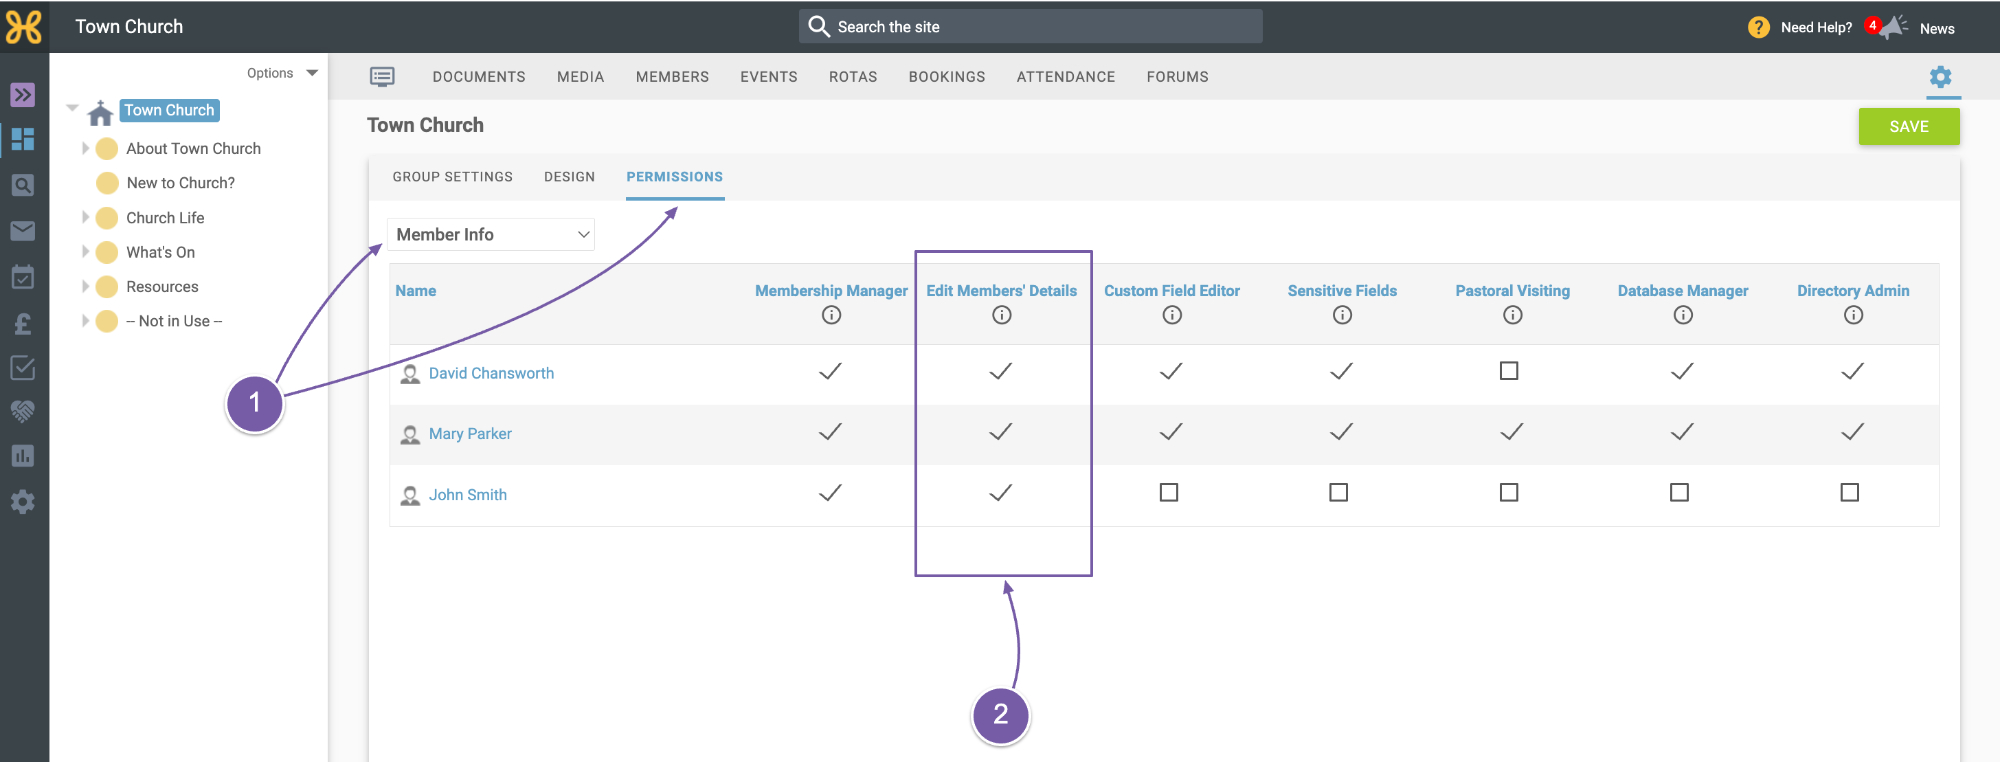
If you would like your team to manually add electoral roll data in people's profiles directly in the web office, they will also need the "Edit Members' Details" permission.
-
Check their permissions within "Member Info"
-
Make sure the "Edit Members' Details" box has been ticked
-
Let's look at the electoral roll area now.
-
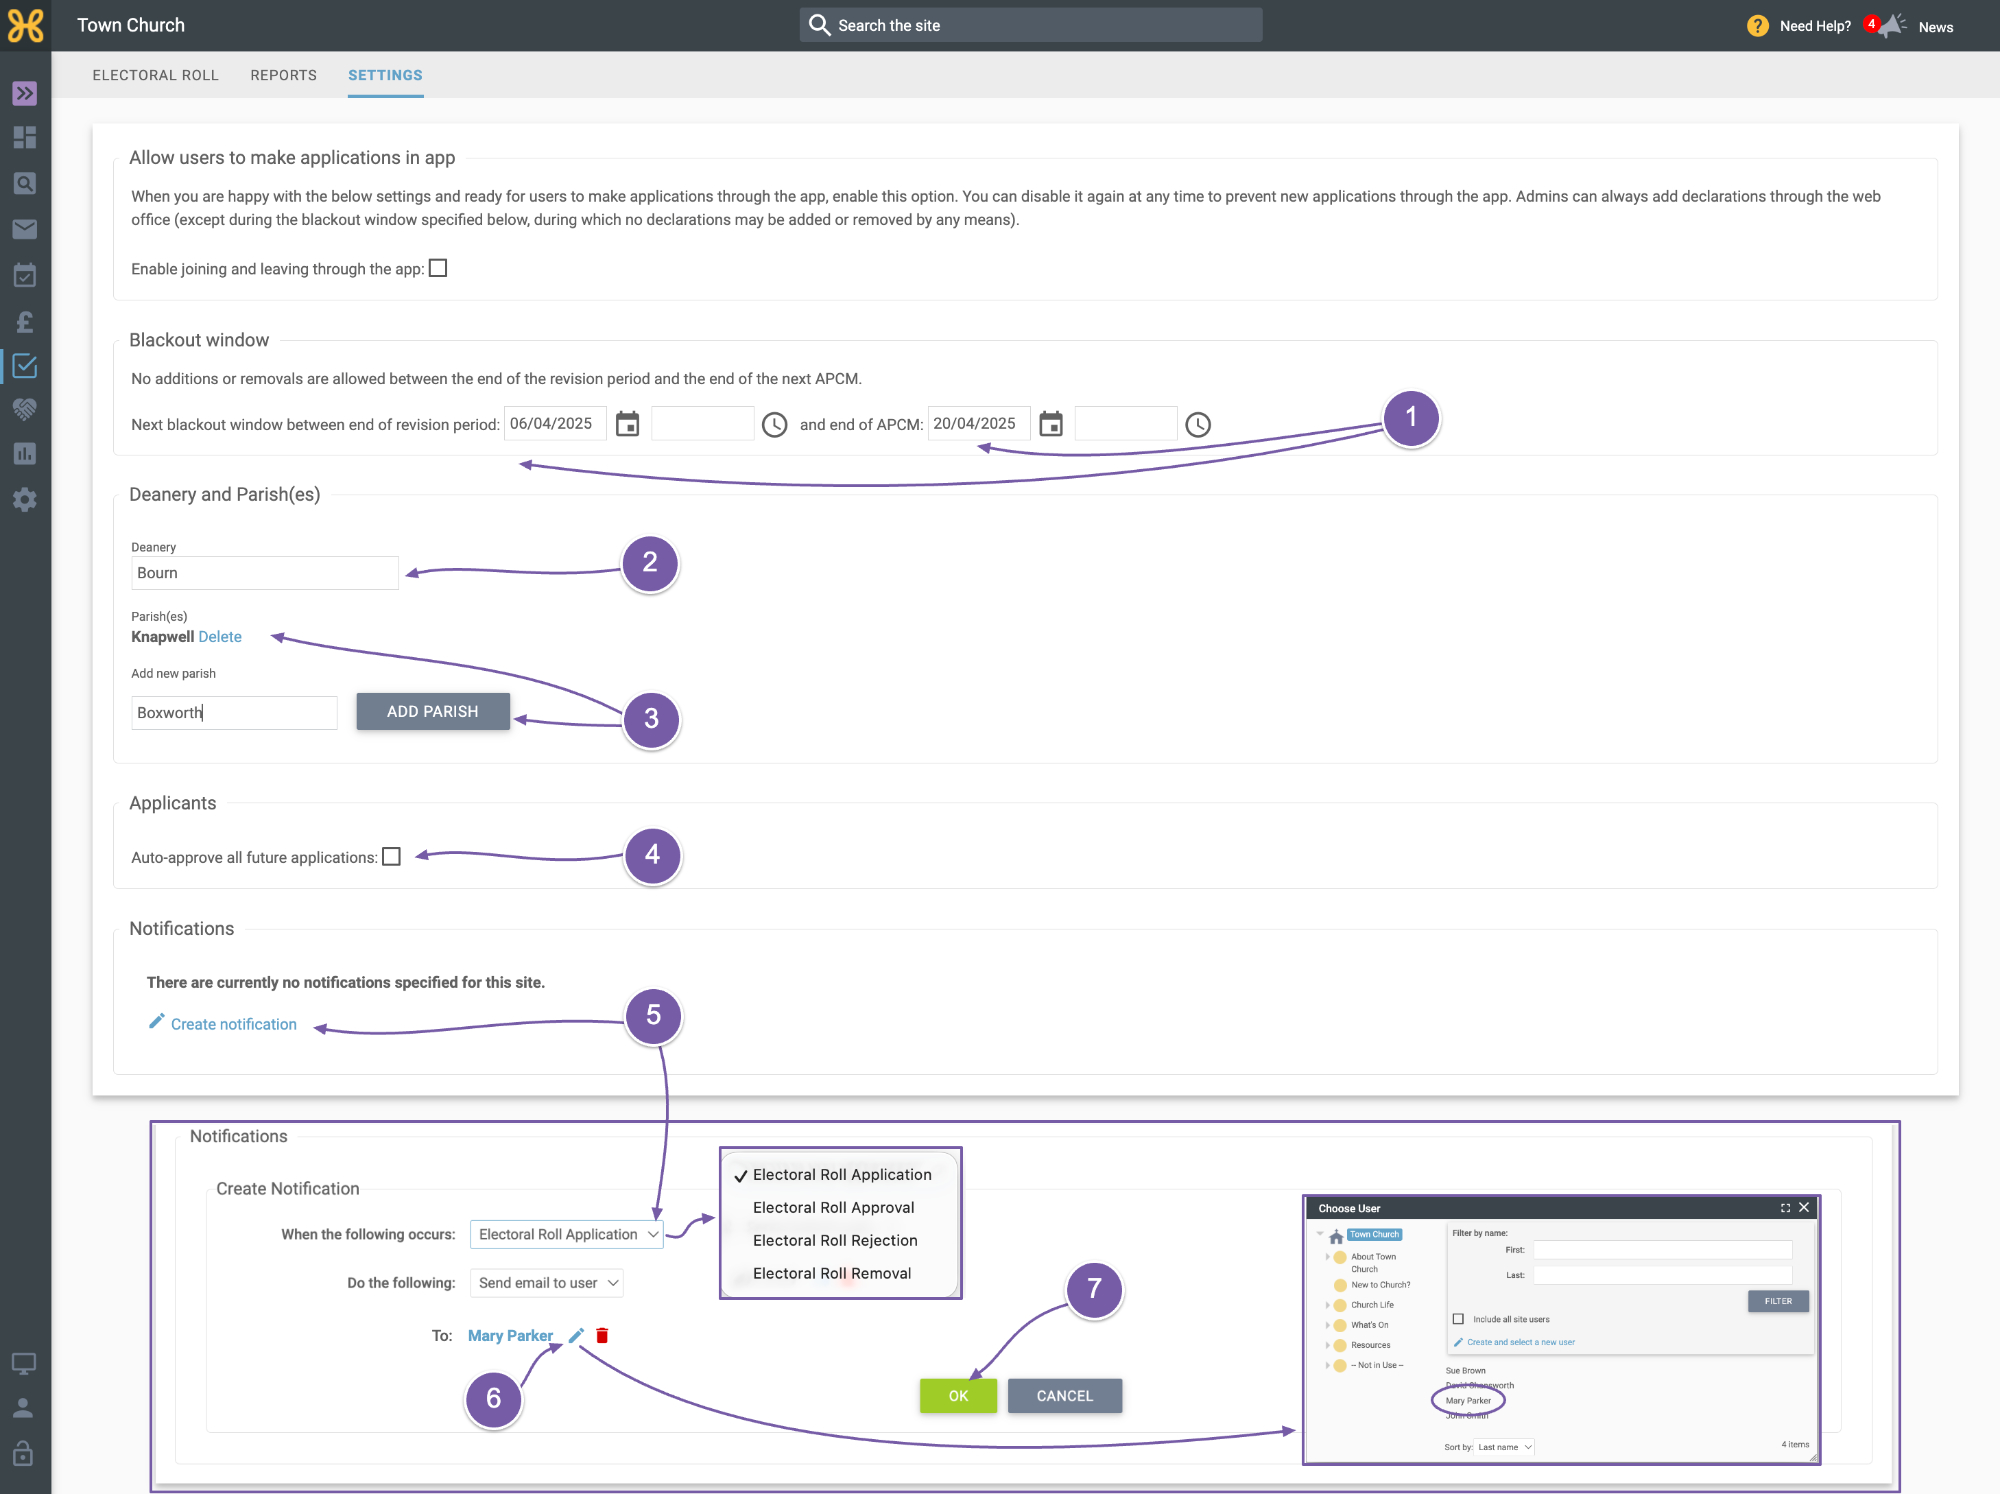
Before anyone can apply to join the roll, you'll need to add the deanery and parish settings. Click on the “Settings” tab above to review the settings.
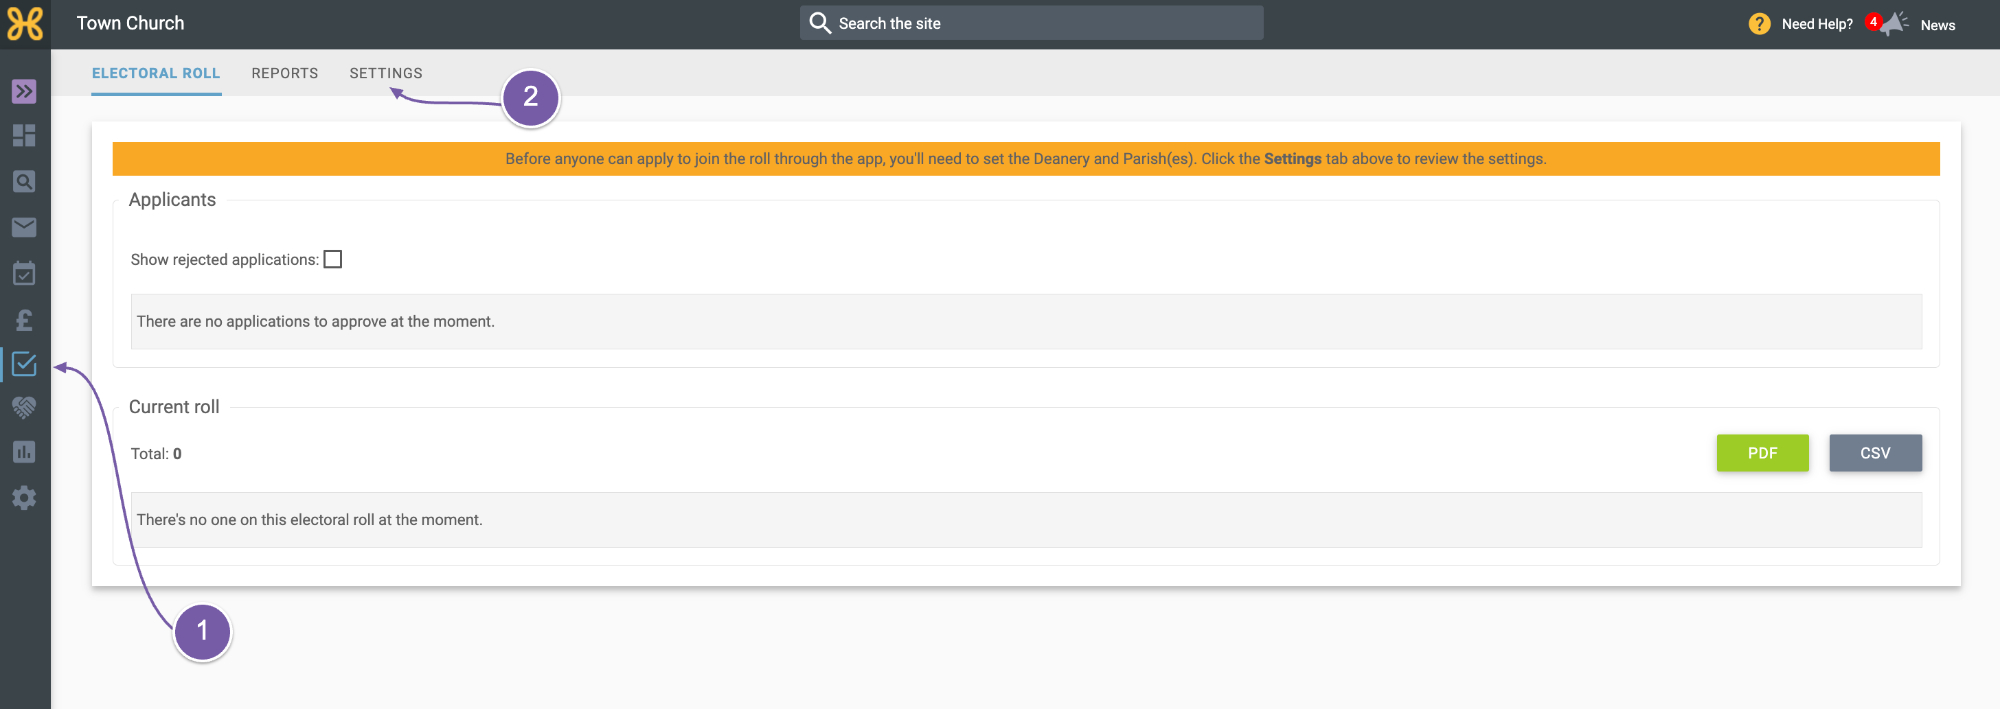
On this page, you can:
-
Add your blackout window dates
-
Add the deanery
-
Add your parish. If you need to add more than one parish, you can.
-
By default, everyone applies to be on the roll and you will review and decide to approve or reject the applications. However, if you would rather have all of the applications auto-approved, you can tick this box.
-
Set up notifications for your admins. Click on “Create Notification” to see the notifications you can set.
-
For each one, select "send email to user" and then pick the user you'd like from the web office.
-
Then click “OK”.
-
You can go through creating all the other notifications for your admins as well.