Querying custom fields
Sorry, your browser is unable to play this type of file.
You can still
download it
Now that you know the basics of custom fields and how to add and edit them, we can look at reporting and performing tasks on their data. To do this:
-
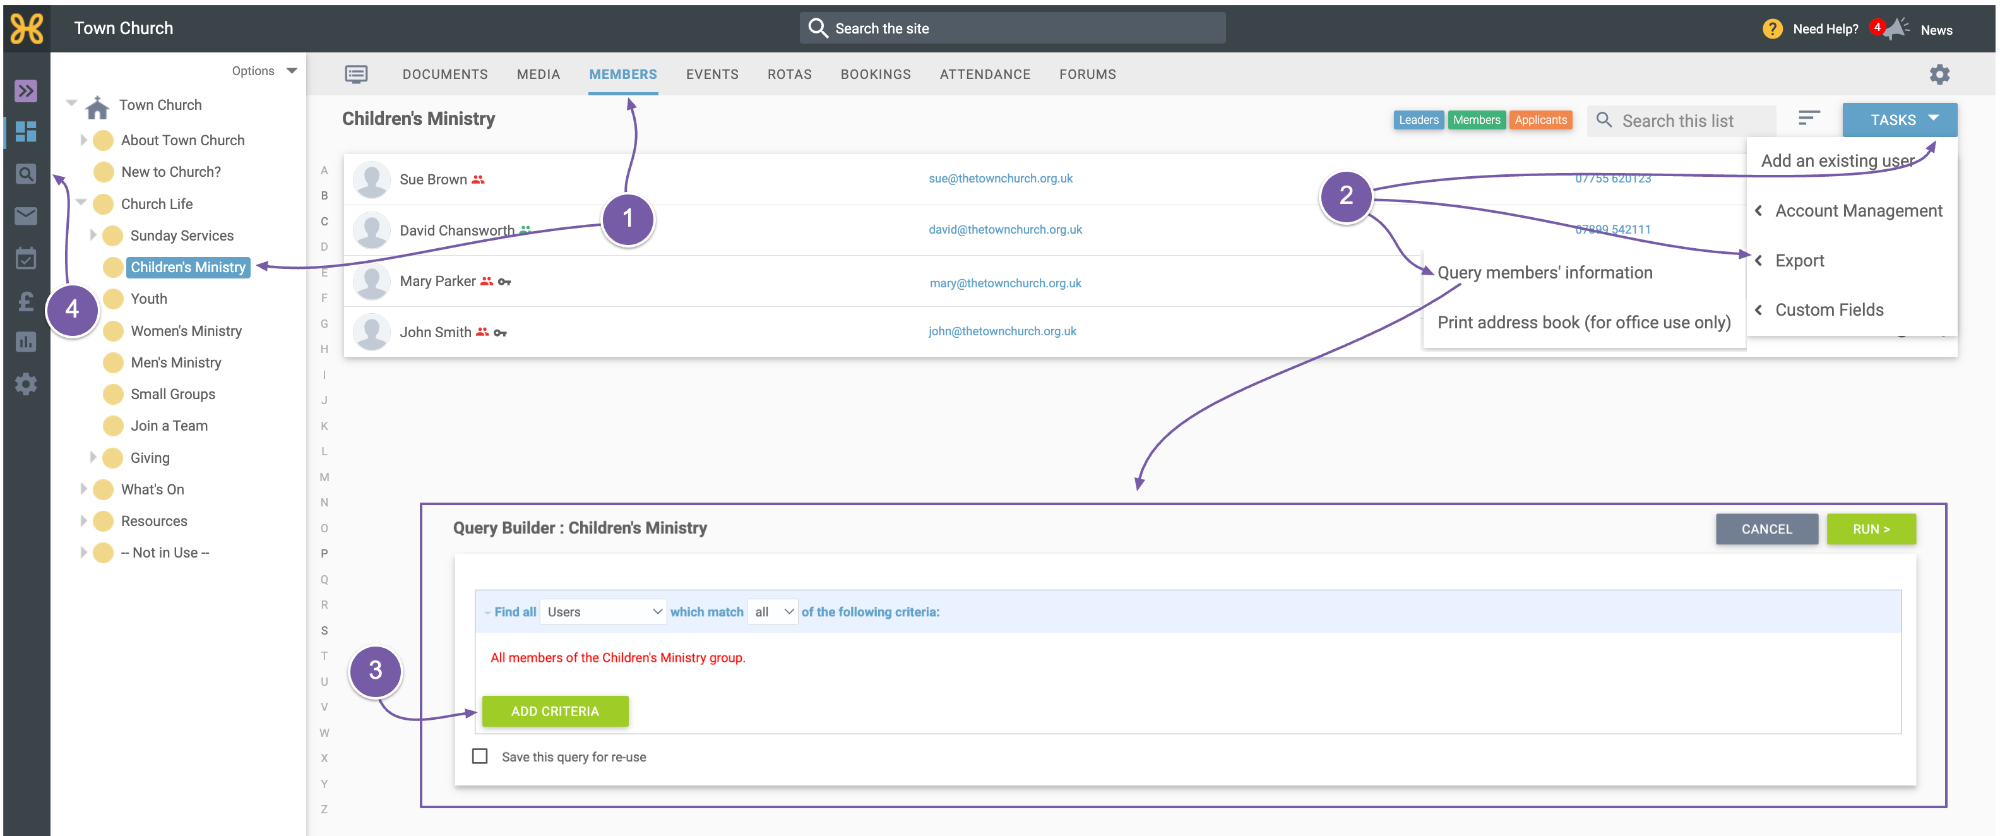
Go to the “Members” tab of the group you want to report on - such as the Children's Ministry group.
-
Click on “Tasks, Export, Query Members Information”.
-
We now come to the “Query Builder”. Here we can add criteria for the search. There are many options in this list. For example, if you have a men's ministry barbecue coming up and want to email all of the adult men in the church, you could find all men over 18. We encourage you to play with the list, see which options are available and explore the report you wish to run.
-
You can also access the “Query” tool from the menu on the left-hand side. When you access “Query” from there, you can query multiple groups at once, not just the group you're in.
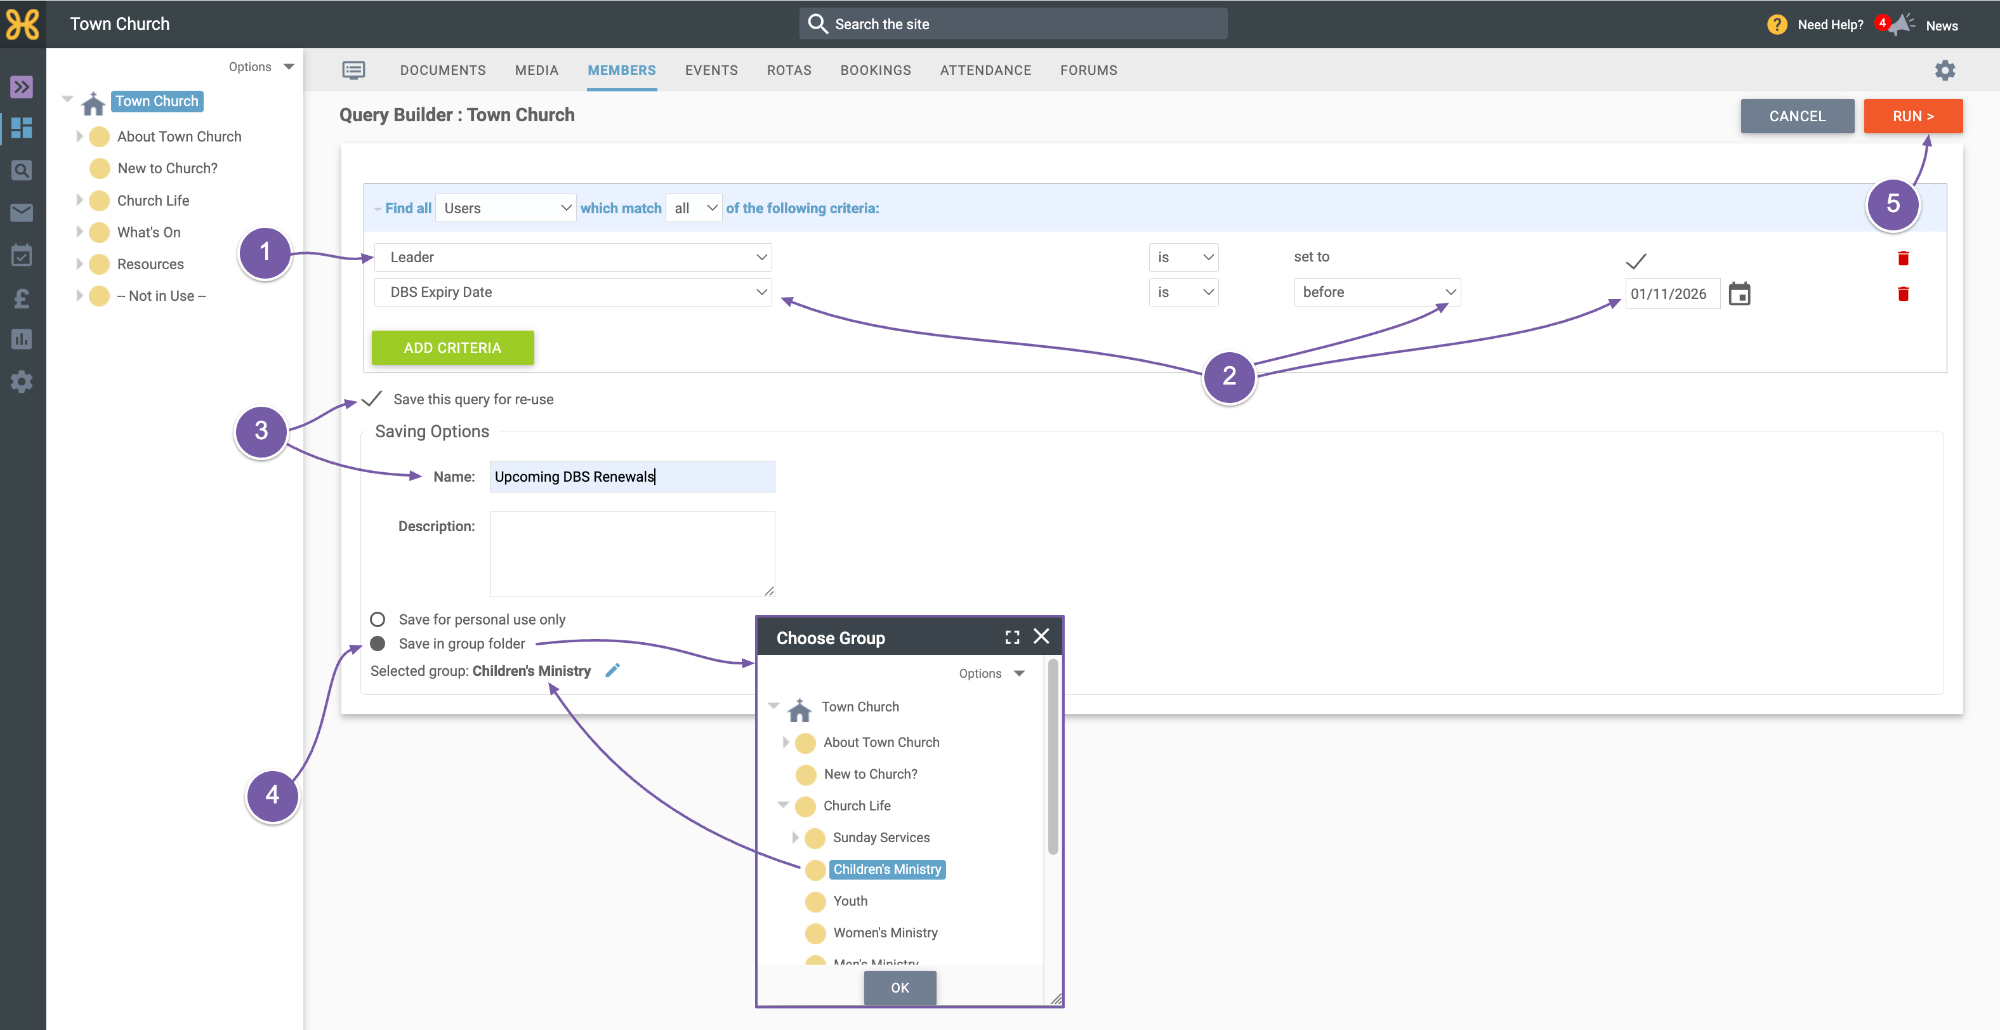
In this example, we want to find:
-
The leaders of our Children's Ministry group
-
With a DBS expiry date before the end of October.
-
Before you run the query, you have the option to save it to reuse later. Tick this option and give the query a title - in this case, “Upcoming DBS Renewals”.
-
You can set this query to be saved in the group folder, not just for your personal use, so that others with access can run this report too.
-
Then run the query and see the results.
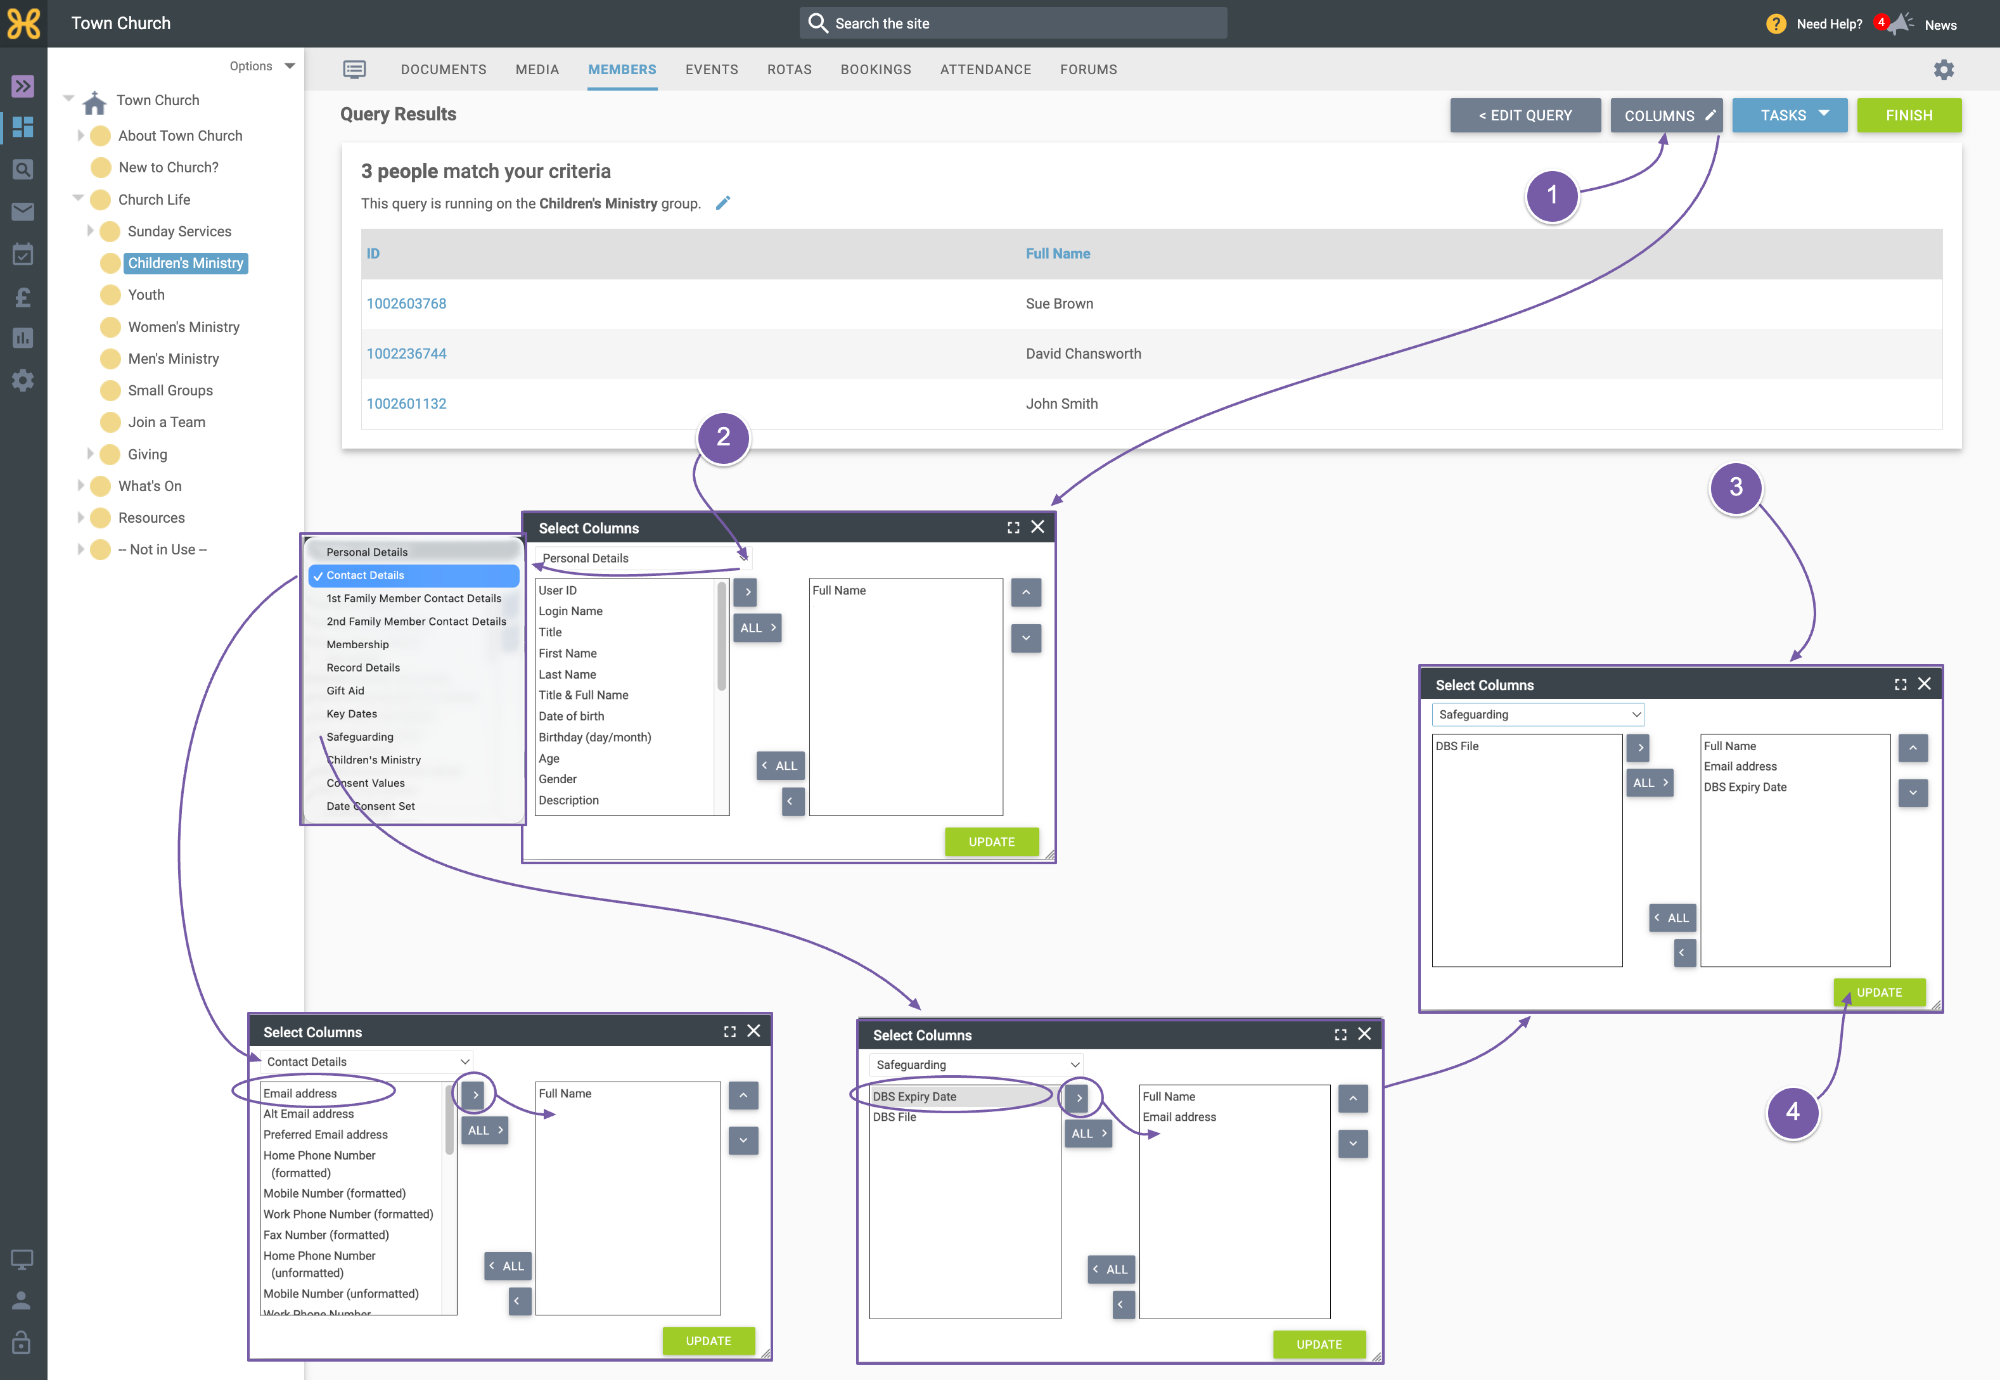
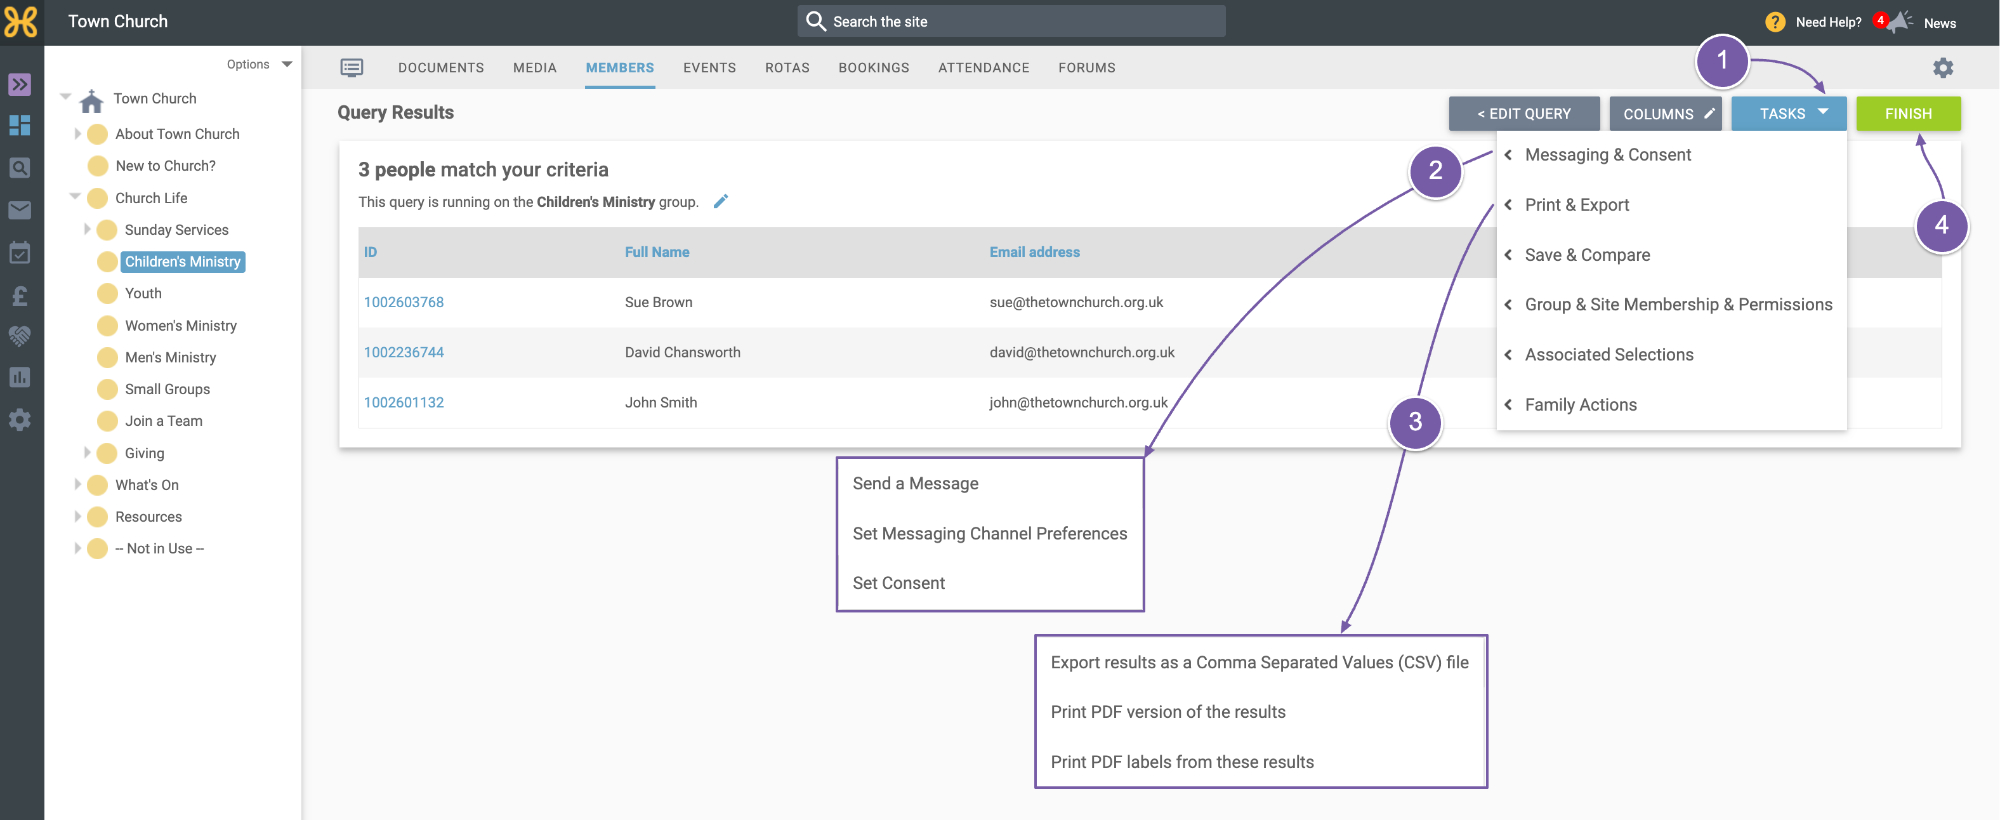
In this example, three people fit the criteria. By default, we only see their name and user ID. You can click on their ID to open their profile. To customise your report, you can add data fields to the results. Later, when you're finished, the display you have made will be saved for when you use this report again.
To add data fields:
-
Click on “Columns”.
-
Explore the long list of data you can add to your report.
-
In this example, we're adding email address and DBS expiry date, which is a custom field within "Safeguarding".
-
When you're done, click “Update”.
-
You can perform many tasks with your data. Let's review the main ones and you can explore more if you like:
-
Send a mailing or set mailing preferences and consent choices
-
Export the results to CSV or PDF.
-
Then click “Finish"
-
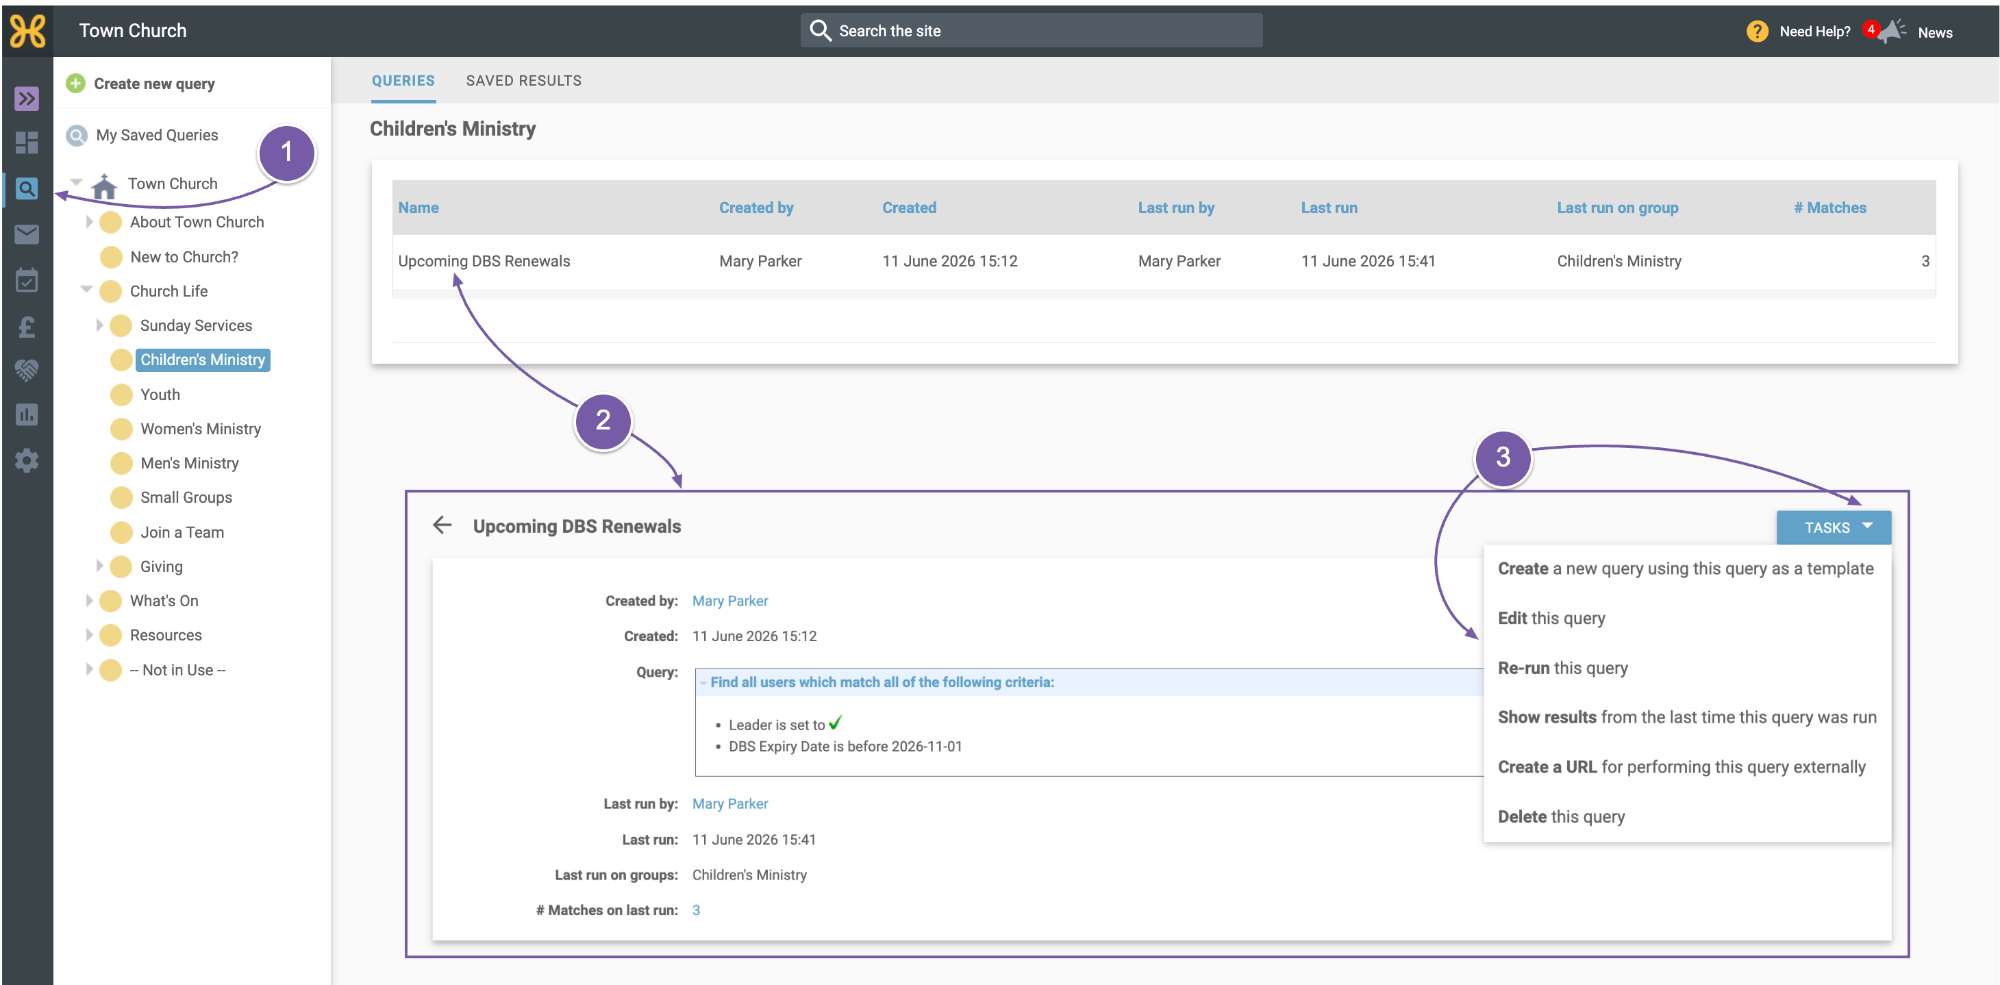
Finally, if you head to the “Query” tool from the left-hand menu, you can see your saved query.
-
Click on it
-
Use the "Tasks" to edit or rerun it.