How to add custom fields
Sorry, your browser is unable to play this type of file.
You can still
download it
Let's go ahead and look at how to create a custom field.
-
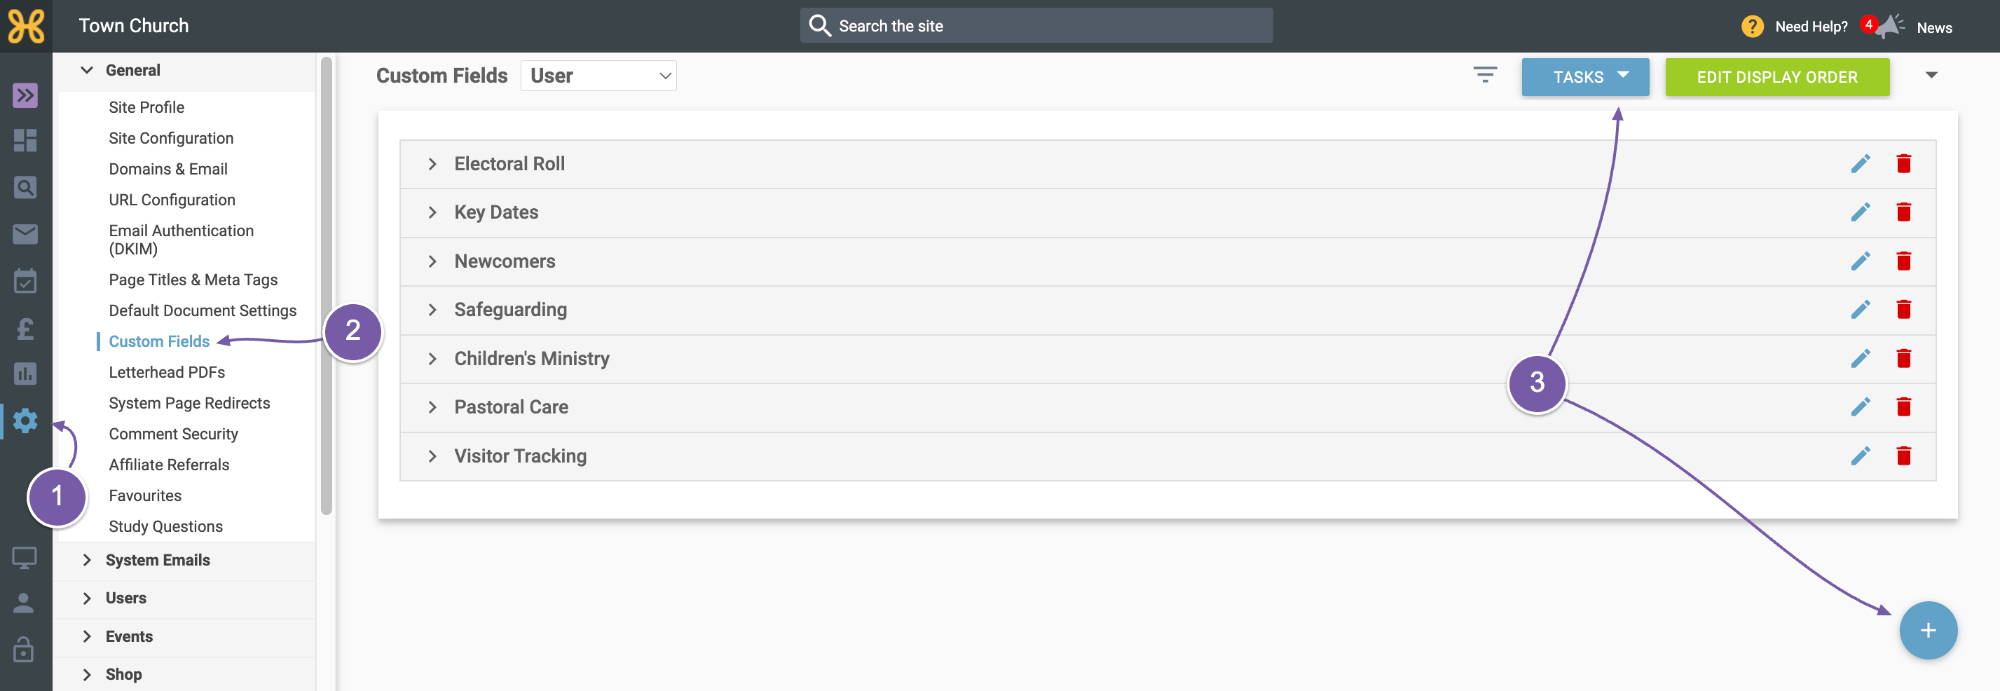
Go to Site Settings on the left.
-
Then select “Custom Fields”.
-
You can click the Tasks button at the top right and select Add Field. Or use the “+” button at the bottom right.
-
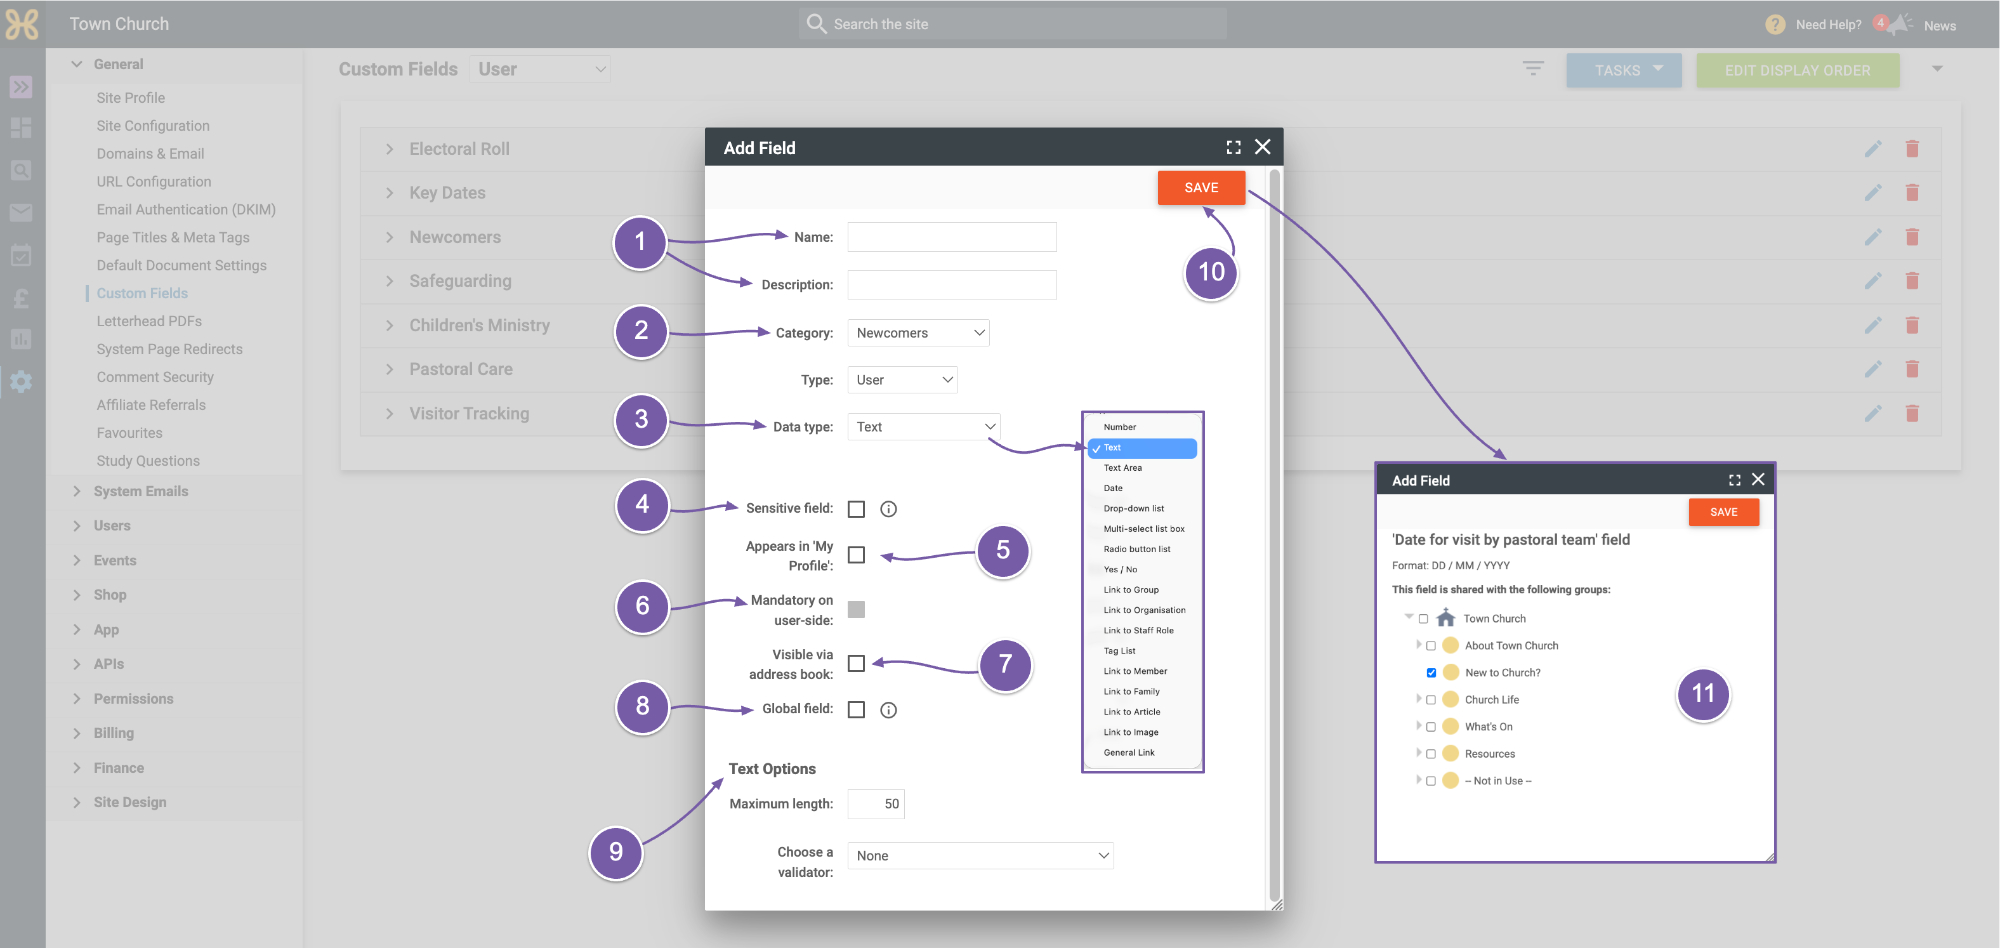
Enter the name and description of the custom field.
-
Select the category you want it to appear in.
-
Then select “Data Type”. Many data types are available. Feel free to play with them, adding some to explore what you can do with each. You may want to add a “Date” custom field to track DBS expiry dates, for example.
-
If the field is to be Sensitive, select the “Sensitive Note” tick box.
-
Select the “Appears in My Profile” option if you want the user to see and edit the details in their profile. If the field is set to Appear in “My Profile” and a “Global” field, the field will also be available to show in the “Site Registration” page.
-
The “Mandatory on User Side” option forces the user to fill in this field. It becomes available only if the field has been set to Appear in their profile.
-
The “Visible” via Address book will display this field in the user's address book entry.
-
If the field is to be “Available” in Everyone's Profile, tick to select the “Global” field box.
-
Different validation options will appear depending on the data type selected, forcing the user to enter data in the required format. For example, you can set the validation to an email address on a text field.
-
When you are done, click to “Save the Custom field".
-
Lastly, if the custom field is not Global, the Group tree appears and you can tick which groups will have the custom field available.