Making a booking for a church event
(5 minutes)
For most churches, you will add more bookings for you church events. This video shows you how quickly and easily you can add your bookings to Hubb.
Sorry, your browser is unable to play this type of file.
You can still
download it
Let's look at how to make a booking for a Church event in Hubb. It's important to understand that you can create resource bookings for your Church events on the Church calendar in the Site Manager and you do not have to go to the resources area to make the booking.
-
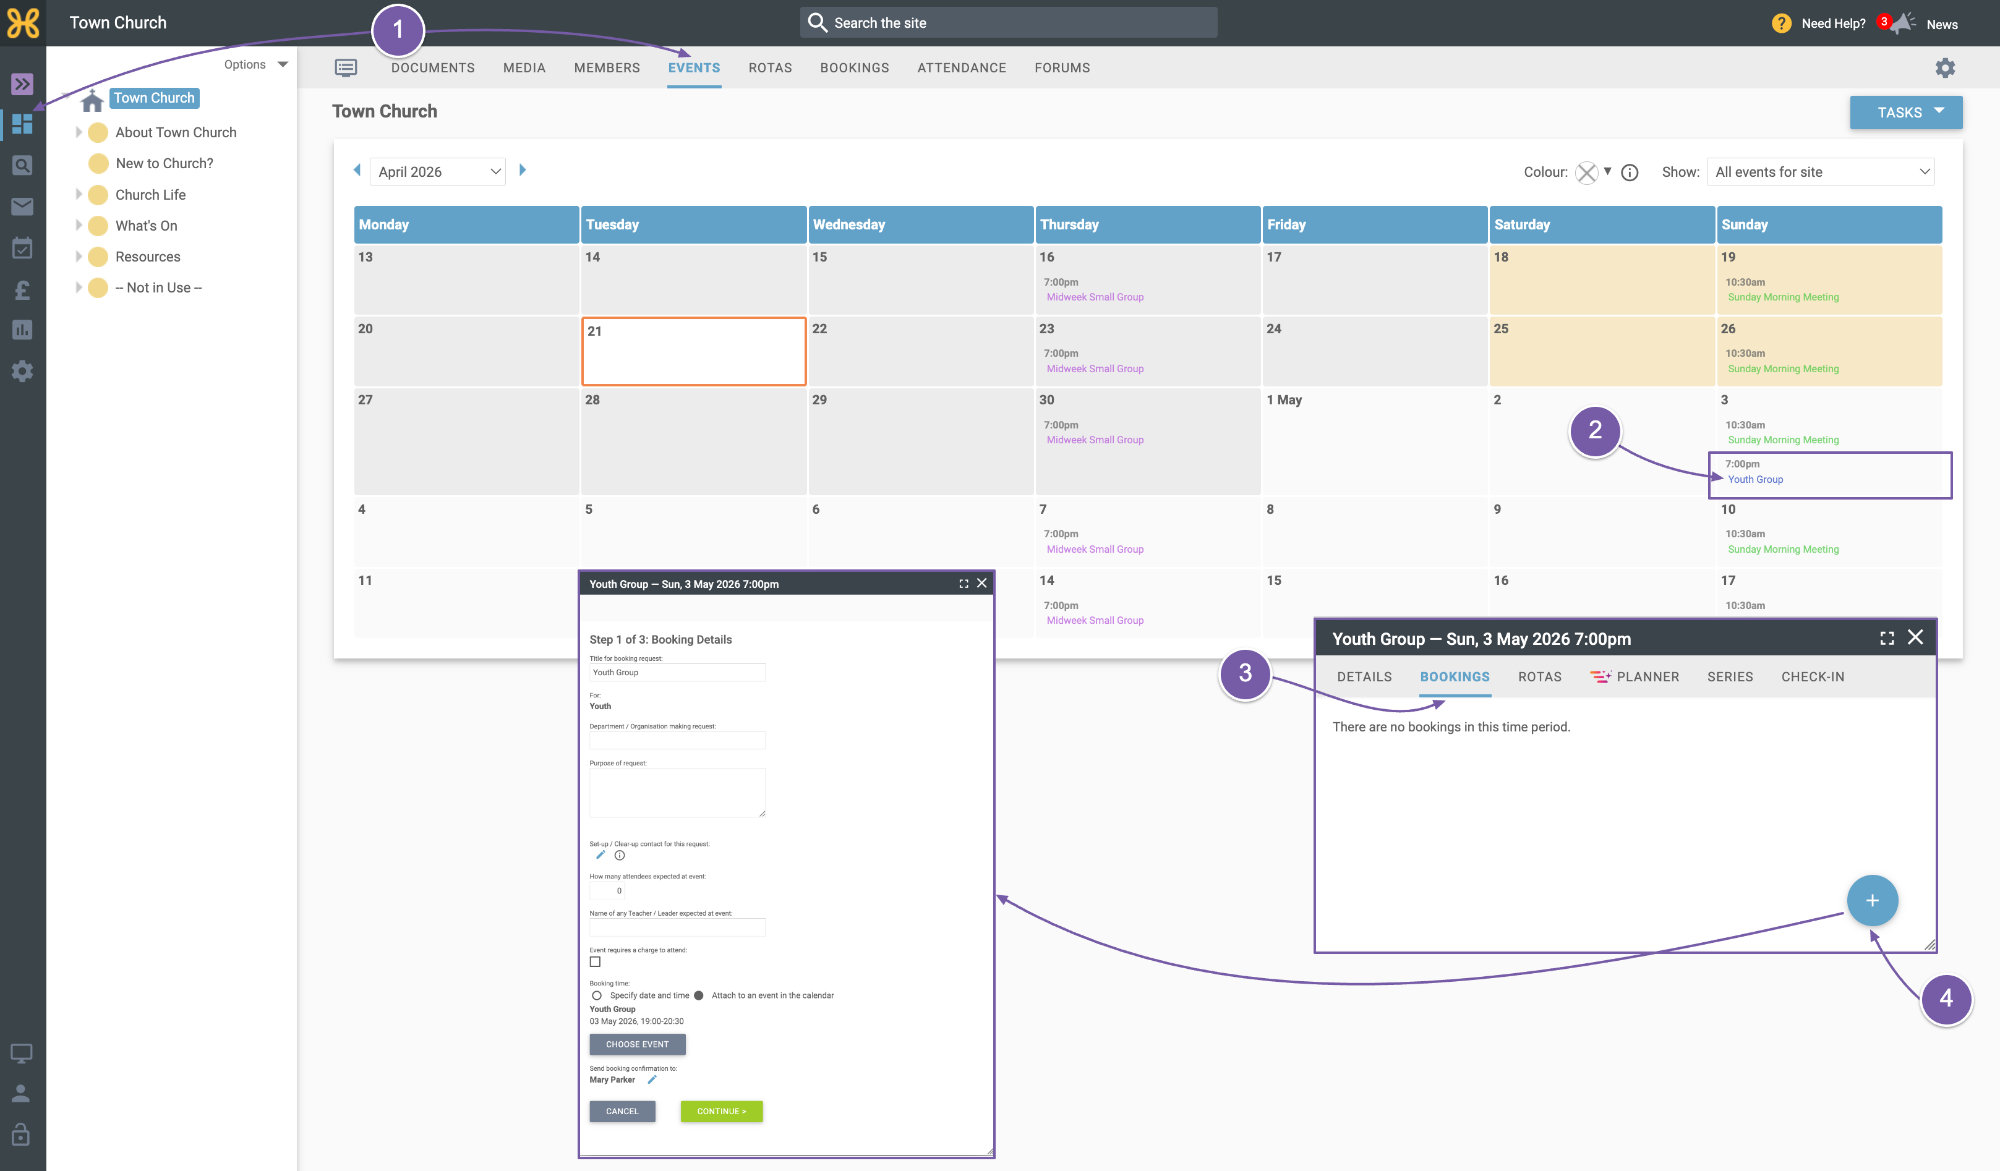
Go to the “Site Manager” and click on the “Events” tab.
-
You just need to click on any event - such as the “Youth Group”.
-
Click on the bookings tab
-
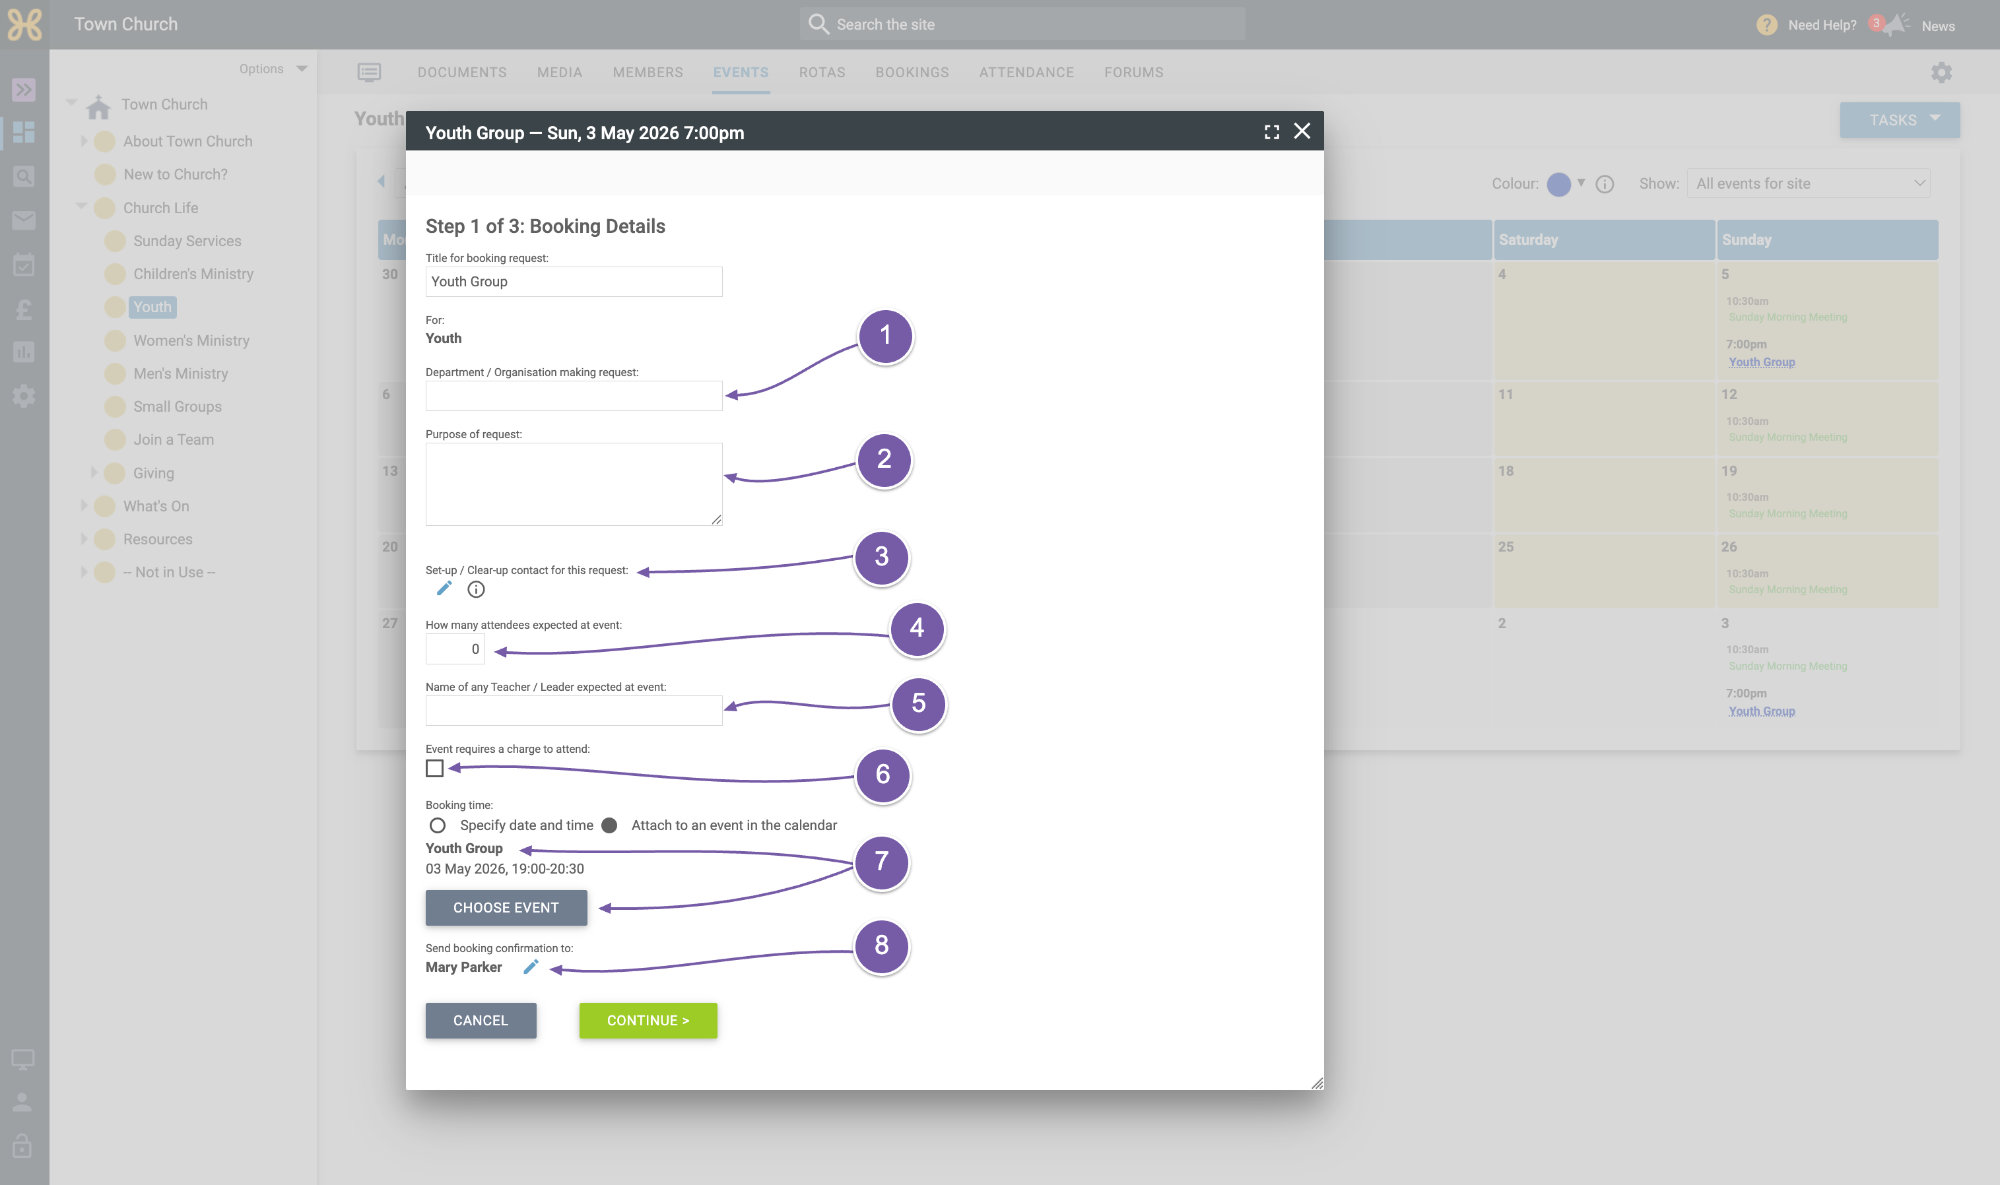
Then click on the blue “+” icon to add a new booking. The booking title is pre-filled to the event name and it will be marked as for the group the event is stored in. For example, it's showing as the youth group.
Many of the boxes you fill in on this page are for information only and may not be relevant or required for your booking. Some may be more relevant for external bookings.
-
If you want to say which department or organisation is making the request, you can enter that here.
-
Likewise, the purpose of the booking request.
-
You can assign a member to be the set-up or clear-up contact for this booking. This is to provide extra information to administrators about who is responsible for setting up the resources, in case this is different to the main booking contact. No automated emails are sent to the person you add here.
-
If it's helpful, you can also enter the number of attendees expected
-
Or a teacher or leader for the event
-
And if there's a charge required to attend.
-
As we have added this booking from an event in the calendar, the system helpfully links the booking to the event. There is a button to pick another event if you need to swap from the current one.
-
Lastly, you can send a booking confirmation to a person on your Hubb system.
It's worth noting that you can leave everything on this page as it is and just click the continue button to speed things up.
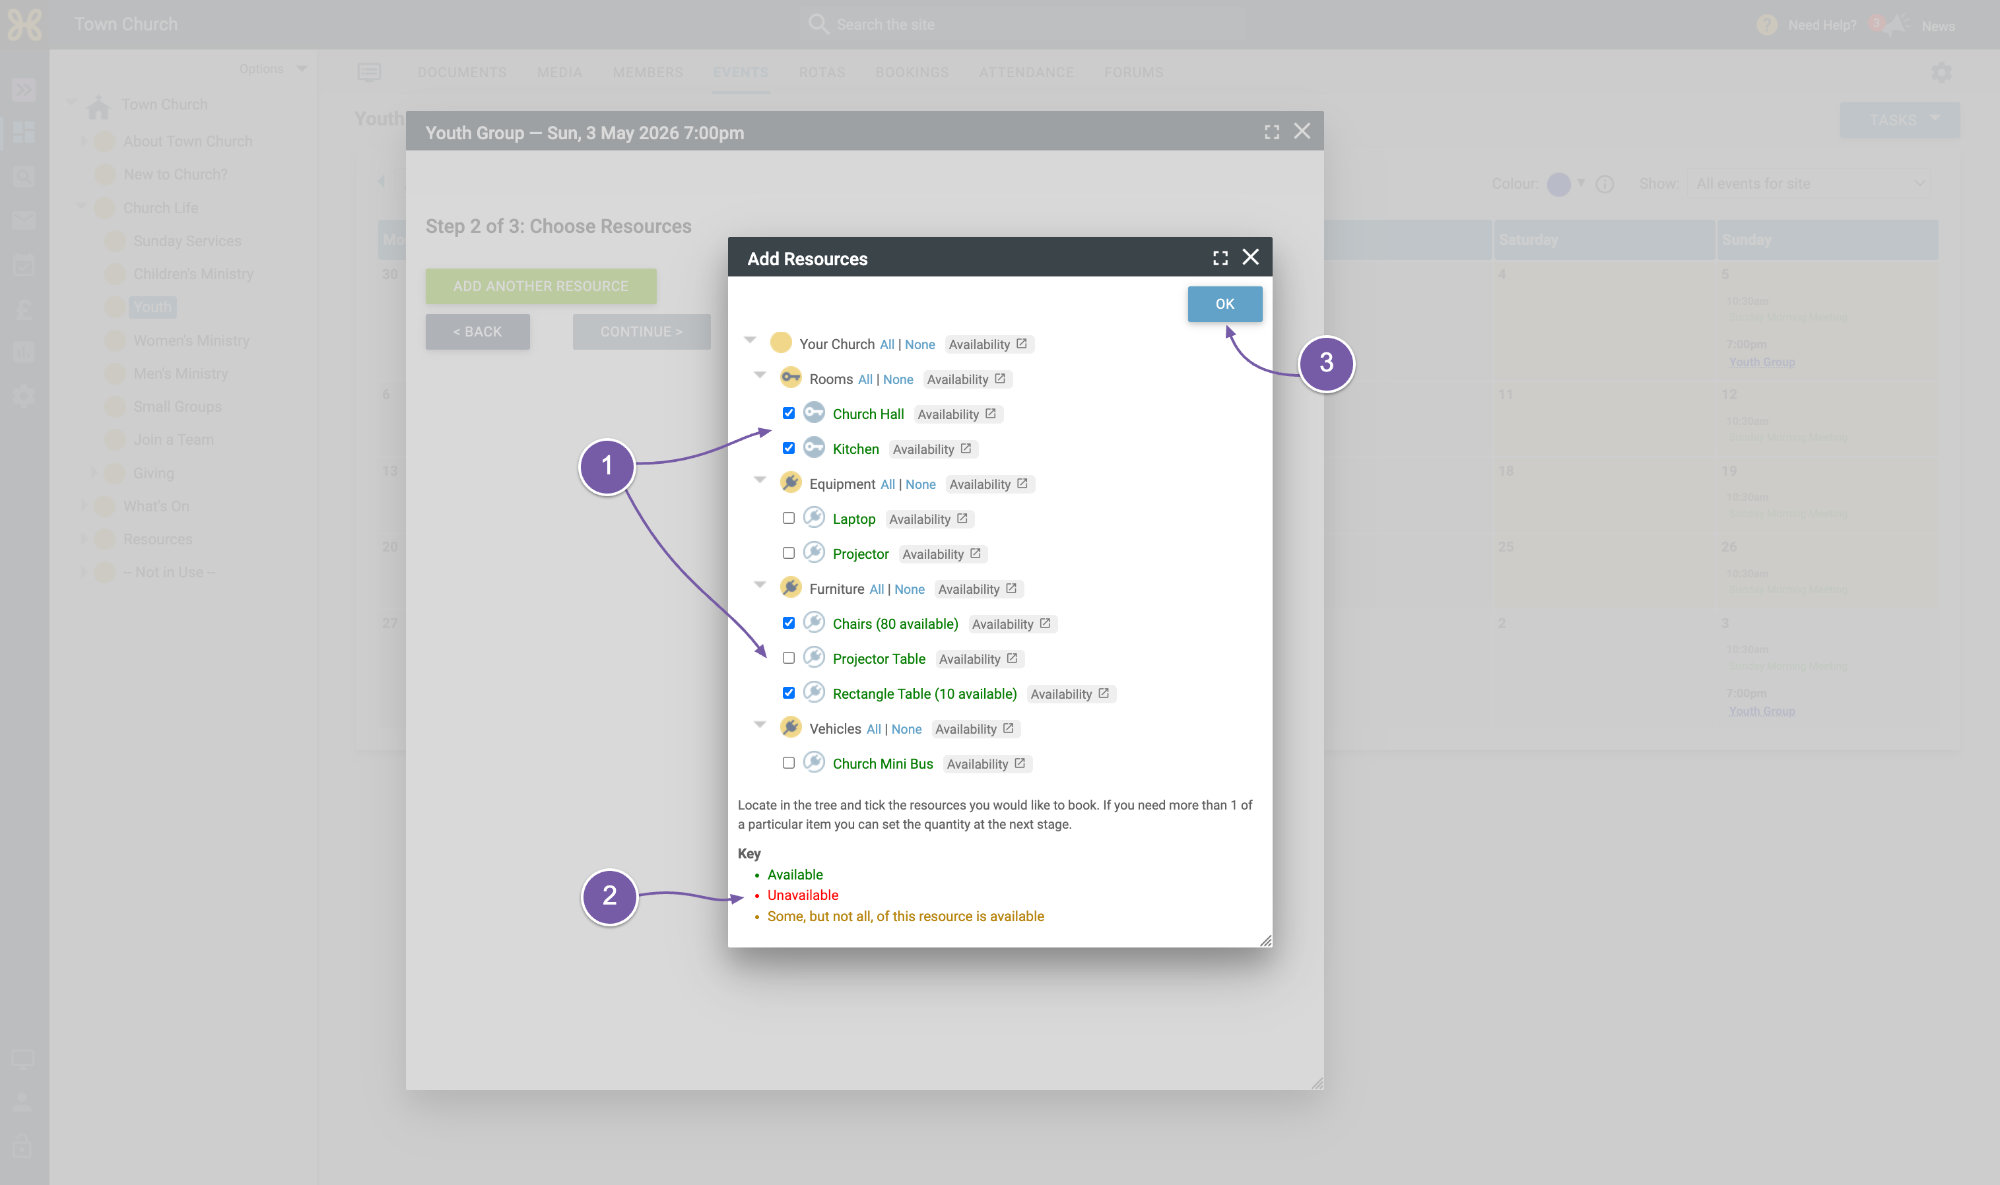
When you click on "Continue" you can start to pick the resources you would like to book.
-
Just browse through the folder structure and select your first resource. In this example we have chosen the “Kitchen" and "Hall” from the “Rooms” folder and “Chairs" and "Tables” from the “Furniture” folder.
-
At this stage, based on the time of the event, we show you the availability of each resource and you can see the key at the bottom.
-
Click “OK” when you have made your selection.
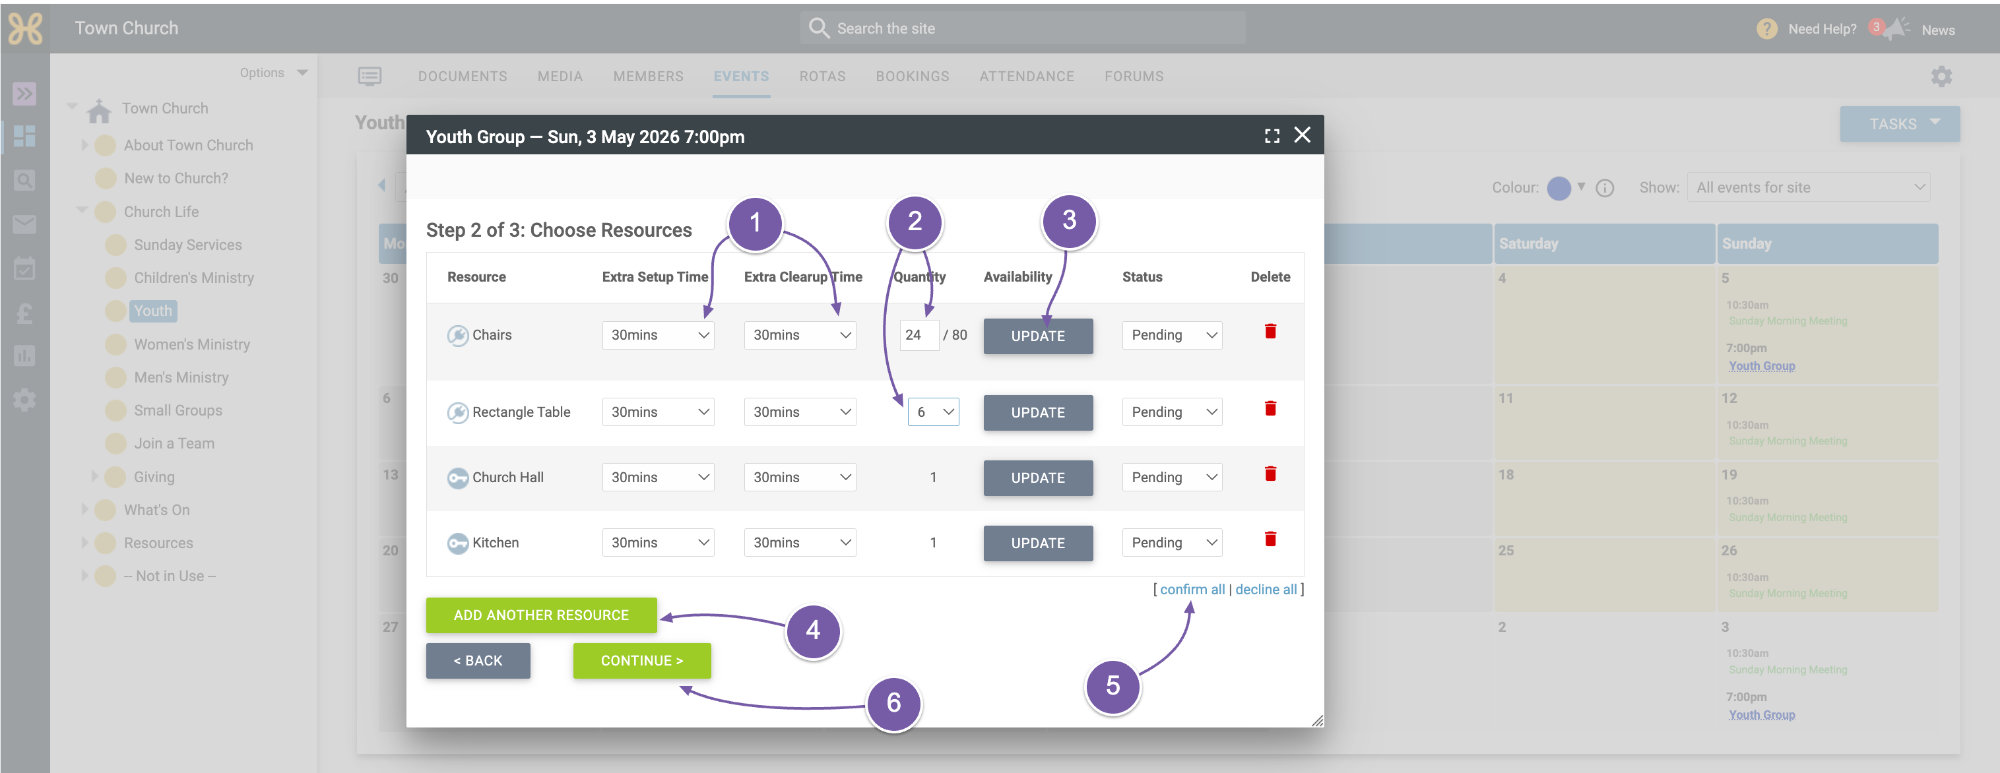
We now come to a screen where you can add some set-up and clear-up time to your resources and pick the quantity of what you would like to book.
-
If you add a set-up or clear-up time to the booking, it will mean that the resources you add these to will not be bookable by others. This can help ensure no bookings overlap and every booking has enough time to set-up and pack away. In this example we have added 30 minutes of set-up and clear-up time to every resource.
-
We've added 24 Chairs and 6 Tables.
-
We now need to re-check the availability of the resources. Clicking any of the “Update” buttons will update every resource's availability.
-
There are options to add other resources if you've forgotten any and we also display the related items.
-
When you have added all the resources and confirmed their availability, you can click to “Confirm All”
-
Then “Continue”.
-
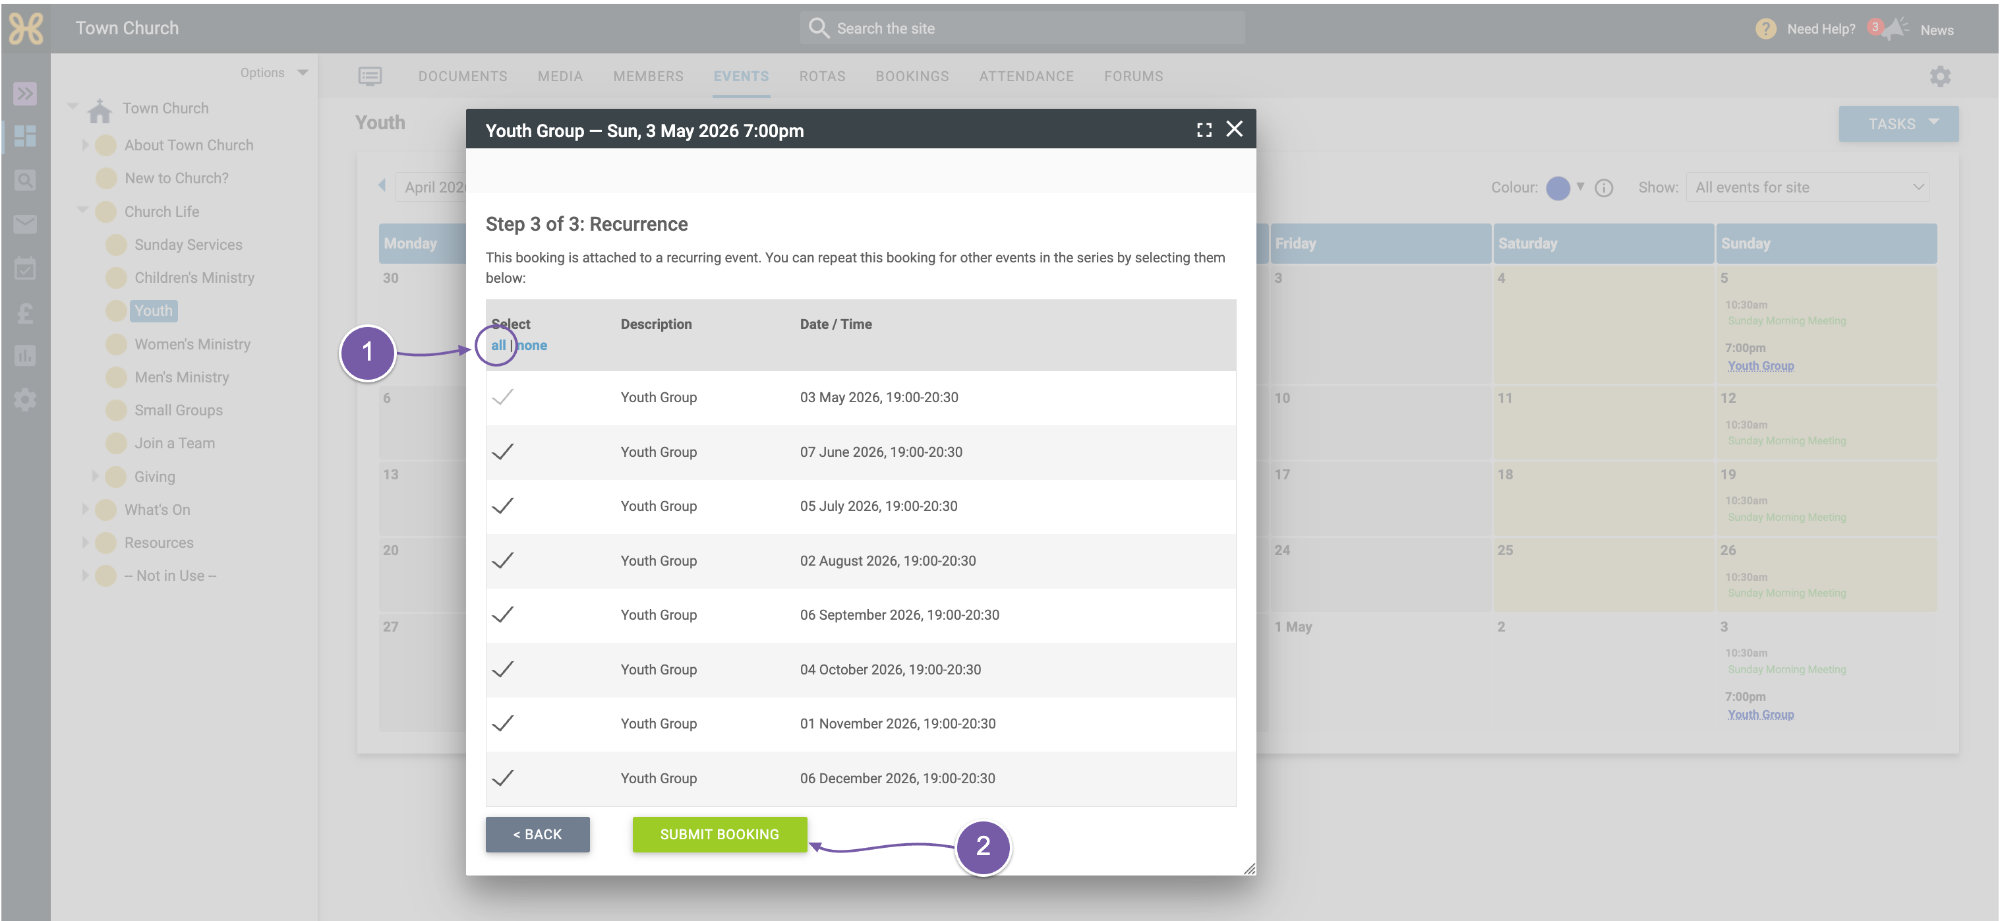
If the event is in a series, Hubb helps you by showing you all events in the series and offers you a quick “All” button so you can quickly and easily get your booking sorted for many months in advance.
-
You can now click “Submit Booking”.
-
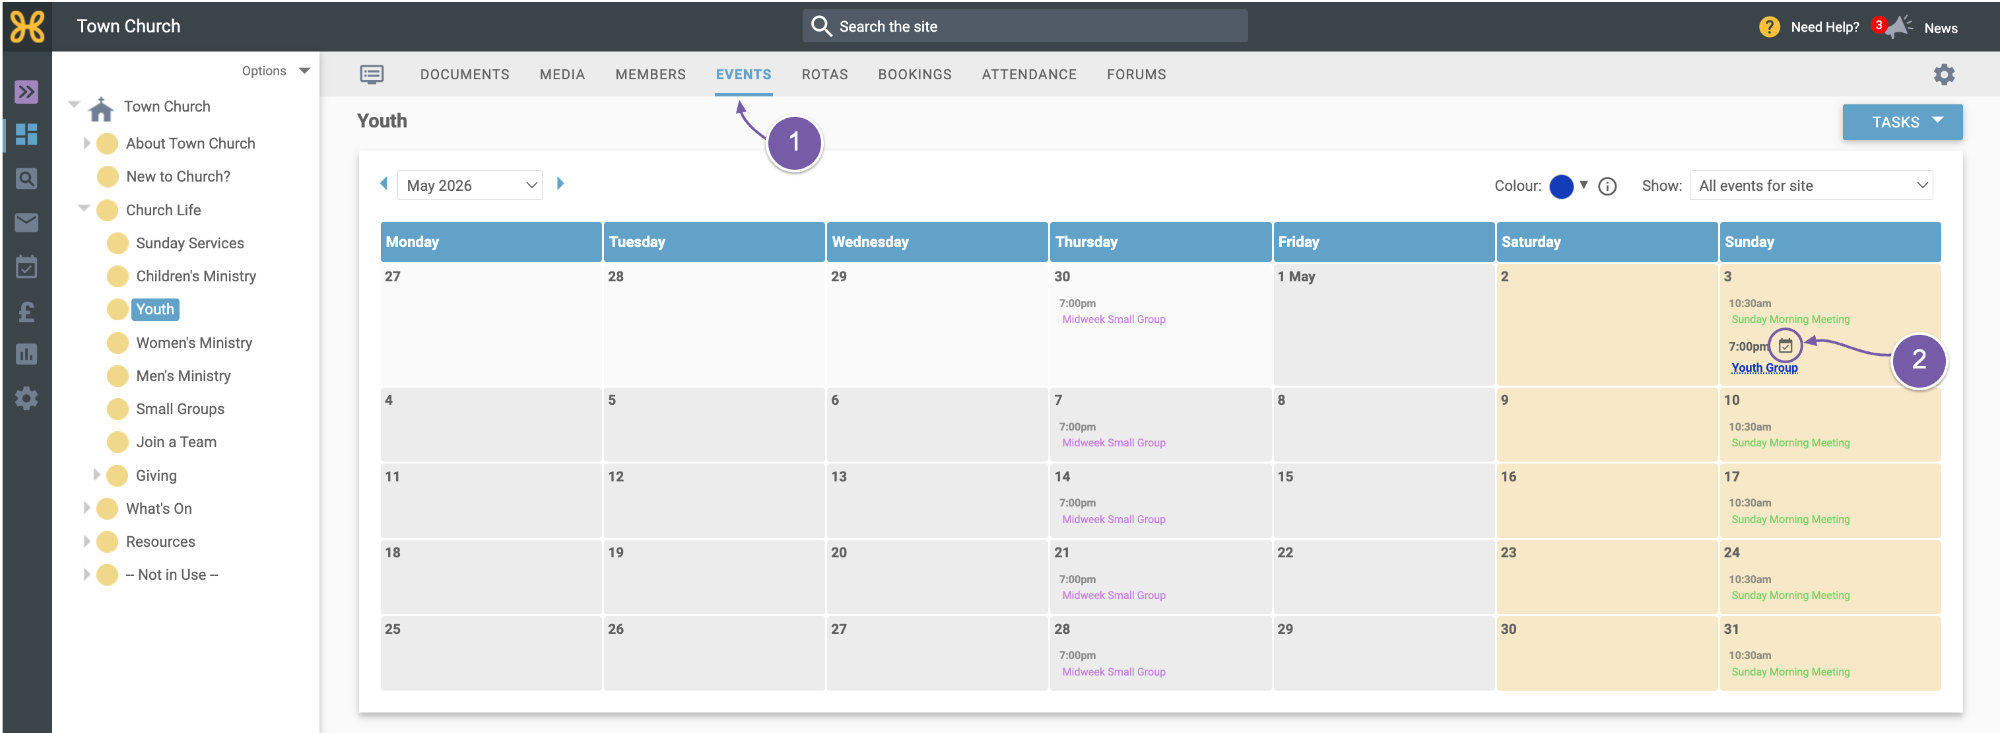
If you go back to the calendar,
-
you can see the booking icon next to your events.
-
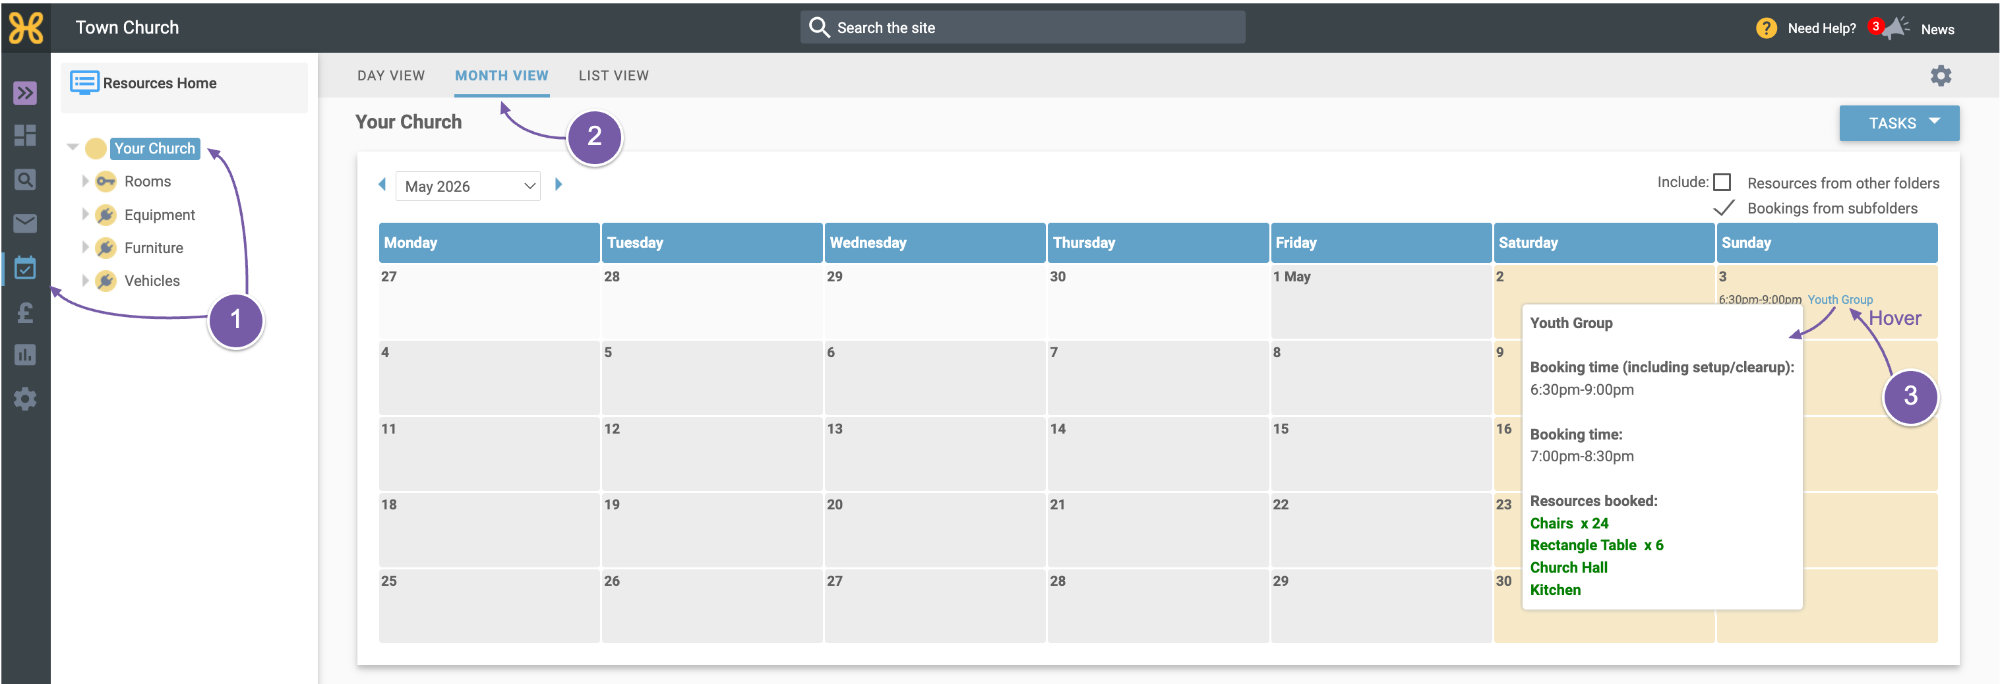
Lastly, let's go to the “Resources” area and see your bookings there.
-
A good view of bookings is our monthly view.
-
If you hover over the booking you've made, you can see what you've booked.
We hope this video and guide will help you power through getting all your church bookings into Hubb.