Adding folders and resources
(6 minutes)
In this video we help you to manage the folder structure of your resources and show you how to add a new resource.
Sorry, your browser is unable to play this type of file.
You can still
download it
For this guide we are using the demo site, The Town Church to show you how to set the folder structure of your resources.
-
To do this, you need to be in the resources area - and here you can see the current structure.
-
Resource folders help organise similar resources. There are two types of folders in the resources area: Venues and Items. Folders are important because when you go to make a booking, you can quickly speed up your booking creation by adding all resources from a folder.
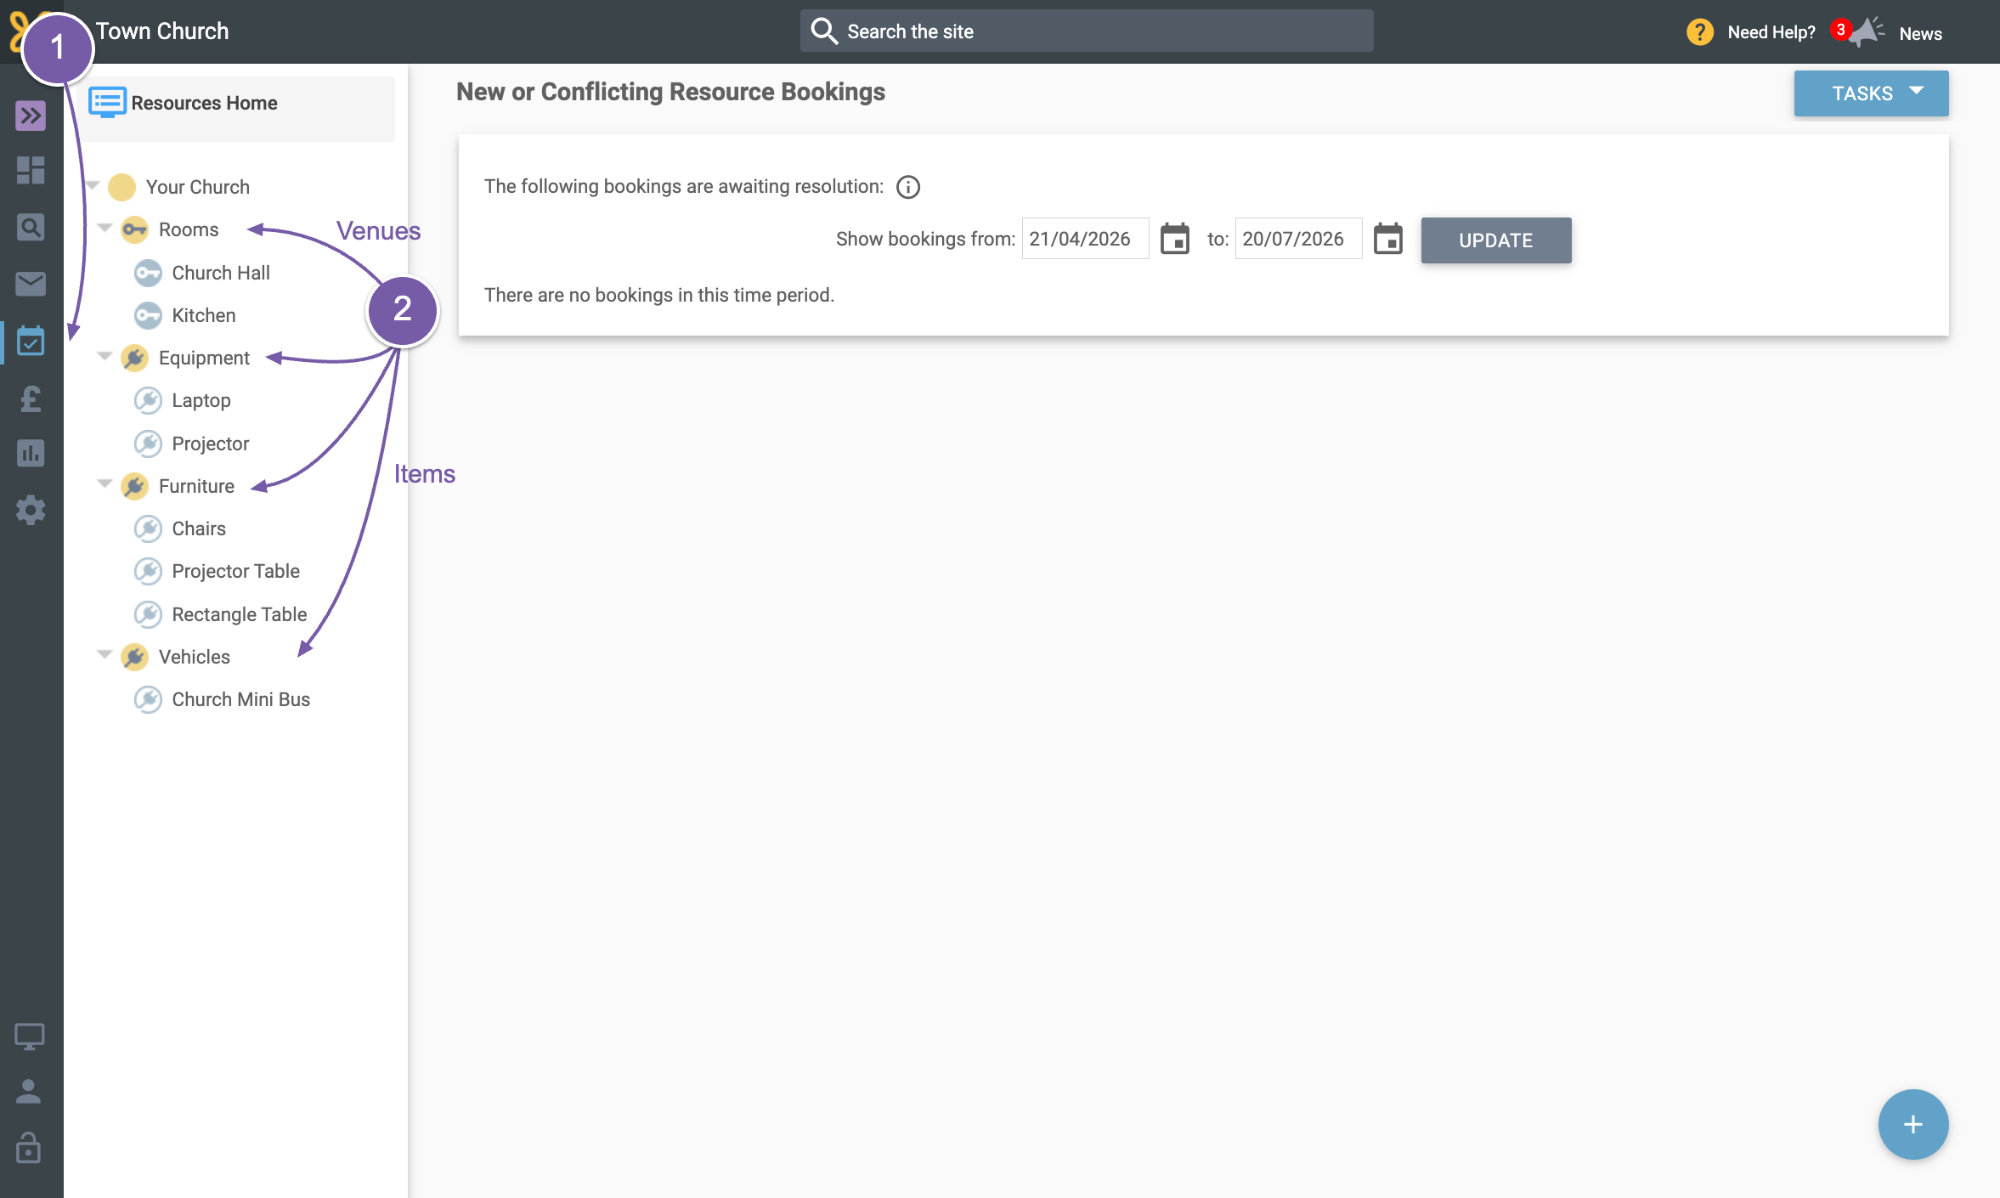
-
When you have some folders created,
-
Go to the folder settings
-
Click on "Tasks" to add a subfolder, delete, move or change the display order of the folders.
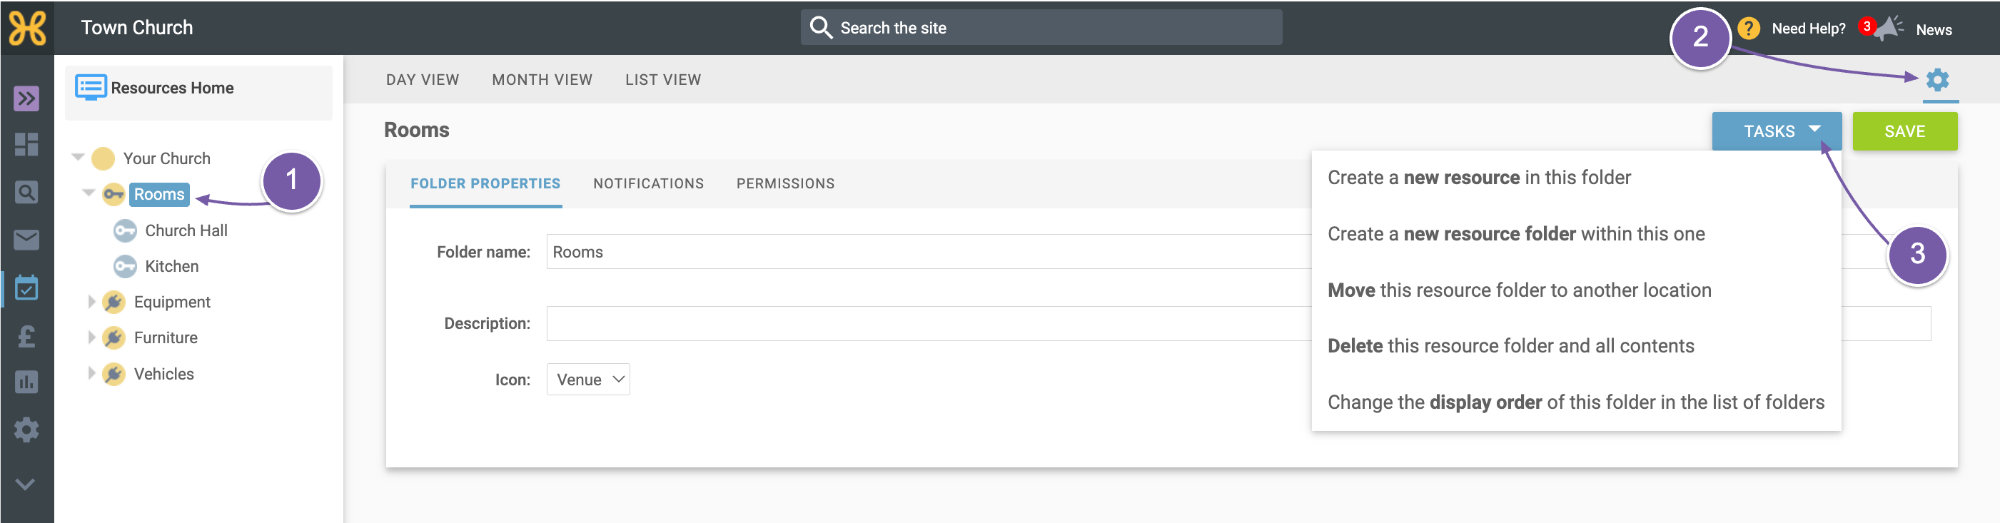
Let's quickly go and add a subfolder to the rooms folder.
-
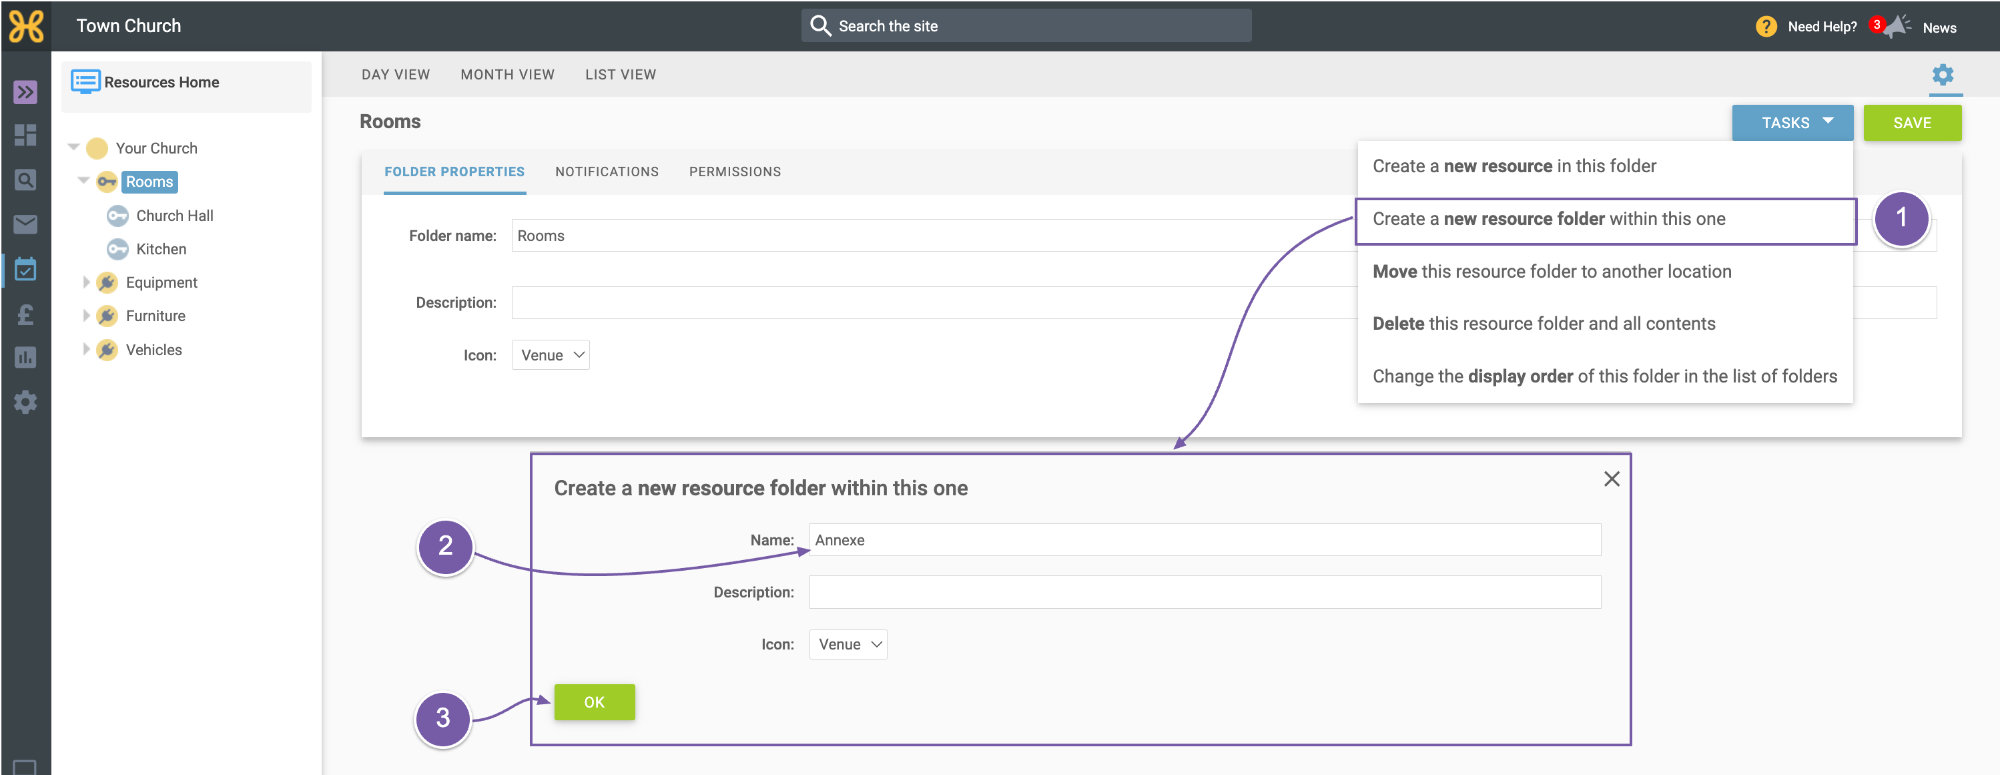
Go to the folder settings and use the tasks to "create a new resource folder within this one".
-
We'll give this folder the title “Annexe”, leave the description blank and type as a "venue"
-
Click “OK”.
-
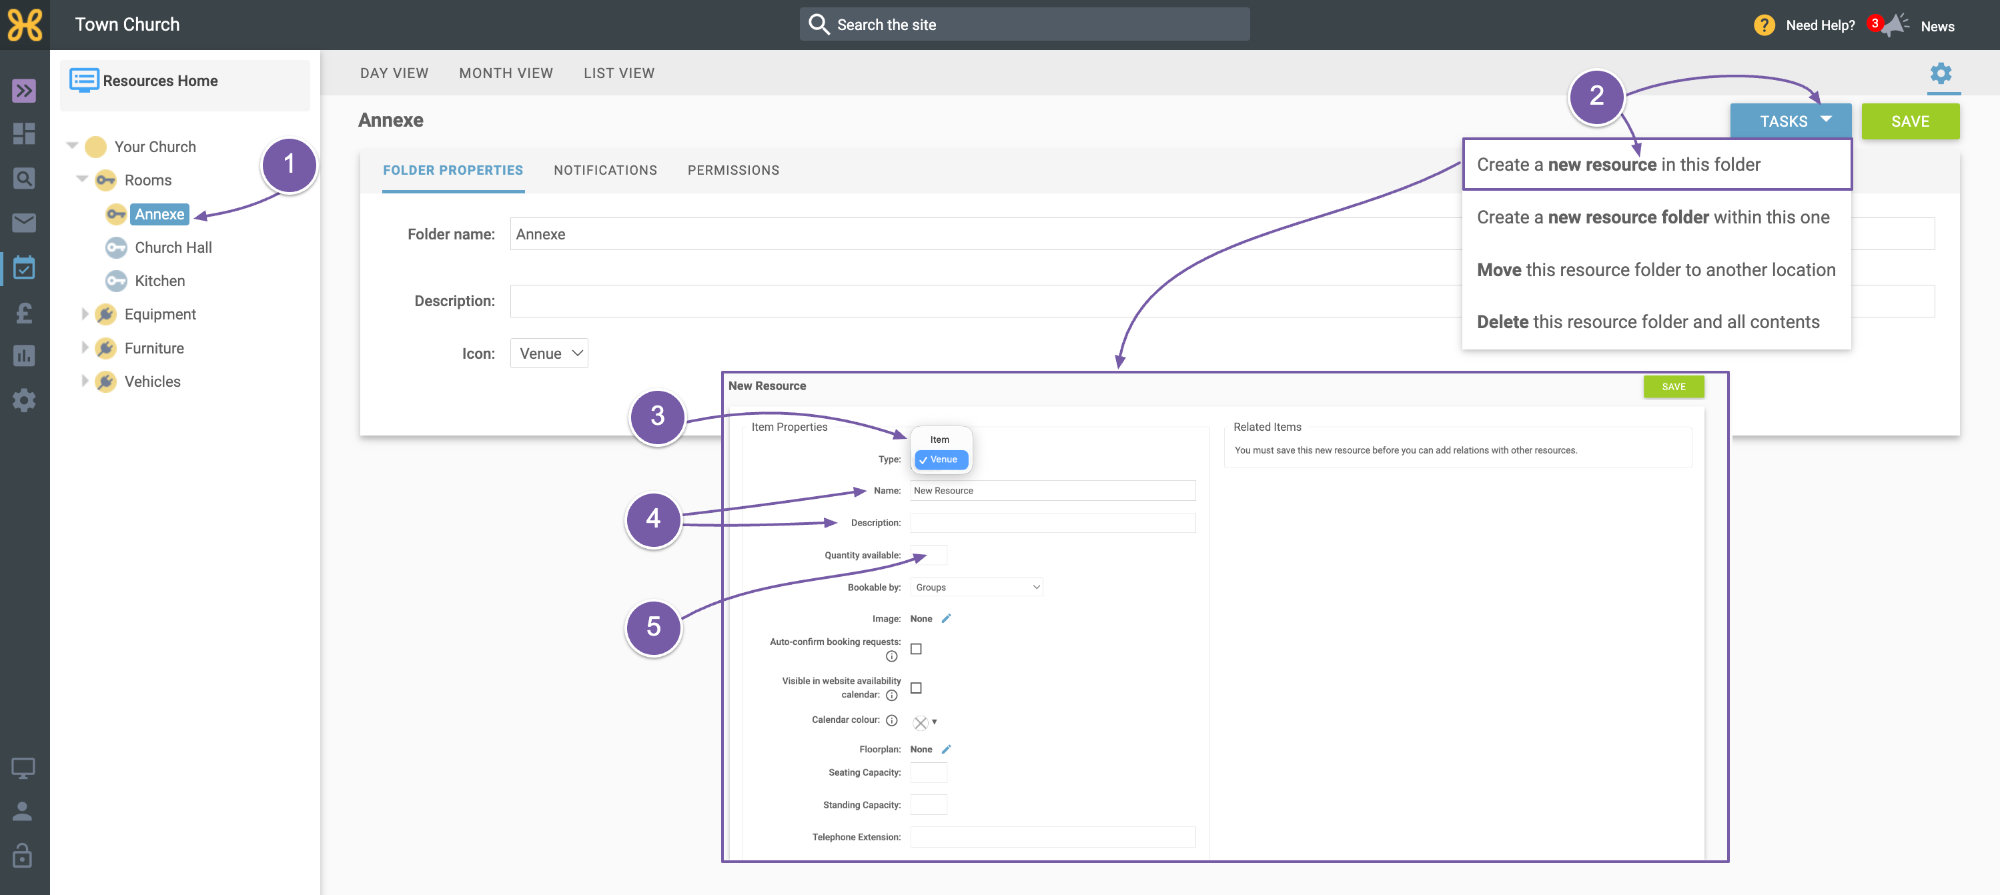
You can see that the new folder is shown on the left. As we have just created the folder, we are helpfully in the folder settings already.
-
To add resources, use the task to "create resources in this folder".
-
You can add a venue or item and depending on which you choose, the properties you can fill in will change to be specific to that type of resource.
-
Let's add a venue to this folder by setting the type at the top of the page, give the resource a name and if needed you can also add a description.
-
Set the quantity,
-
Then set who you would like to let book. If you set it to "nobody", the resource is not available for booking. You may wish to use this setting if the resource is unusable for any reason.
-
"Bookings Managers Only": This means the resource can only be booked from the “Resources” area of the web office. The Bookings Manager can set the booking status to Confirmed when they are making the booking.
-
"Groups": Any group may request a booking for this resource from the “Bookings” tab in the Site Manager area of the web office. This would be used if you want the “Youth Leader” to book resources for the youth group but you don't want them to access or manage other bookings or other groups or external bookings the church makes.
-
"Groups and My Bookings": This allows groups and any logged in member of the website to make a booking request. You don't have to let church members request bookings, but it may be useful - for example, members could request a booking for their child's birthday party.
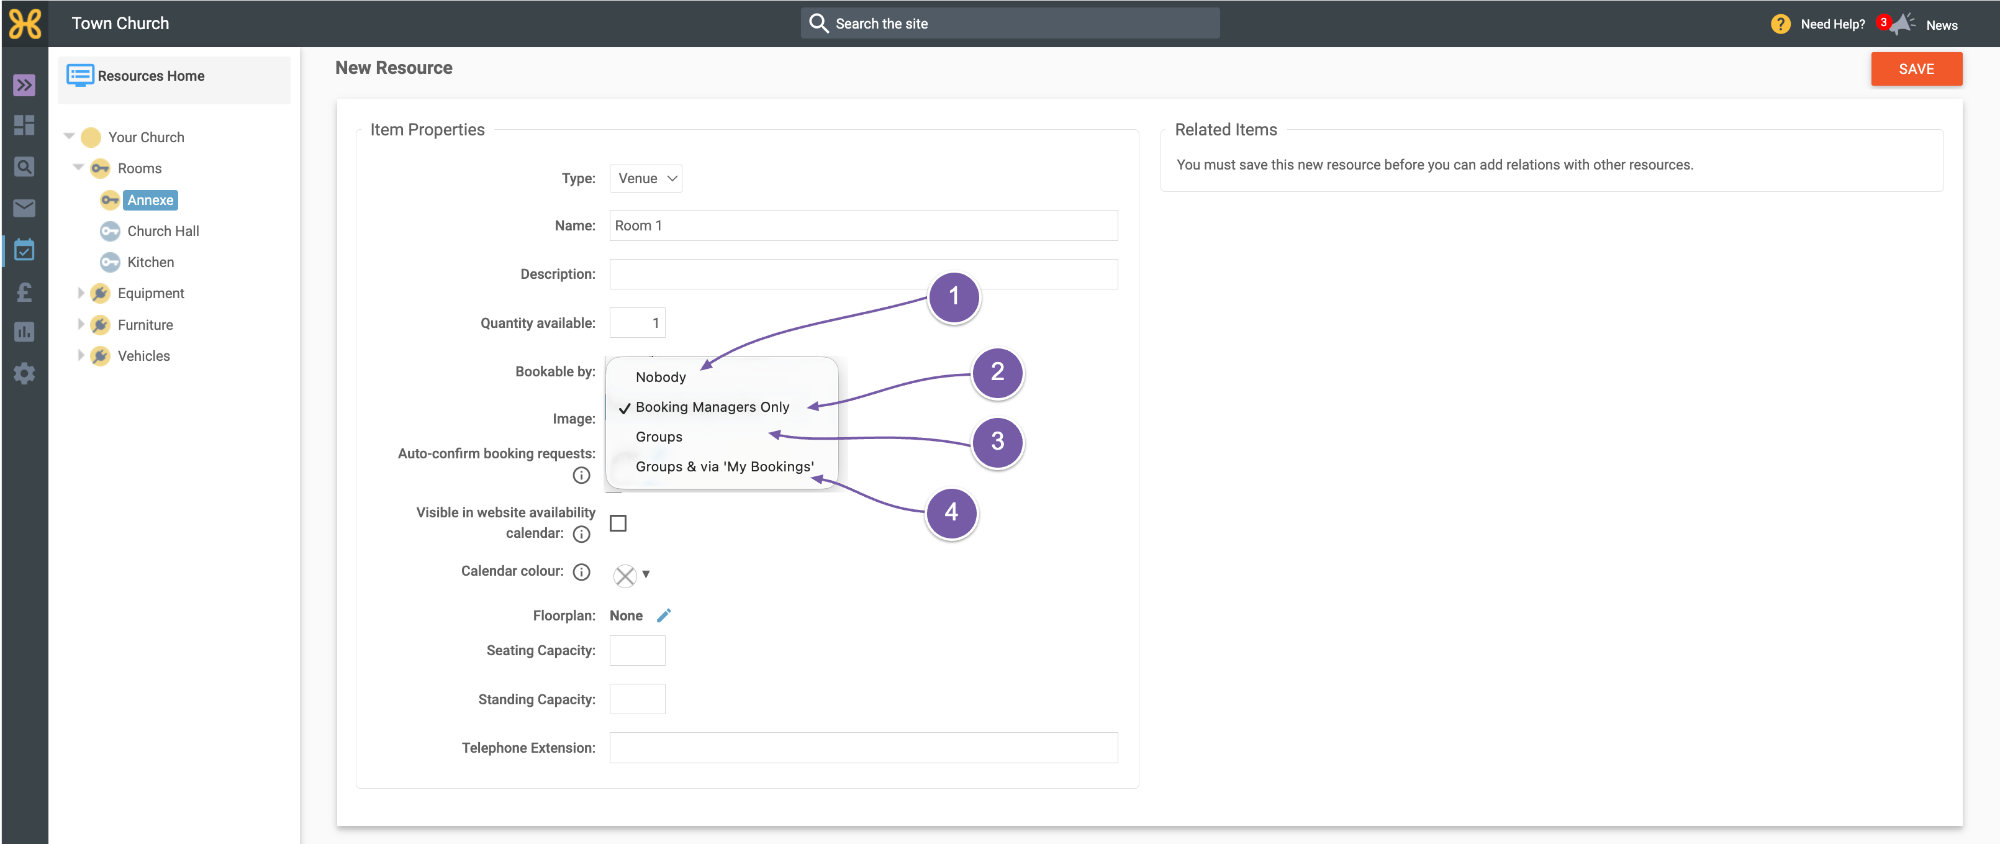
Groups and Personal Booking Requests have the status set to "Pending" and will be shown on the "Resources" homepage for Booking Managers to sort. Booking Managers can also receive email notifications of booking requests.
-
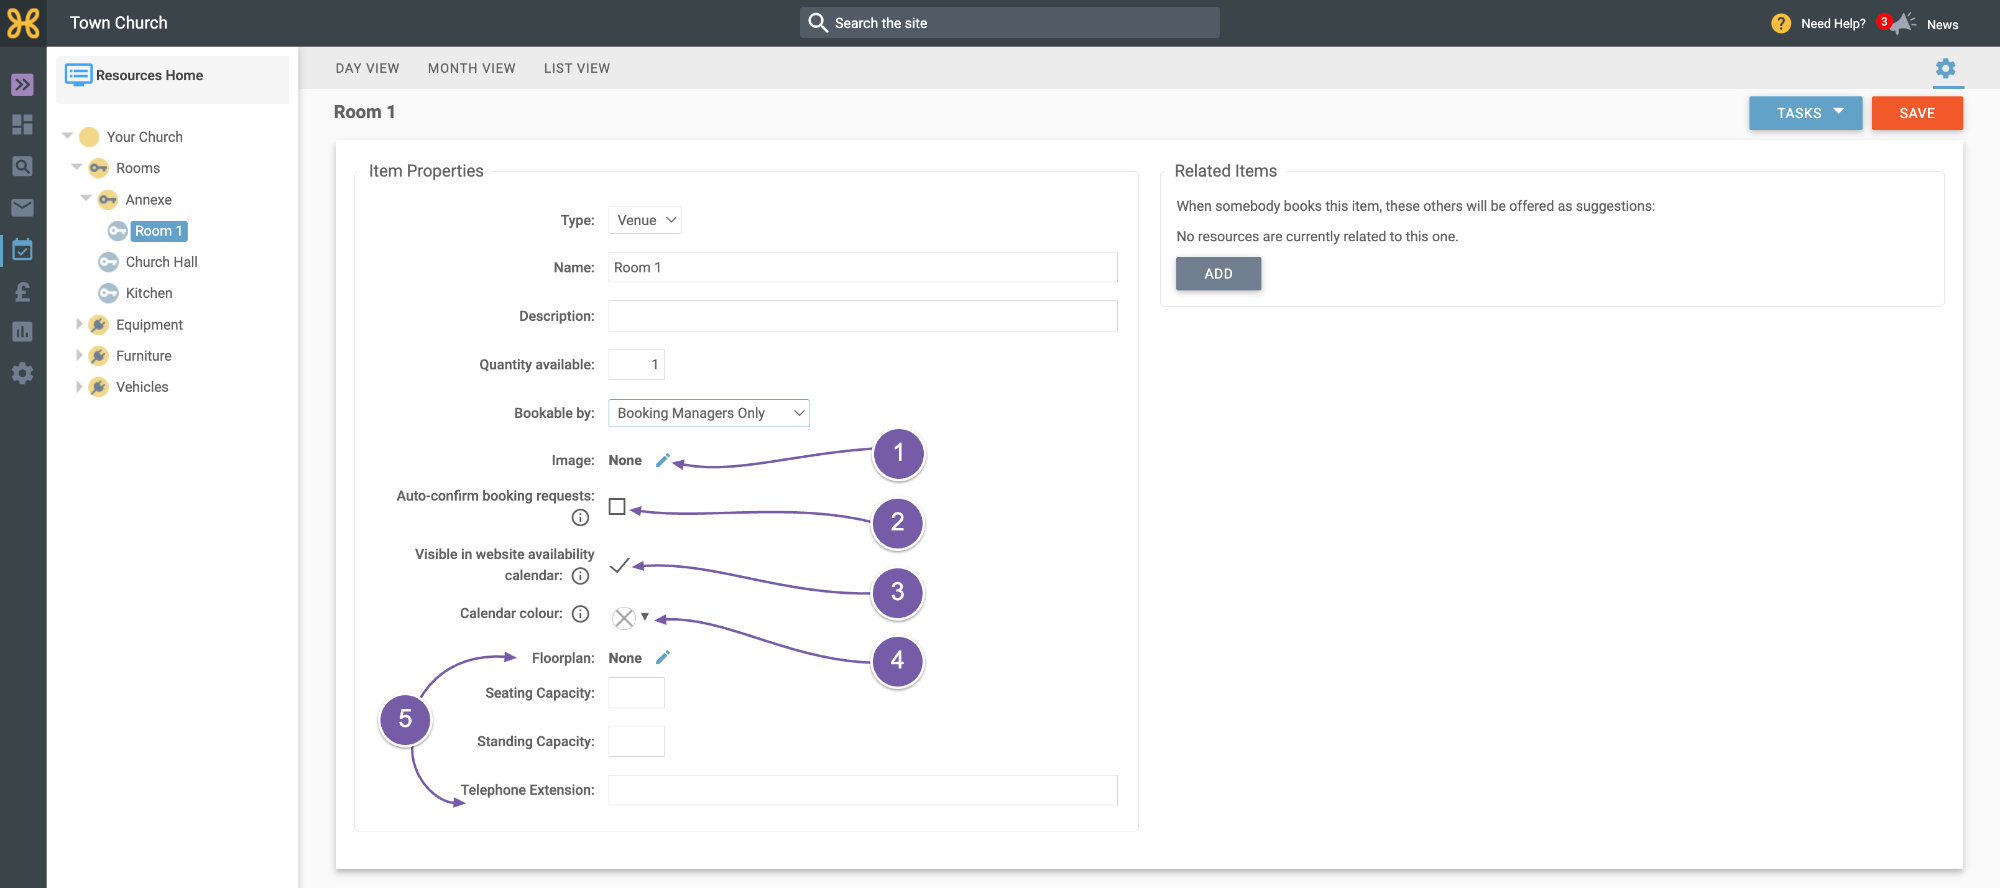
If you want to add an image of the resource, you can.
-
If “Auto-Confirm” is enabled, new booking requests will automatically be confirmed whenever they do not conflict with other bookings.
-
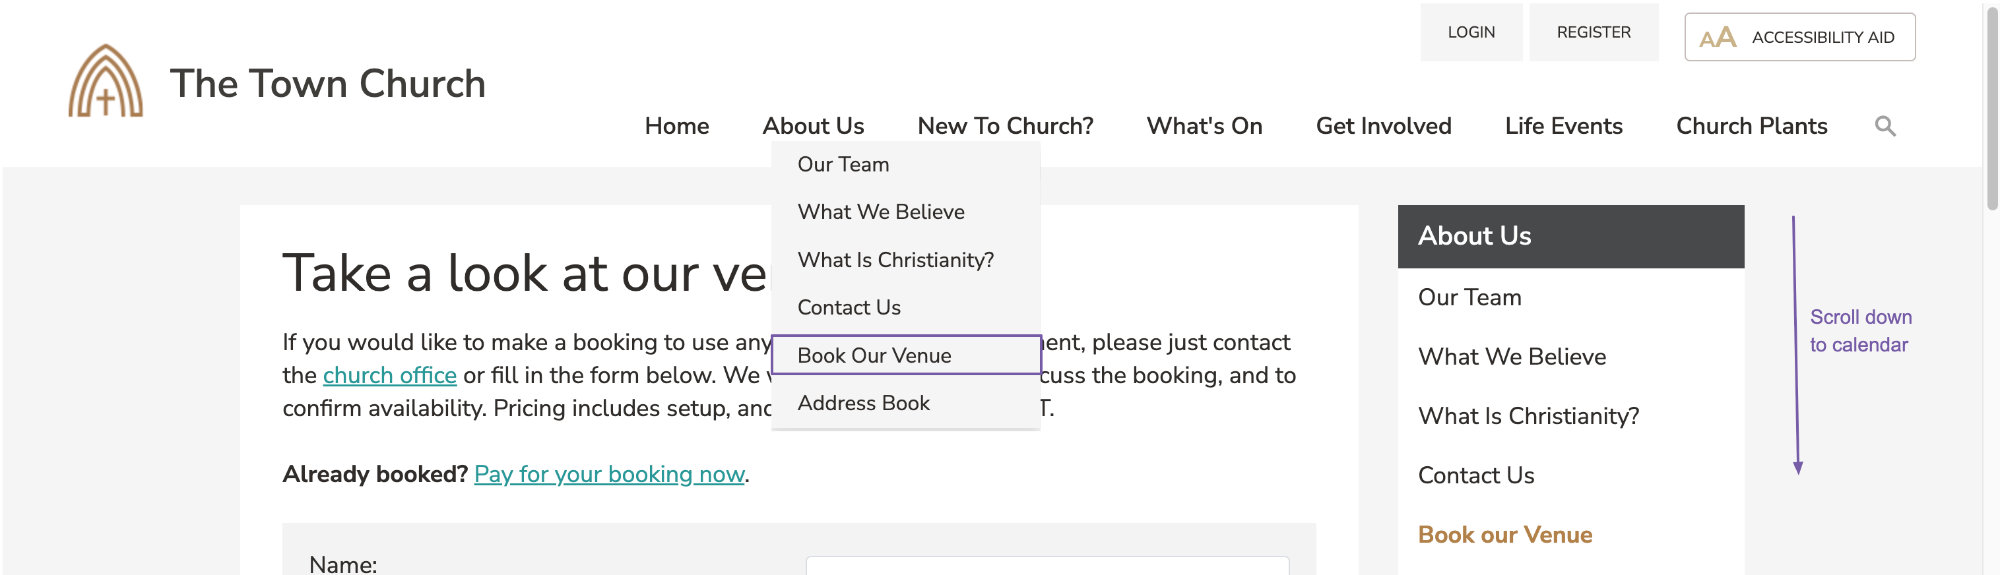
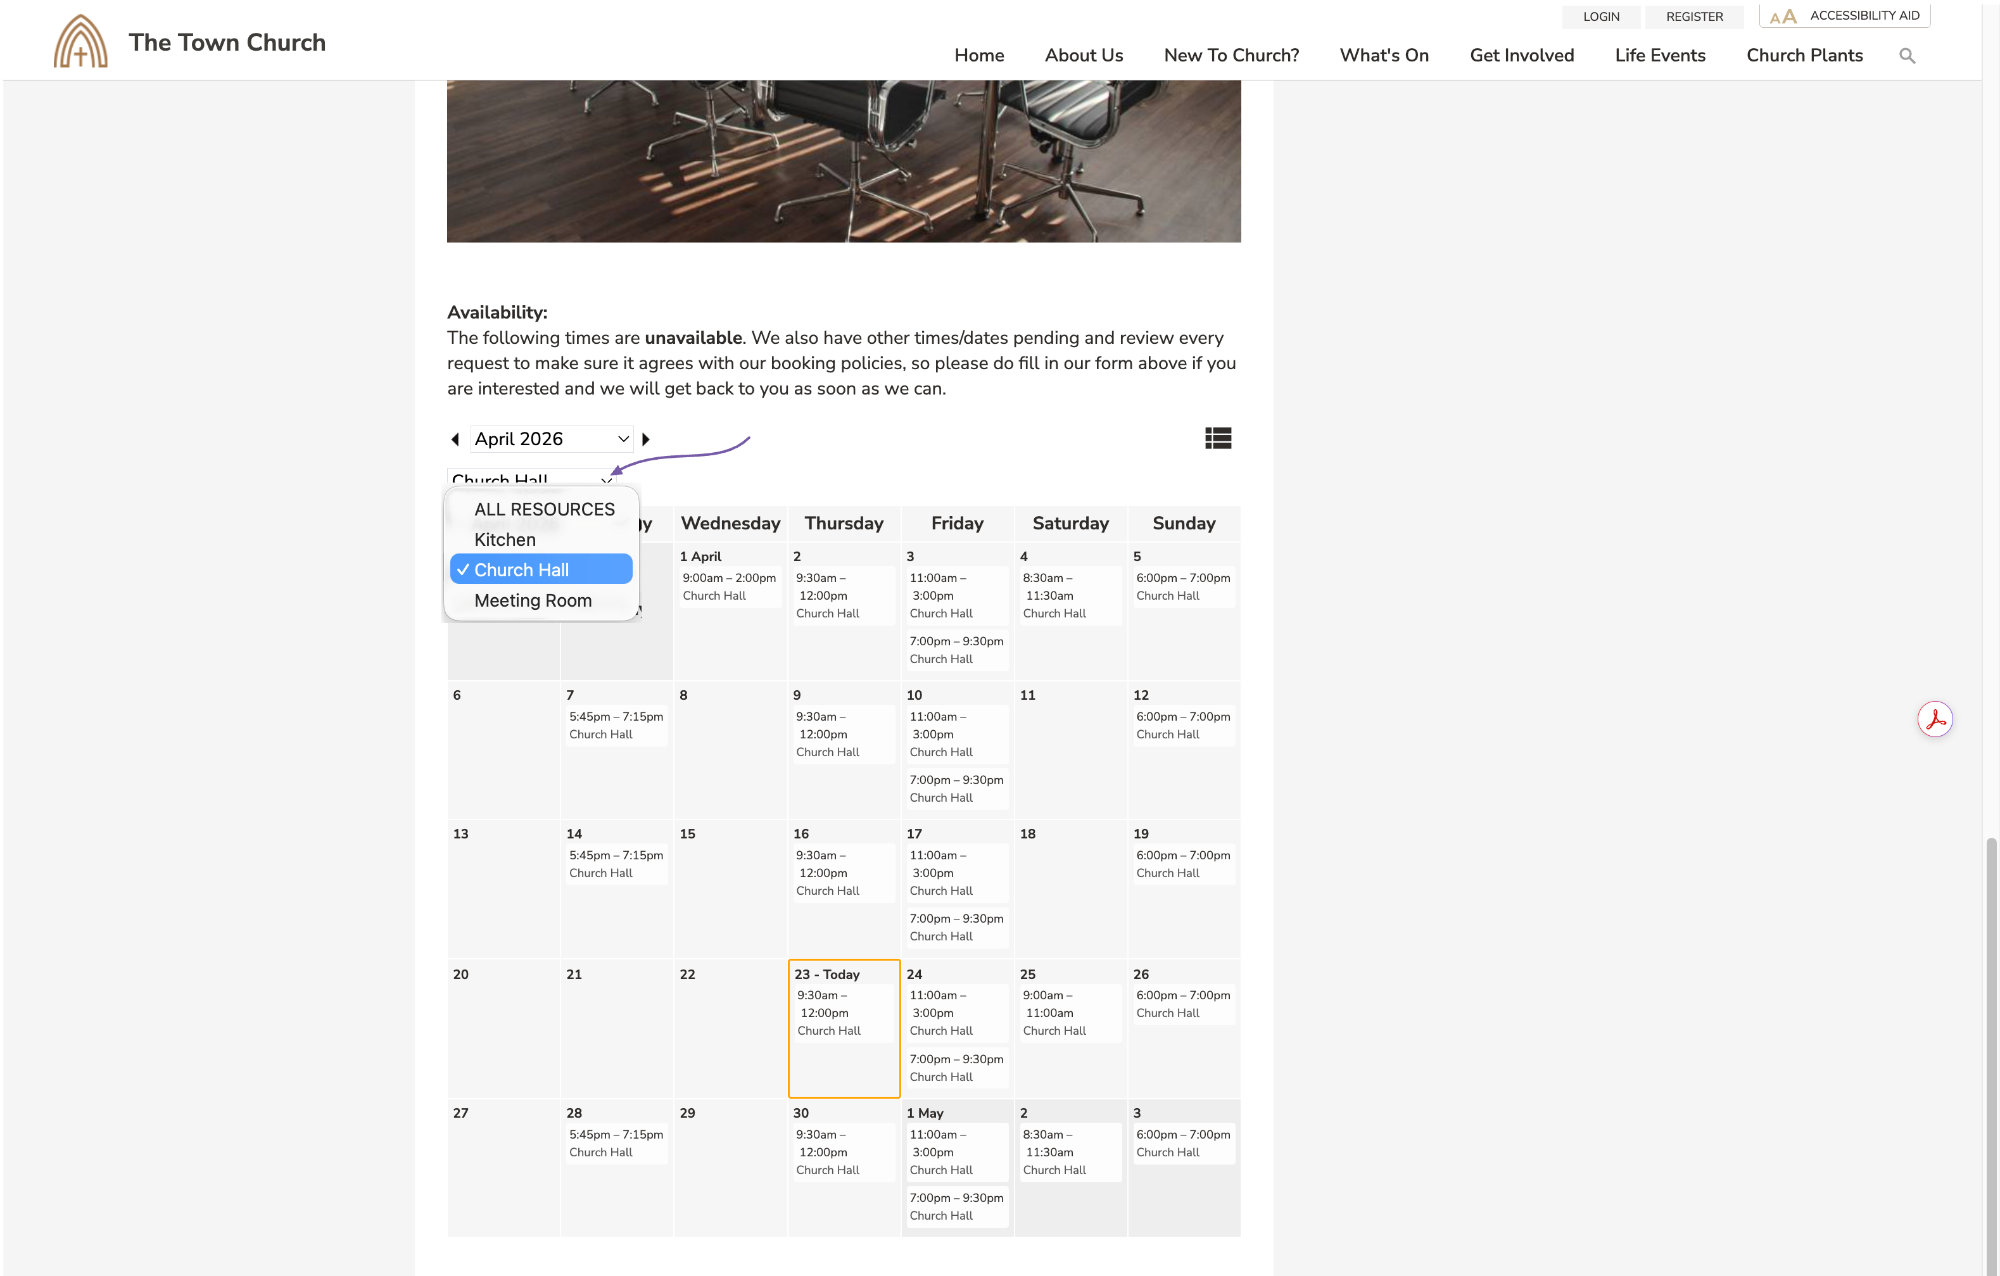
The next option lets you set if you would like to show the availability of the resource in the resources calendar you can place on a page of your website. If we quickly look at my demo site and go to the “Book Our Venue” page in the “About Us” menu, we can scroll down and see it in action. In the example below*, I am choosing only to show the availability of rooms and not every single resource.
-
Back in the web office, you can set the colour of the resource that will be shown in the resources calendar.
-
There are some options you can fill in for reference about your resource to help your team if needed.
 * View on the demo site showing the availability of resources
:
-
If you go up to the top of the page and change the type to "Item"
-
You can see that some of these options at the bottom change to be more specific to items rather than rooms.
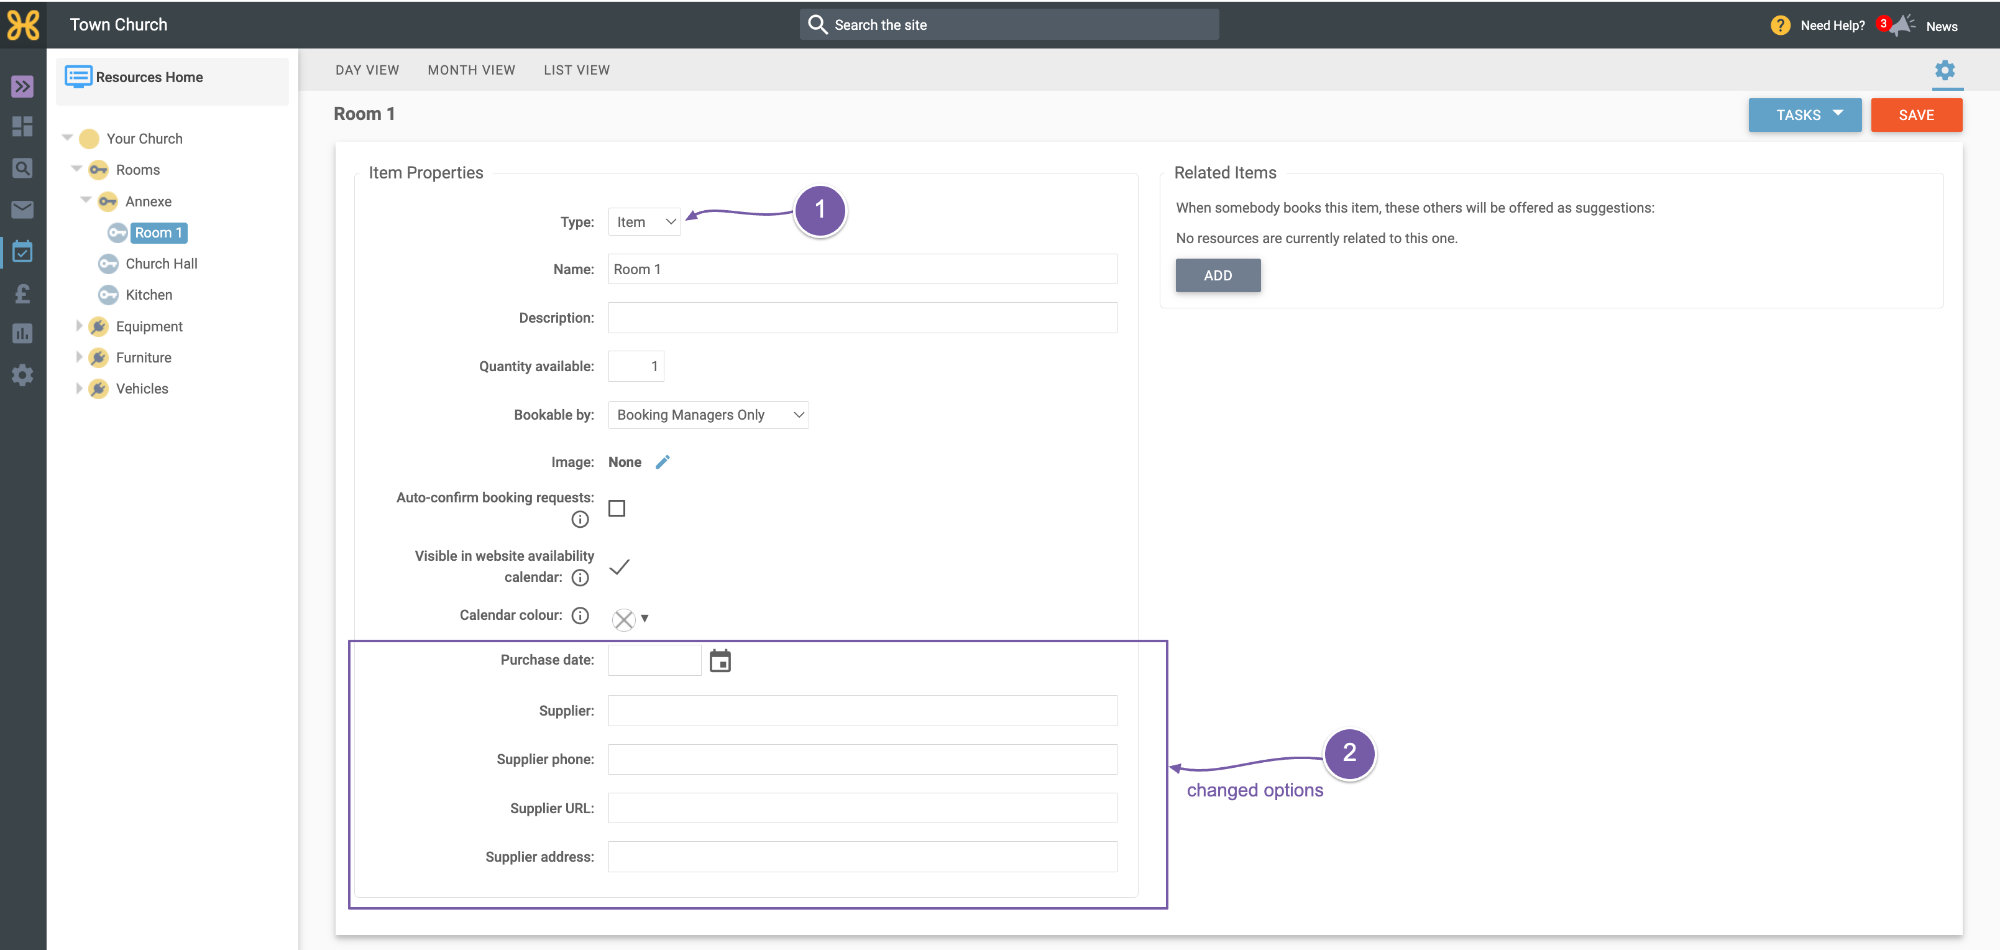
When finished, you can save the new resource and then add related items.
-
To do this, click “Add” and find the resources you would like.
-
Tick the box of any resource
-
Then click “OK” and that will be auto-saved.
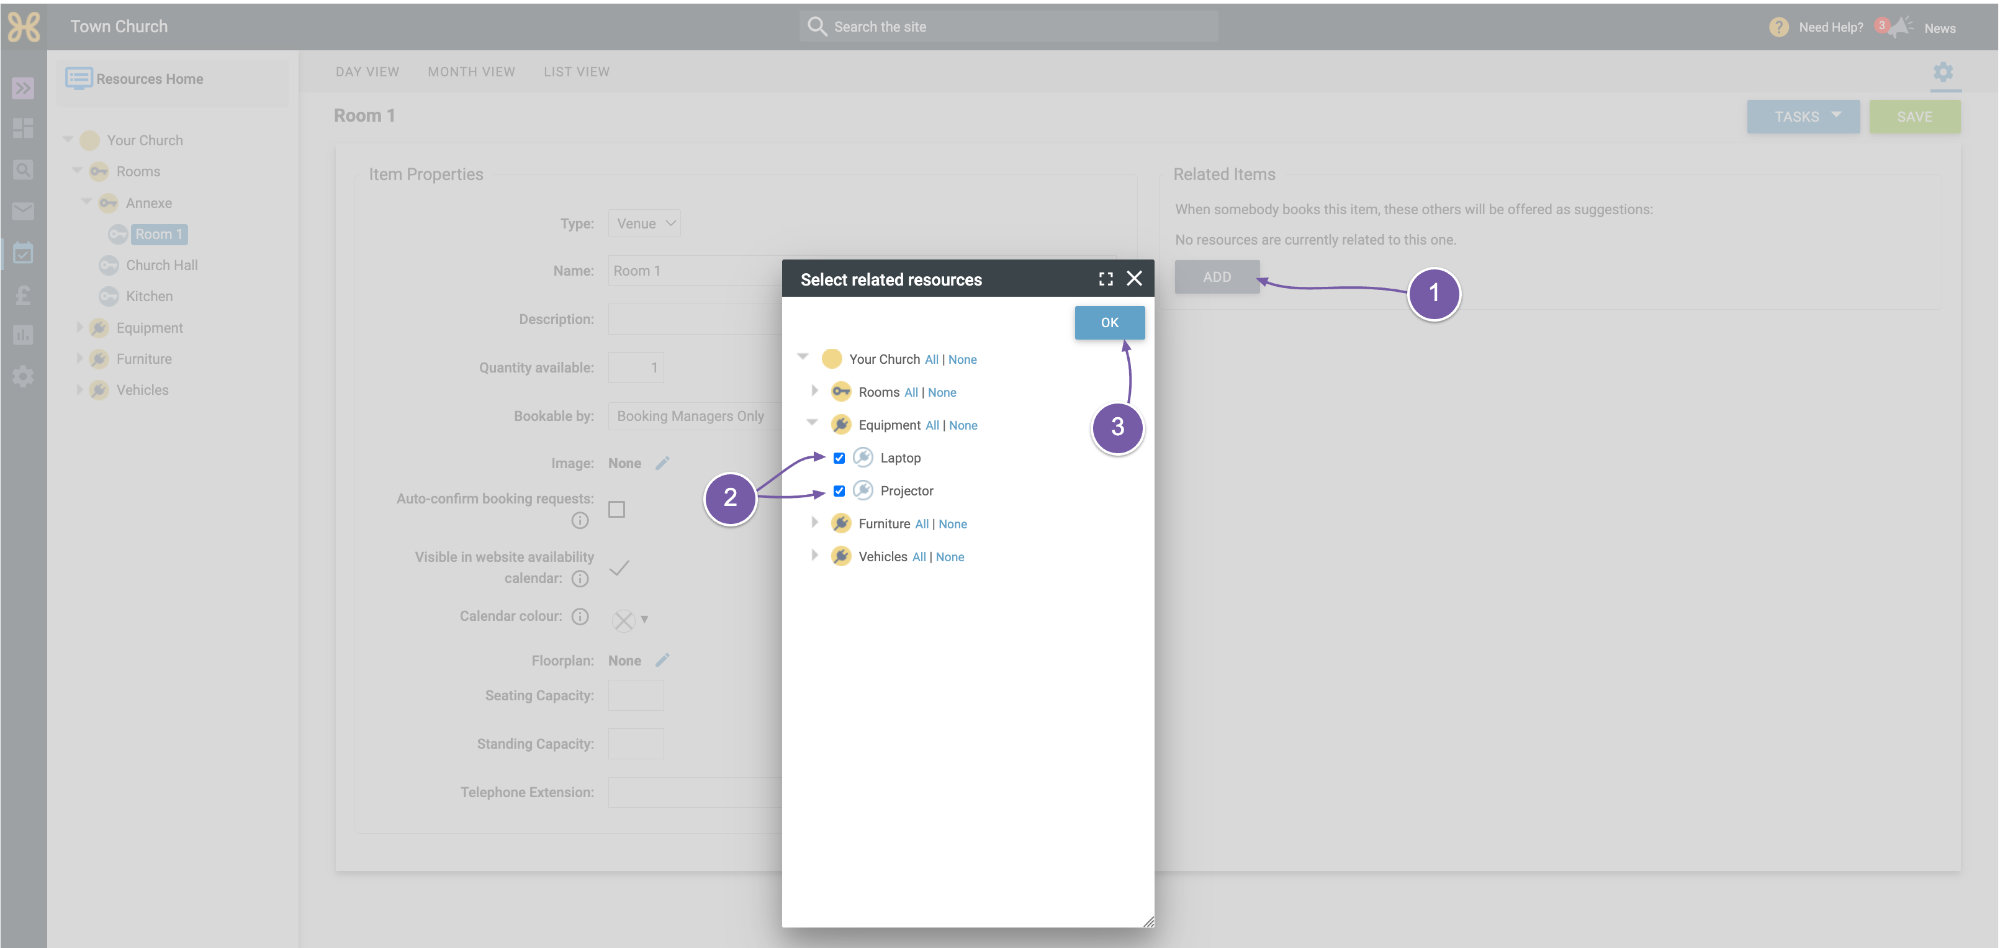
Related items are useful because these related items are shown to people when they book this resource to help speed up the booking process.
So that's how to manage your resources folders and add your resources.