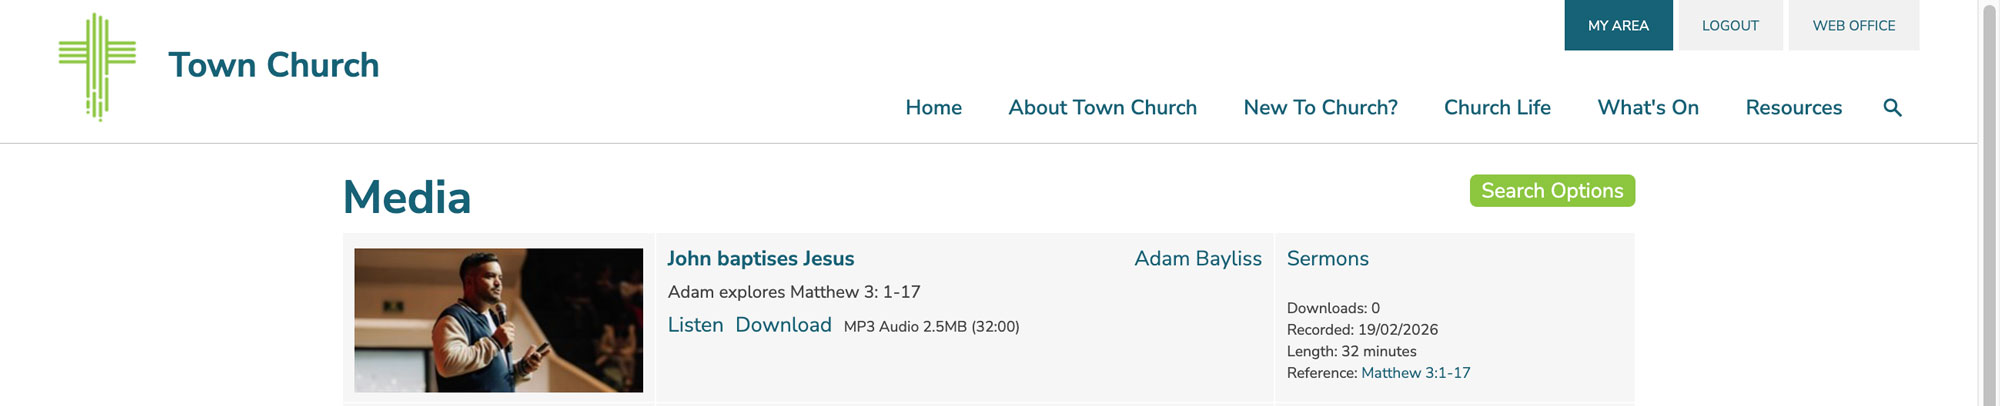
Uploading your first sermon series
(5 minutes)
Start adding recent sermons to your site by uploading your audio, video or documents to your site.
Sorry, your browser is unable to play this type of file.
You can still
download it
Adding a sermon to your website is very simple. In this guide we will show you how to upload your first sermon with just an audio file and get it published on your website.
-
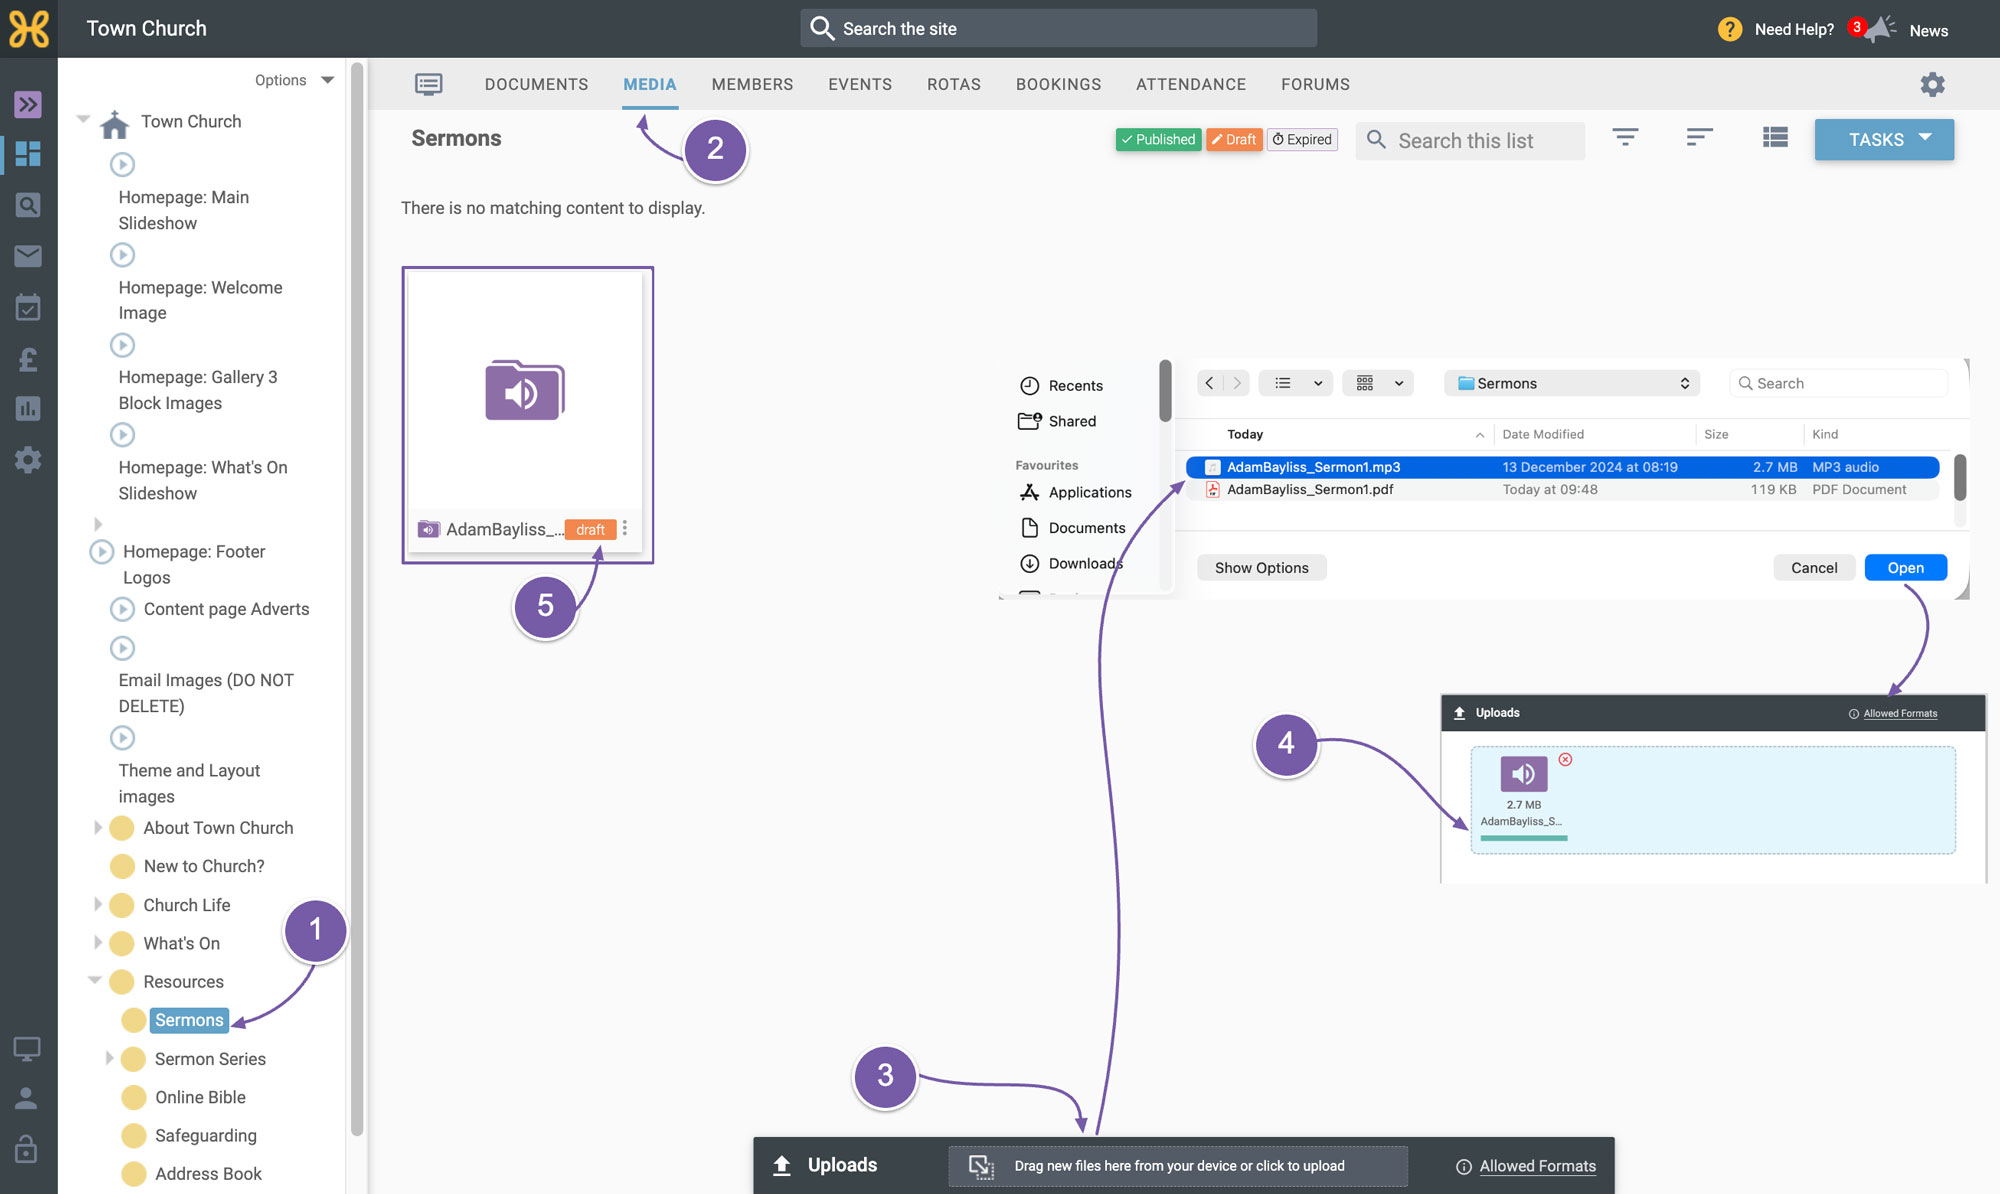
In the web office go to the group where you will store your sermons
-
Go to its “Media” tab.
-
Click on the “Upload” area and find the file from your computer.
-
You will see the upload progress of your file.
-
When it's finished uploading you will see it at the top left of the files area with the draft tag showing. We leave the recording in draft because we need to go in and edit a few settings before publishing to the website.
We use the term “Recording” and this is because in Hubb a sermon can be uploaded in many formats, audio, video for example, and may contain sermon notes in a PDF or Word file. We refer to this group of media items as "recordings". Many churches just have one file in a recording but you can have more, so that's why we use the term “Recording” in the web office as opposed to talking about individual files.
-
Click on the recording created from the one audio file that was uploaded.
-
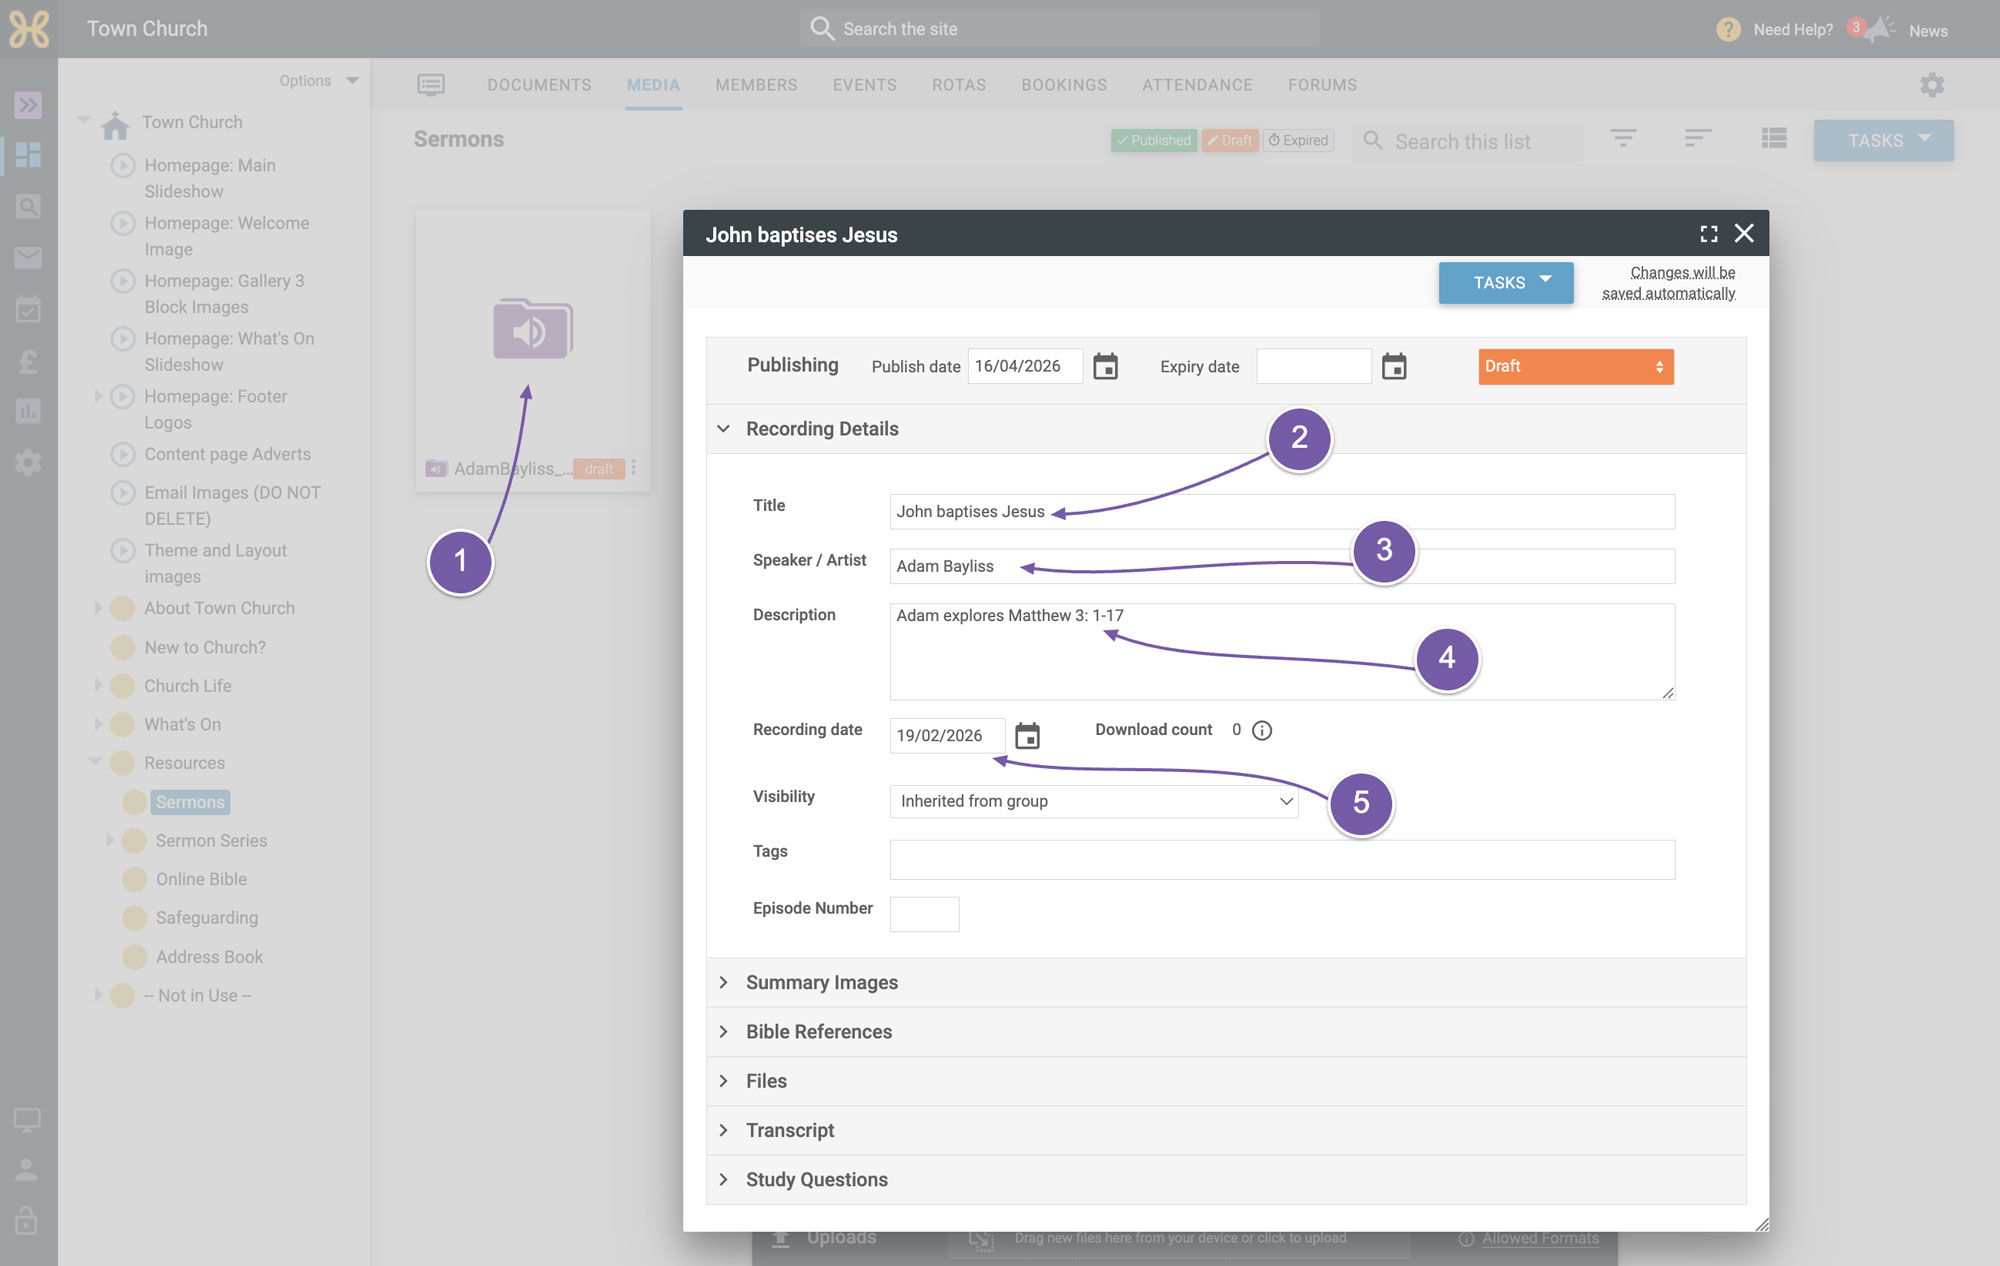
The first thing to do is write a nice title which will be displayed on the site - so it should be written nicely like “The sermon on the mount”, for example and not contain file extensions. The properties on our media area use our autosave feature so as soon as you change a field and move away from it, it will save the changes for you.
-
Next is the speaker. Type the name of the person who gave the sermon.
-
If you like you can also write a description of the sermon.
-
Next, add the date the sermon was preached.
That completes the recording section.
-
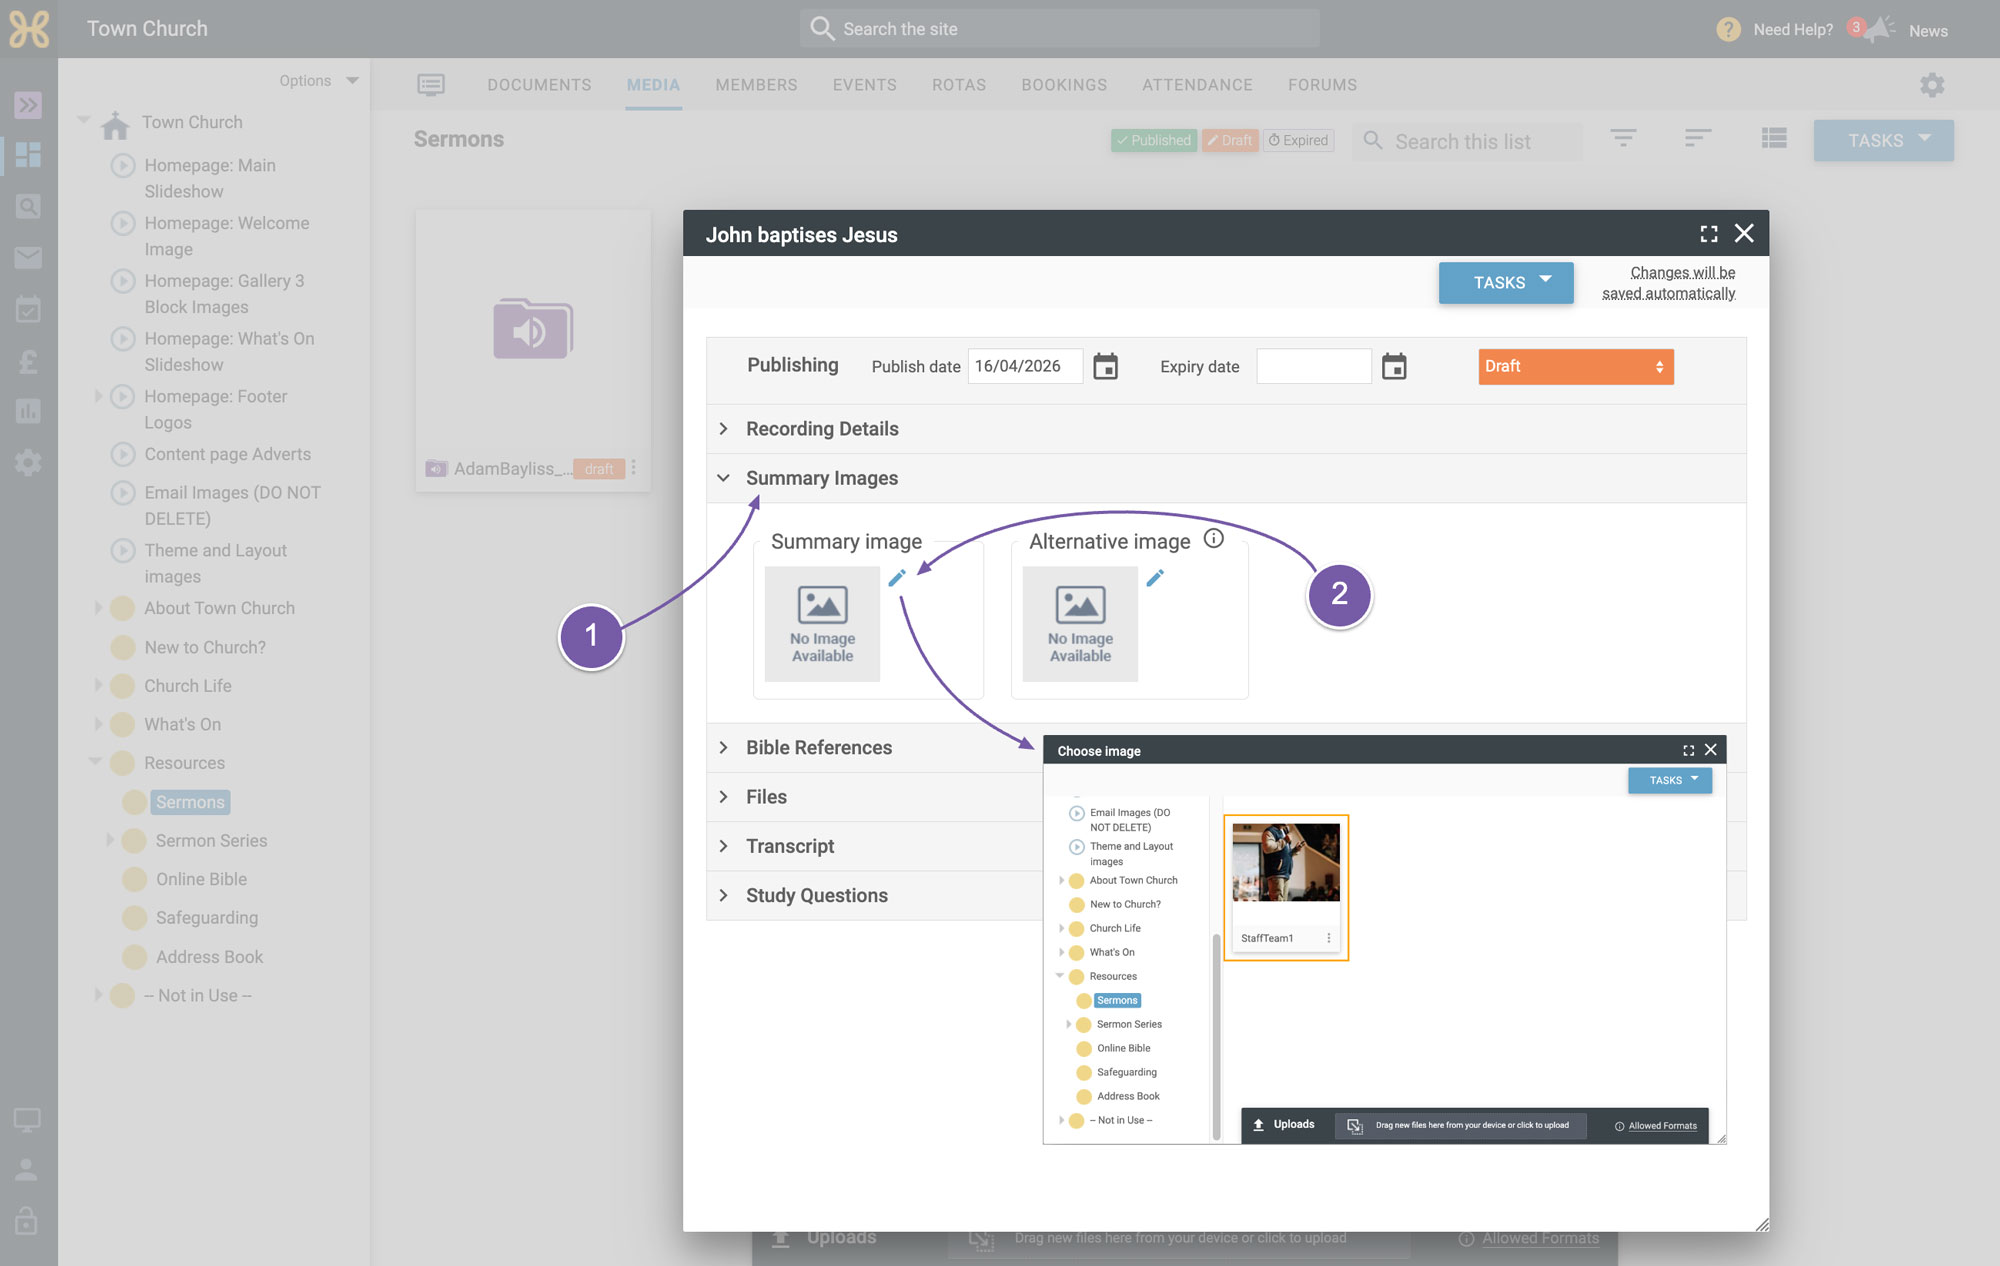
Now we can move down to the summary images. We suggest using our feature image size of 800x400 pixels.
-
Here you can click on the blue “pencil icon” to find or upload your image. If the image is not the right size don't worry you can edit that after using our built-in image editor (see below).
-
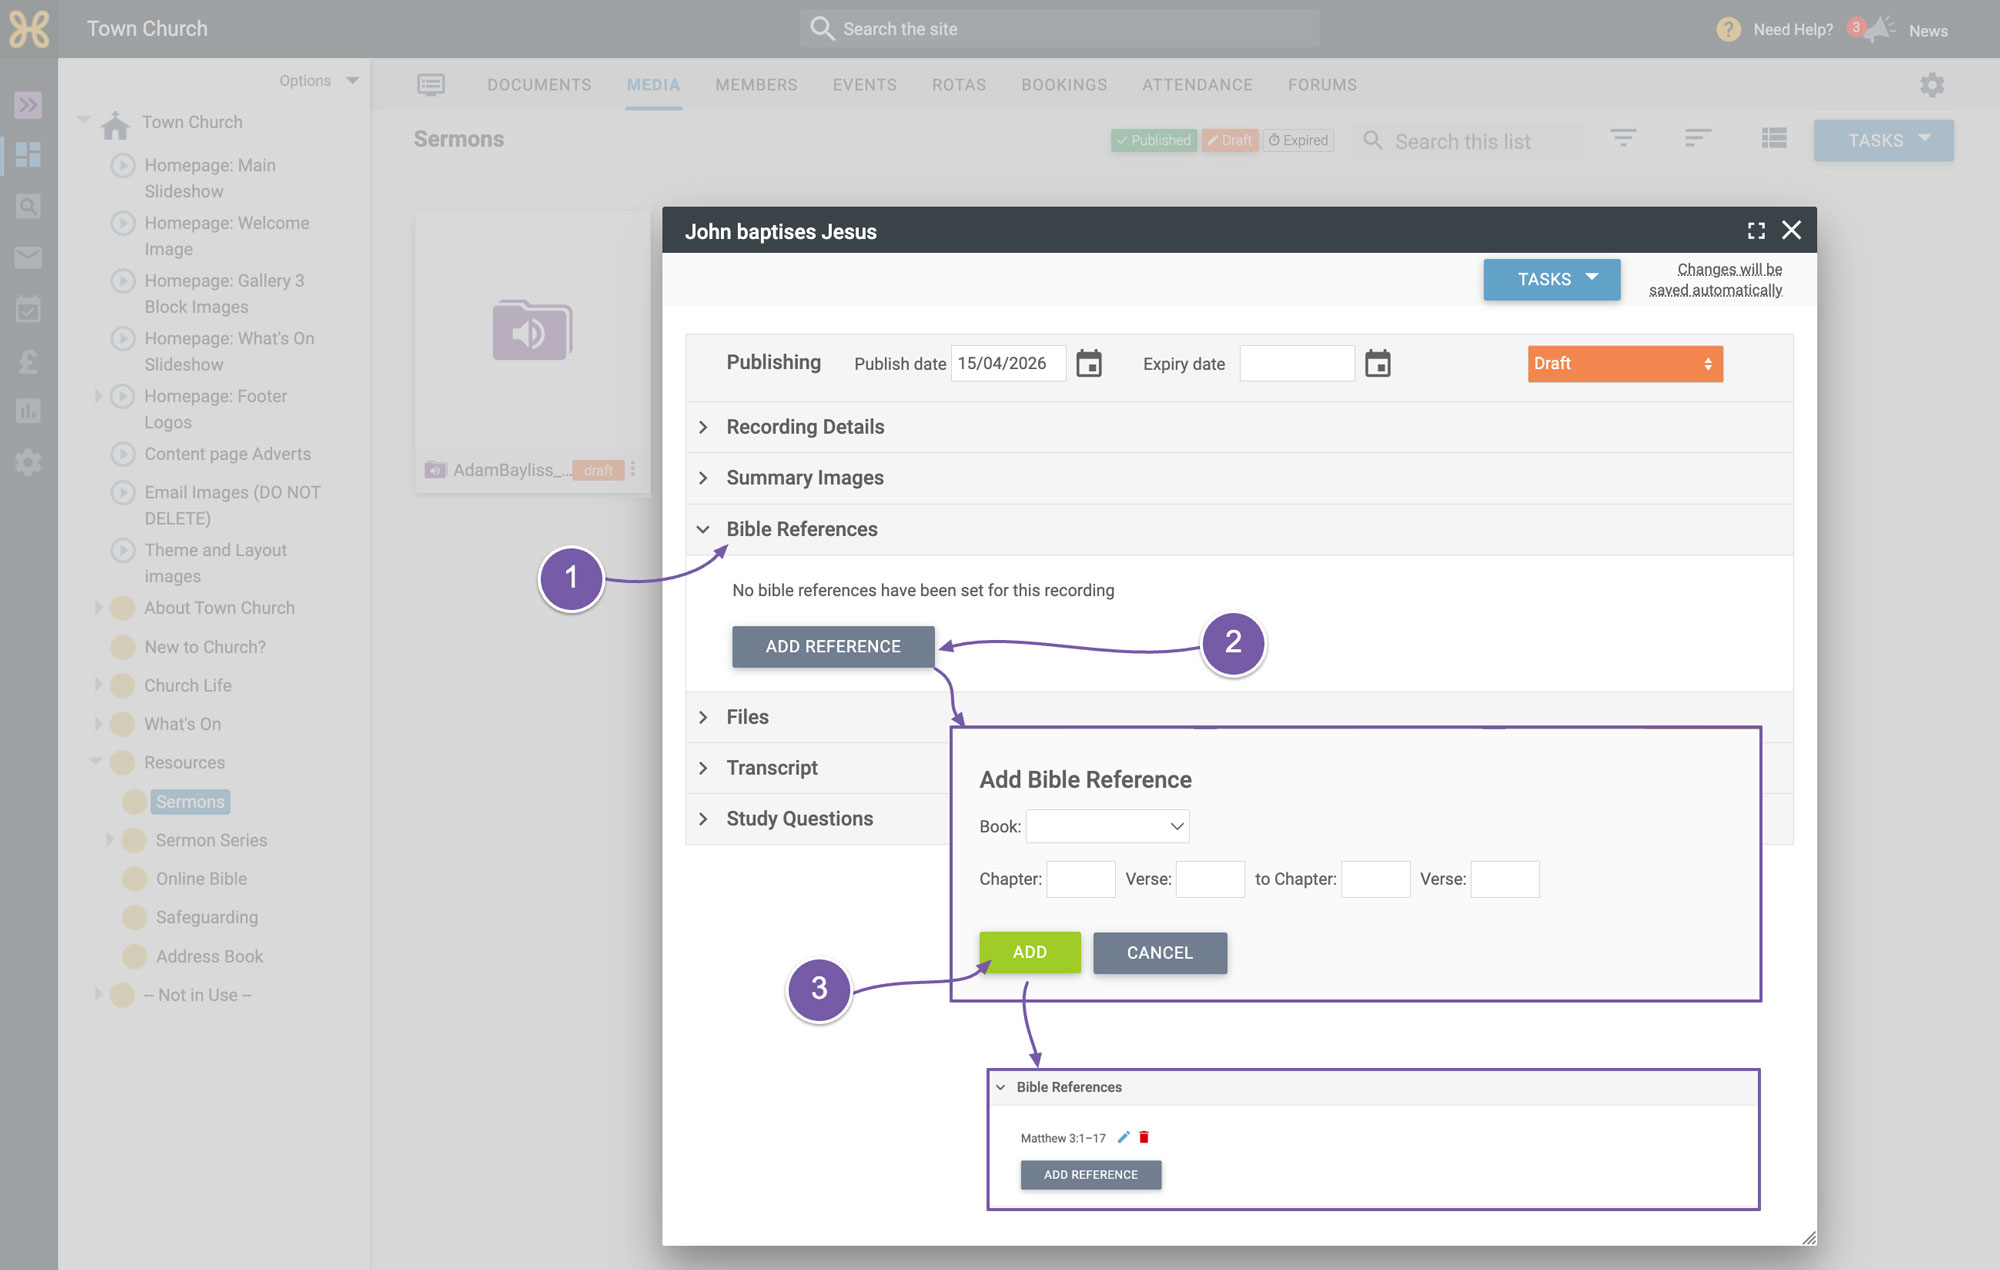
The next section is our “Bible References” section.
-
If you want to add one, some or all of your Bible references then you can use the “Add Reference” button and pick the book, chapters and verses that your sermon references.
-
When you are done just click "Add" to save the changes.
-
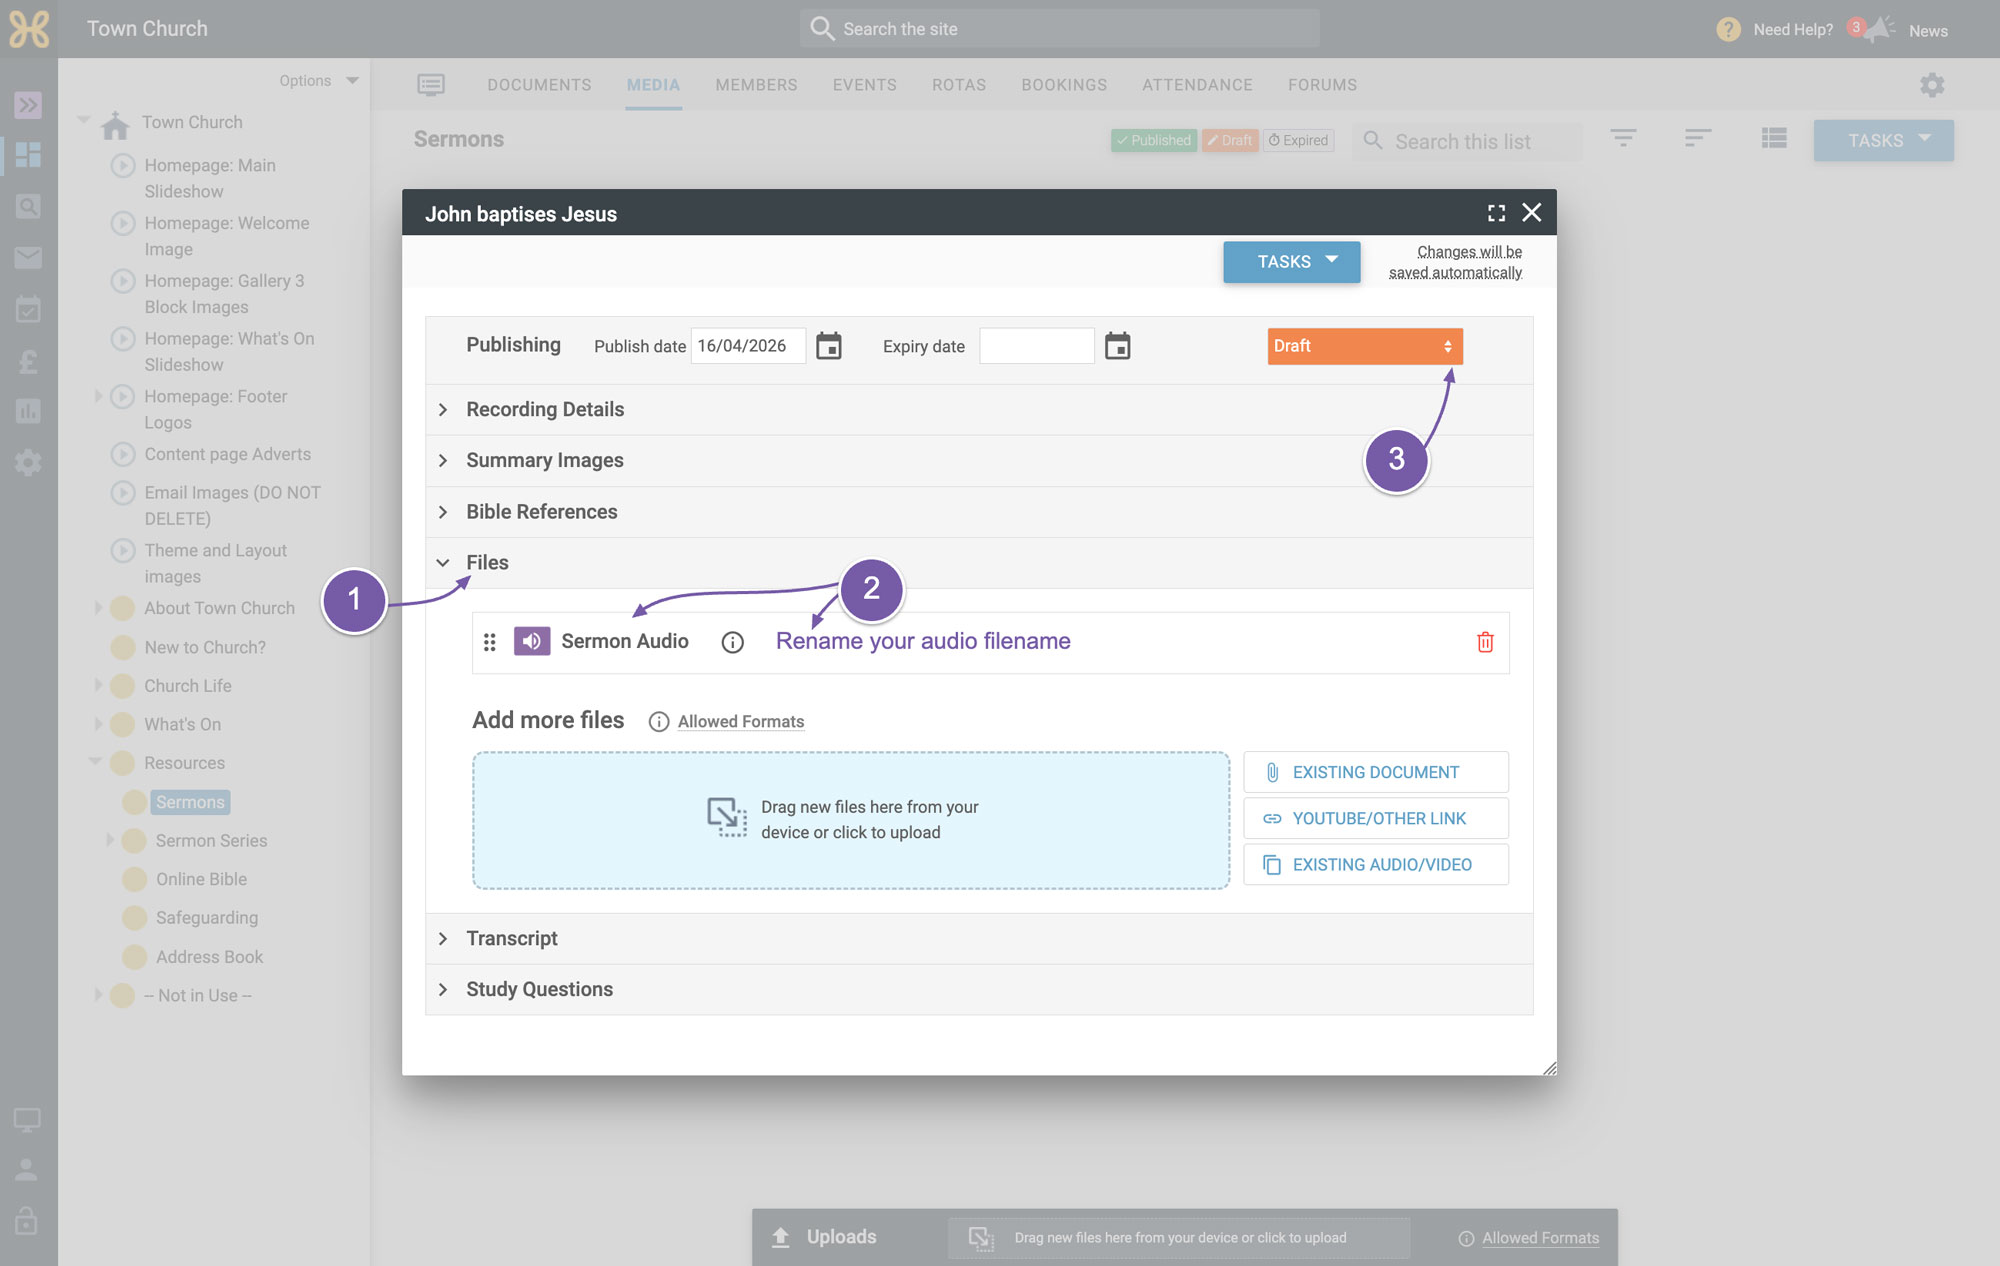
The last section is the “File” section.
-
It shows the name of the file we uploaded. To make it nice and friendly for people we suggest just writing “Sermon Audio” (this will not change the filename), and saving the change.
-
If your image is the right size, then you can just click on the orange draft box and select "published"
If you need to reformat the image:
-
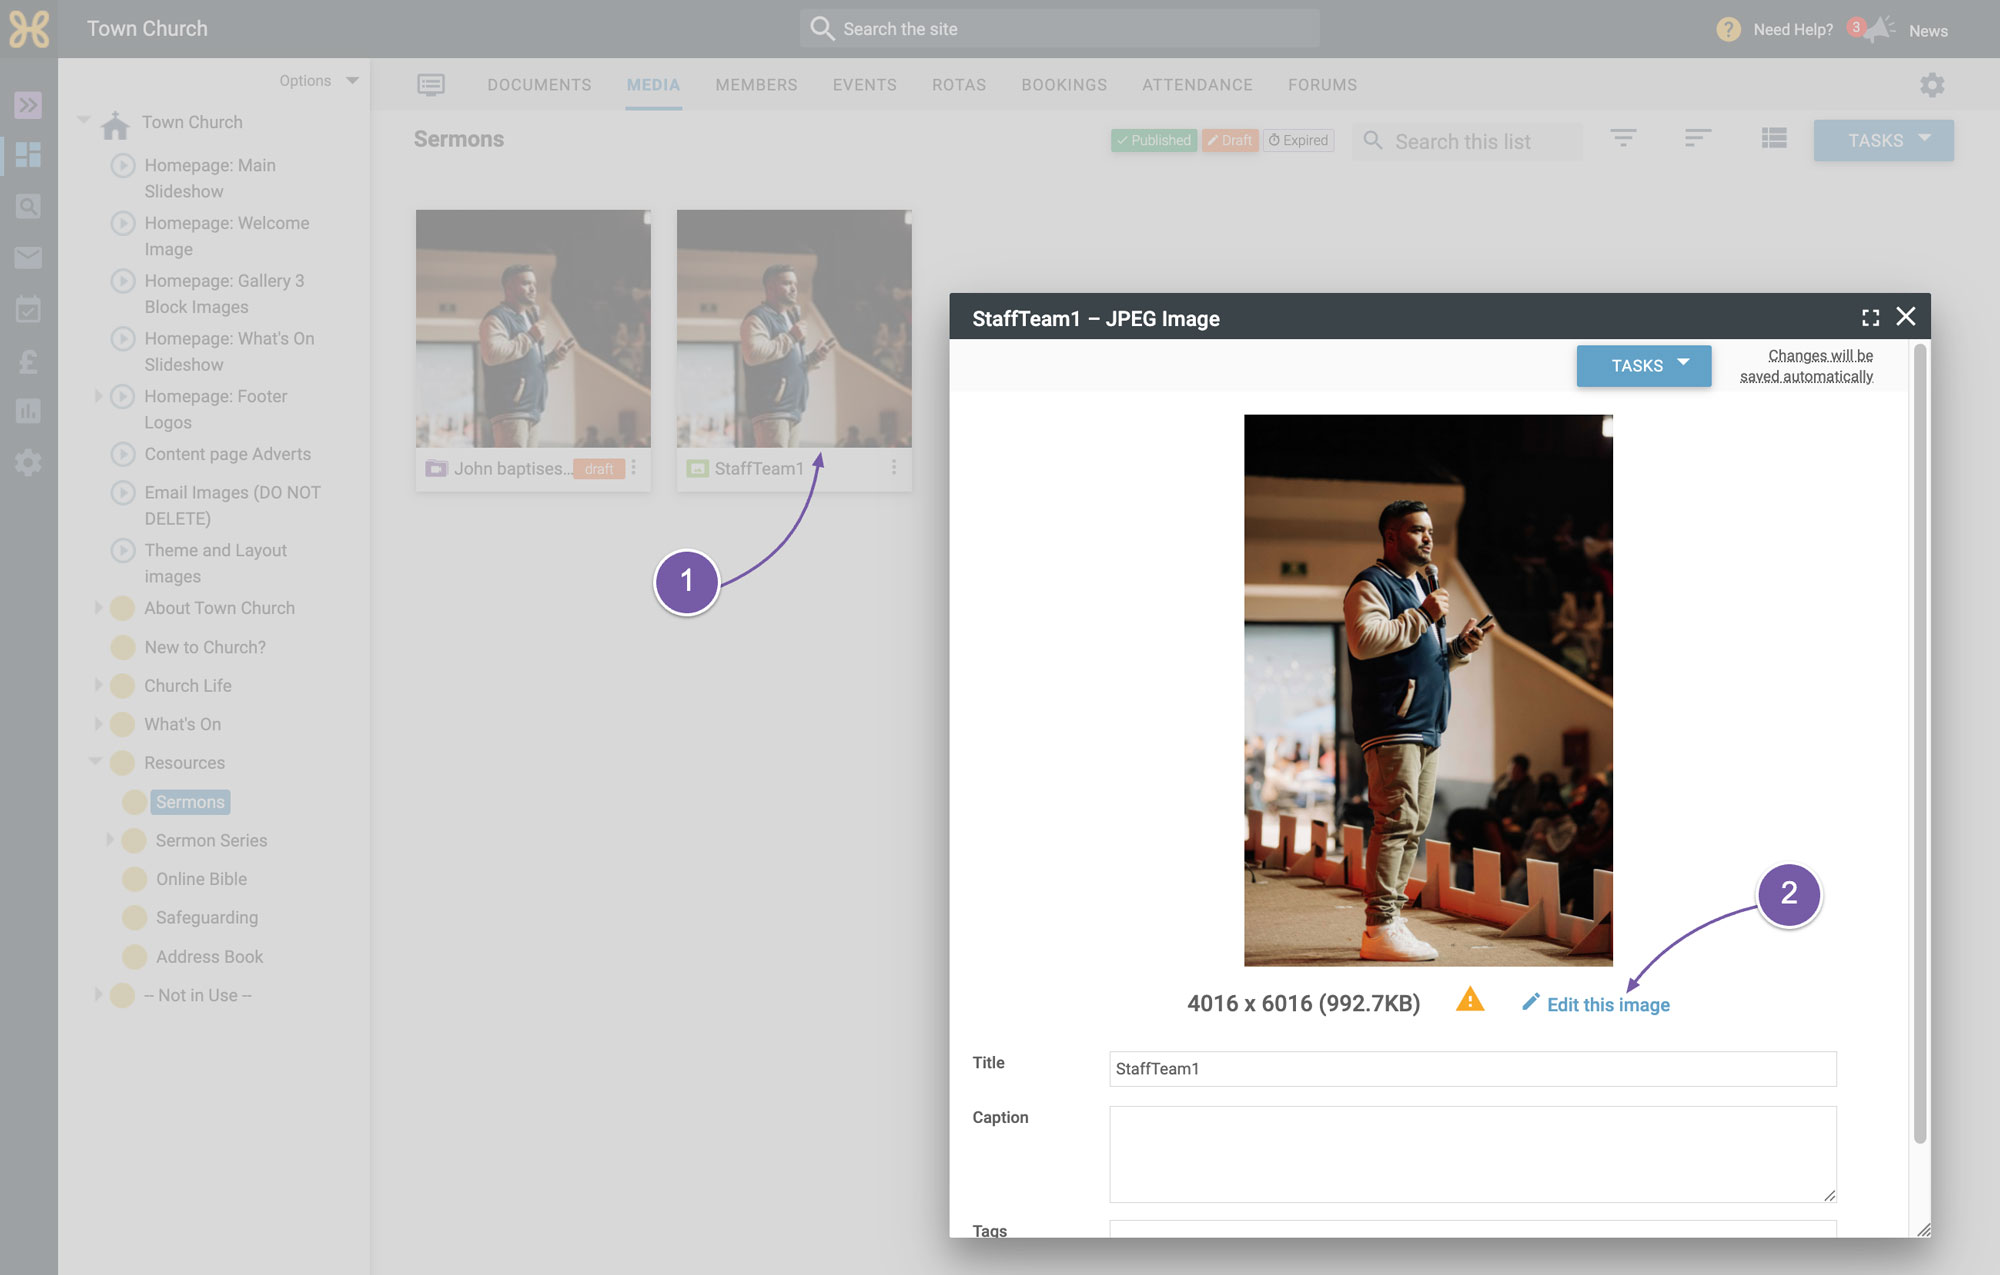
Click on the image you have uploaded
-
Then click on the "Edit this image" link.
-
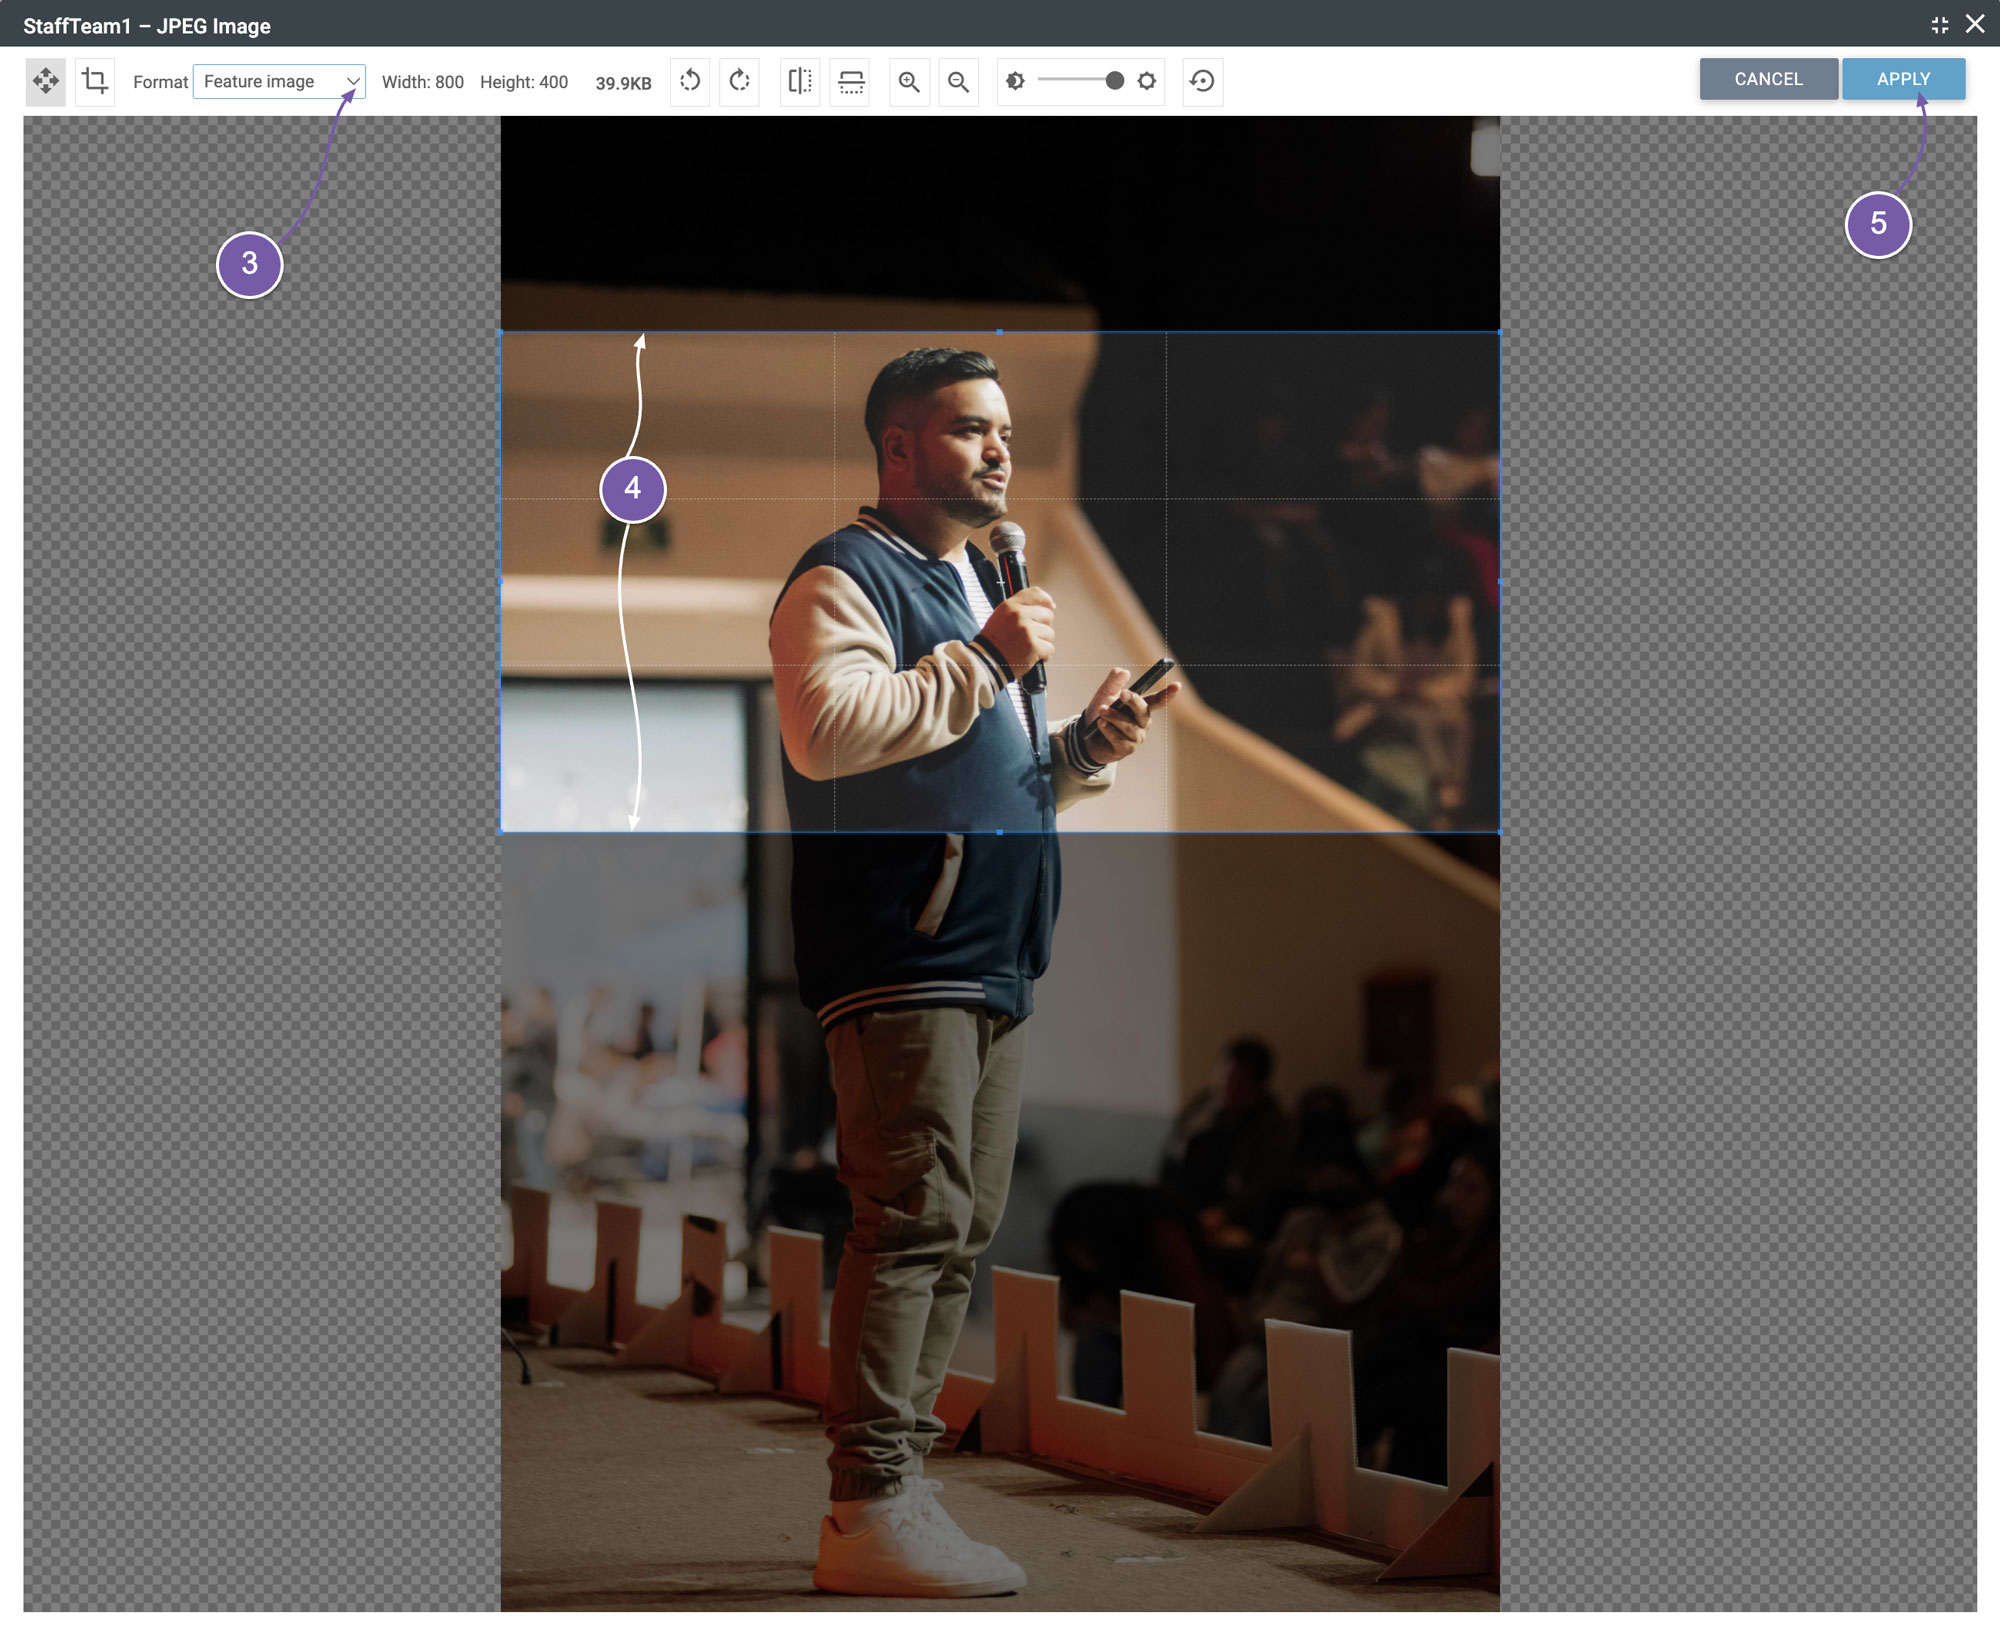
Now you're in the image editor, select the “Feature Image” option from the format drop-down.
-
Drag the light area to the part of the image you want to keep
-
Then click “Apply” when you're happy and confirm the changes.
-
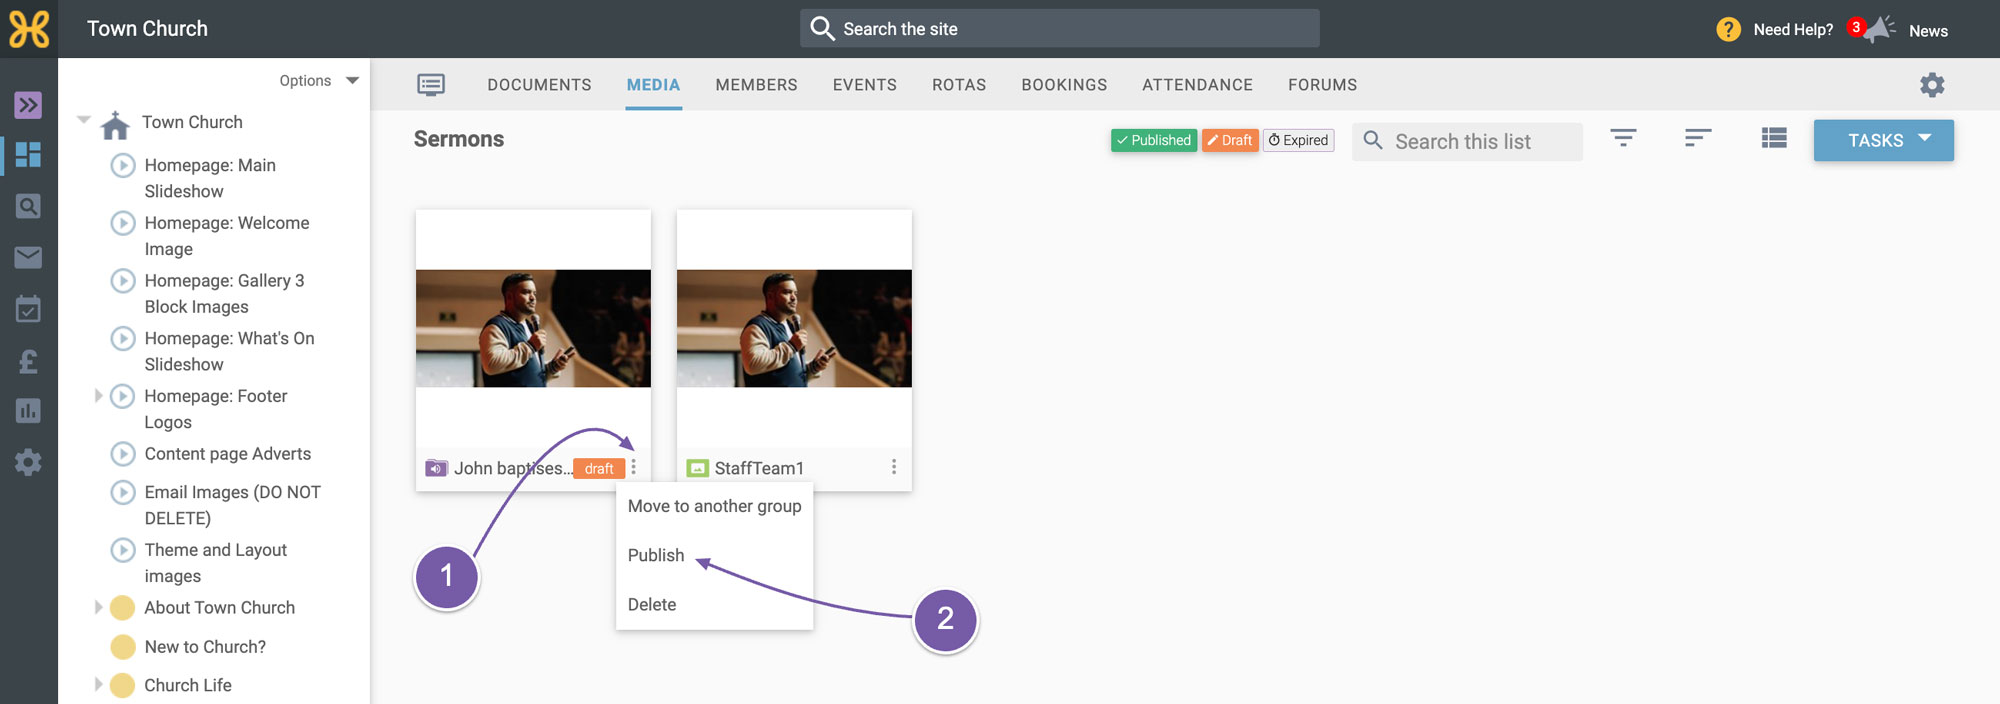
Close the image and then click on the 3 option dots of the draft recording
-
Select “Publish”.
Now the recording is published you can go to the website, find the “Sermons Page” and click on the “Recording” to see how it looks.