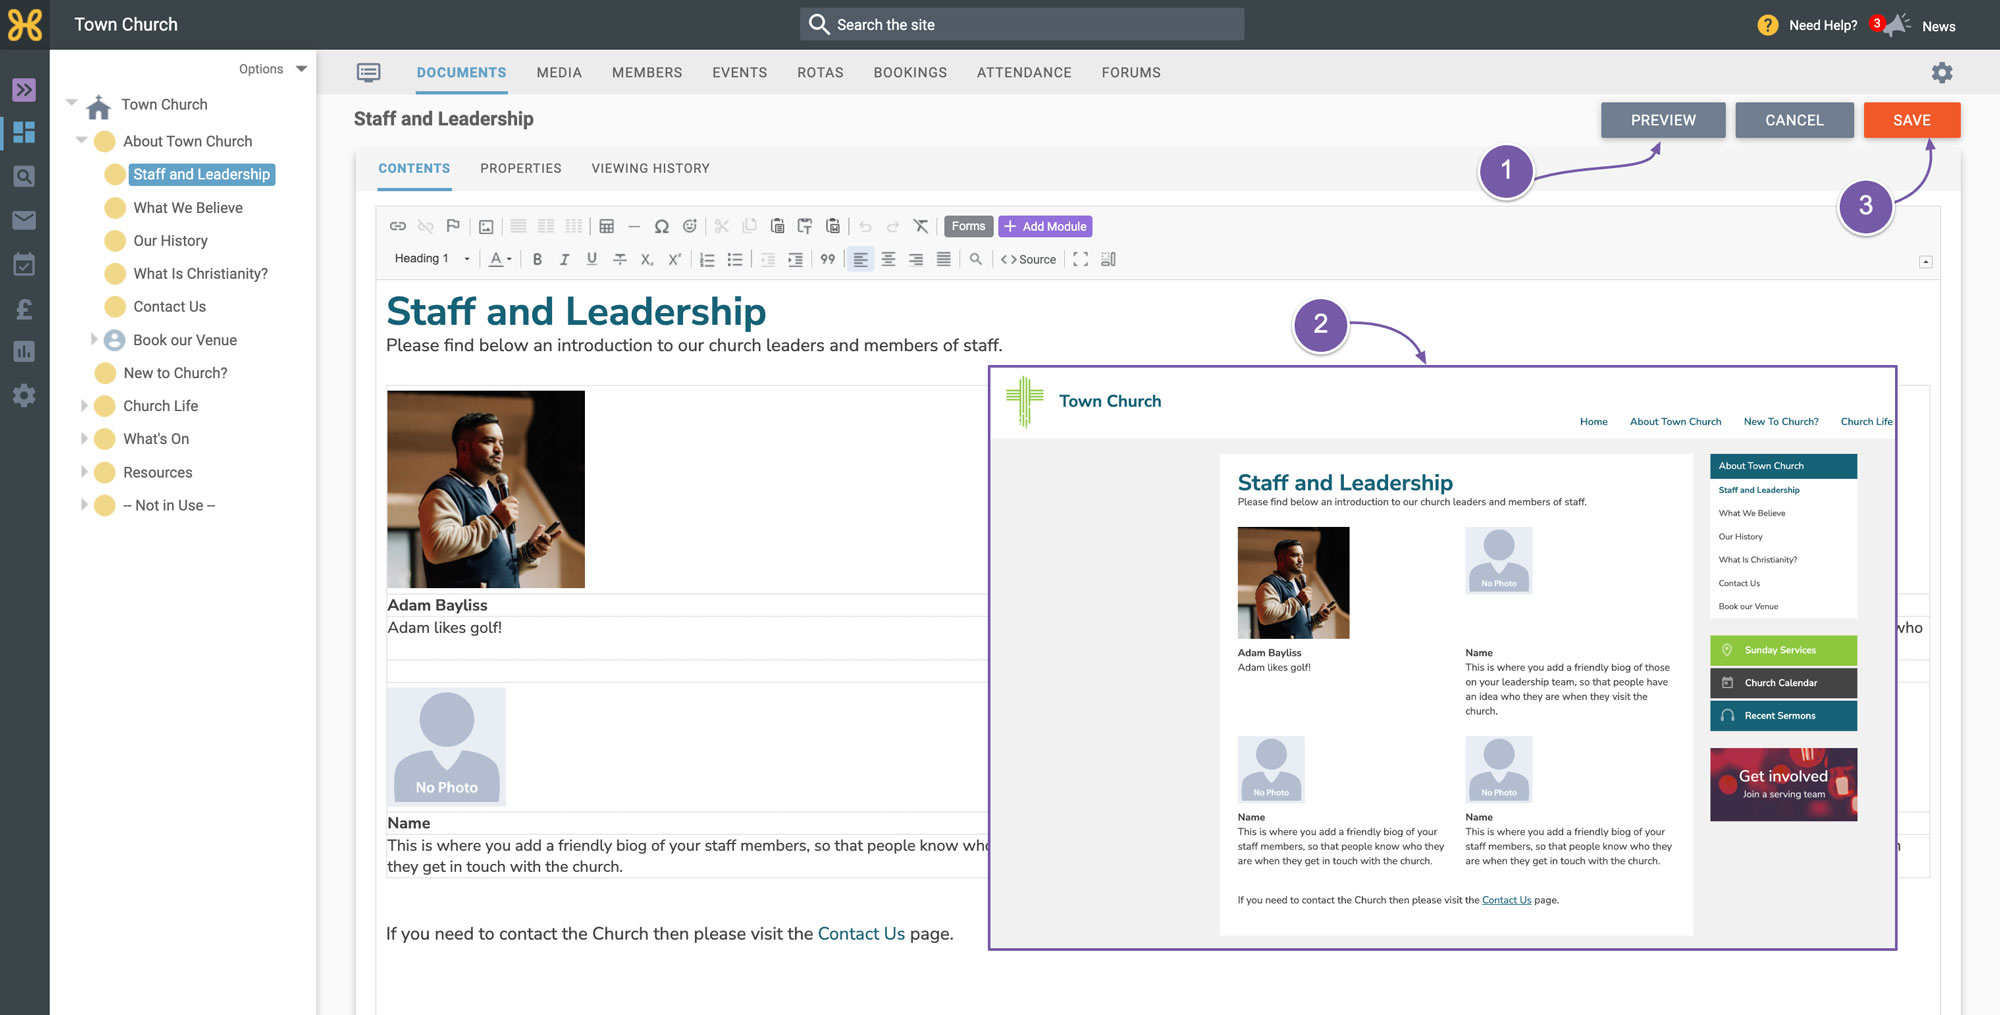
Personalise your staff and leadership page
(7 minutes)
Add in your staff and leadership photos with information about each person to make the website more personal to visitors.
Sorry, your browser is unable to play this type of file.
You can still
download it
One of the pages that requires the most personalising is the “Staff and Leadership” page.
-
This page is found under “About Us” and it is a page to profile the people who lead, work for and volunteer at your church.
-
Our default page has a space for an image, name and text for writing a brief introduction to that person. The page is split into two columns and it is important to keep it like that so it works well on mobile phones.
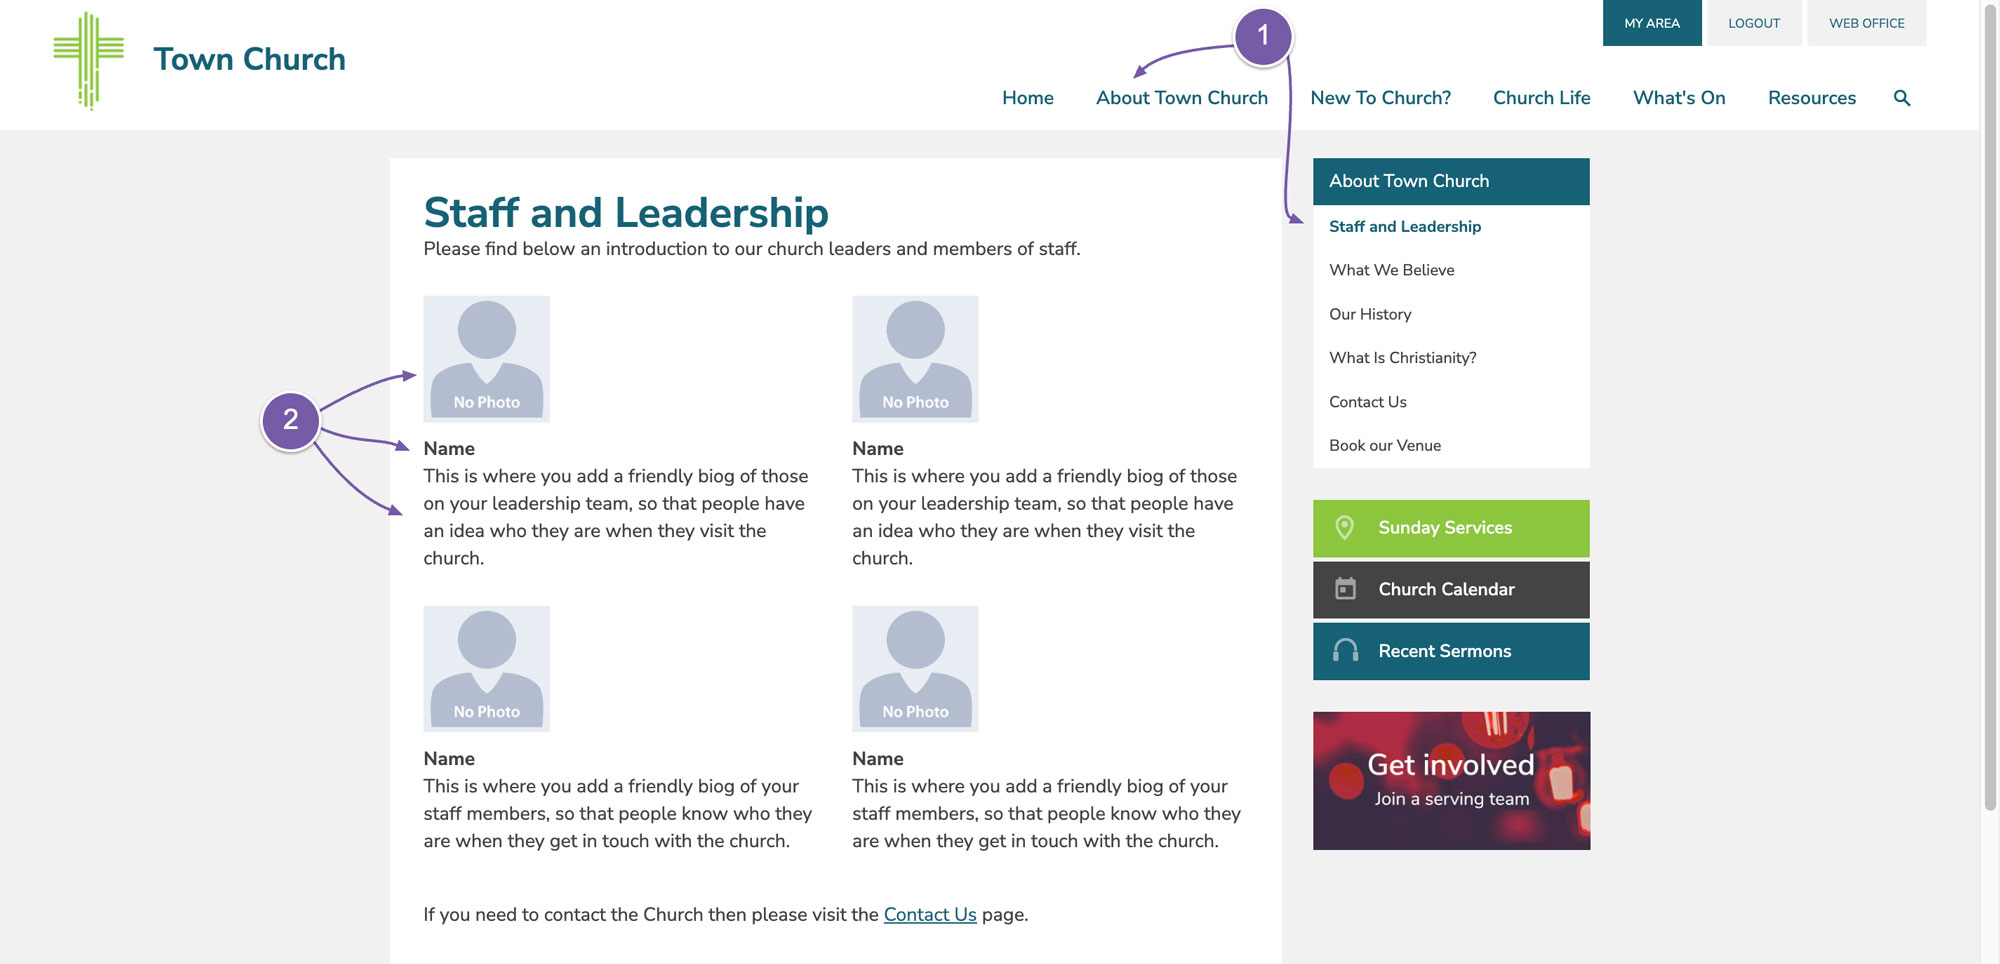
Let's go into the web office and see how to personalise the page and add extra people to the page if needed.
-
In the web office open up the “About Us” group in your Site Manager group tree and click on the “Staff and Leadership” group.
-
Then go to the “Documents” tab and click on the “Staff and Leadership” article.
-
You can very easily change the title and summary text at the top.
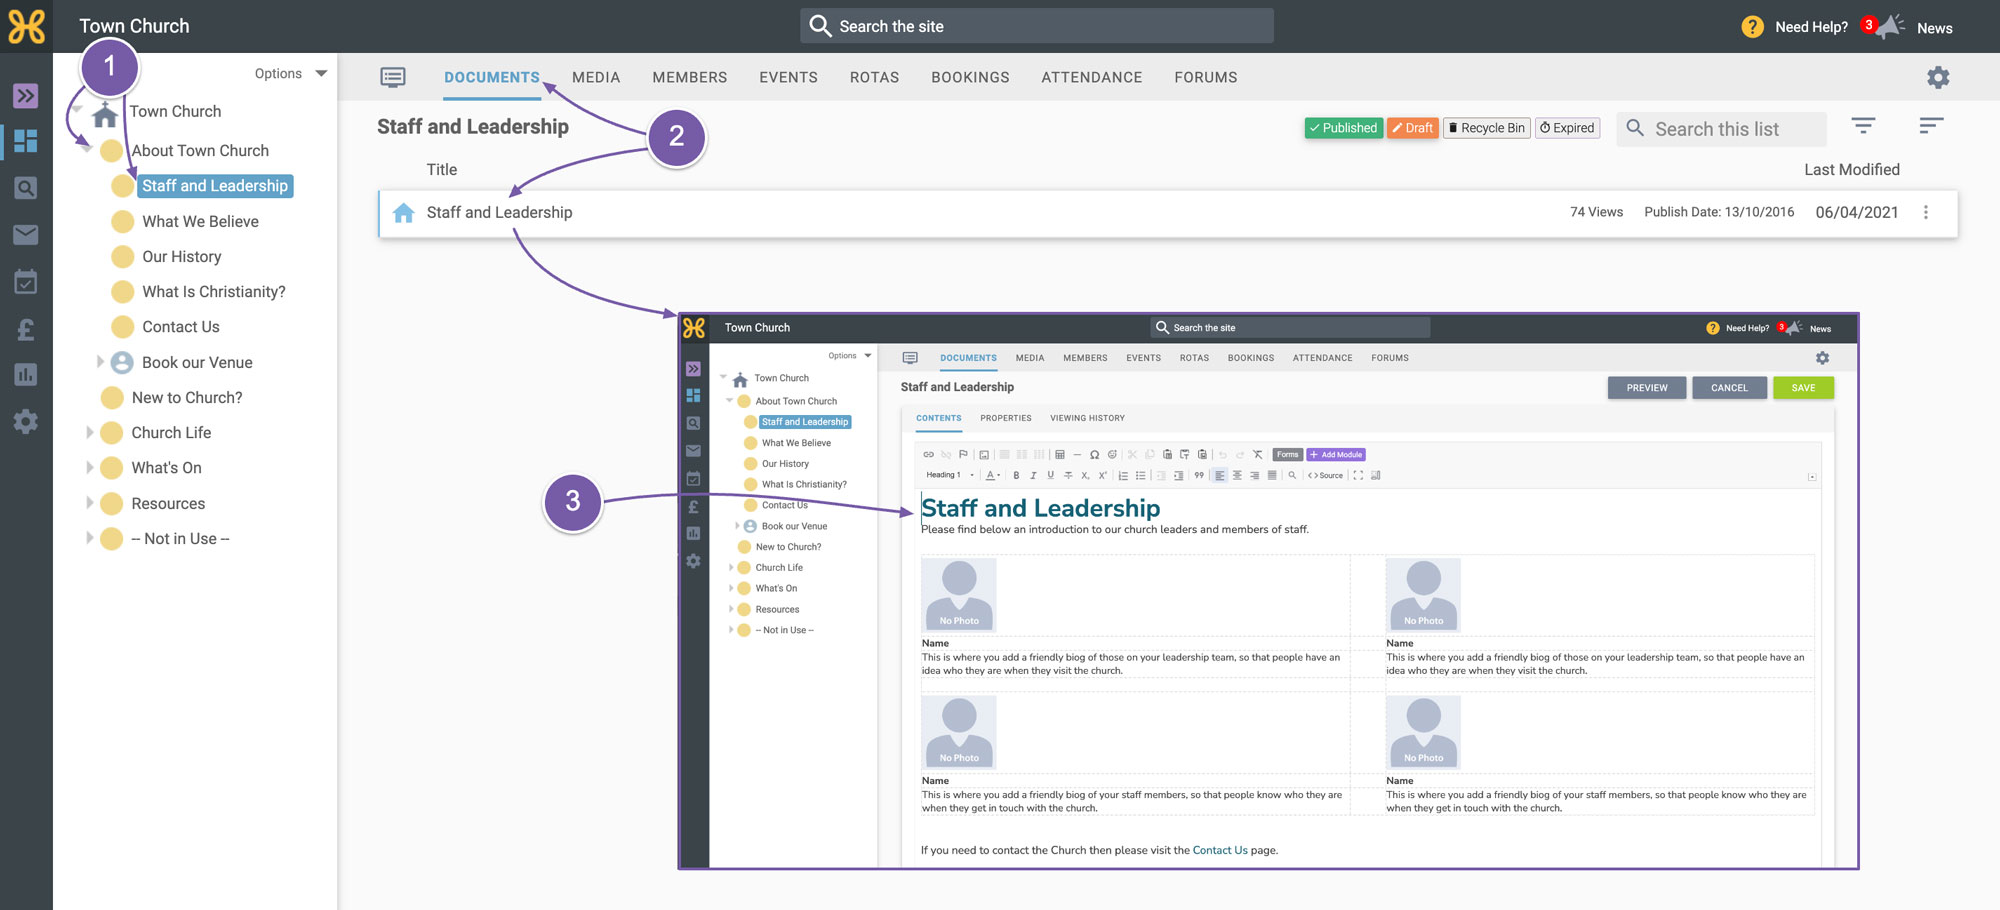
So, let's look at the staff members. The first thing to say about this is that this is a table made up of rows and columns. We have added settings and code to the table to make it look good and work well on all devices. So, it's important not to change the settings of the table apart from adding more rows so you can add more people.
Let's now look at changing the first person in our table.
-
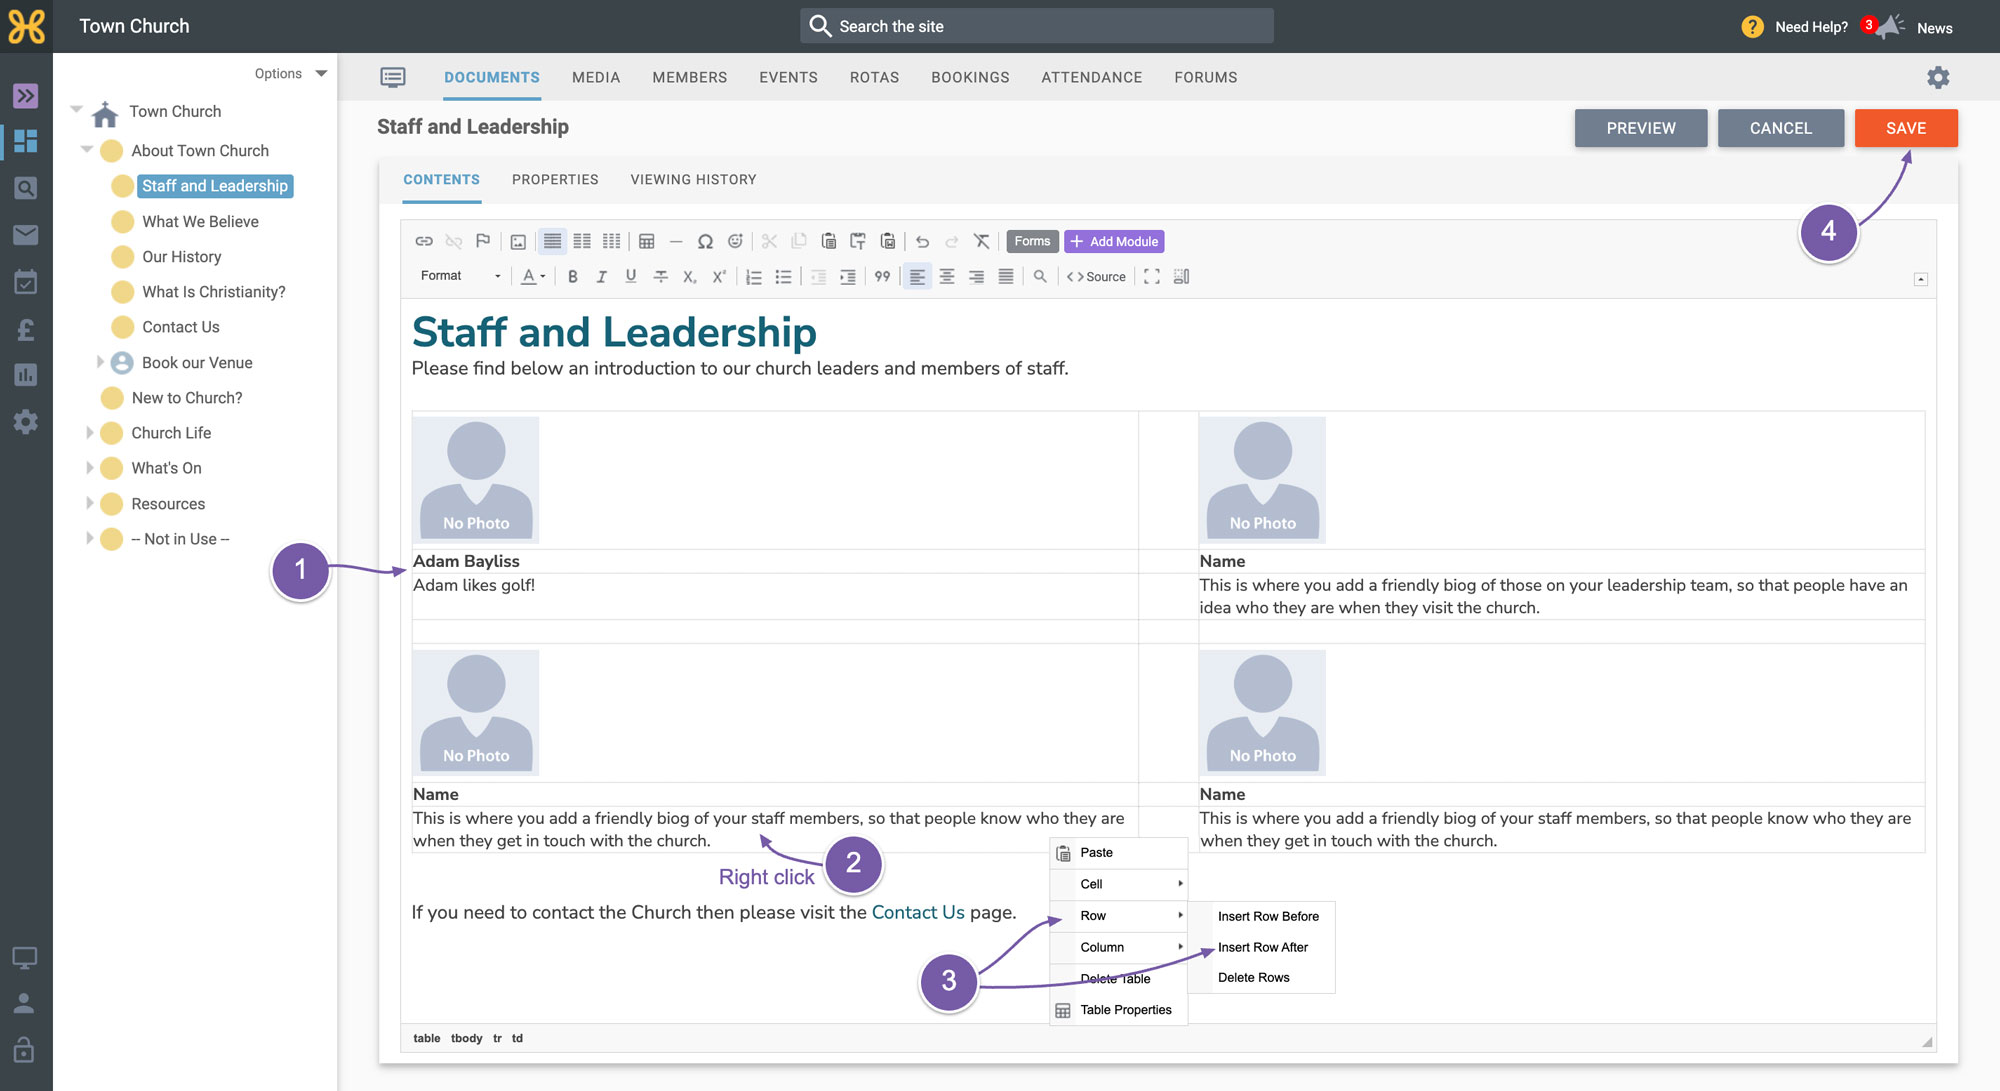
Change the name and description of that person with a little bit of information about them. At this stage, we would recommend doing all of the names and descriptions before going on to the images (see below for details on how to do this).
-
If you need more rows to add people it's very simple. Just right-click in the bottom row of the table
-
Using the menu that appears select “Row” then "Insert row after". You will need four rows. One to have a gap between the people above and the next three will be one each for the image name and description. You can keep adding as many rows as you need to get all of your team on the page.
-
Save the article once you have added all the people and descriptions.
Let's now look at getting images uploaded and resized before adding them to this page.
Before we upload images, we just need to run through some information on image sizing to make sure this page looks nice and tidy as well as working well on phones and smaller screens. The most important thing here is to make sure that the images are the same size. That way the page will look nice and tidy. We have used a square image and display it at 120x120 pixels. You don't have to have square images but they usually work well for photos of people. The main thing is to keep all the same size and have them display no larger than 400 pixels wide. We have a built-in image editor which will help you crop and resize all of your images very easily.
-
Go to the "Media" tab for this group.
-
To upload one or many images, click on the “Upload” area at the bottom of the screen.
-
Select the images from your machine and then click to “Upload” them.
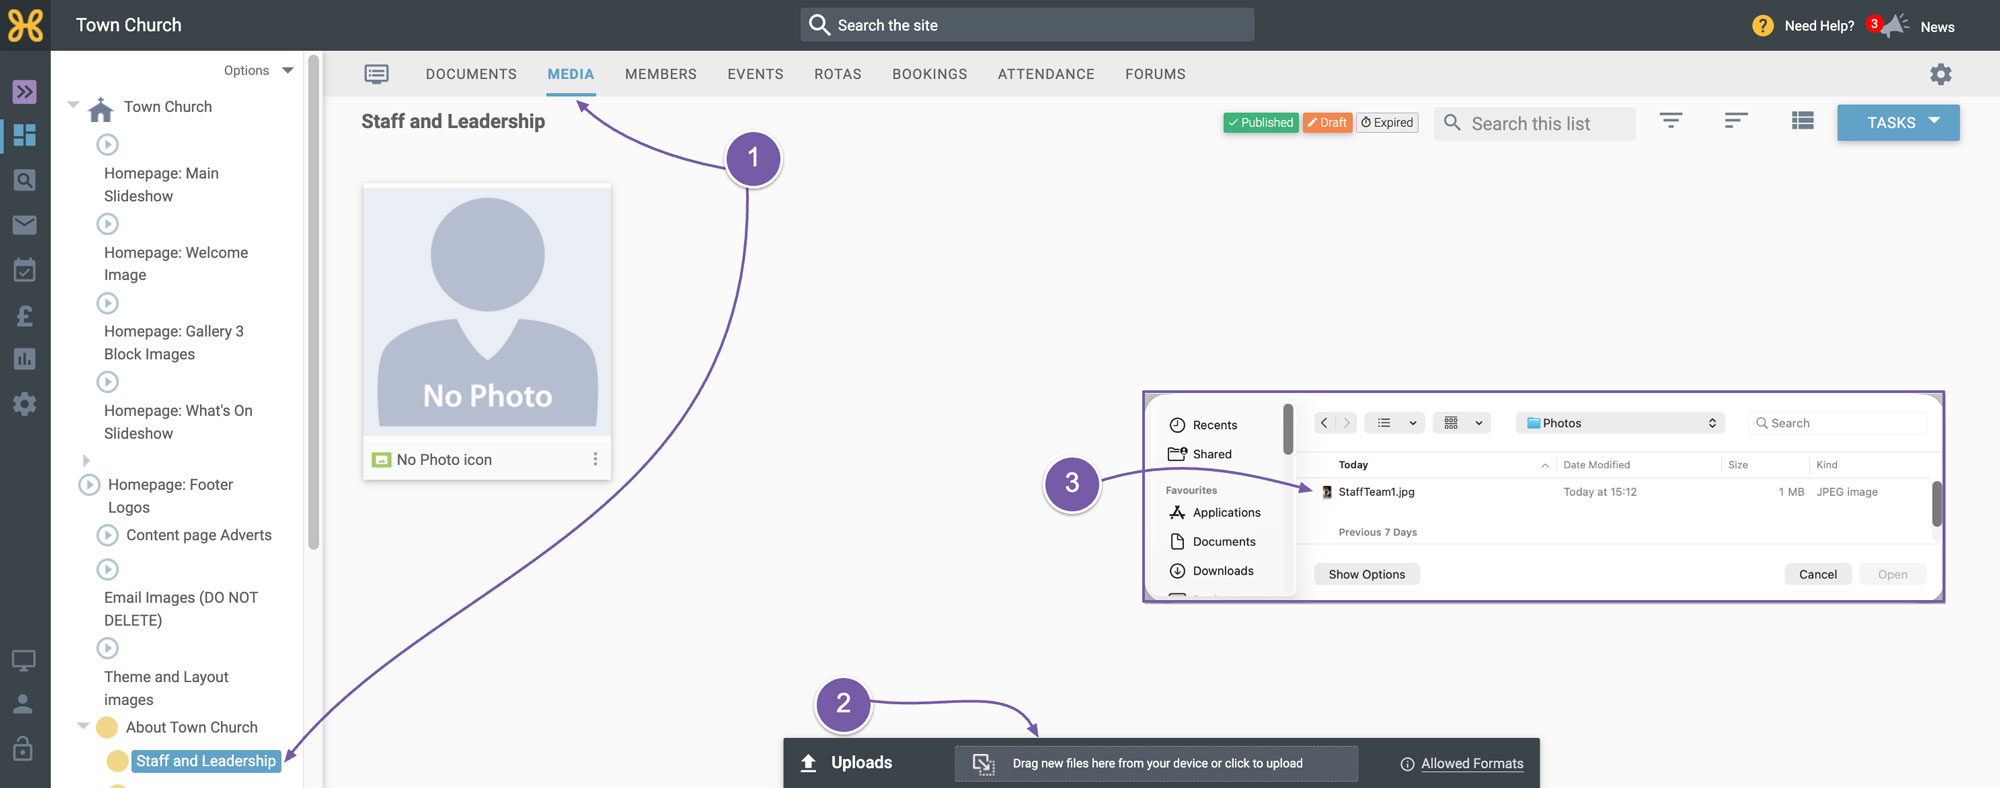
-
To edit an image, click on the image you wish to edit
-
When the image settings box opens up click on "Edit this image".
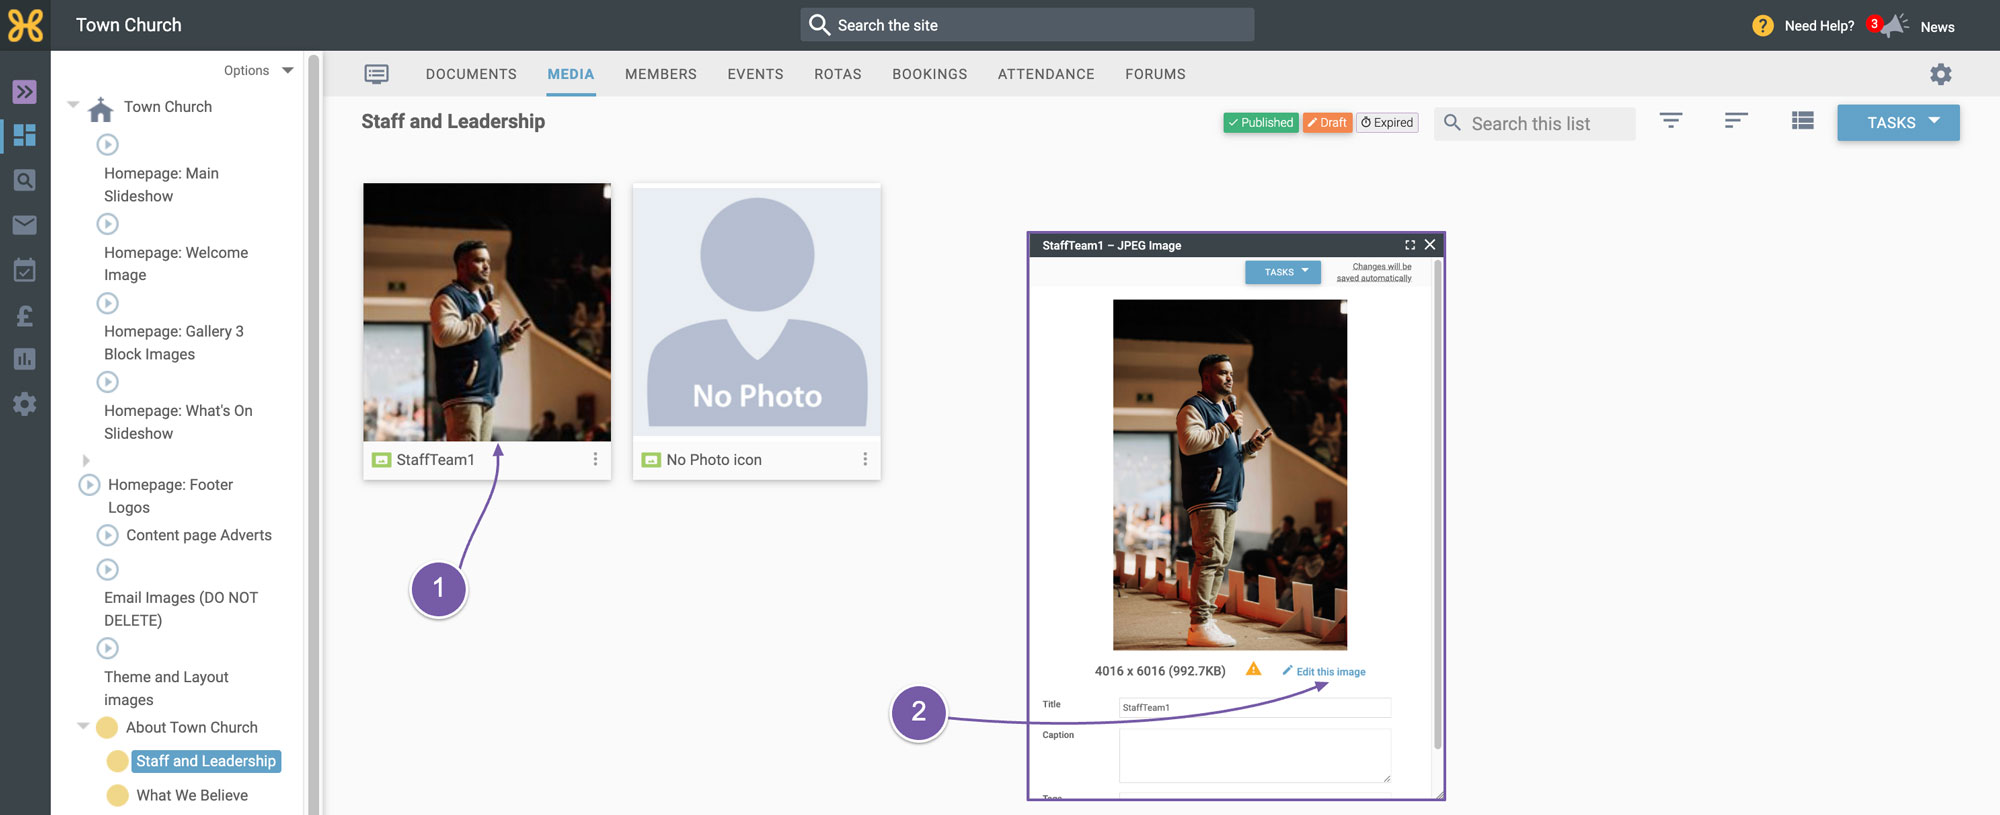
-
In the image editor, click on the drop-down image and select the "square" option.
-
Then on the output size drop-down select "small" which makes this a square image 400 pixels high and wide. It's important to note that you only choose the "small" size of 400 pixels if your original image was larger than that. If it was smaller and you resize it to be larger the quality of the image will be reduced. You can see the size of the image when you upload it here next to the output size drop-down. If you have uploaded a smaller image then just do the first part of using the square format and leave the output size as it is.
-
When you are done click "Apply"
-
Confirm the changes by clicking “OK” on the next warning prompt.
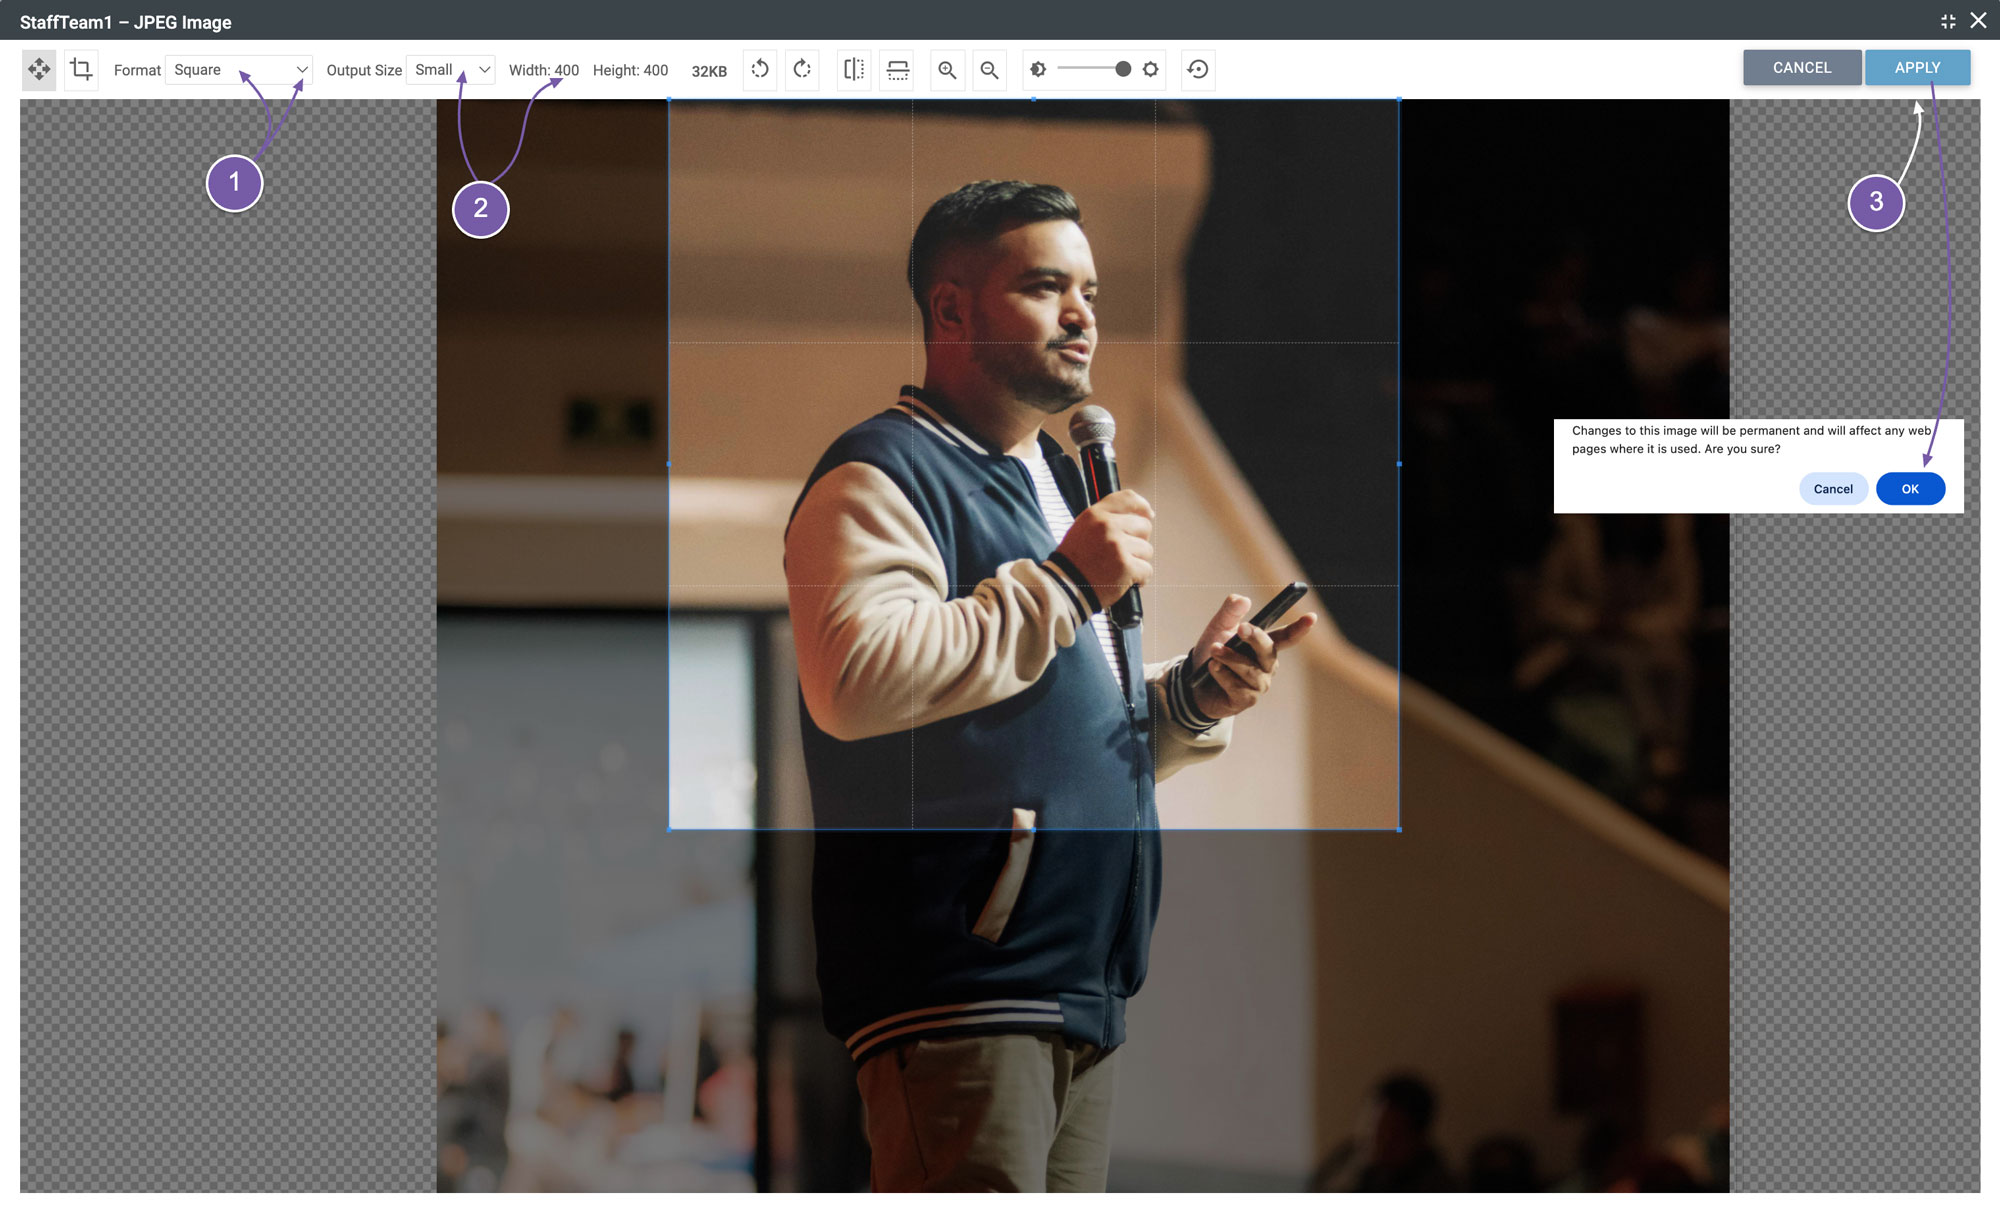
You need to repeat this process for all of your staff images. When you have all your images uploaded and the same size, head back into the article and then put the images in the table:
-
Click on the “Documents” tab
-
Select the “Staff and Leadership” article.
-
To change an image just double click on the image you wish to change.
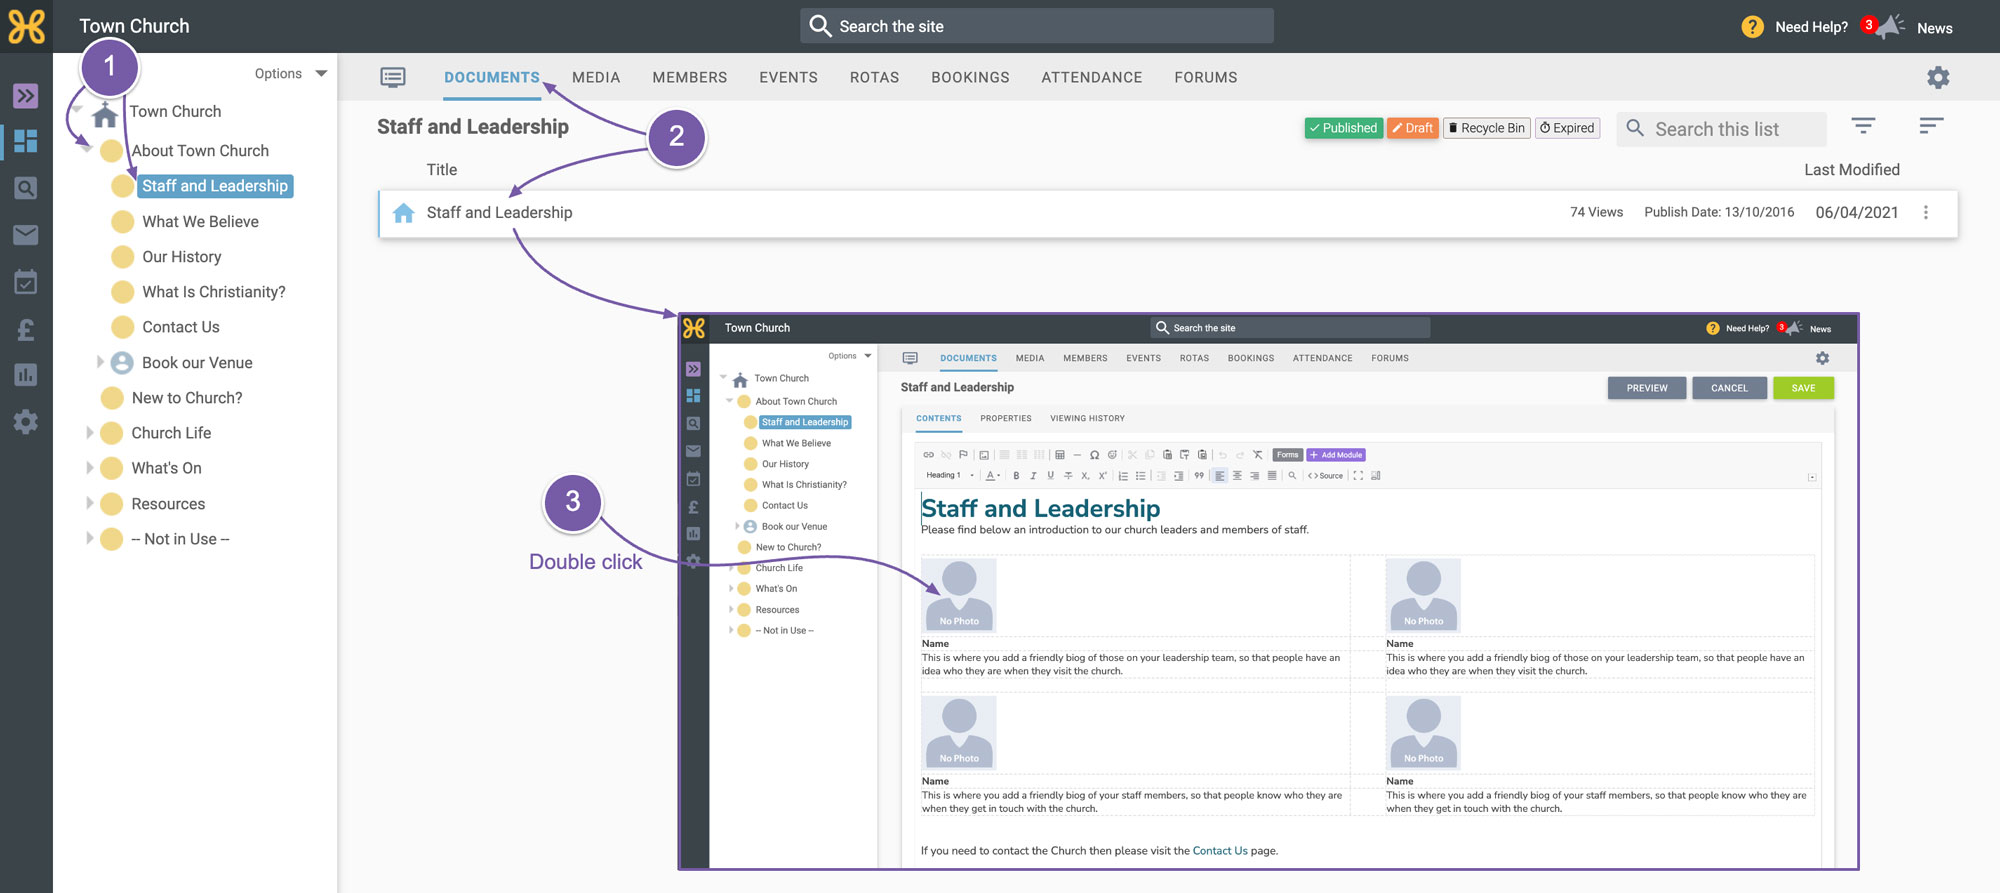
-
Click on “Change Image”,
-
Select the image you want and then make sure the size is what you want.
-
We recommend 200 pixels wide will be just enough for desktop and allow the image to still look good on phones.
-
Finally, click “OK”
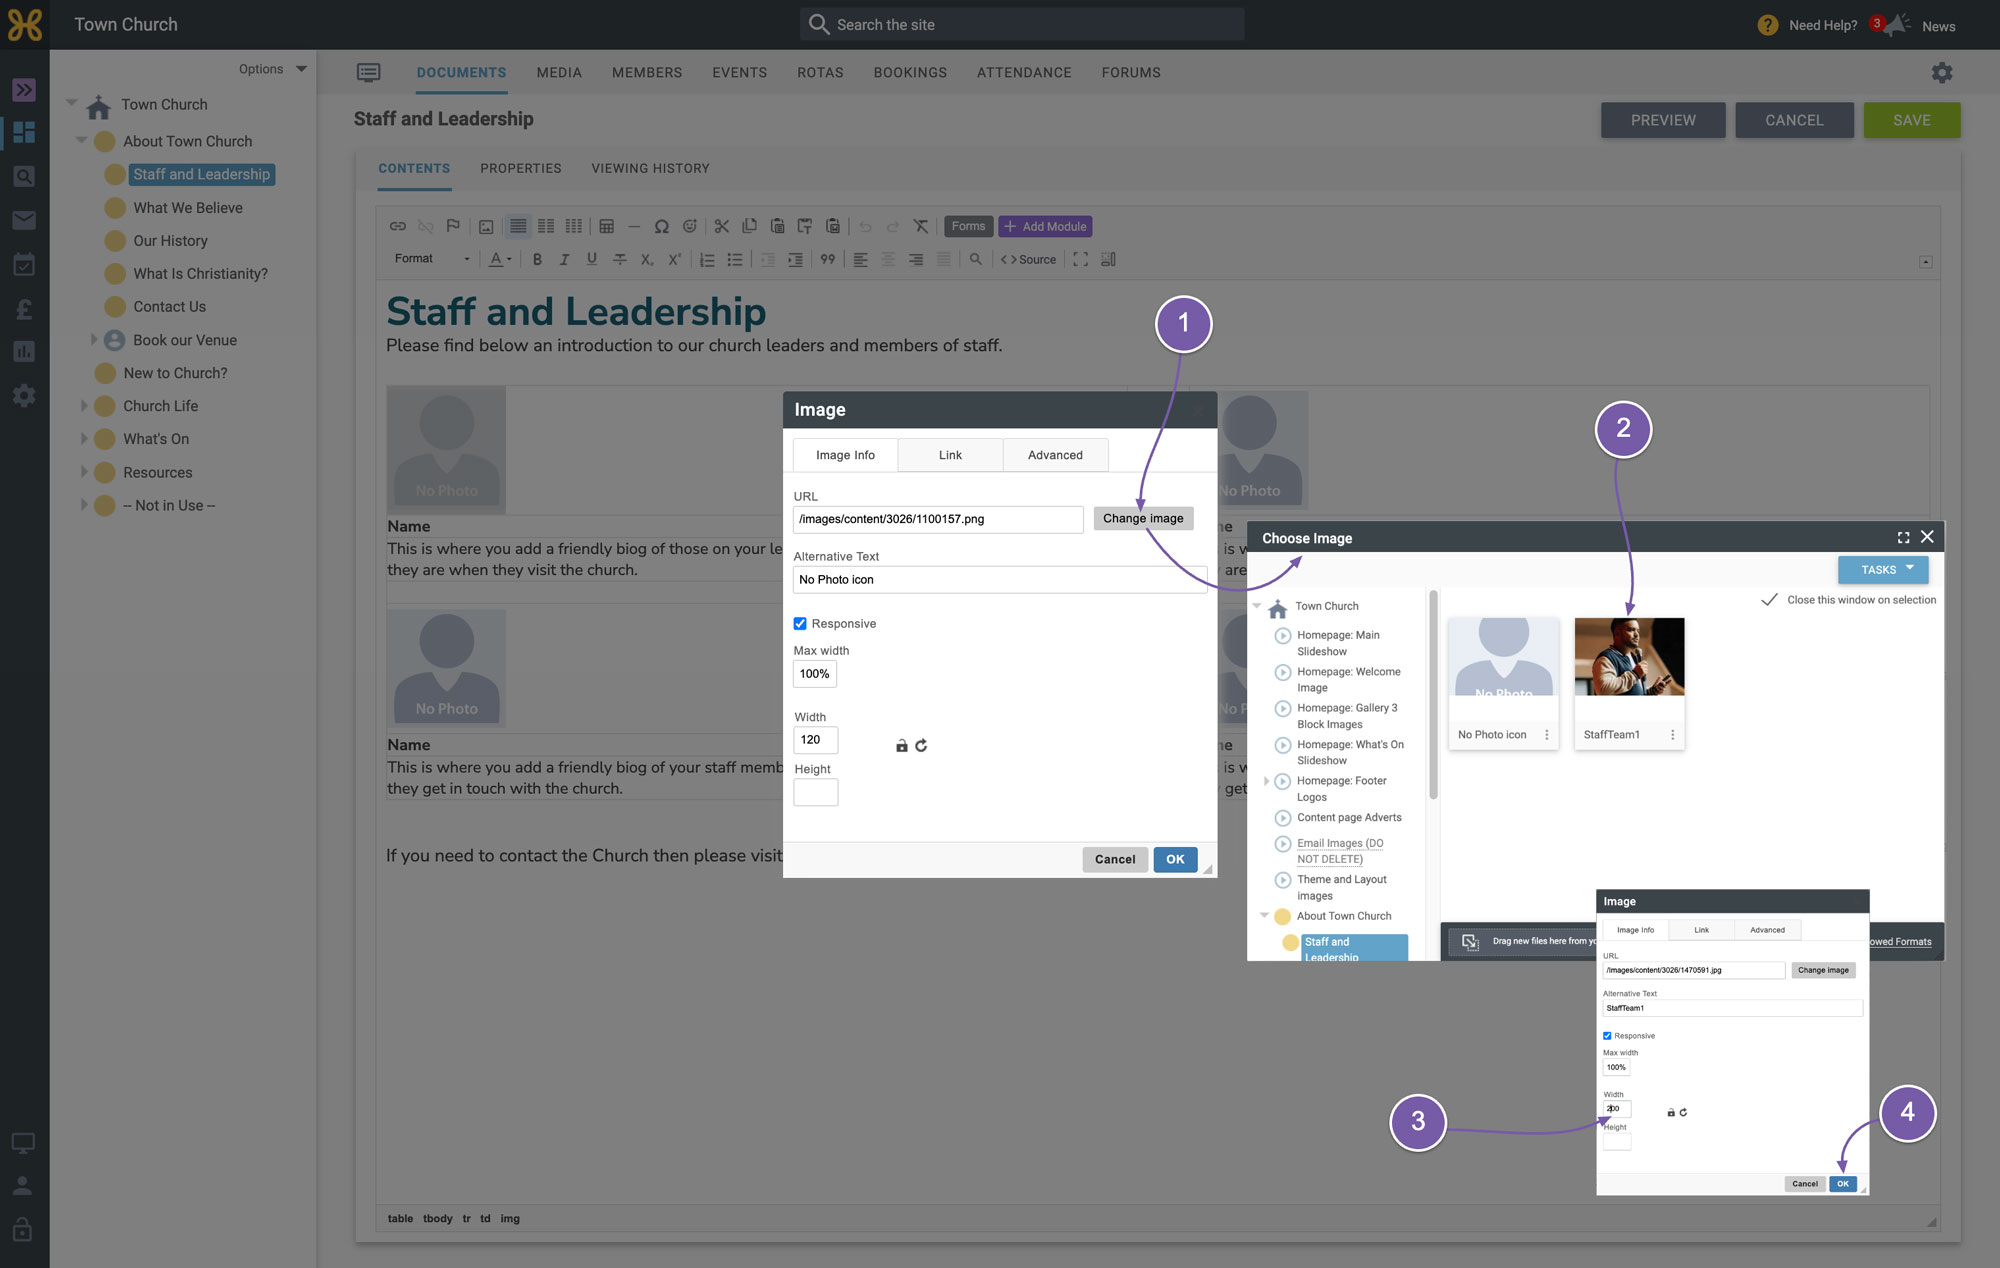
Repeat the process for all your images.
-
When you have done all of those you can click preview at the top right
-
See how your page looks
-
When you're happy, just save the article.