Set up your contact us page
(7 minutes)
You will learn how to edit the content of your Contact Us page, and also how to set up an email notification when someone fills in the form on the website.
Sorry, your browser is unable to play this type of file.
You can still
download it
Being contactable by potential visitors to your church is very important and this guide shows you how to edit your “Contact Us” page to make sure you have the correct details, and set up notifications to go to your administrators when someone fills in the form on the page. Let's start by taking a look at the website to see which details are showing and then you can look at how to customise the page.
-
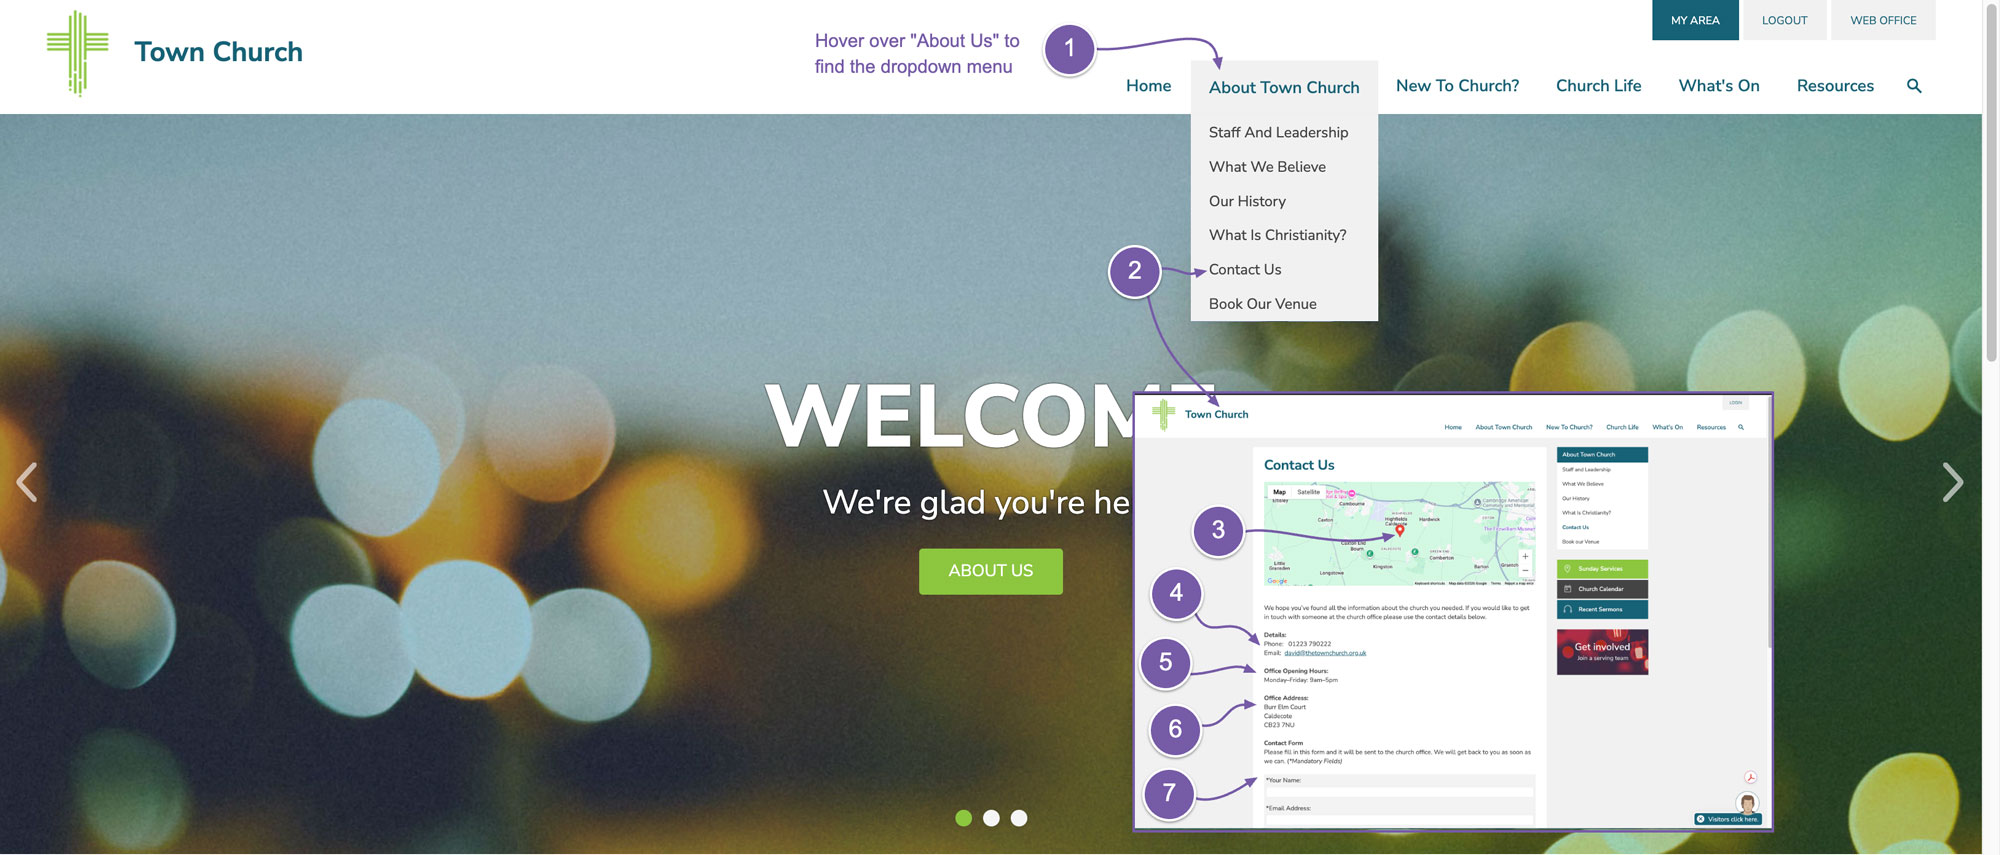
You can find the “Contact Us” group in the “About Us” menu.
-
Select that menu item and go to the page you can see there is:
-
a map that should show your location
-
your phone and email address
-
office opening hours
-
your office address
-
a form that people can fill in to send you a message.
To edit the details, we can go back to the web office and in the site manager:
-
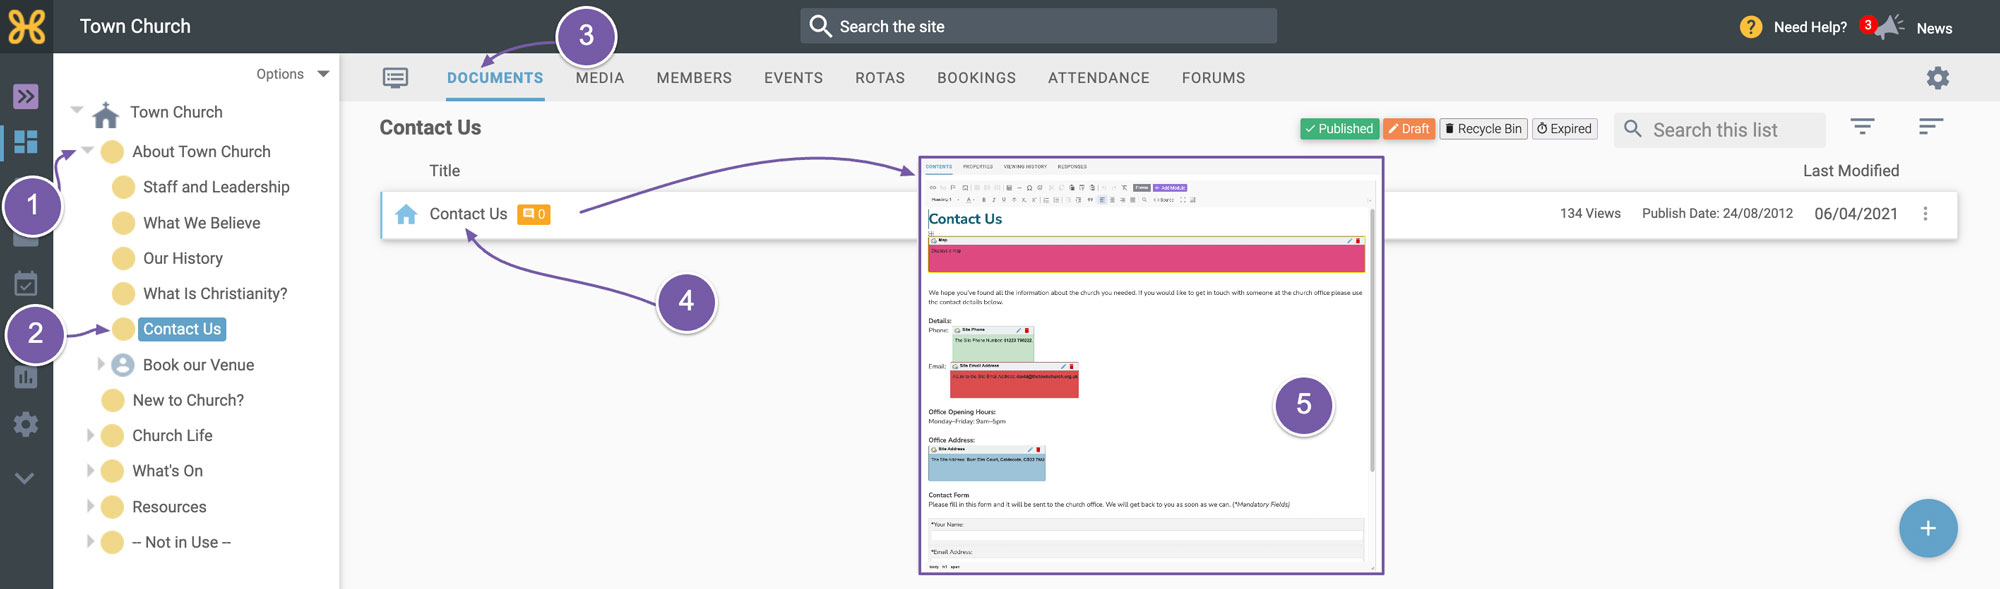
Expand the “About Us” group in the group tree
-
Click on the “Contact Us” group
-
Click on the documents tab
-
Select the “Contact Us” article.
-
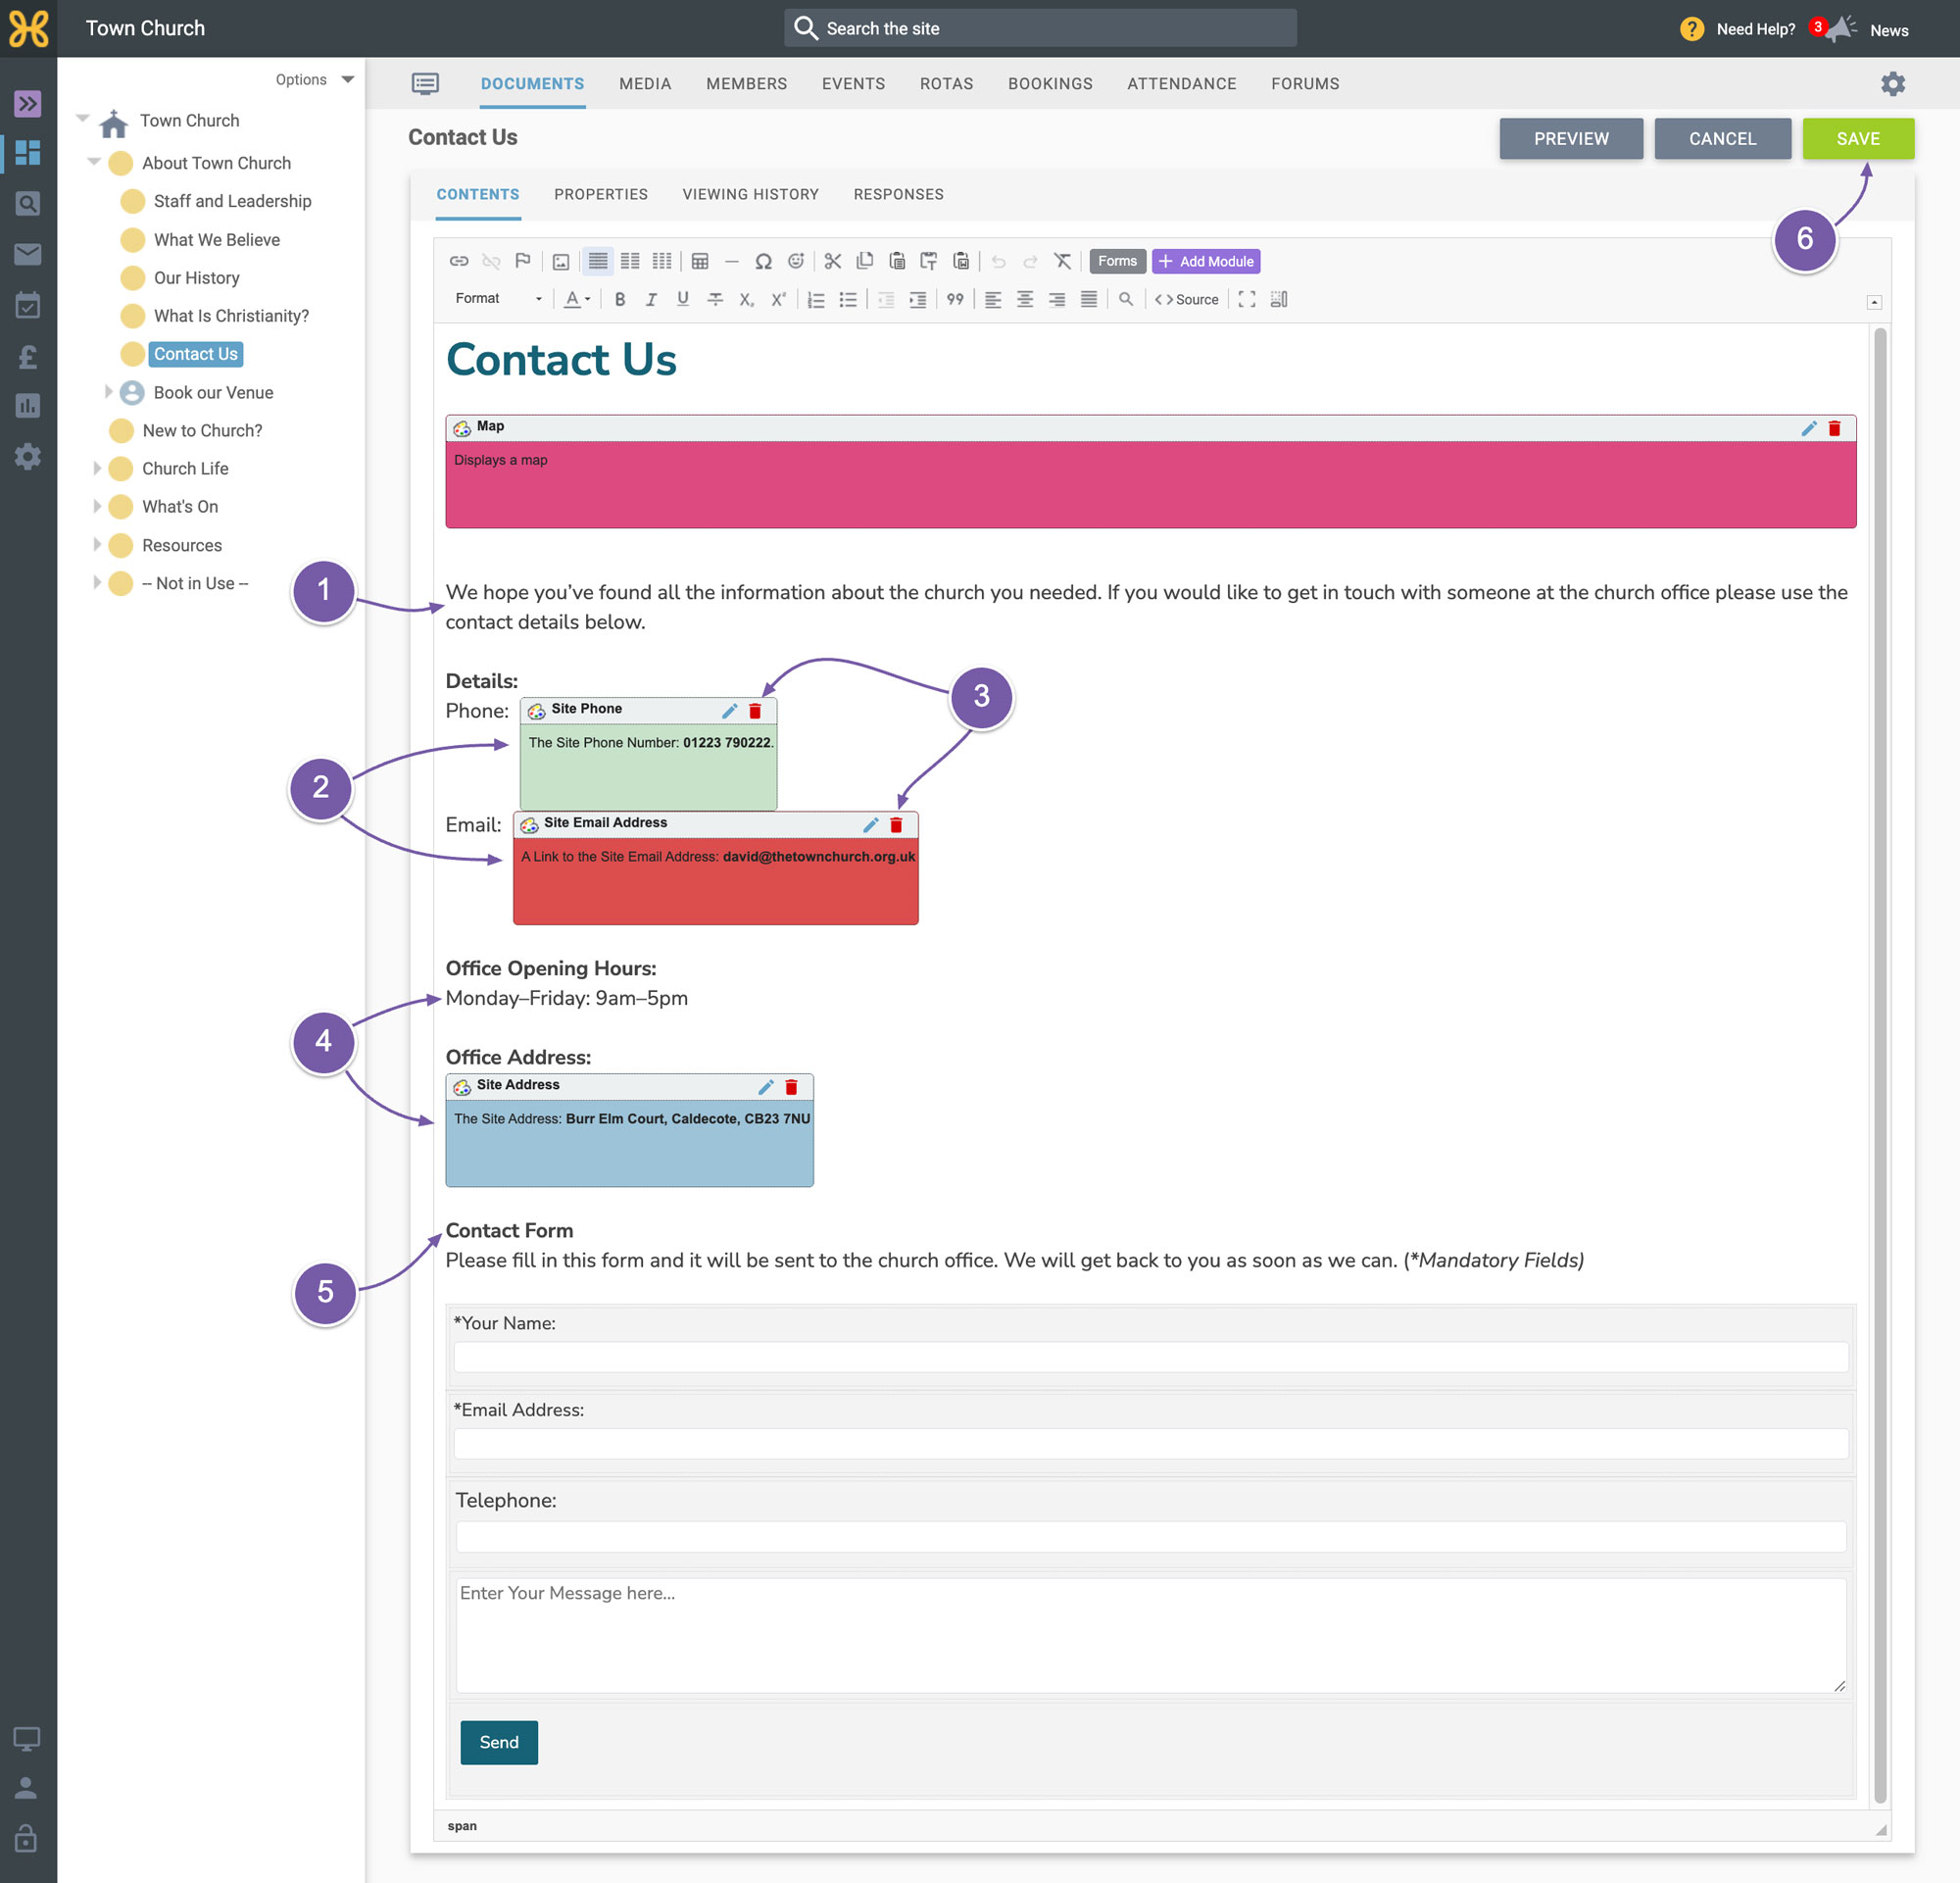
You can see that the contents of the article match up with what we saw on the website but there are some large coloured boxes. These boxes are what we call modules and they display data from your Hubb system.
So, let's now look at checking and customising what's on the page. Firstly, the “Map”.
-
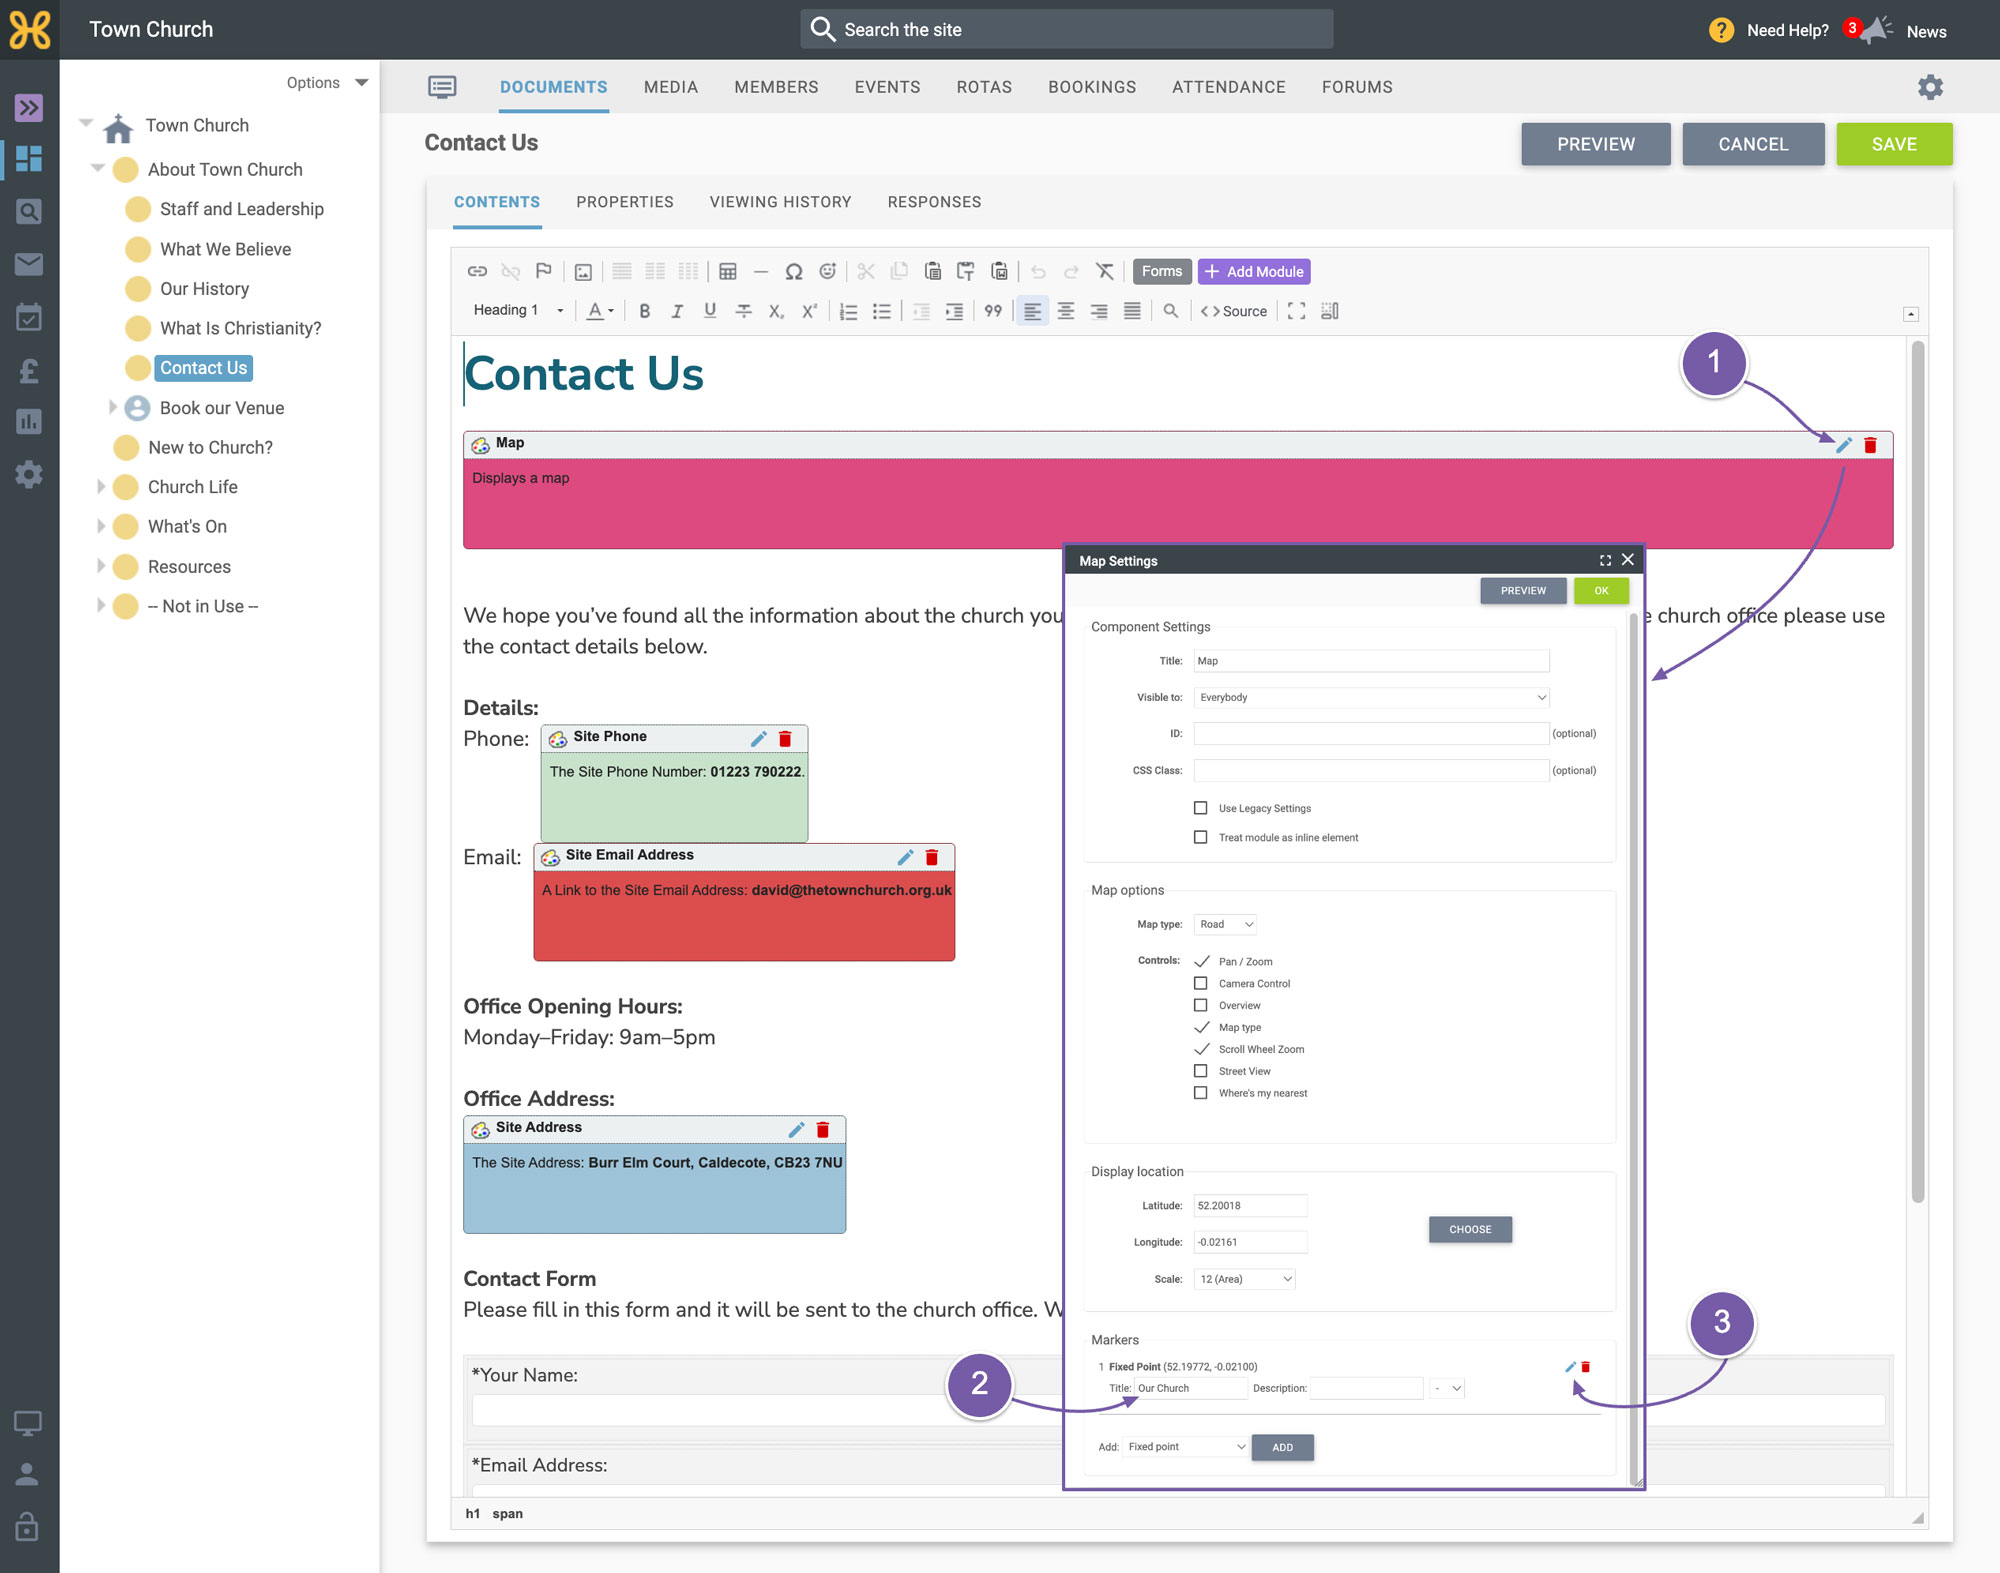
To edit the map just click on the edit module icon at the top right corner of the module and the map settings will appear in a dialogue box.
-
If you scroll down to the “Markers” section at the bottom you can change the name of the marker.
-
When you have done that, you can click on the edit icon.
-
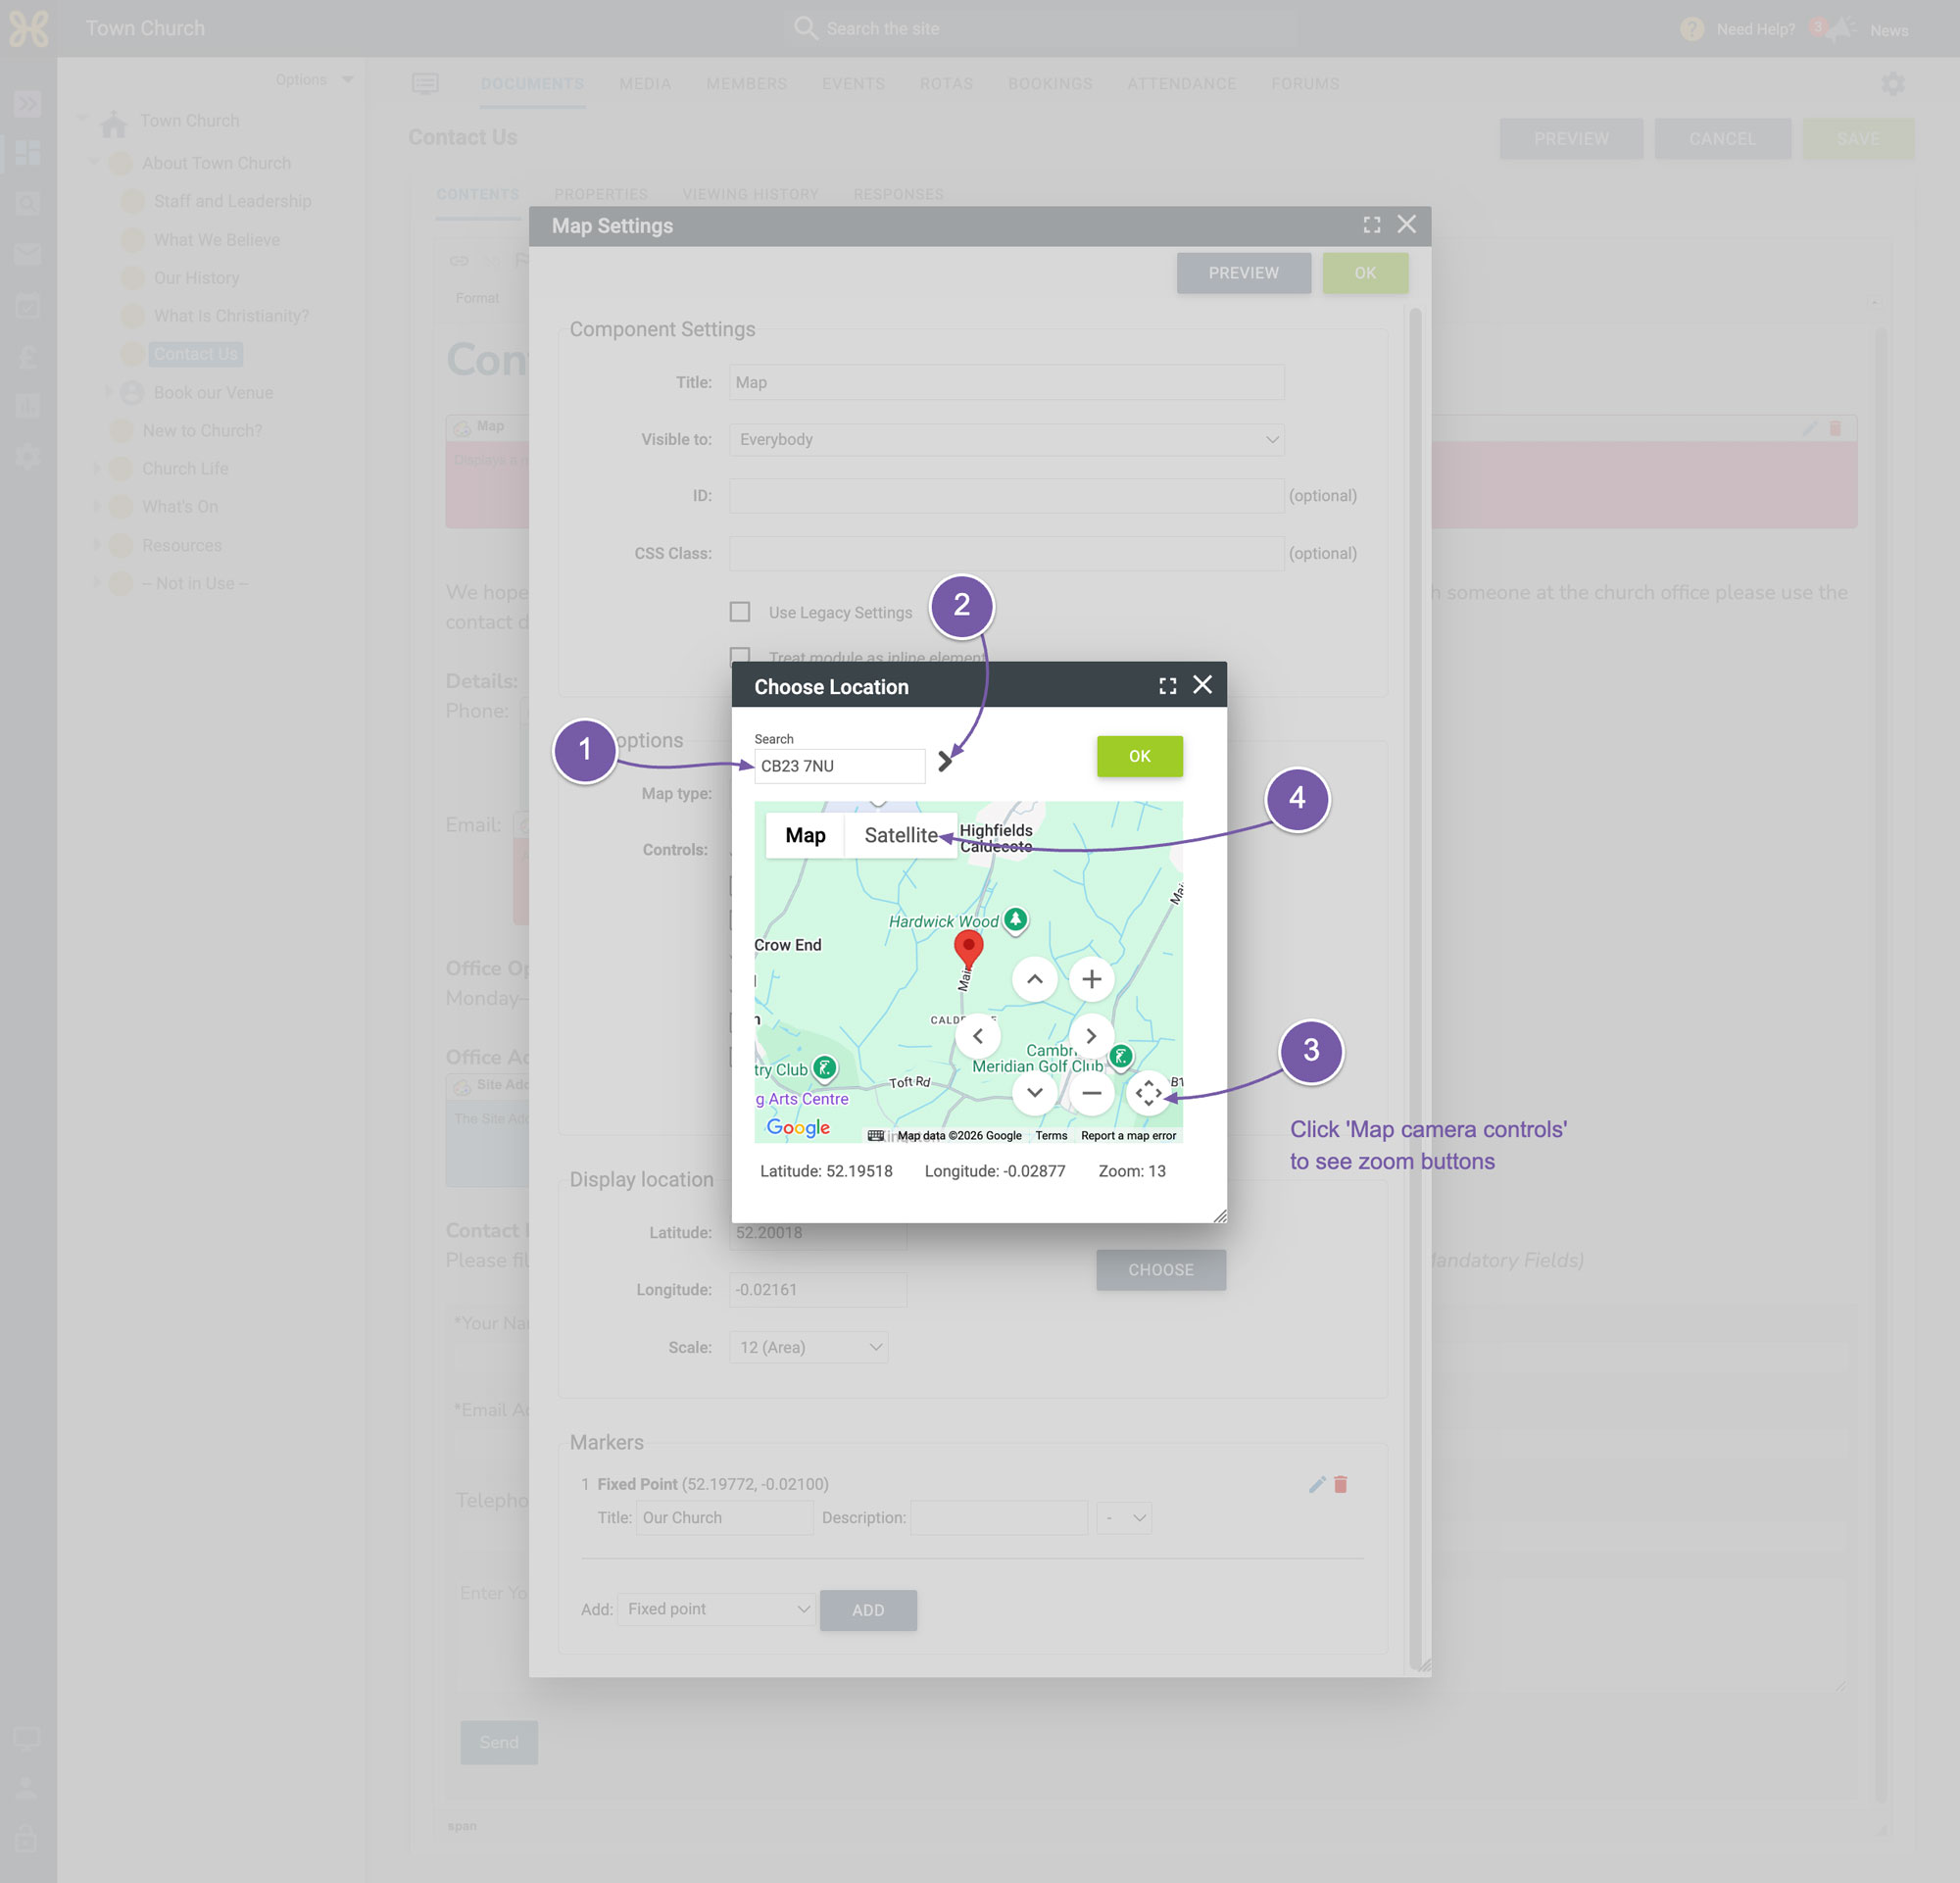
Now you will see the "Choose location" box where you need to type your postcode at the top
-
Click on the “Search” arrow. To get the map pin to where you want you can simply click on the place you want the map pin to be.
-
We recommend you use the zoom in button to get a sense of where the map is showing
-
Then select the Satellite view from the map type.
-
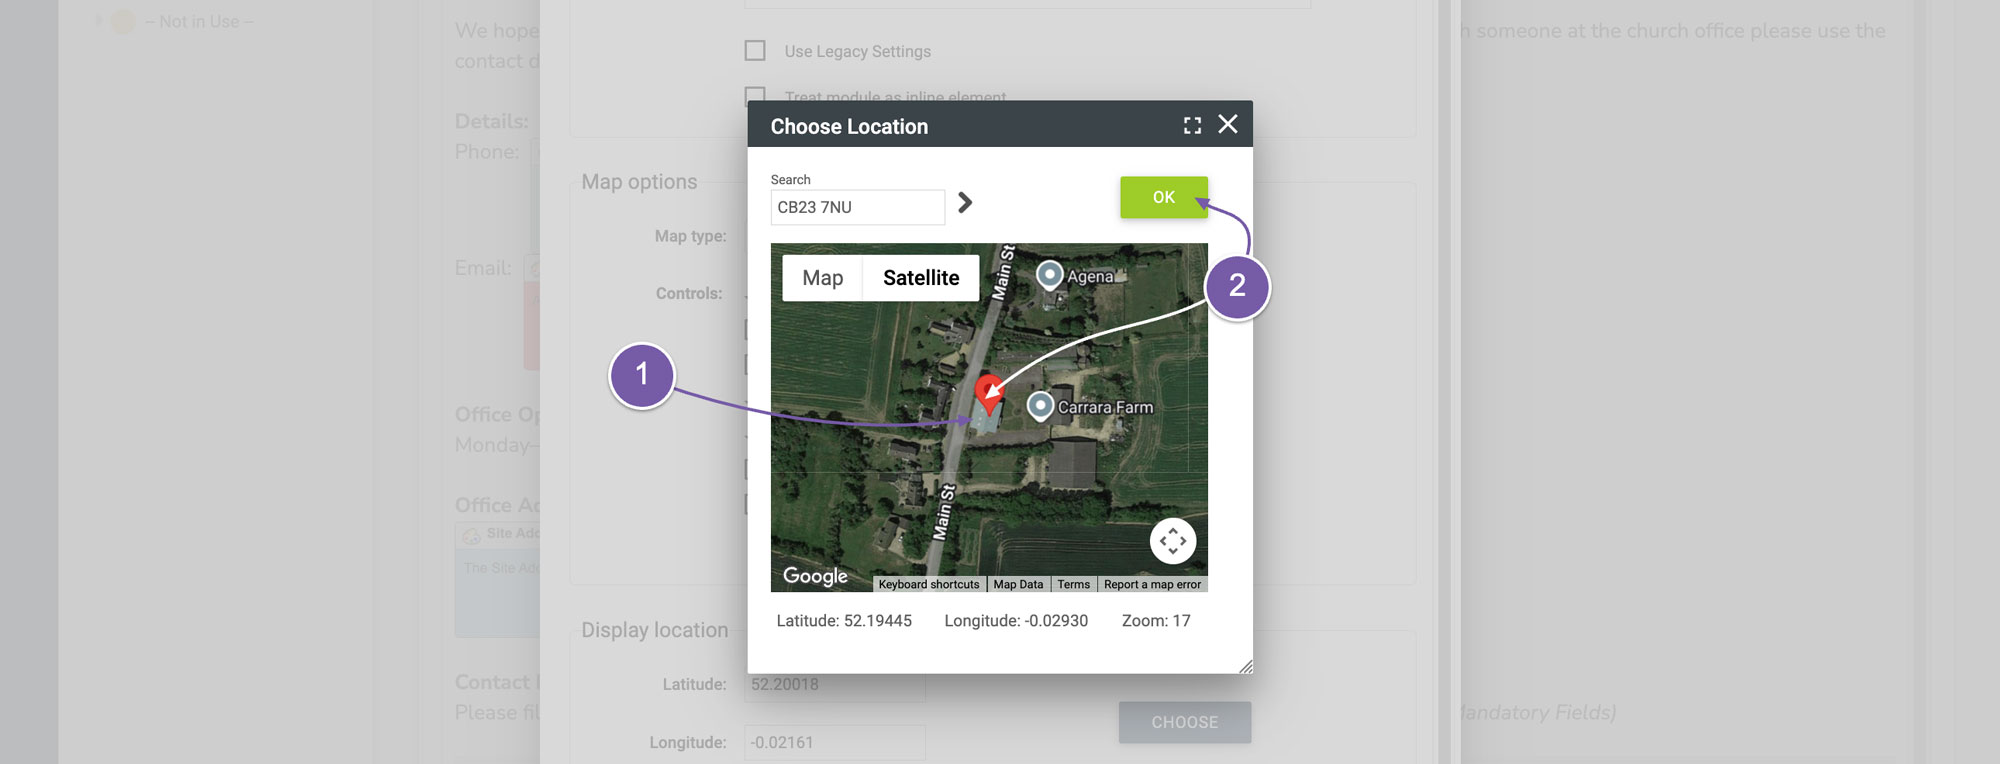
Hopefully now you'll be able to zoom in and locate your building.
-
The last thing you need to do is click on the map where the pin should go and click “OK”.
Back on the map settings we need to set the area that the map will display.
-
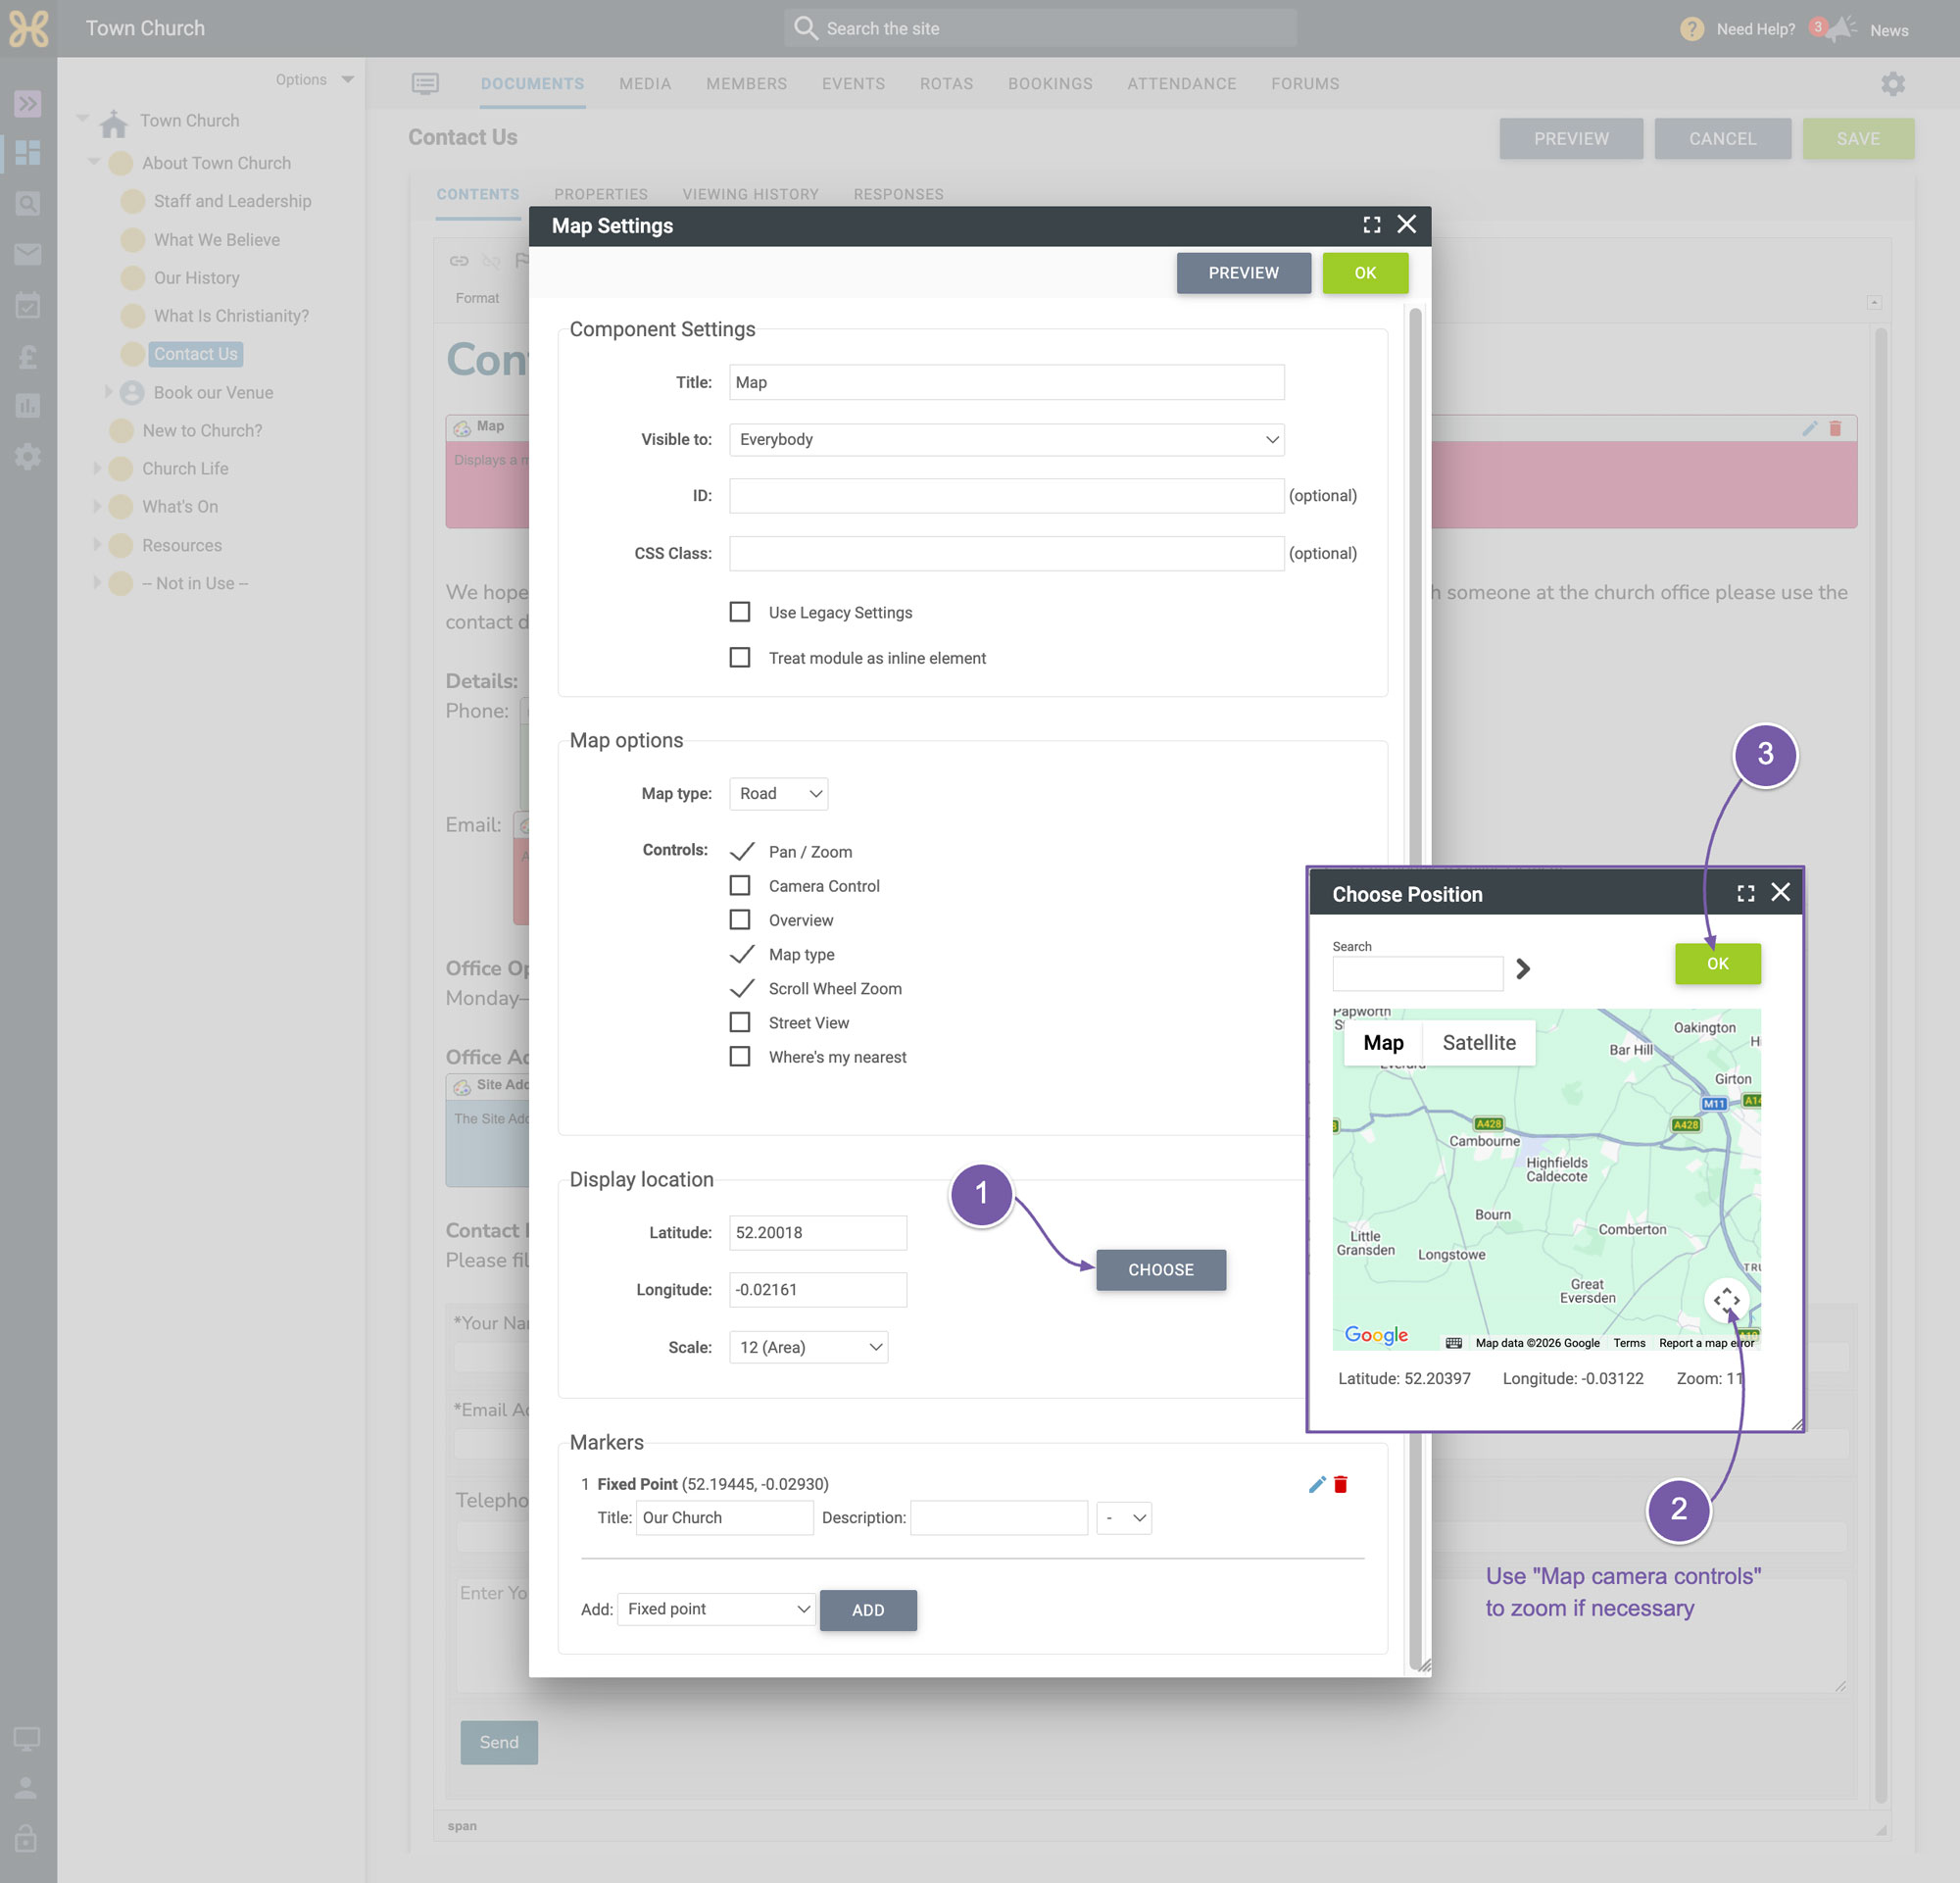
In the display location click on the “Choose” button
-
Drag the map to the location you want the map to show on your site. Ideally, your marker would sit in the middle. There is no marker to place here you are just selecting the physical area the map module will show.
-
When you are done click “OK” and you'll be taken back to the map settings box again.
We now need to set the zoom level that the map shows.
-
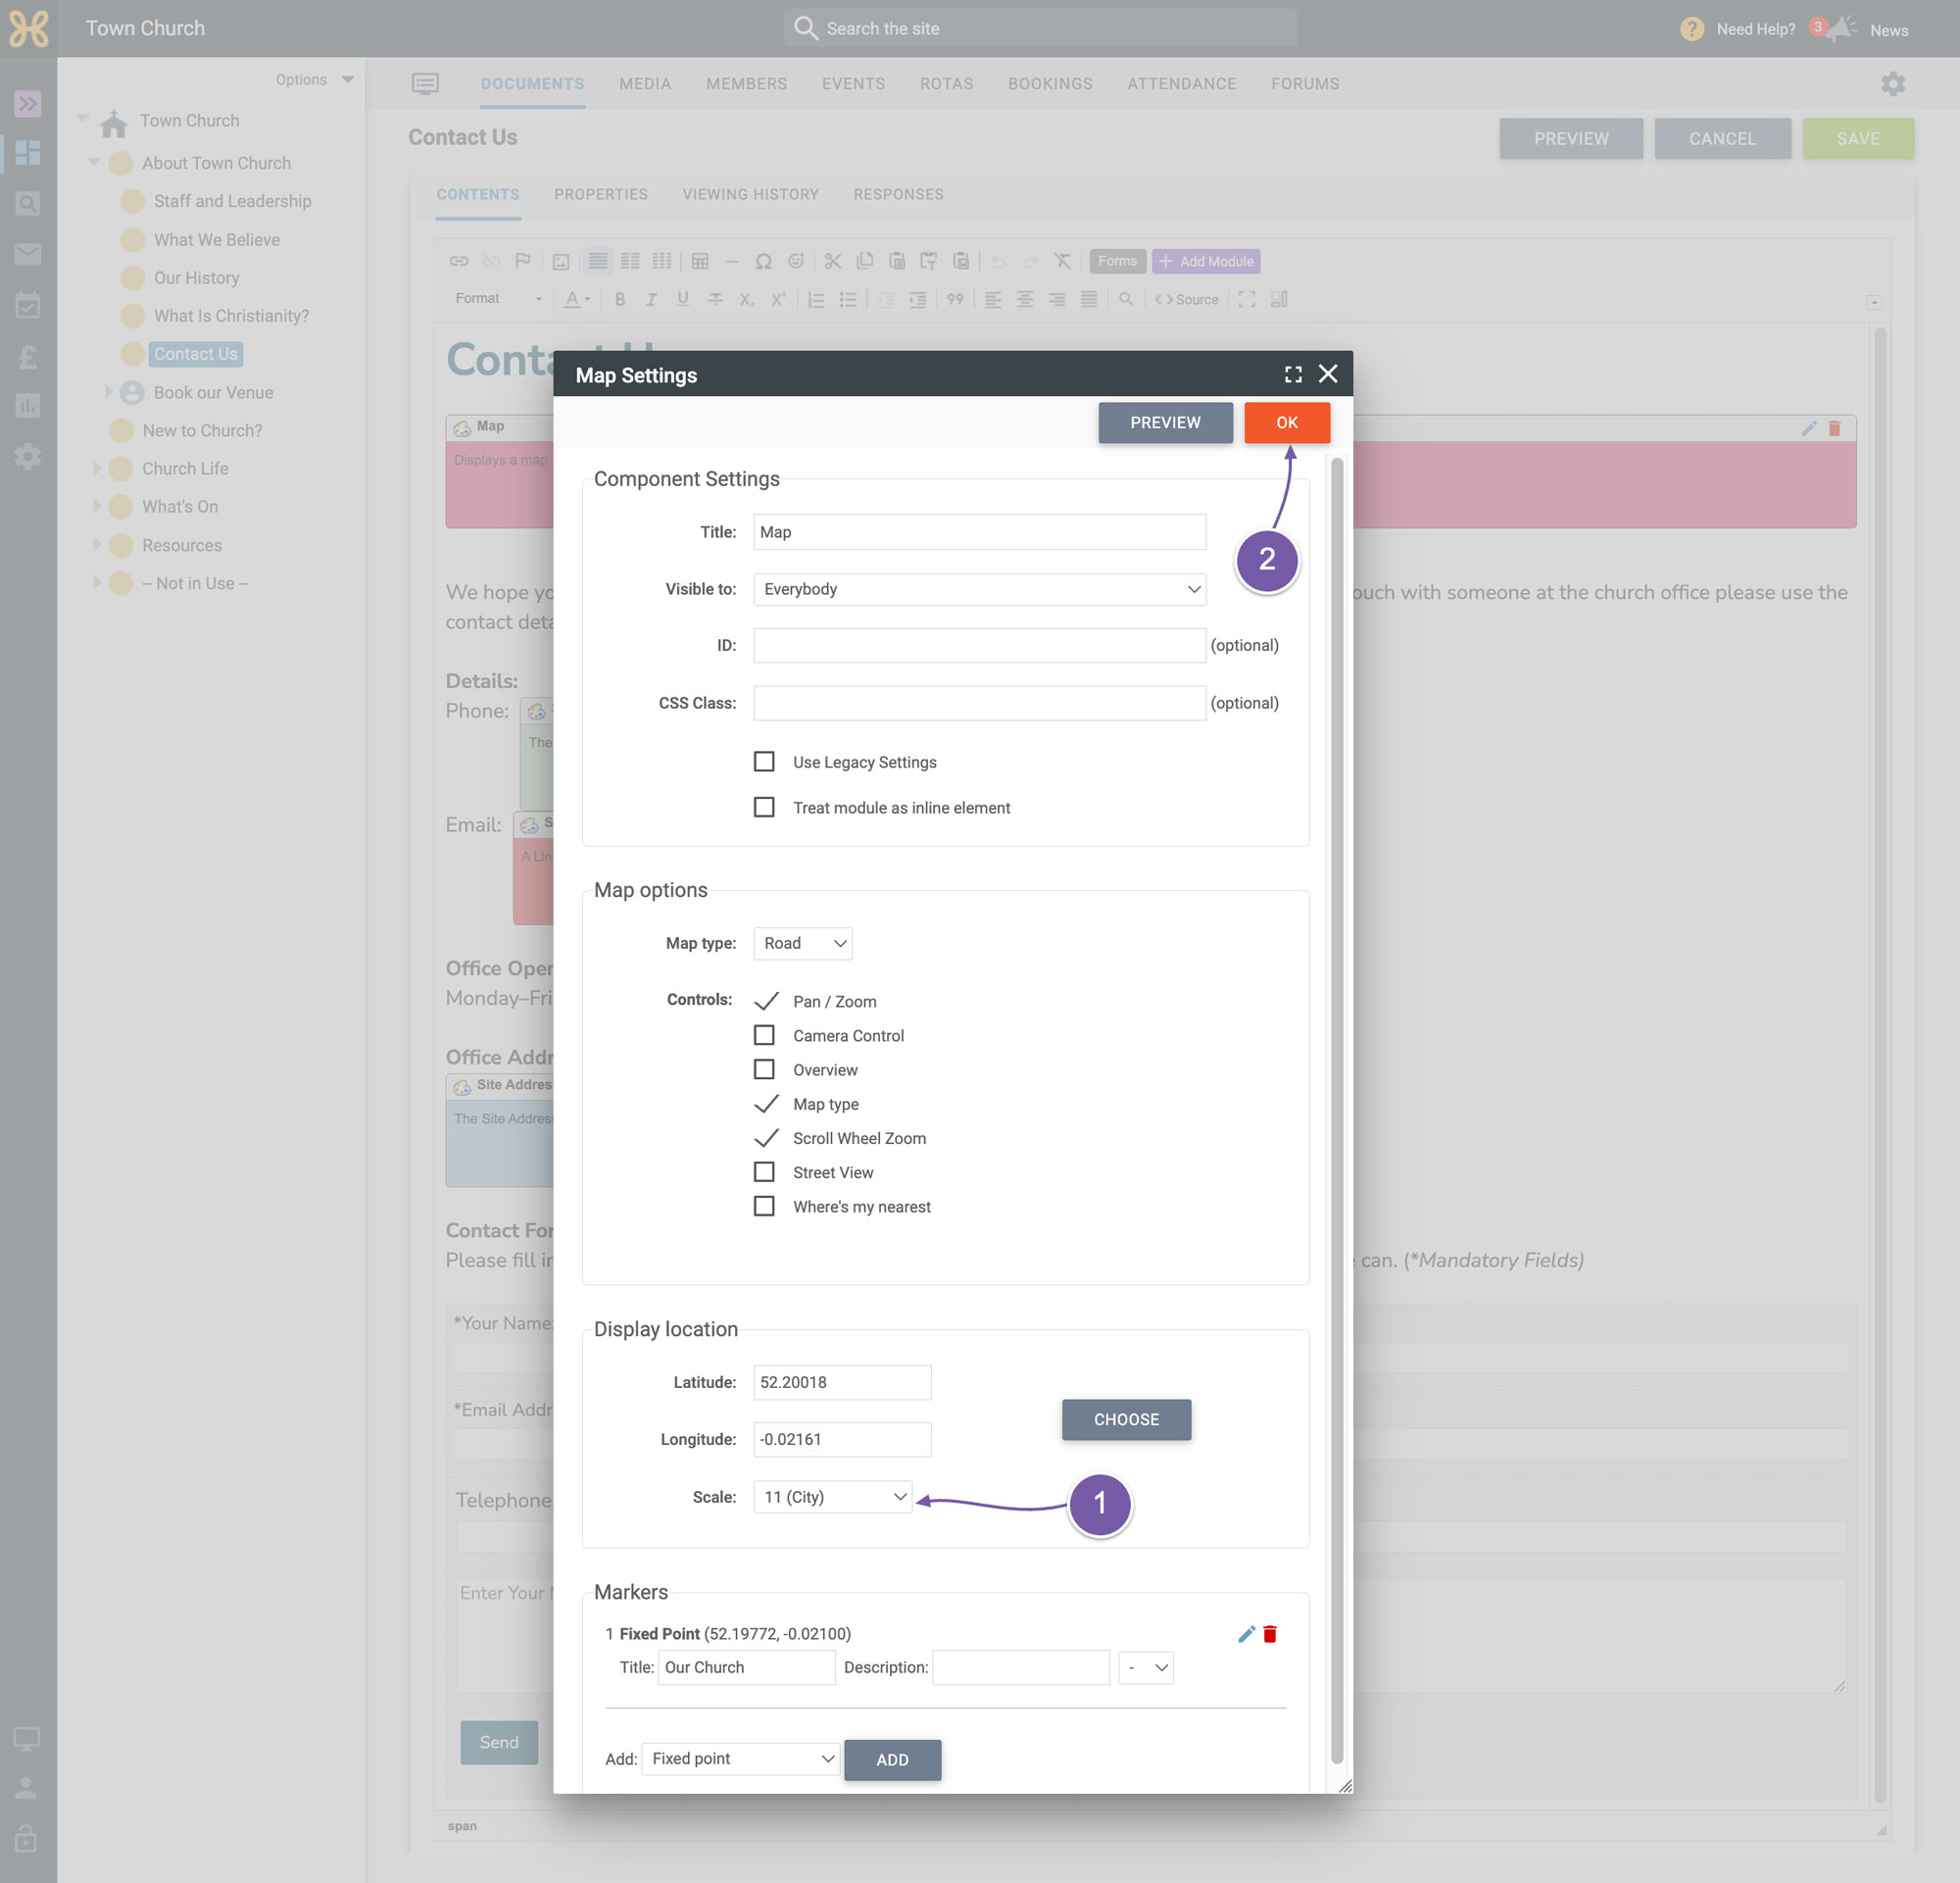
In the display location area click on the “Scale” and select the level of zoom. We have set it to 11 which will be fine for most scenarios. If you find this is too zoomed in when you look at the map you can come back in here and try any number to make it as helpful as possible to people who are trying to find your location.
-
When you are happy with the settings, just click “OK” at the top of the map settings box.
-
The next area of the page is a short paragraph about contacting the church. You can edit this to be whatever you need.
-
Next, come your phone and email address. These are taken directly from your site settings. If they are correct just leave them.
-
If you want to change the details to be different from your site settings, then you need to click on the red bin icon at the top right of each module and just write any details that you wish to show.
-
Just a bit lower down you can change the opening hours and remove the address box with any text you like just as you did with the phone and email details.
-
The form at the bottom is all set up and ready to work. You will just need to go and make sure that a notification is set up to let you know when someone has filled it in.
-
First now that you have completed personalising the Contact Us page, click "Save".
 To set up the Contact Form notification
:
-
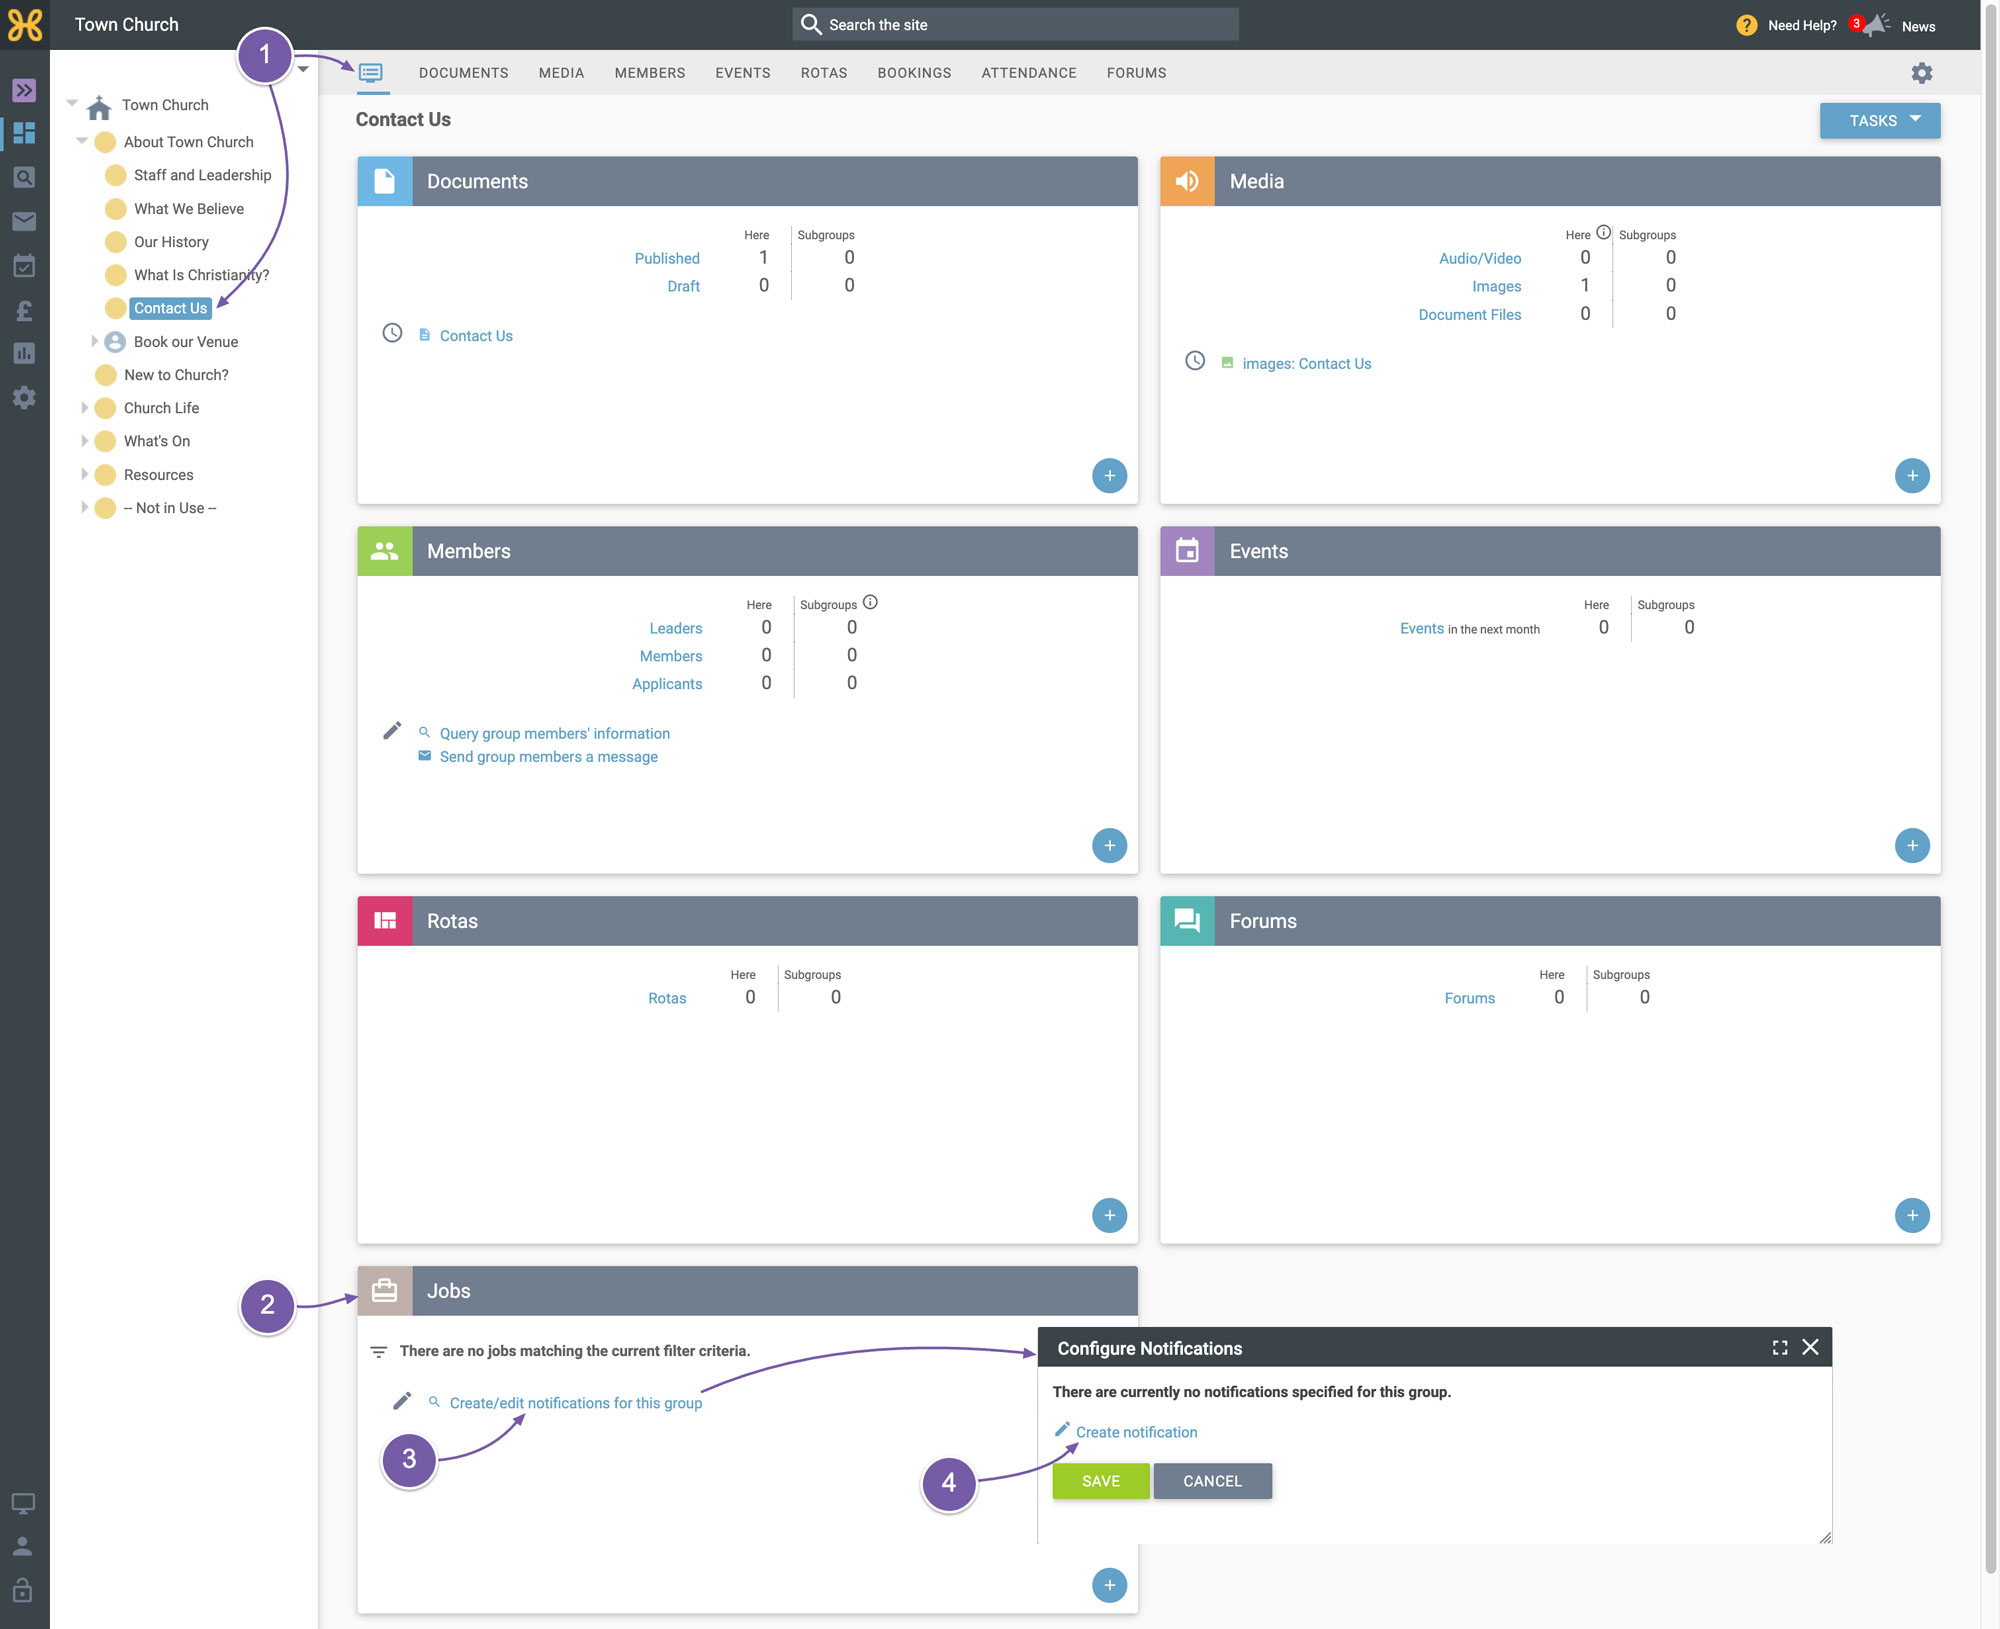
Go to the “Group Summary” tab
-
Scroll down to the "Jobs" area. This is where you can set notifications for when certain things happen in the system.
-
Click on "Create/edit notifications for this group". A box will display with the current notifications that are already set up.
-
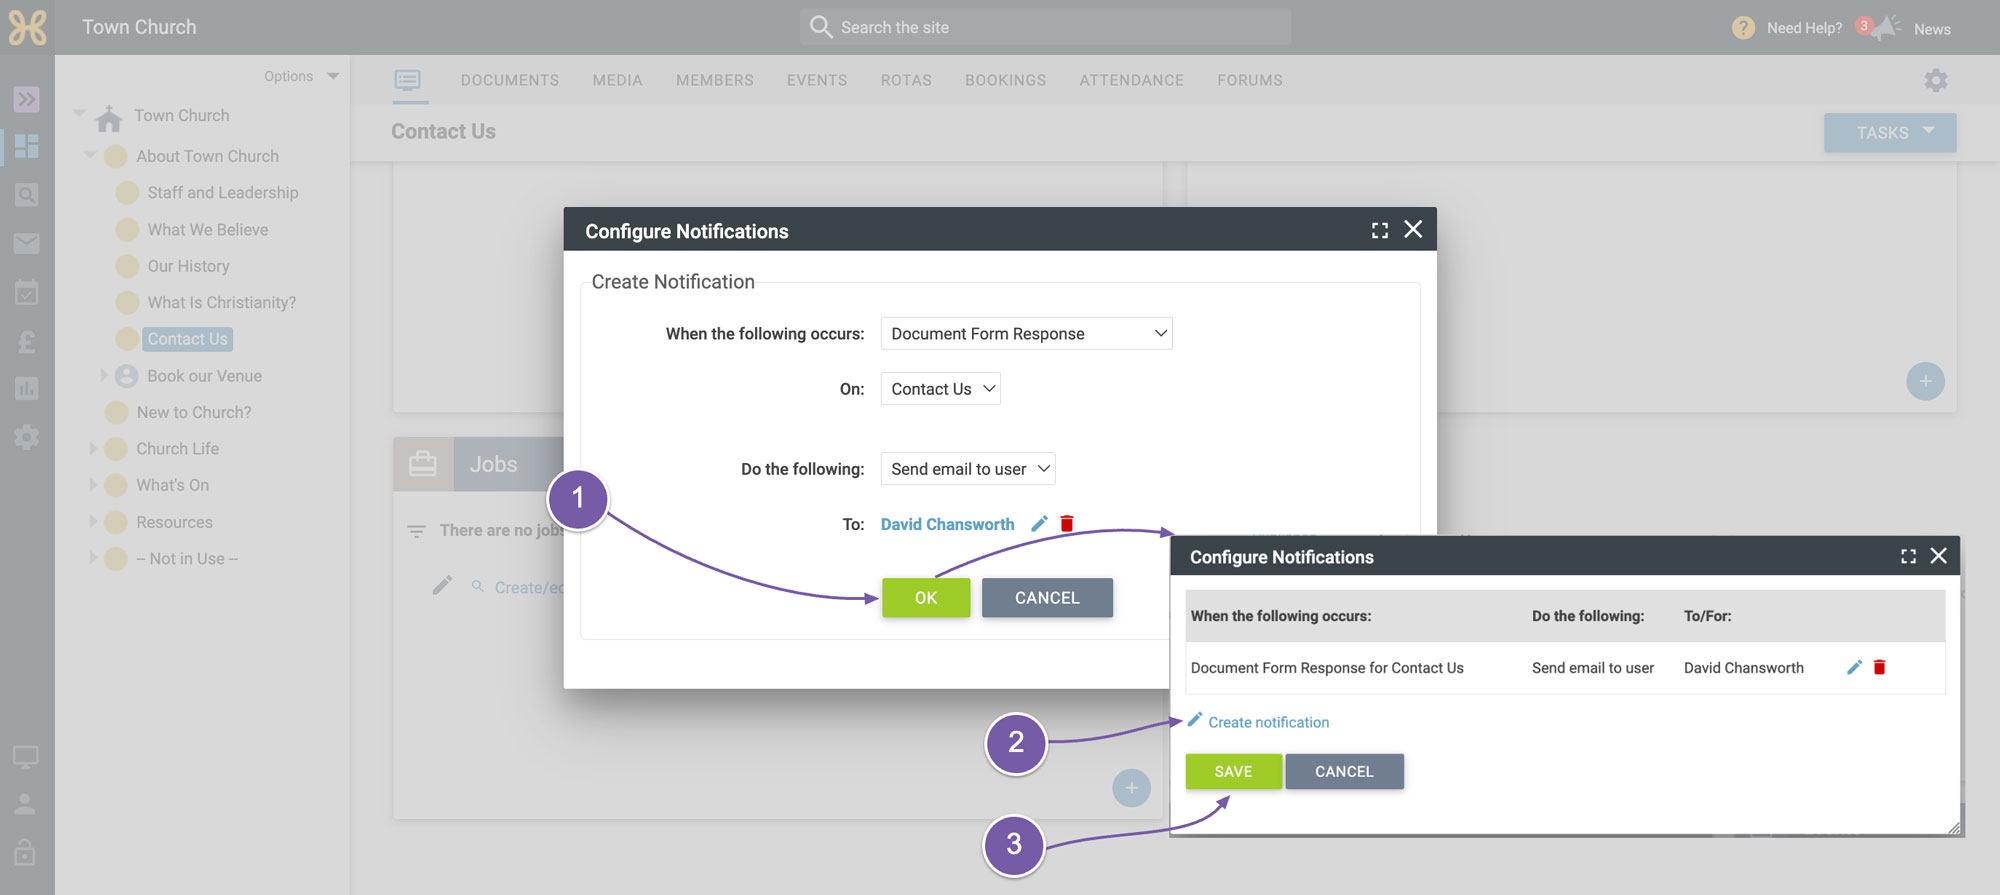
To add a new one, click on “Create notification”.
-
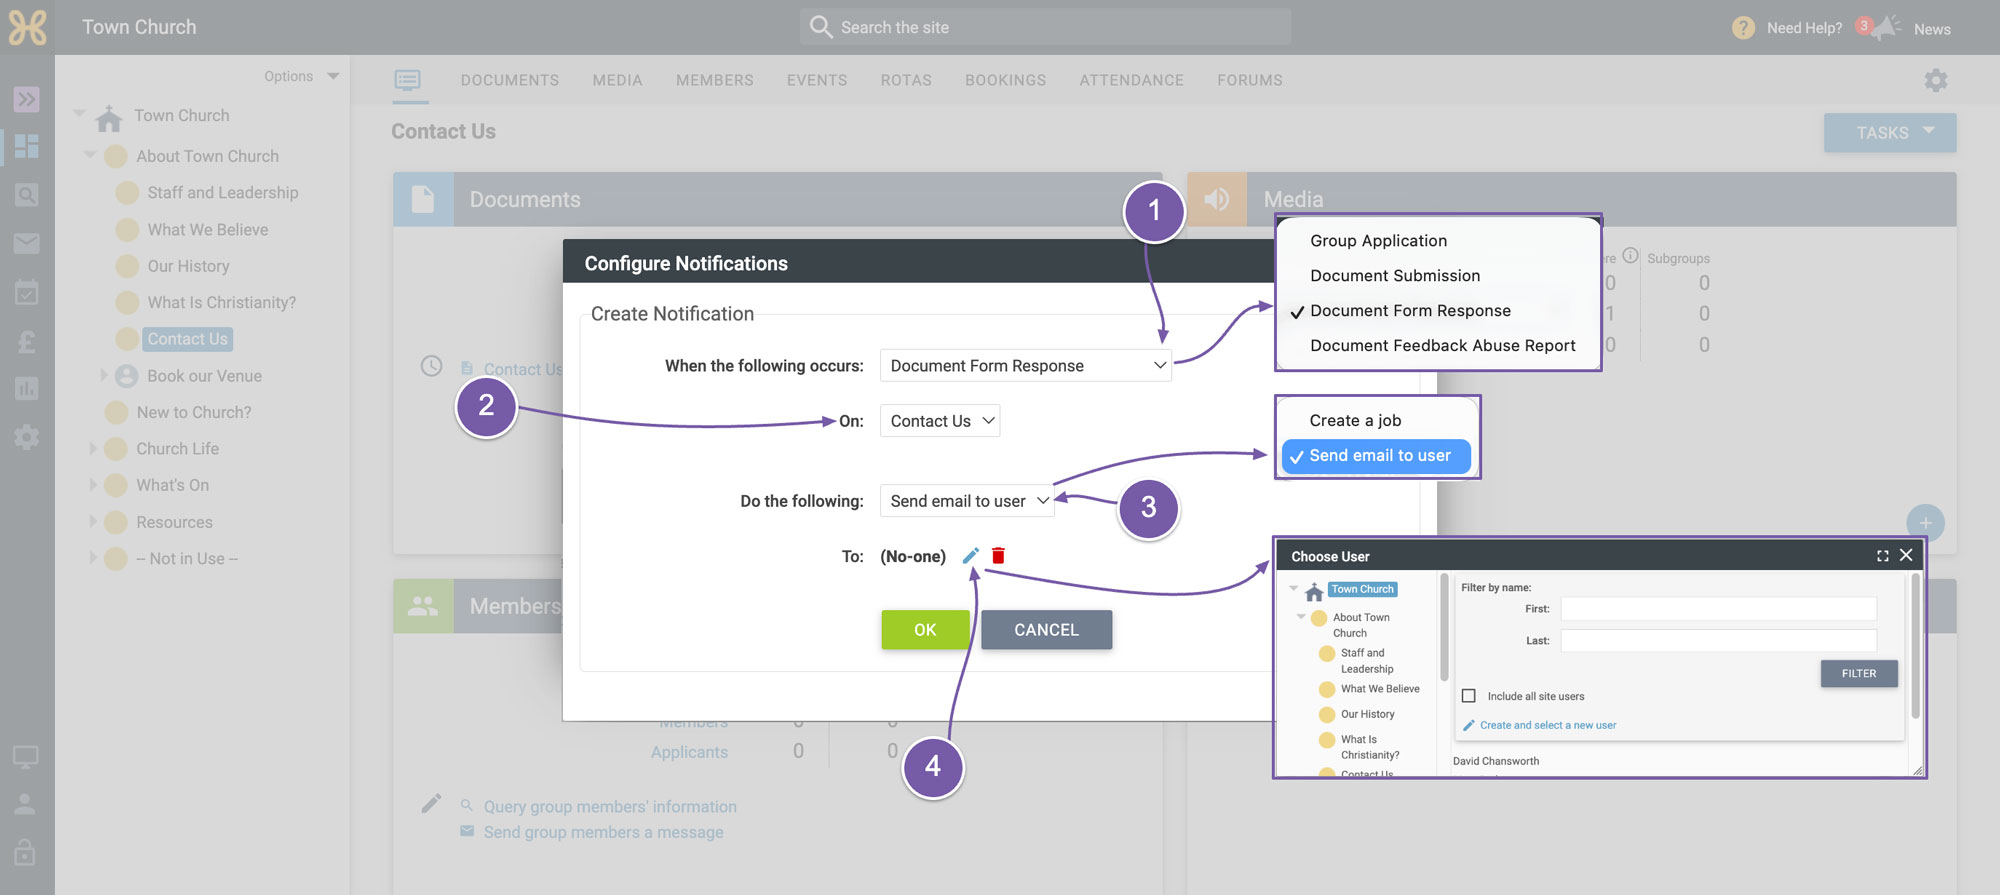
For the top box we need to choose what we are setting up the notification for and it needs to be set to a "Document form response".
-
Then choose which document you want to set this notification up for - which is “Contact Us”.
-
Then you need to choose between either setting up a job on the system or adding an email notification. It's worth mentioning here that "jobs" is basically a task list of things you need to do in the Hubb system. But what we have found is that most people like to set up email notifications. So, for now let's stick with an email notification
-
Then pick who needs to get that email by clicking on the blue “Edit” icon and finding who you would like to add.
-
When you have found that person, save this by clicking OK and reviewing the change you just made.
-
You can now go and add more people to receive notifications, if required
-
When you are done, click “Save”.