Change your welcome image
(3 minutes)
Swap our stock welcome image for one of your own.
Sorry, your browser is unable to play this type of file.
You can still
download it
-
The last part of the welcome area to personalise is your welcome image.
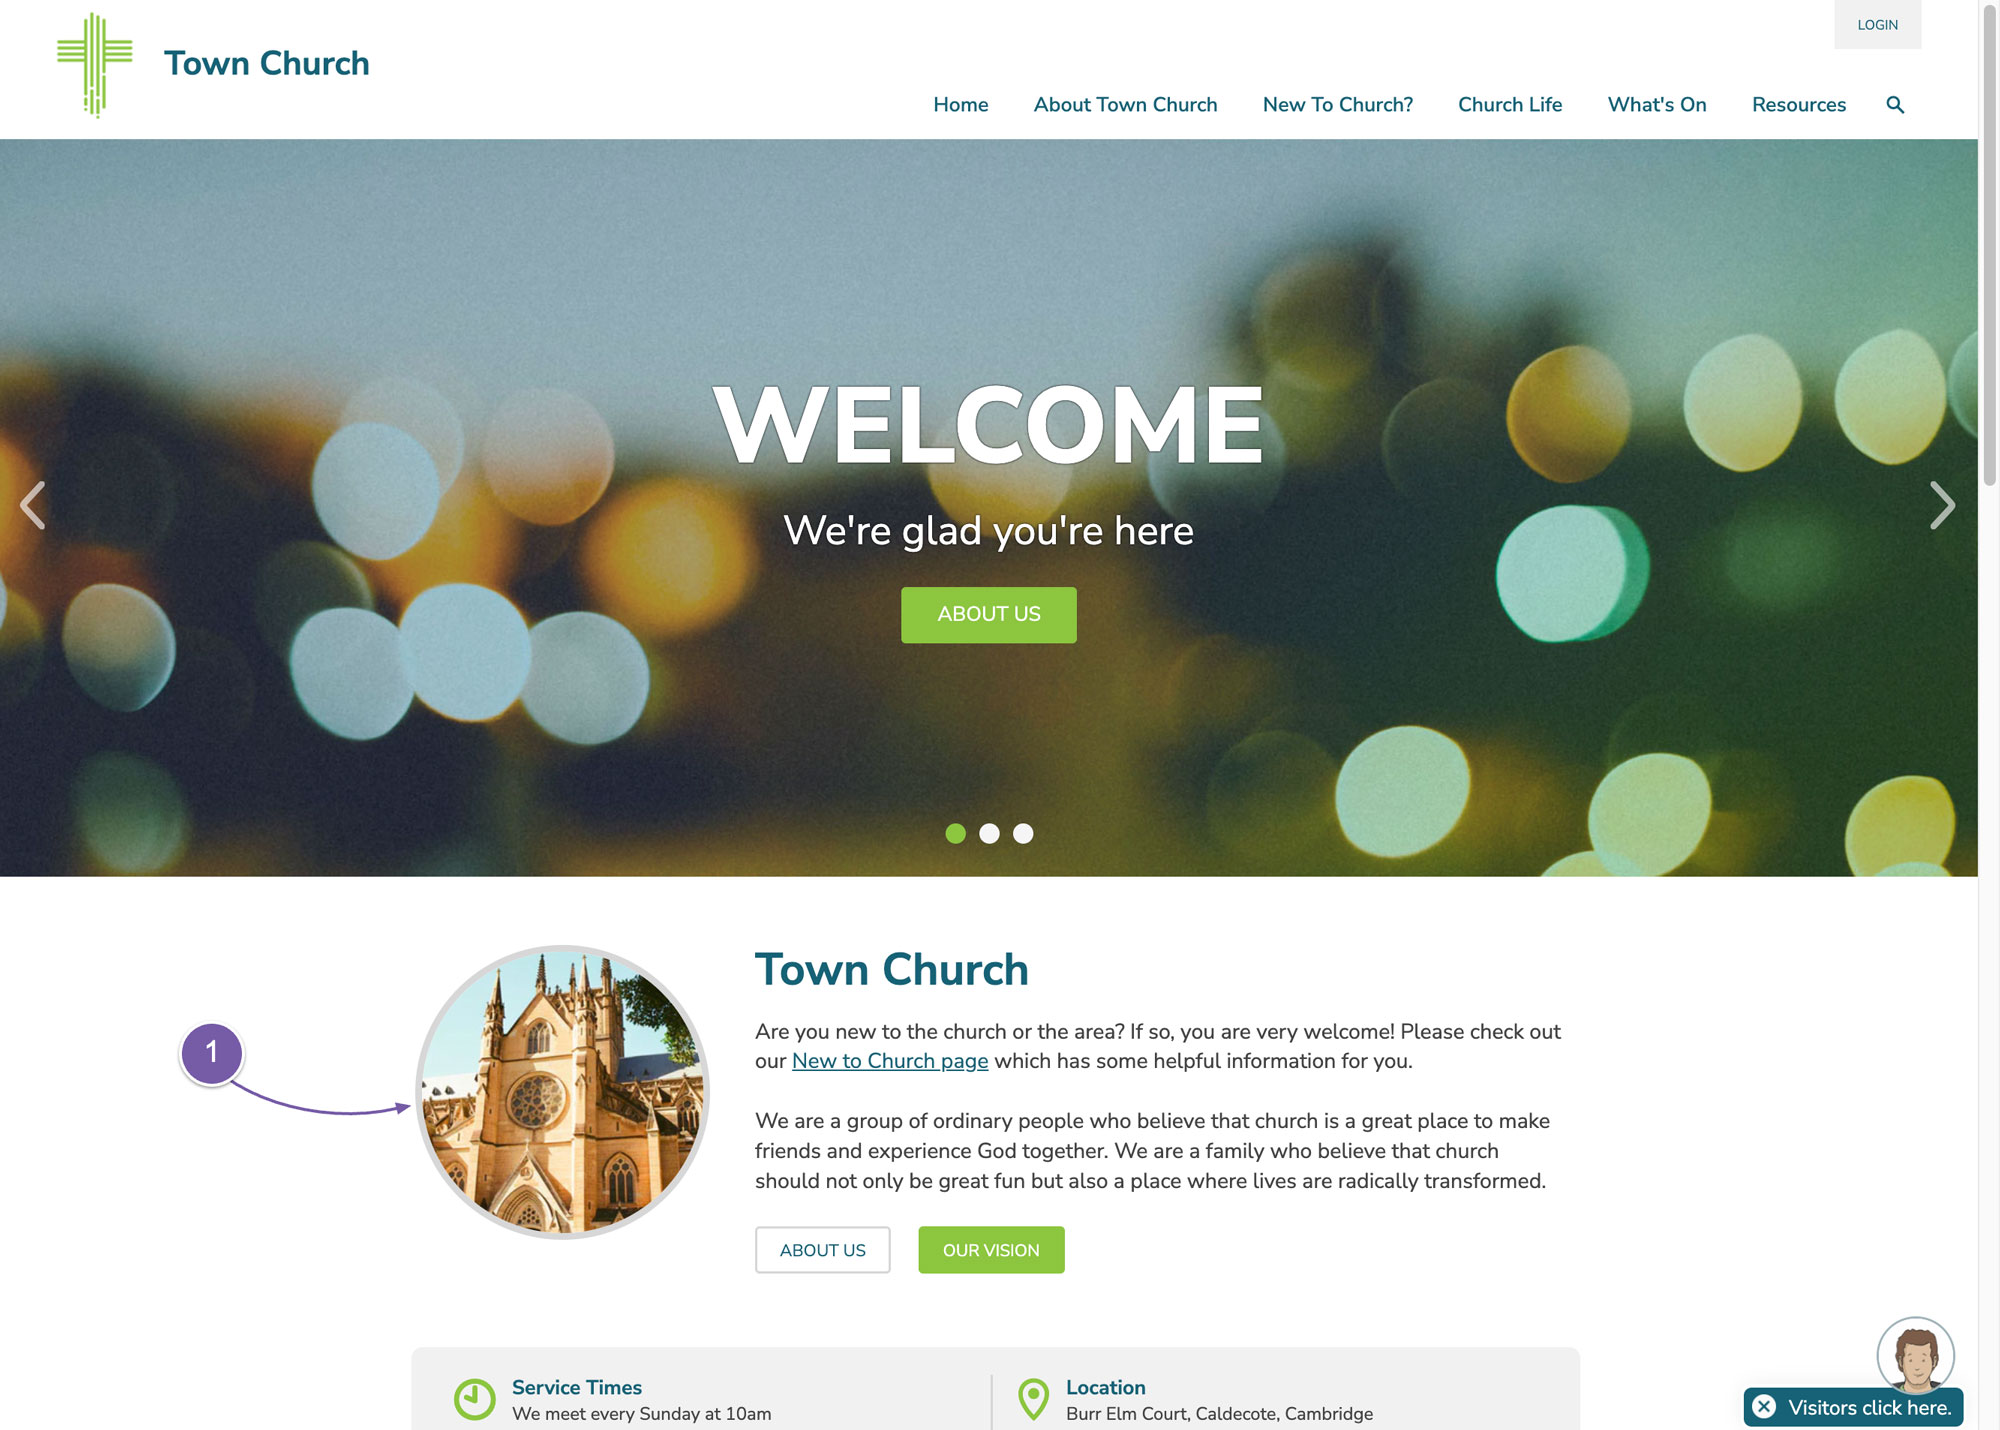
The size of your image needs to be square and is displayed at 262 pixels wide by 262 pixels high. You don't have to have it that size, but we would recommend it and we will show you how to upload your image, crop it to be square and resize it to be 262x262 pixels all inside your Hubb web office.
-
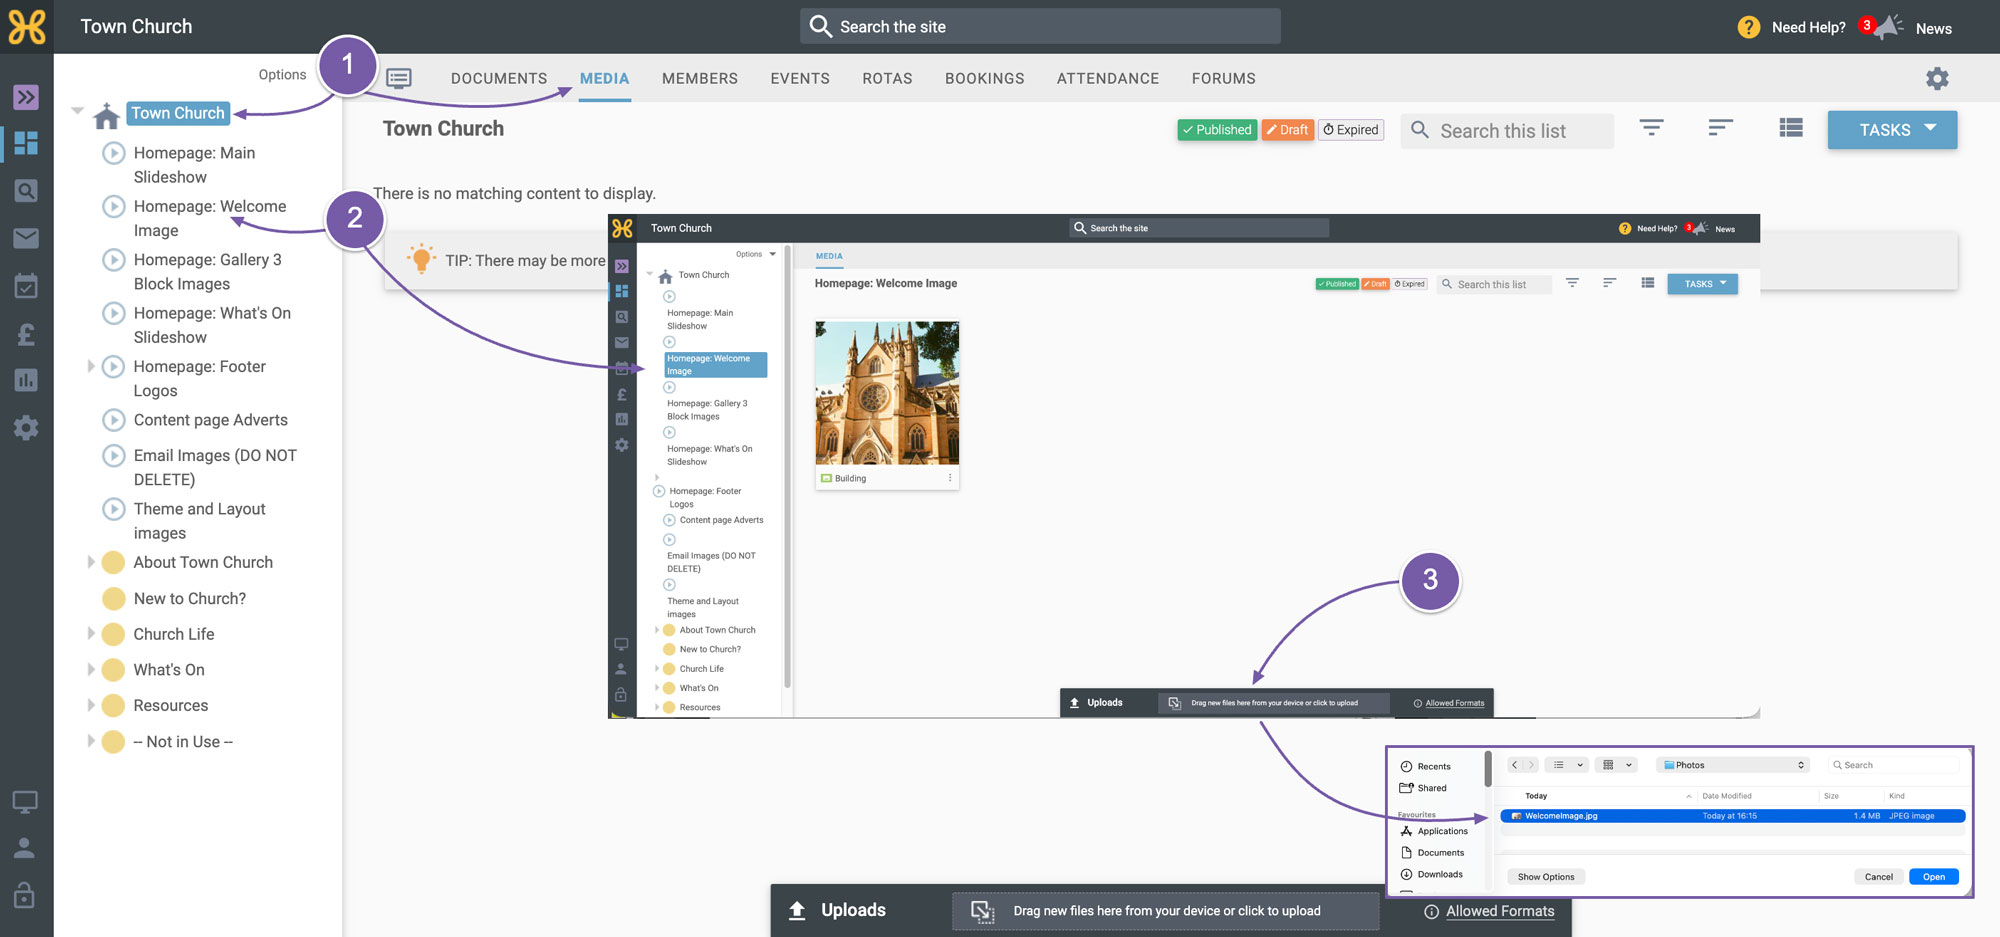
In your web office, go to the top group of your group tree and click on the “Media” tab.
-
Then choose the media group called “Homepage Welcome Image”.
-
Click in the “Upload” area at the bottom of the screen and upload your image.
-
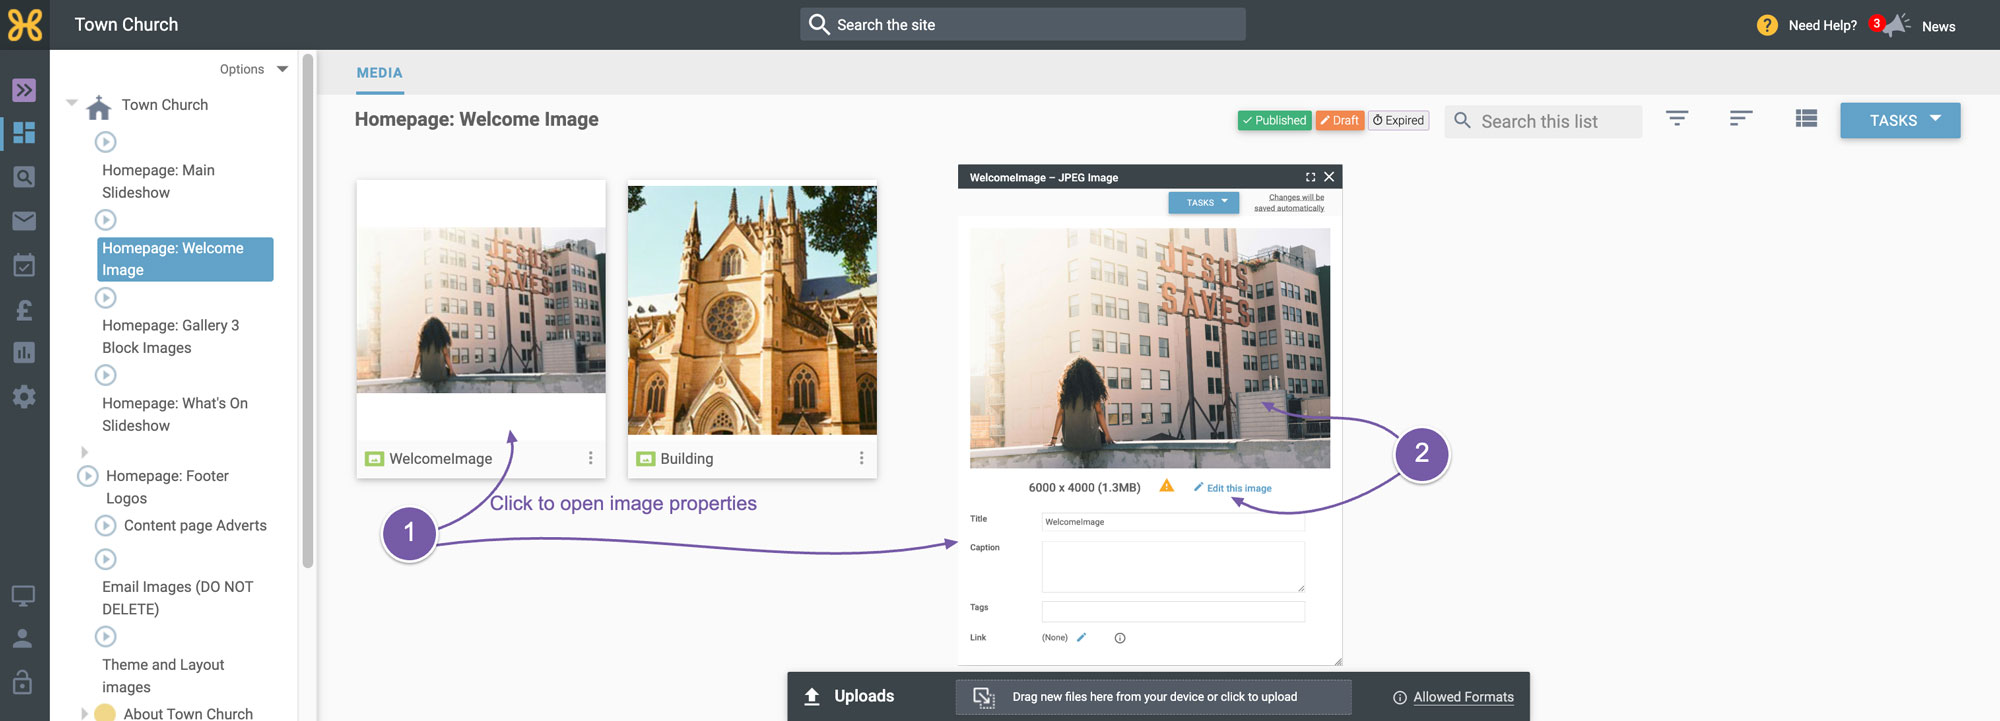
Once it's uploaded, you just need to click on it to open its properties
-
Either click on the image or on the "Edit this image" link
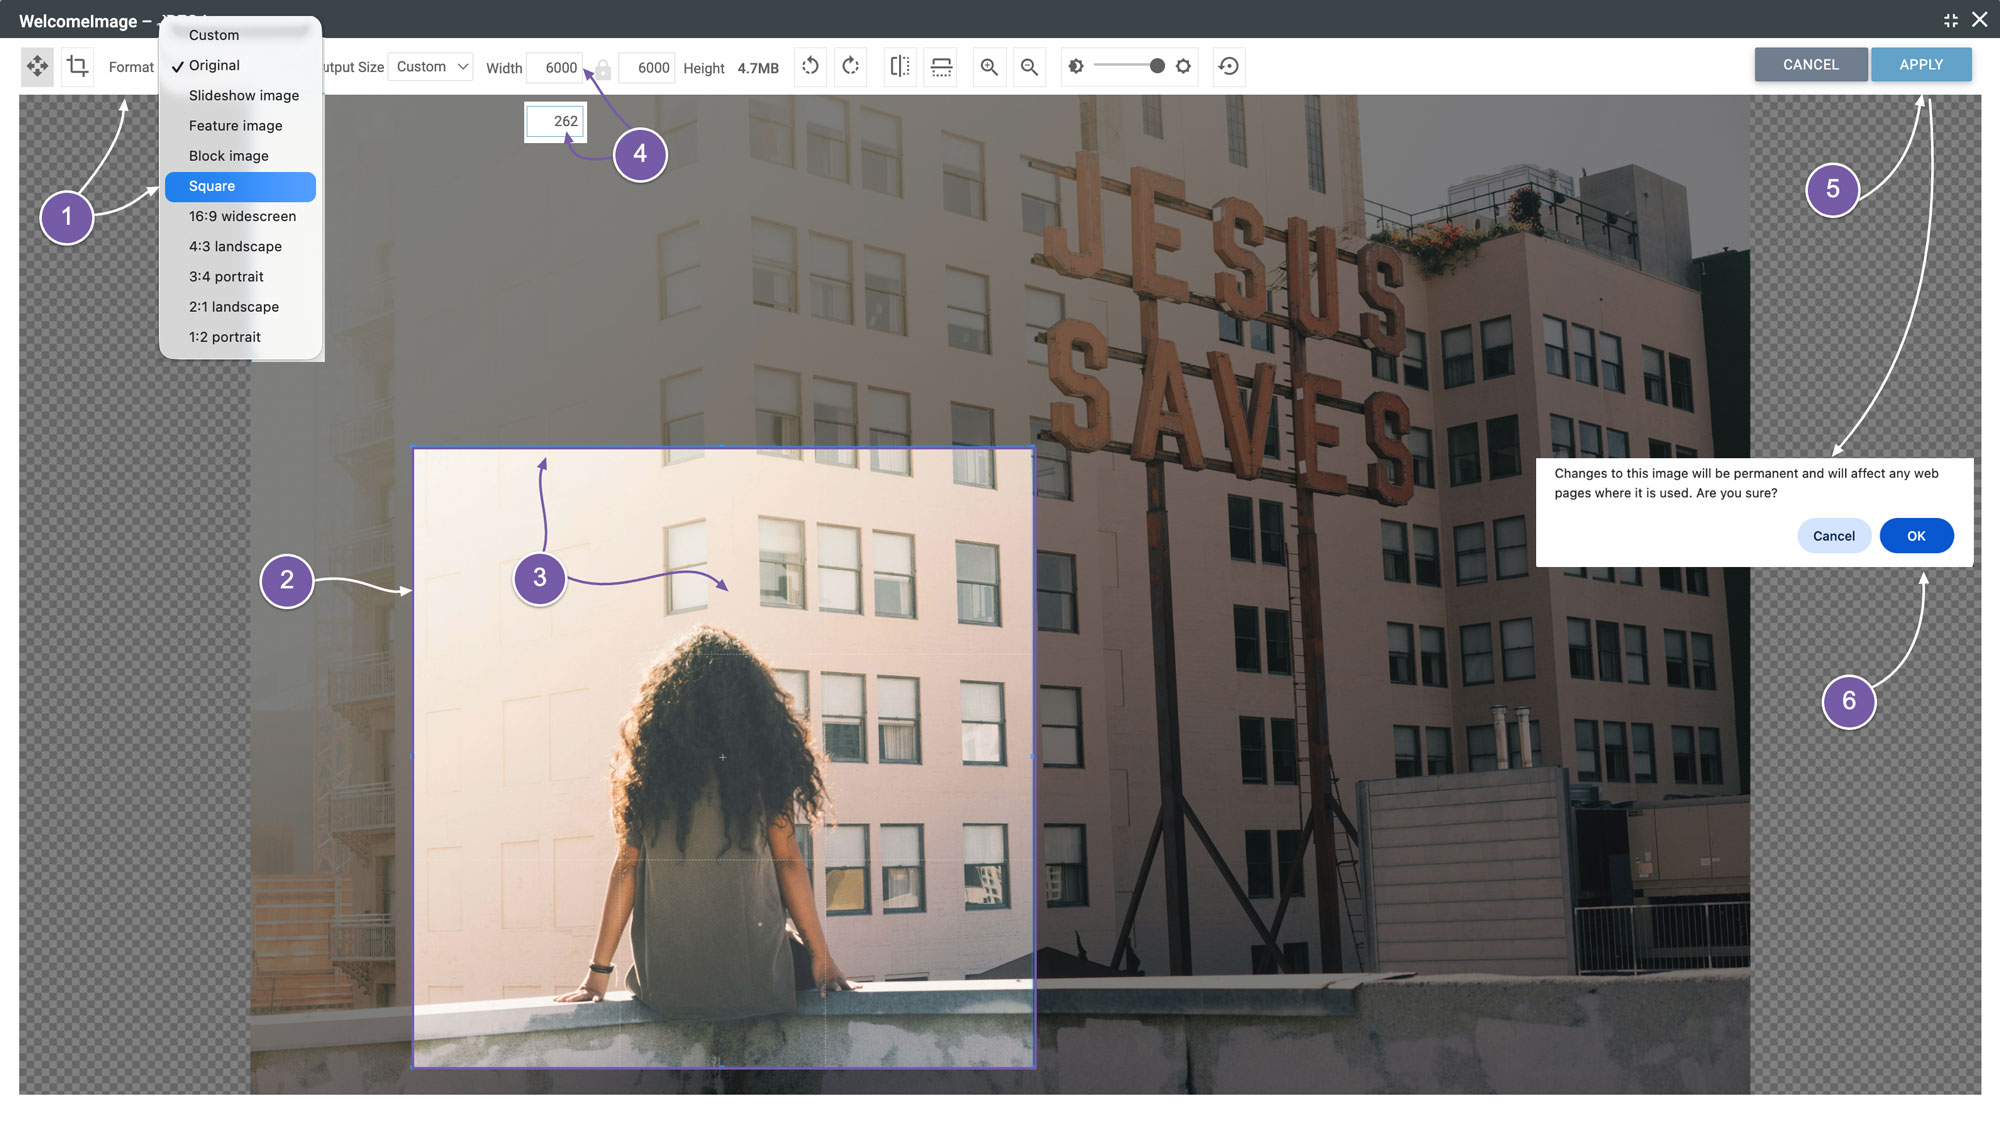
Now you are in our built-in image editor to help you crop the image to be square.
-
We have the format dropdown at the top left of the screen. All you need to do is click on that dropdown and select “Square”.
-
What you can now see is a light area that is the correct size for the square image. The dark area is what will be lost when you save the changes.
-
What you can do now is click on the light area and drag it to where you want.
-
When you are happy with the position, just type in 262 in the "width" box.
-
Click on the “Apply” button at the top right of the editor
-
Then “OK” on the final confirmation prompt.
Now you have your chosen image in the right size you need to
add it to the welcome article. To do this:
-
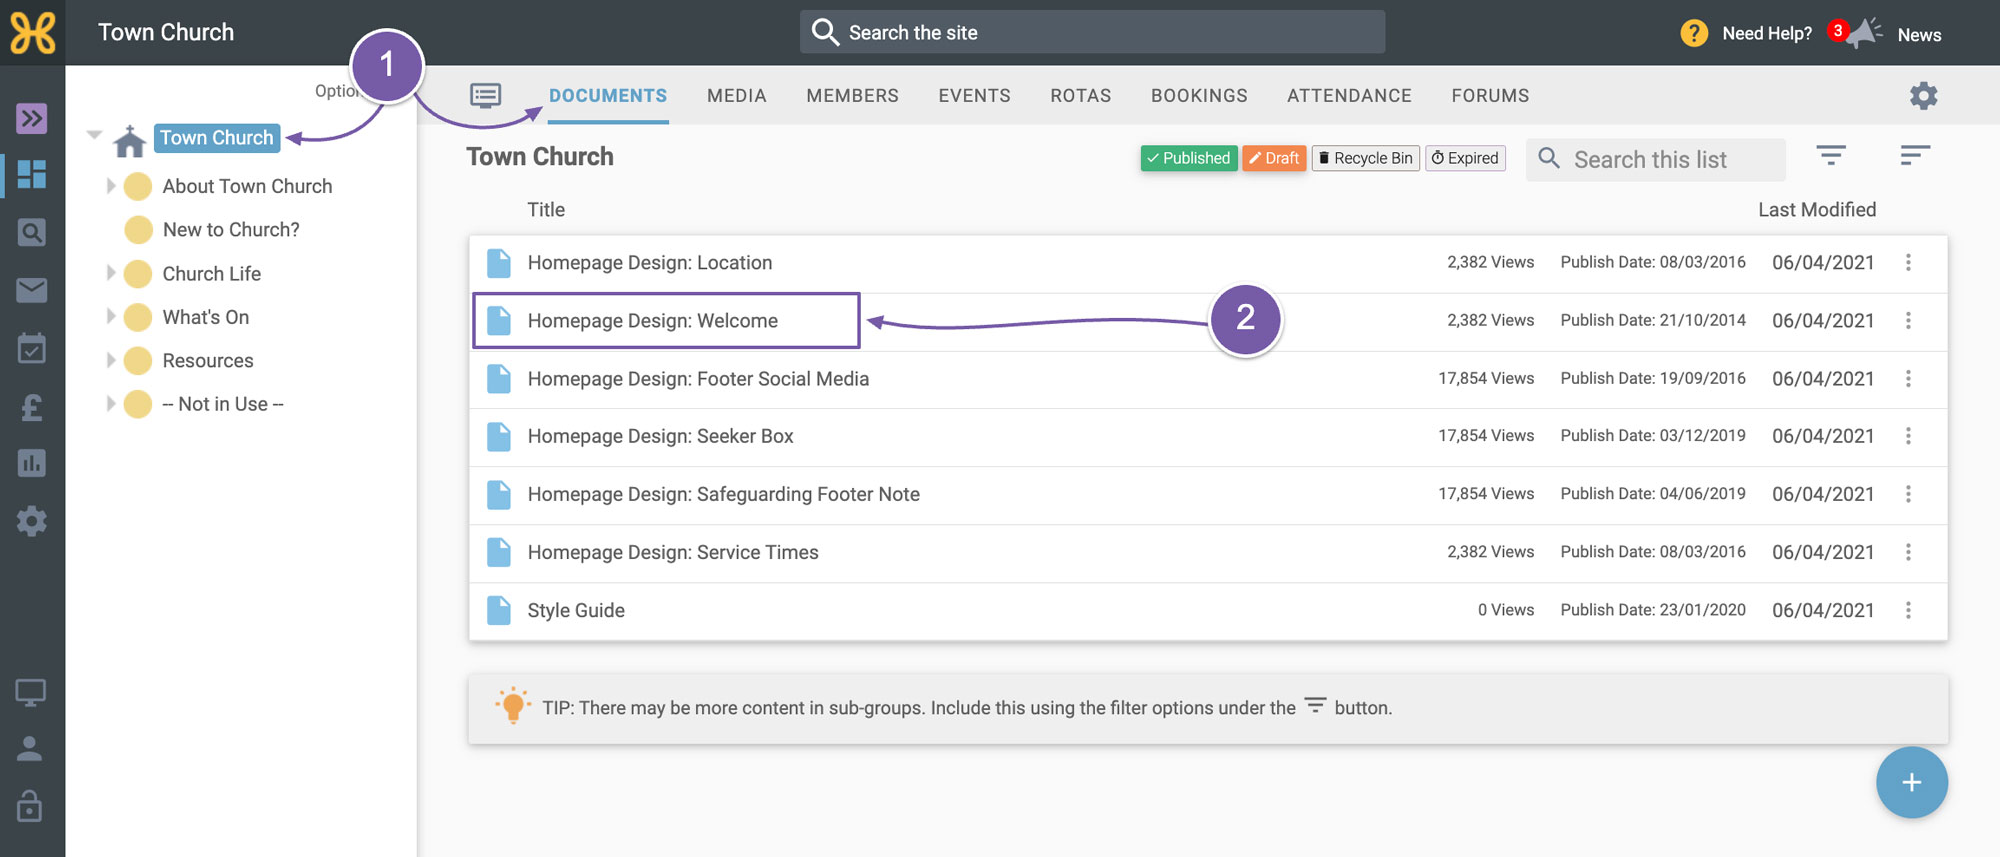
Click on the top group of your group tree and click on the “Documents” tab.
-
Then choose the article called “Homepage Design: Welcome”.
-
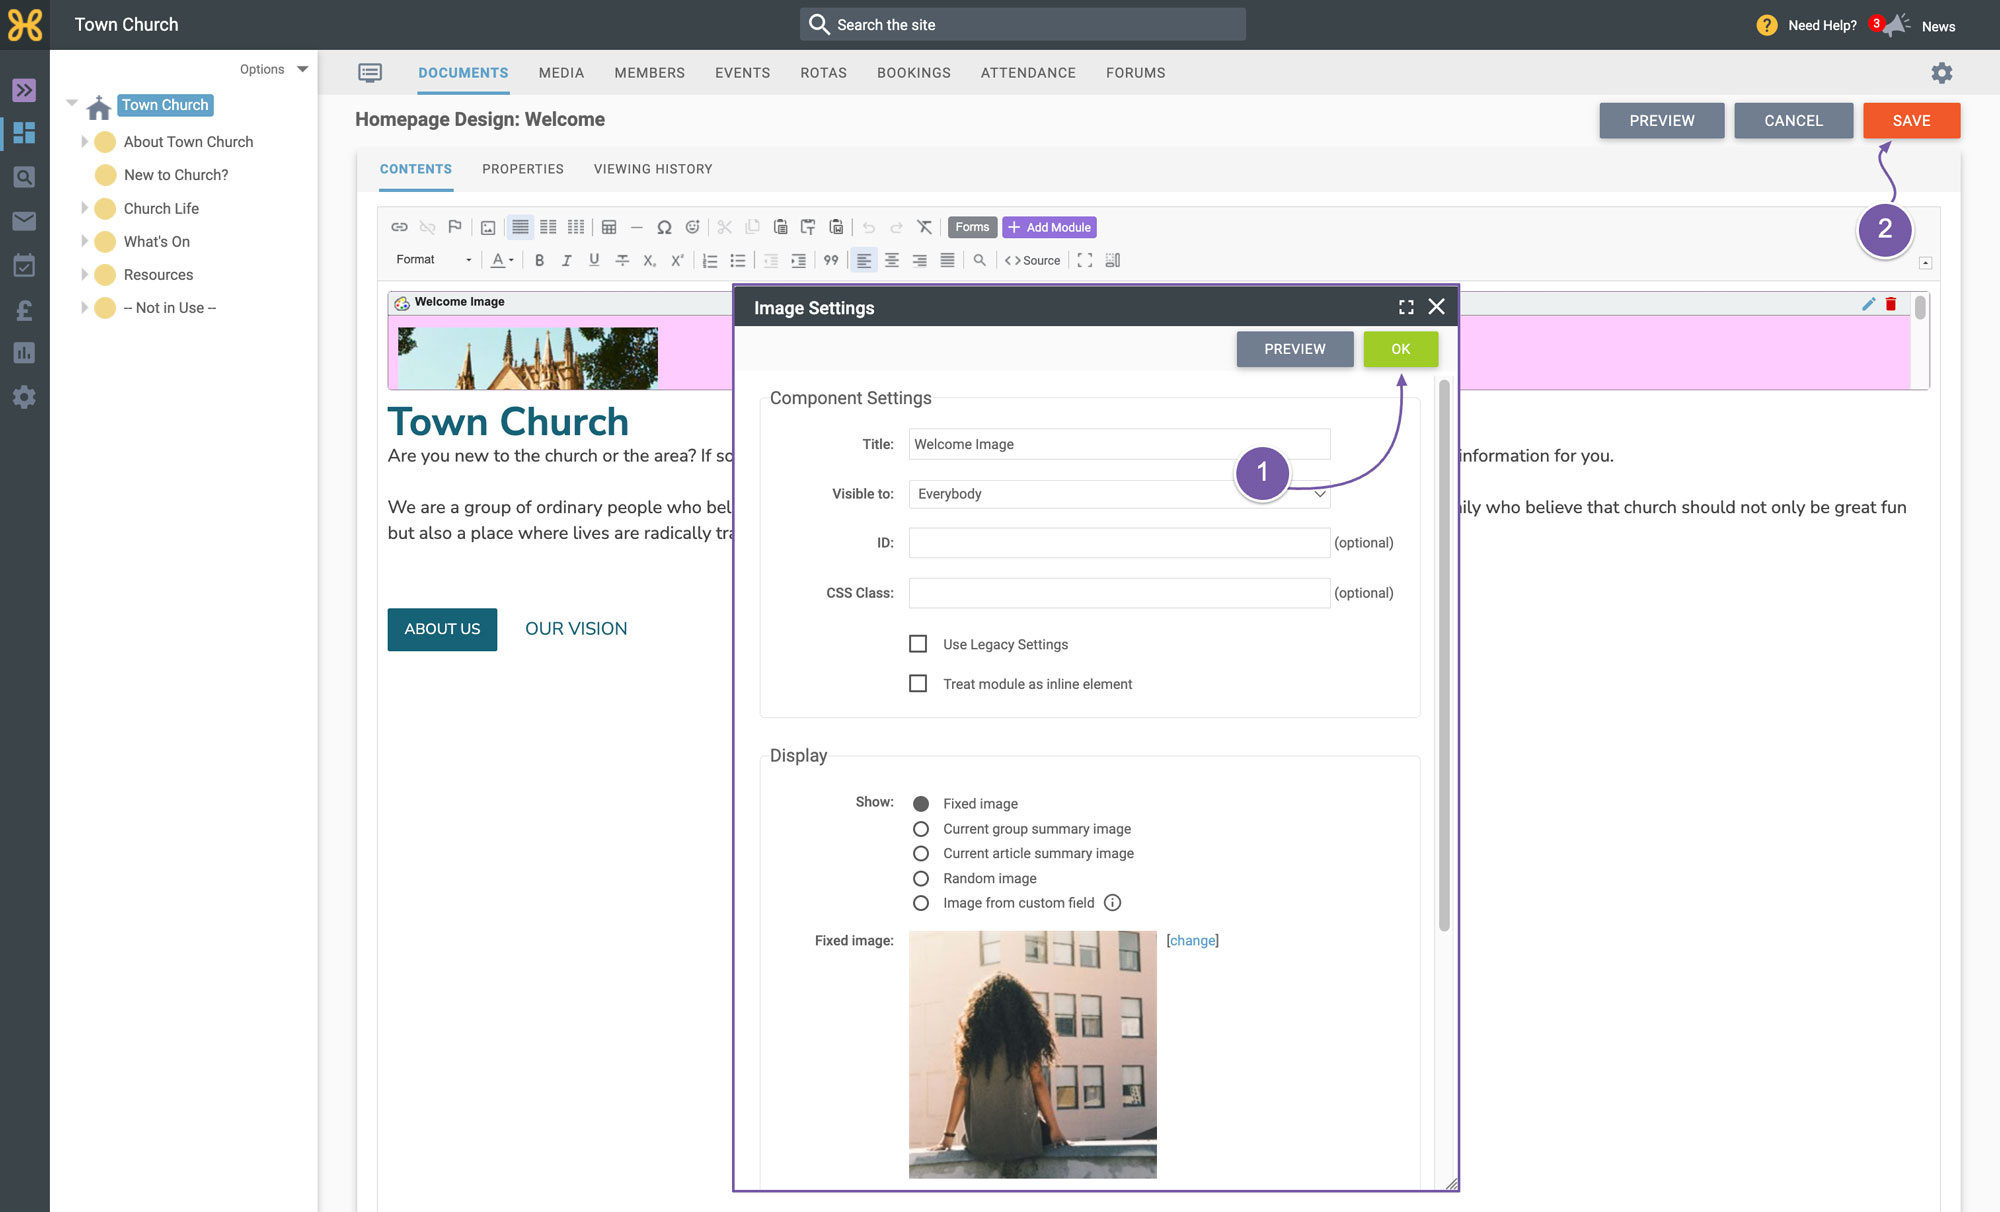
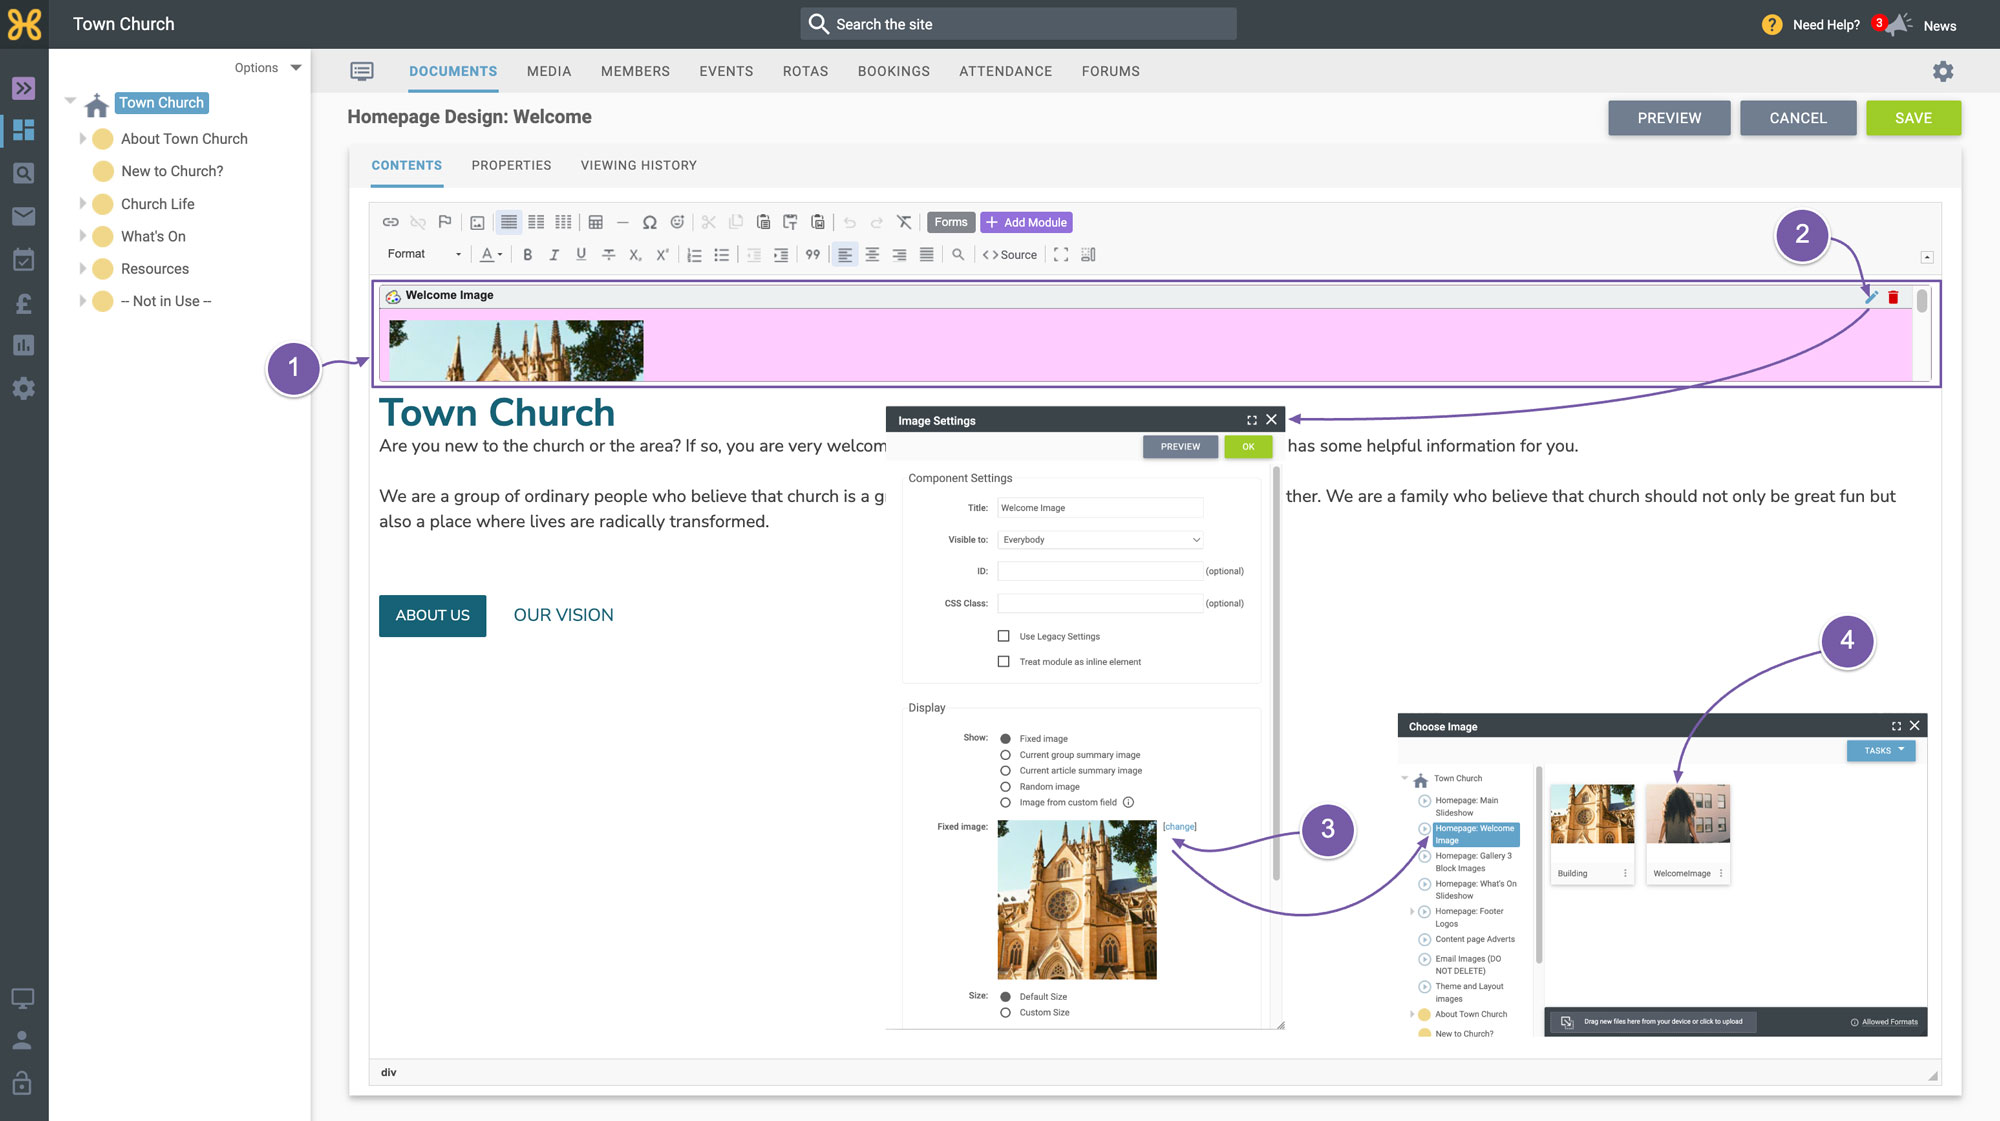
You can see right at the top you have a module that contains an image. This is our image module.
-
Click on the blue “Edit” link on the top right of the module to bring up the settings dialogue.
-
Scroll down the display settings and to the right of the current image you will see the “Change Image” link. Click on that link and select your “Homepage Welcome Image” media group in the group tree
-
Select your image.
-
To save this, click “OK” at the top right of the settings dialogue.
-
Click “Save” on the document editor.