Change your Gallery 3 Block images
(4 minutes)
Further personalise your new church website by adding more of your own images.
Sorry, your browser is unable to play this type of file.
You can still
download it
We will now look at personalising your site with your own images for the gallery of 3 block images that are displayed under your welcome section. We are going to skip past the "Welcome Image” as we have a
separate guide for personalising the whole of that section.
The block images here need to be 665 pixels wide and 592 pixels high. But don't worry about uploading an image the right size as we will go through how to use the built-in image editor to quickly resize the image.
-
As the Media group that displays the images is a live feed of the images within it, you need to make sure you don't upload and edit the new images straight into it as people will initially see the image in the wrong size without the right settings and the web page will look very odd.
-
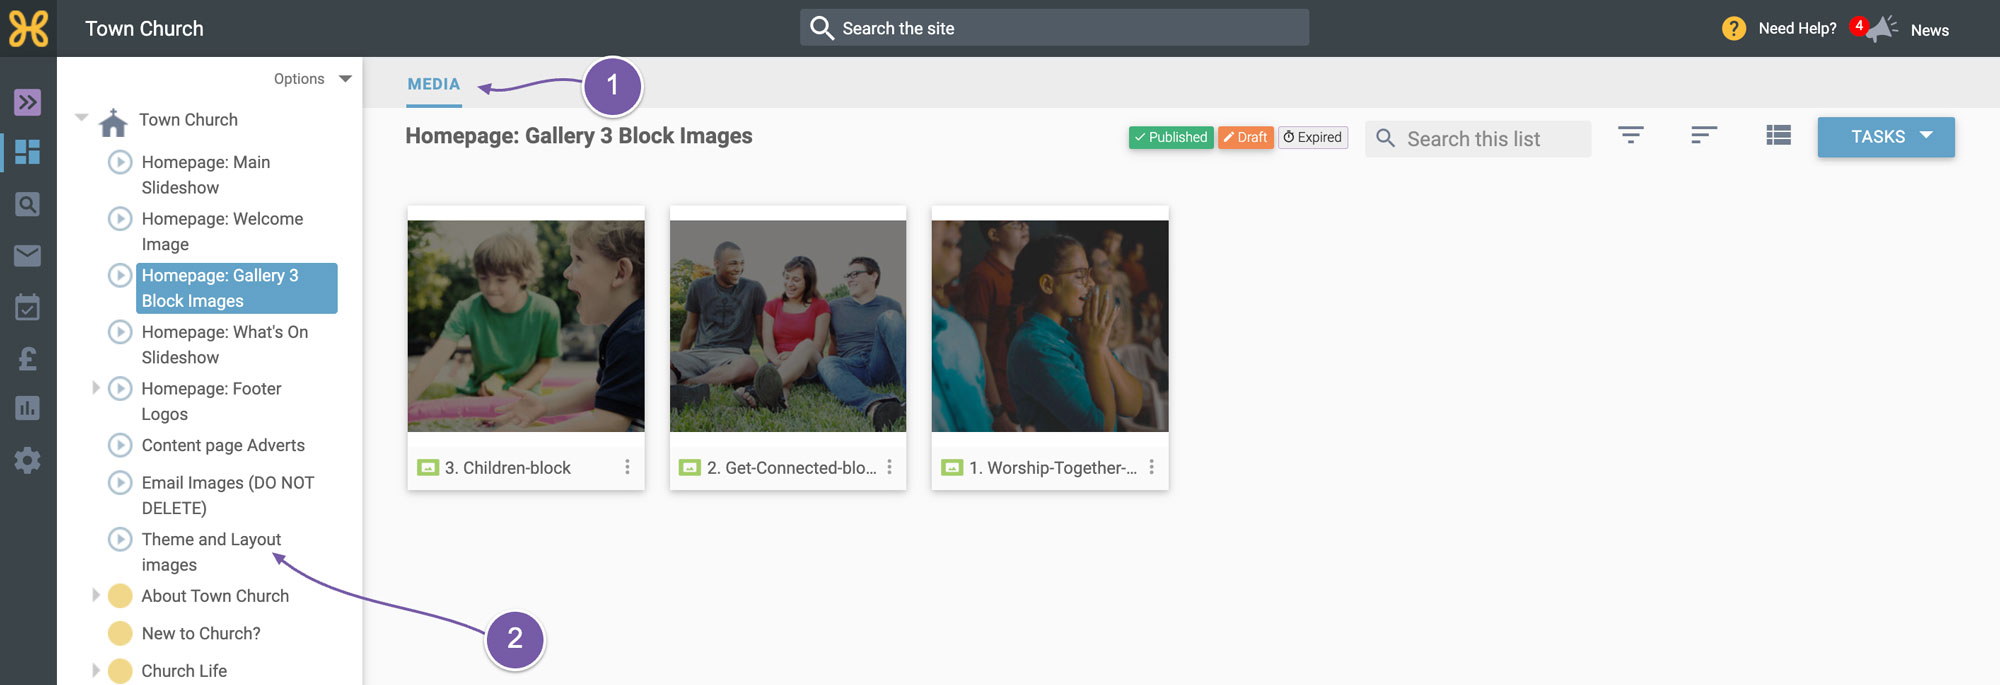
Use the group called “Themes and Layout Images”. This is a Media group that you can store any media item in and there are no live feeds of its content displaying on the site.
-
When you are in the Theme and Layout group you can drag and drop your files into this area, or click on the upload area at the bottom of the screen to select a file from your computer.
-
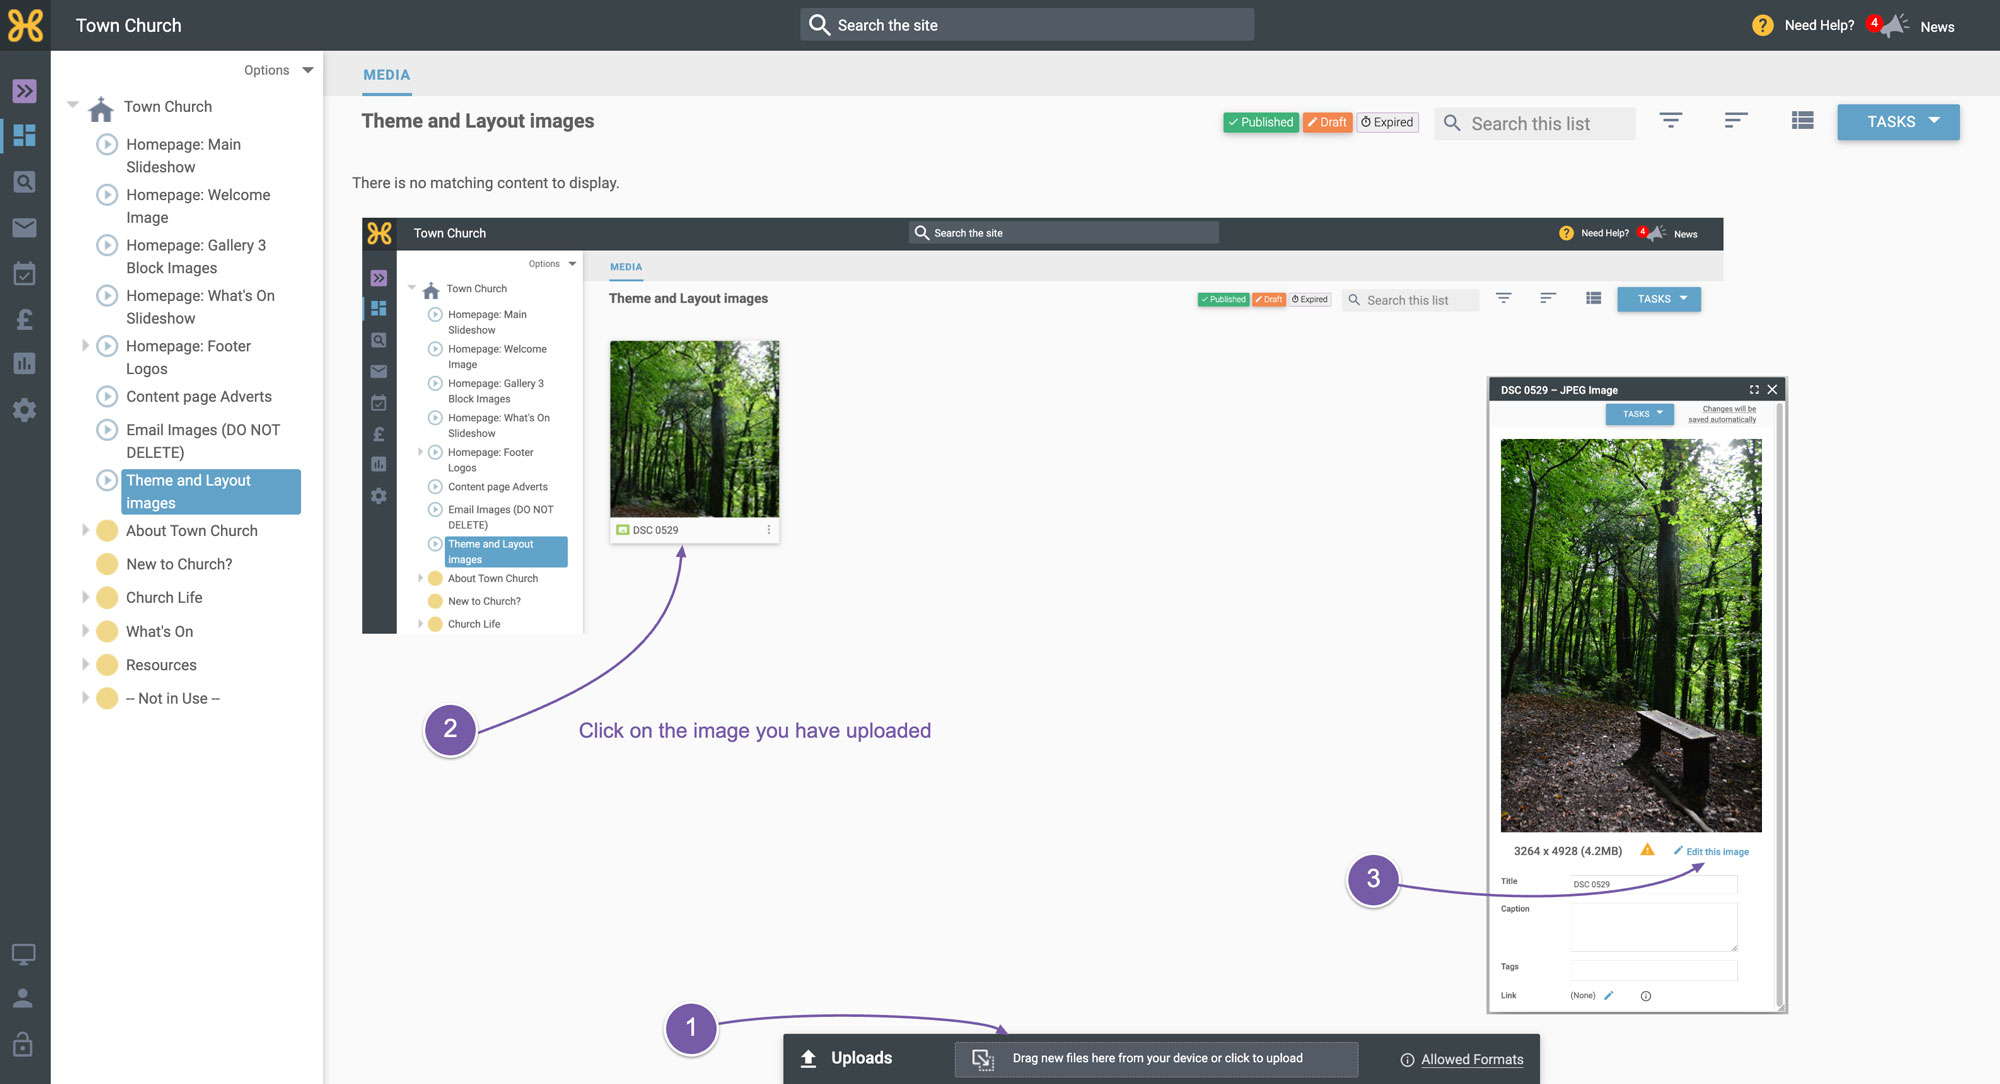
Wait for that to upload and then click on the image to open up its settings.
-
And then click on the “Edit This Image” link to bring up the built-in image editor.
-
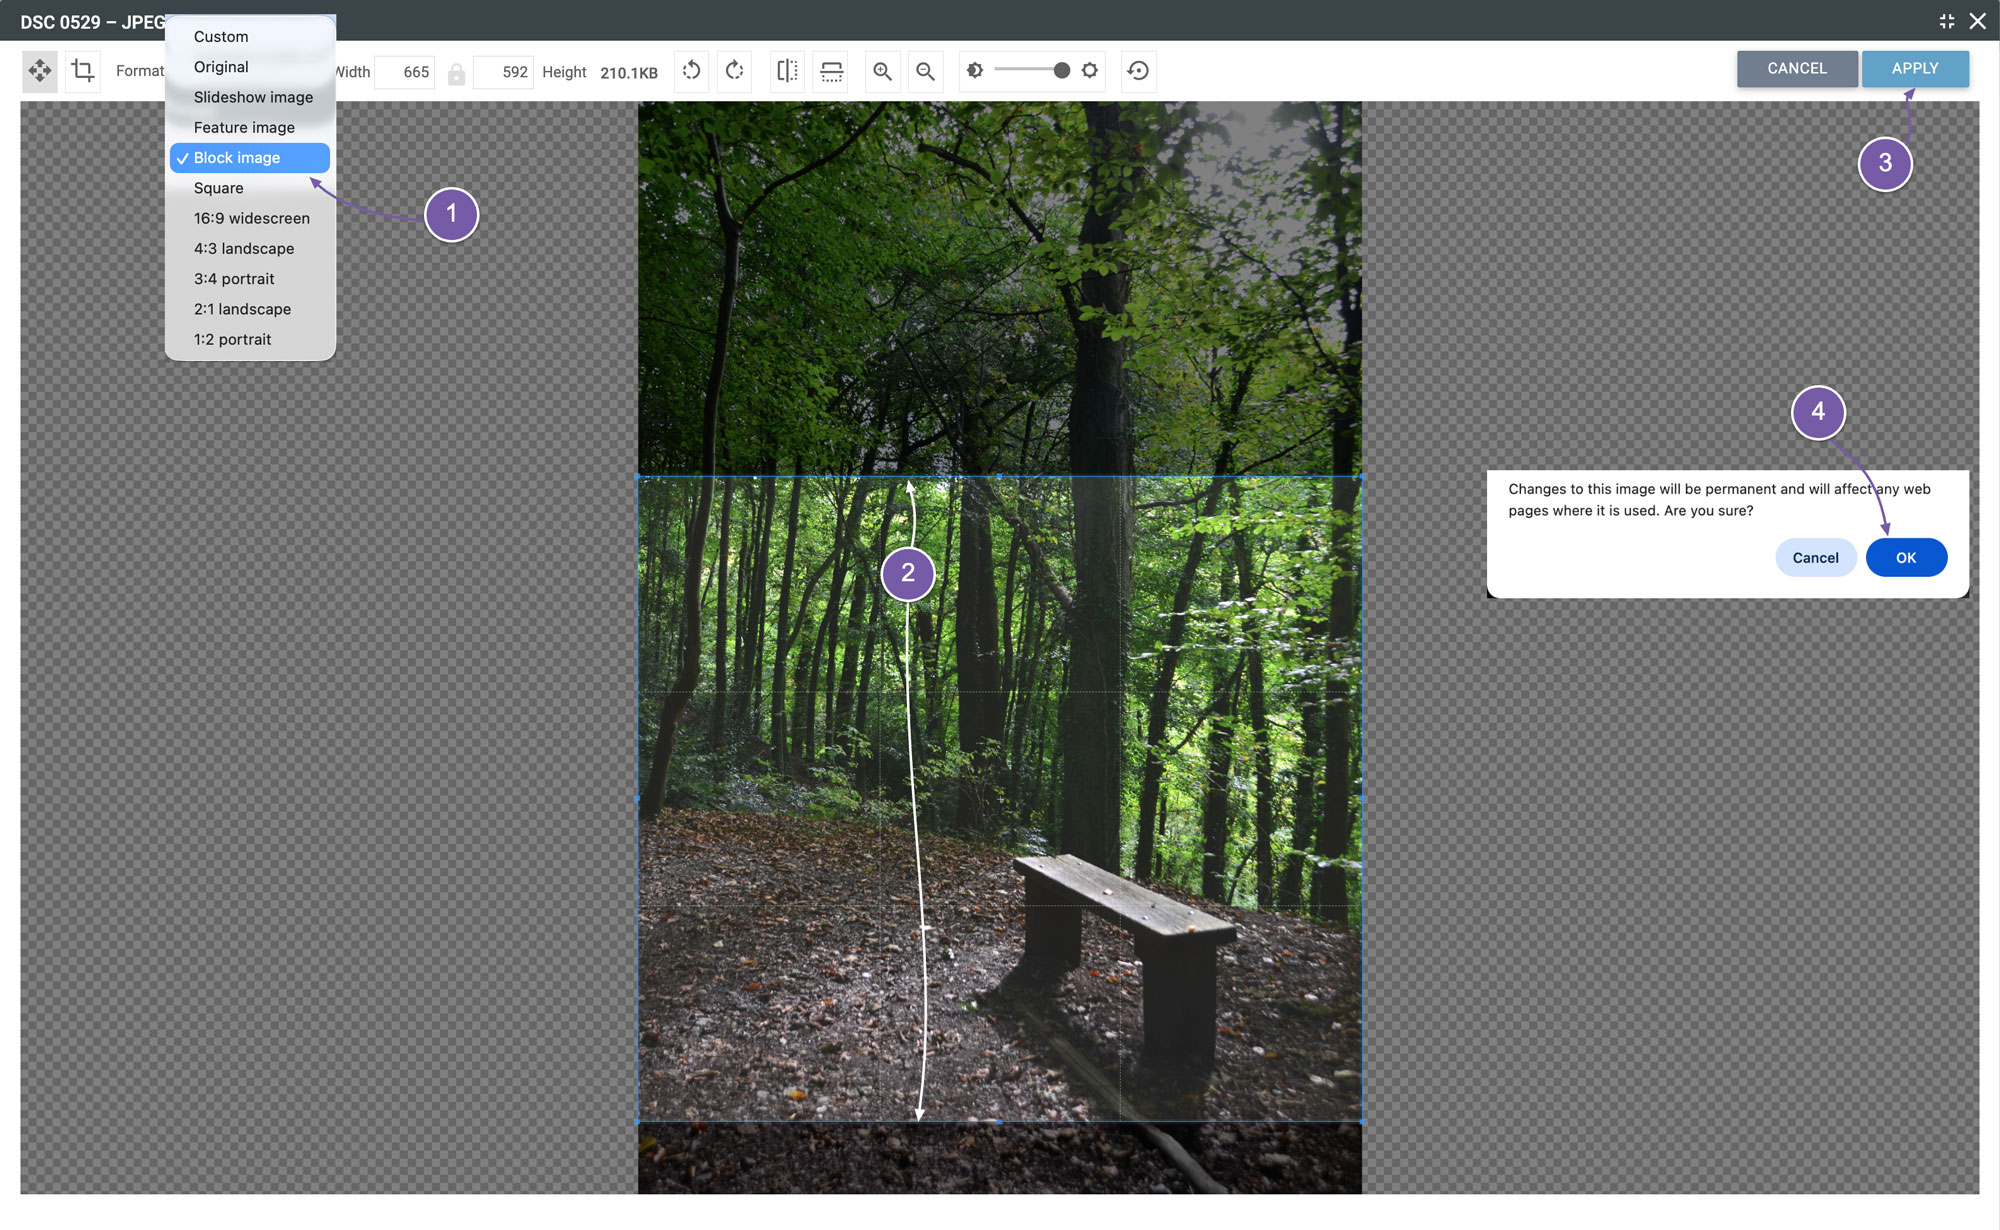
All you have to do is select "Block image" from the format drop down at the top left of the editor
-
Drag the light area over the part of the image you want to keep. The dark area shows the part of the image that will be lost by the crop.
-
When you are ready click “Apply” at the top right of the screen
-
And then click “OK” on the prompt warning about the change being made everywhere the image is used. As it's not being used anywhere else it's okay.
-
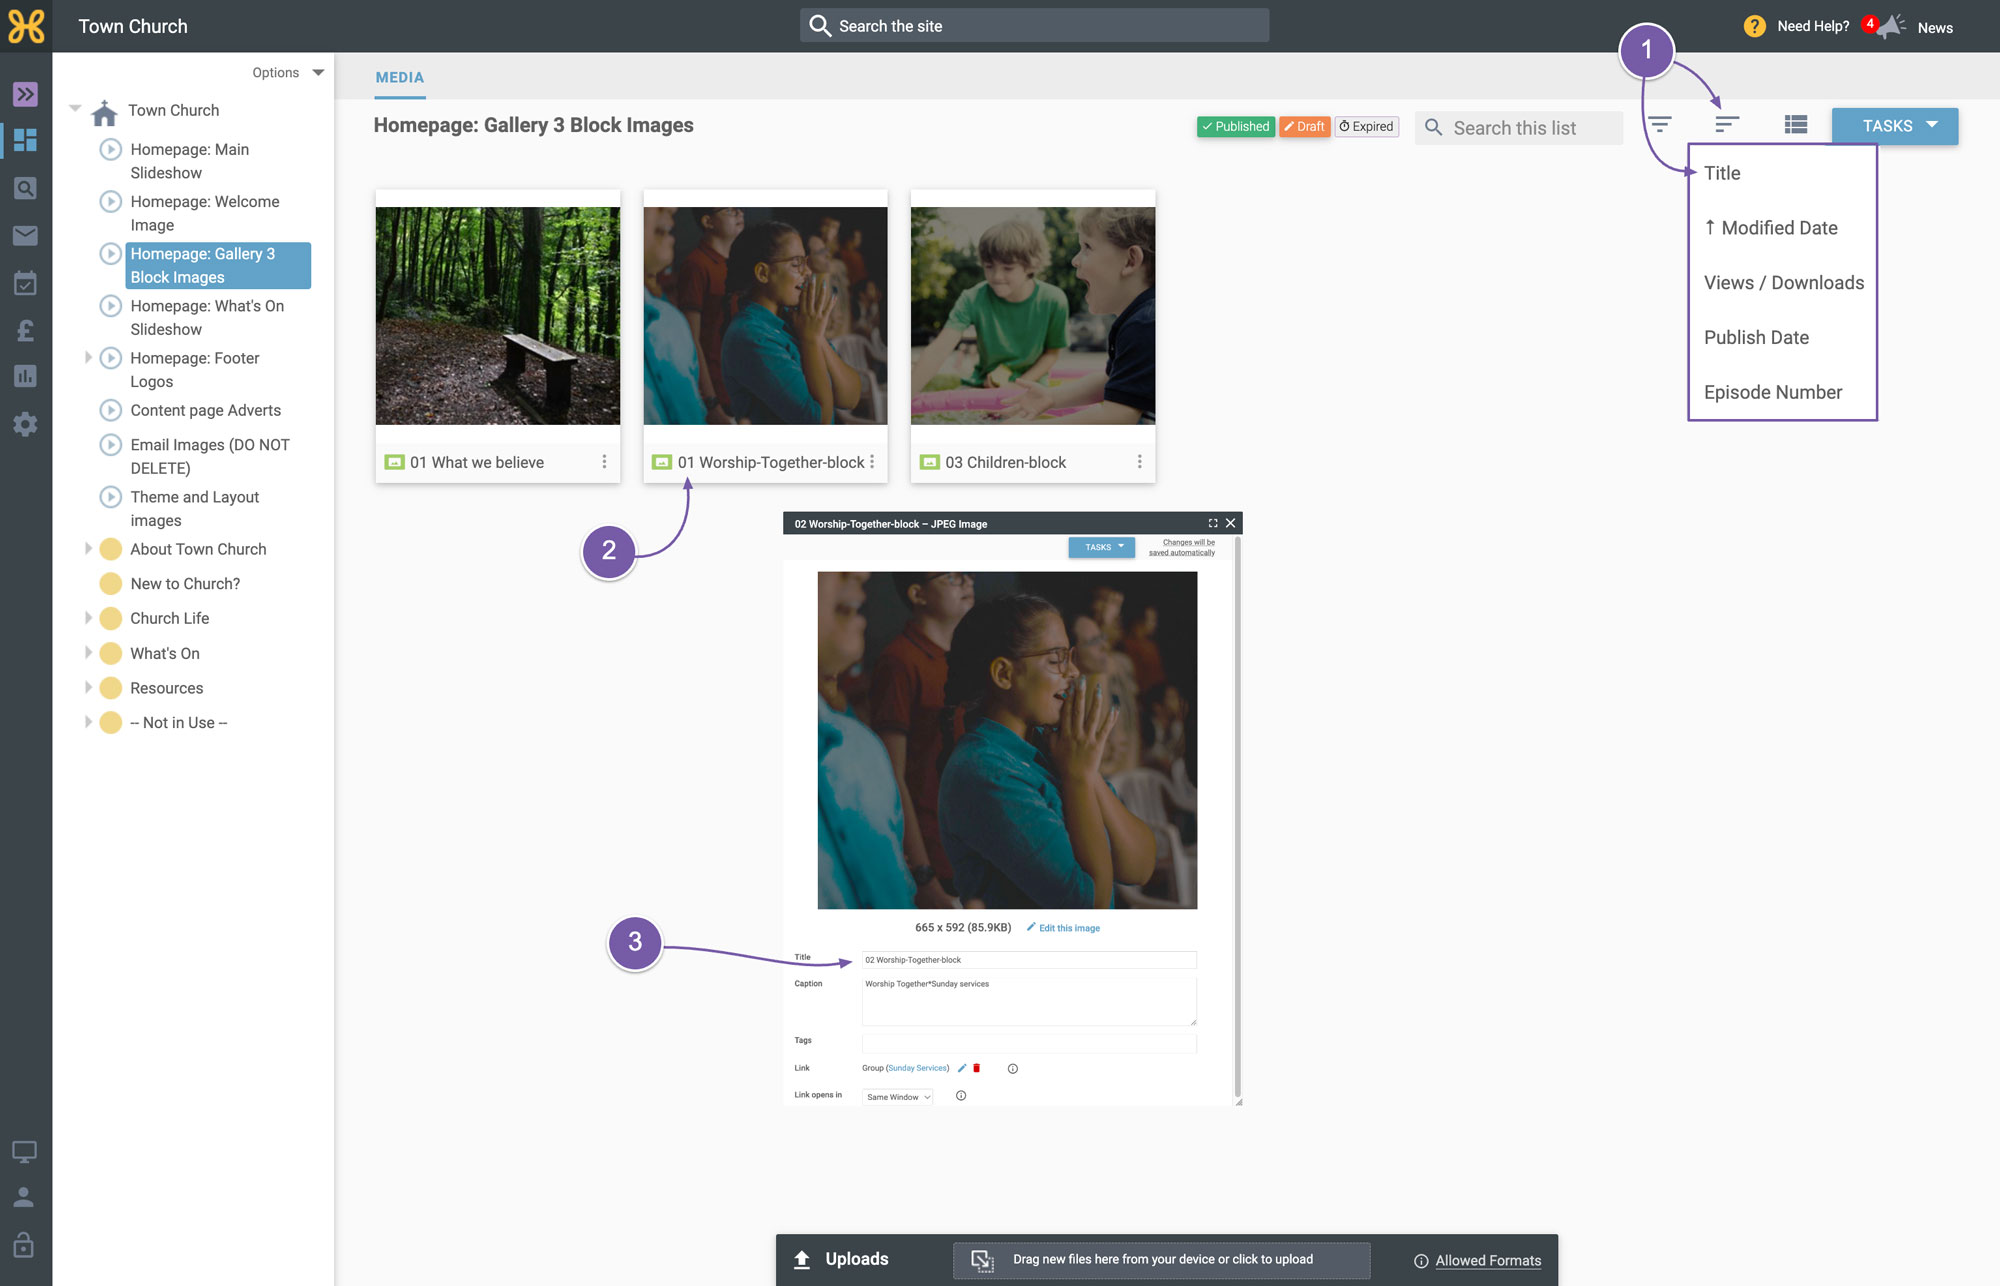
You now need to add a title summary and link the image to another page on the site. As the ordering is alphanumeric, make sure your image is called something like "01 What we believe", for example, if you want it to appear first in the list. It's very easy to do this.
-
In the caption area add a title - for example “About Us”, and then add a star after it. Then add your summary like “Get to know our church”.
-
To add the link click on the “Edit” link icon and pick something to link to, such as the “About Us” page.
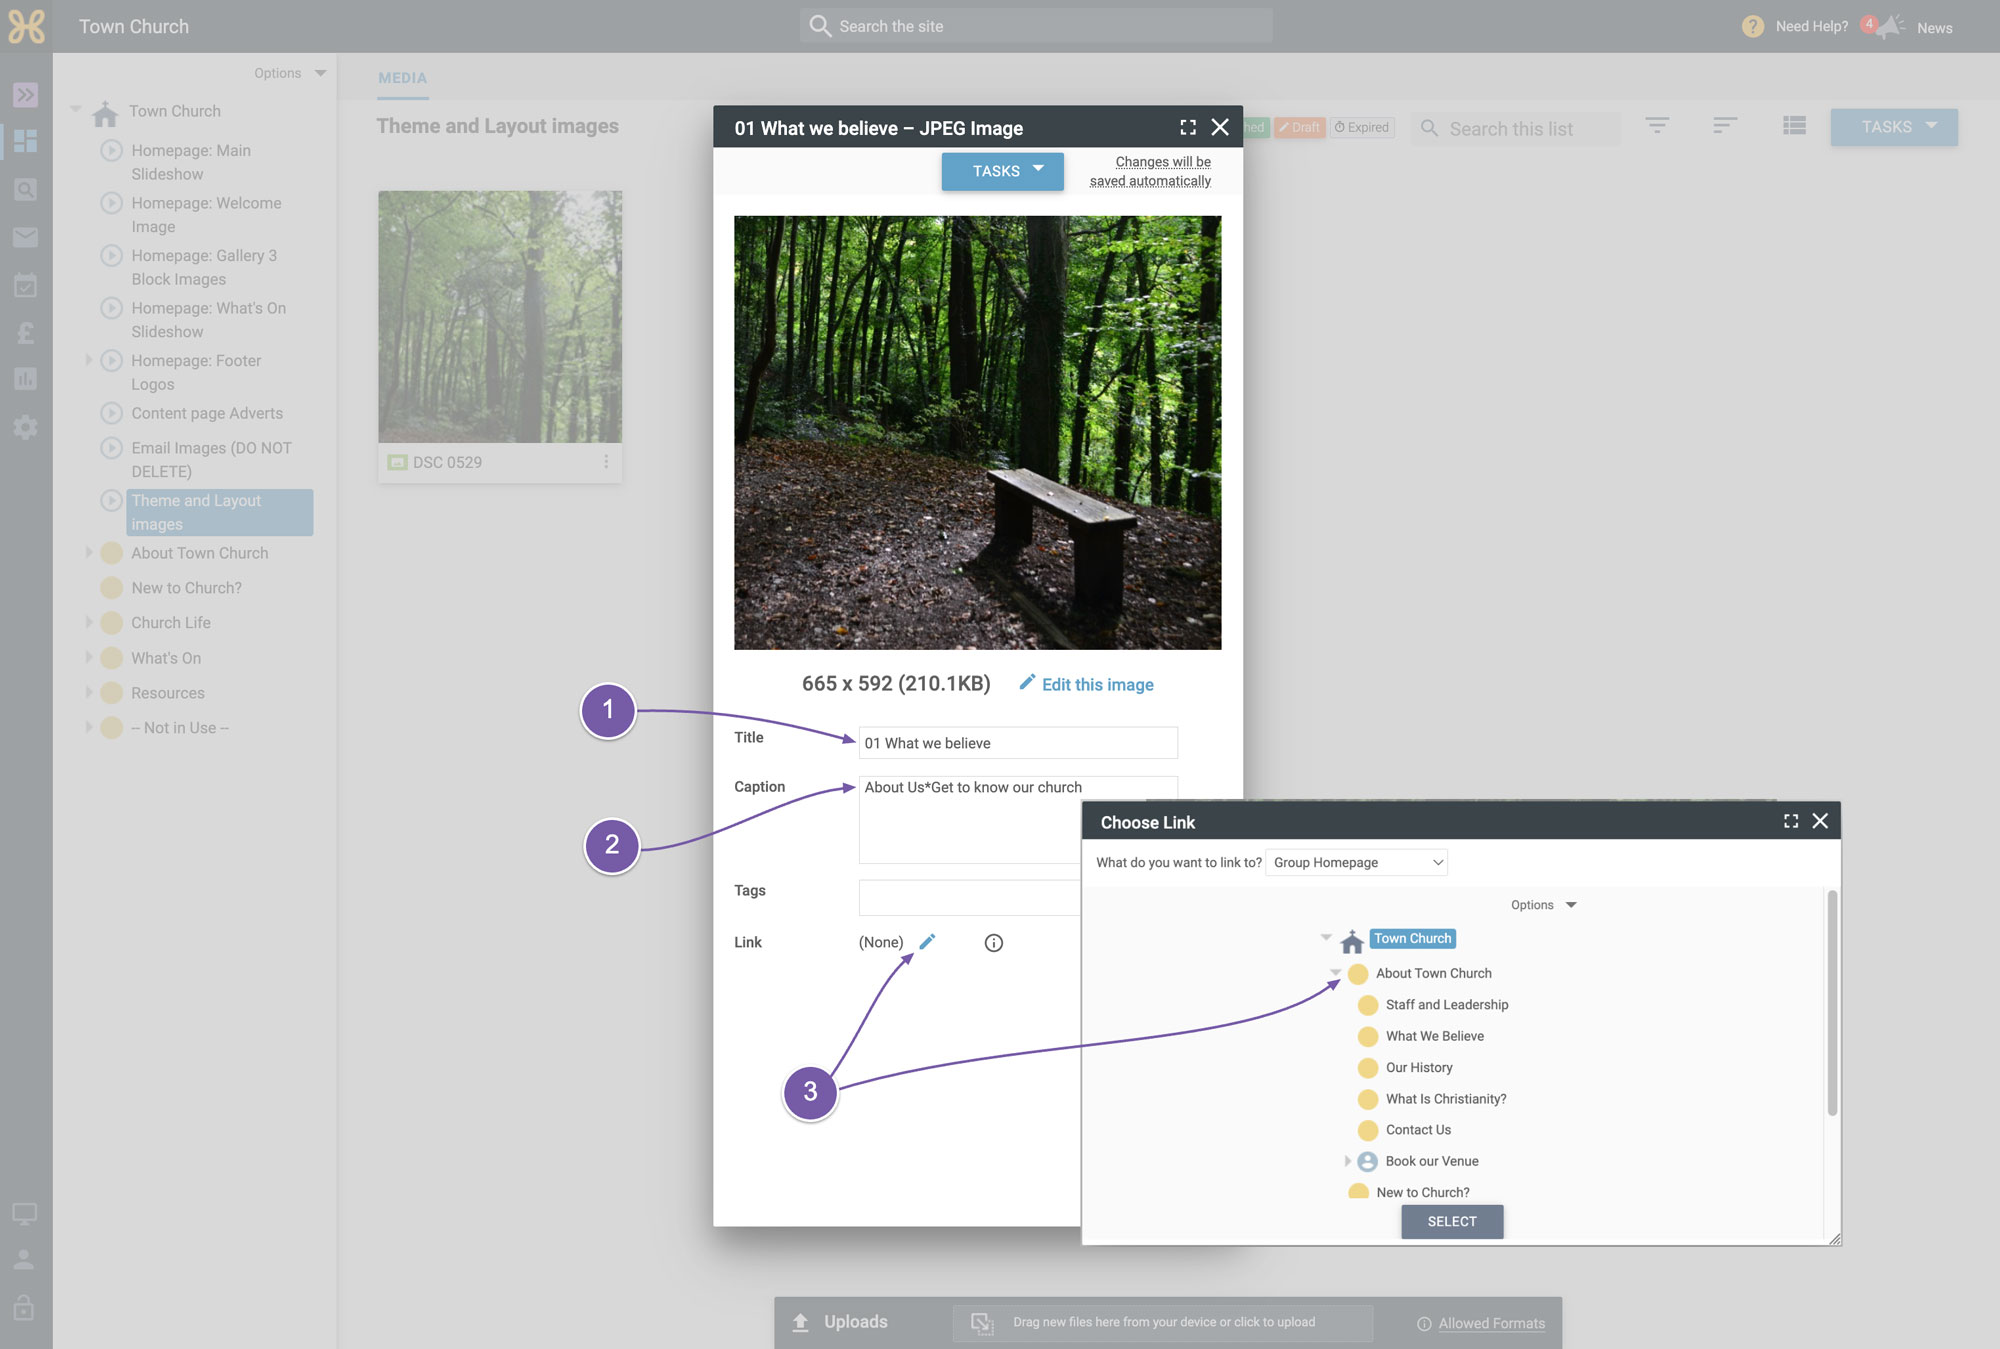
Now the image is ready to add to your site.
-
Click on “Tasks” and choose the task to move this image to a different folder.
-
Click on the “Homepage gallery 3 block image” group
-
Confirm by clicking “OK”.
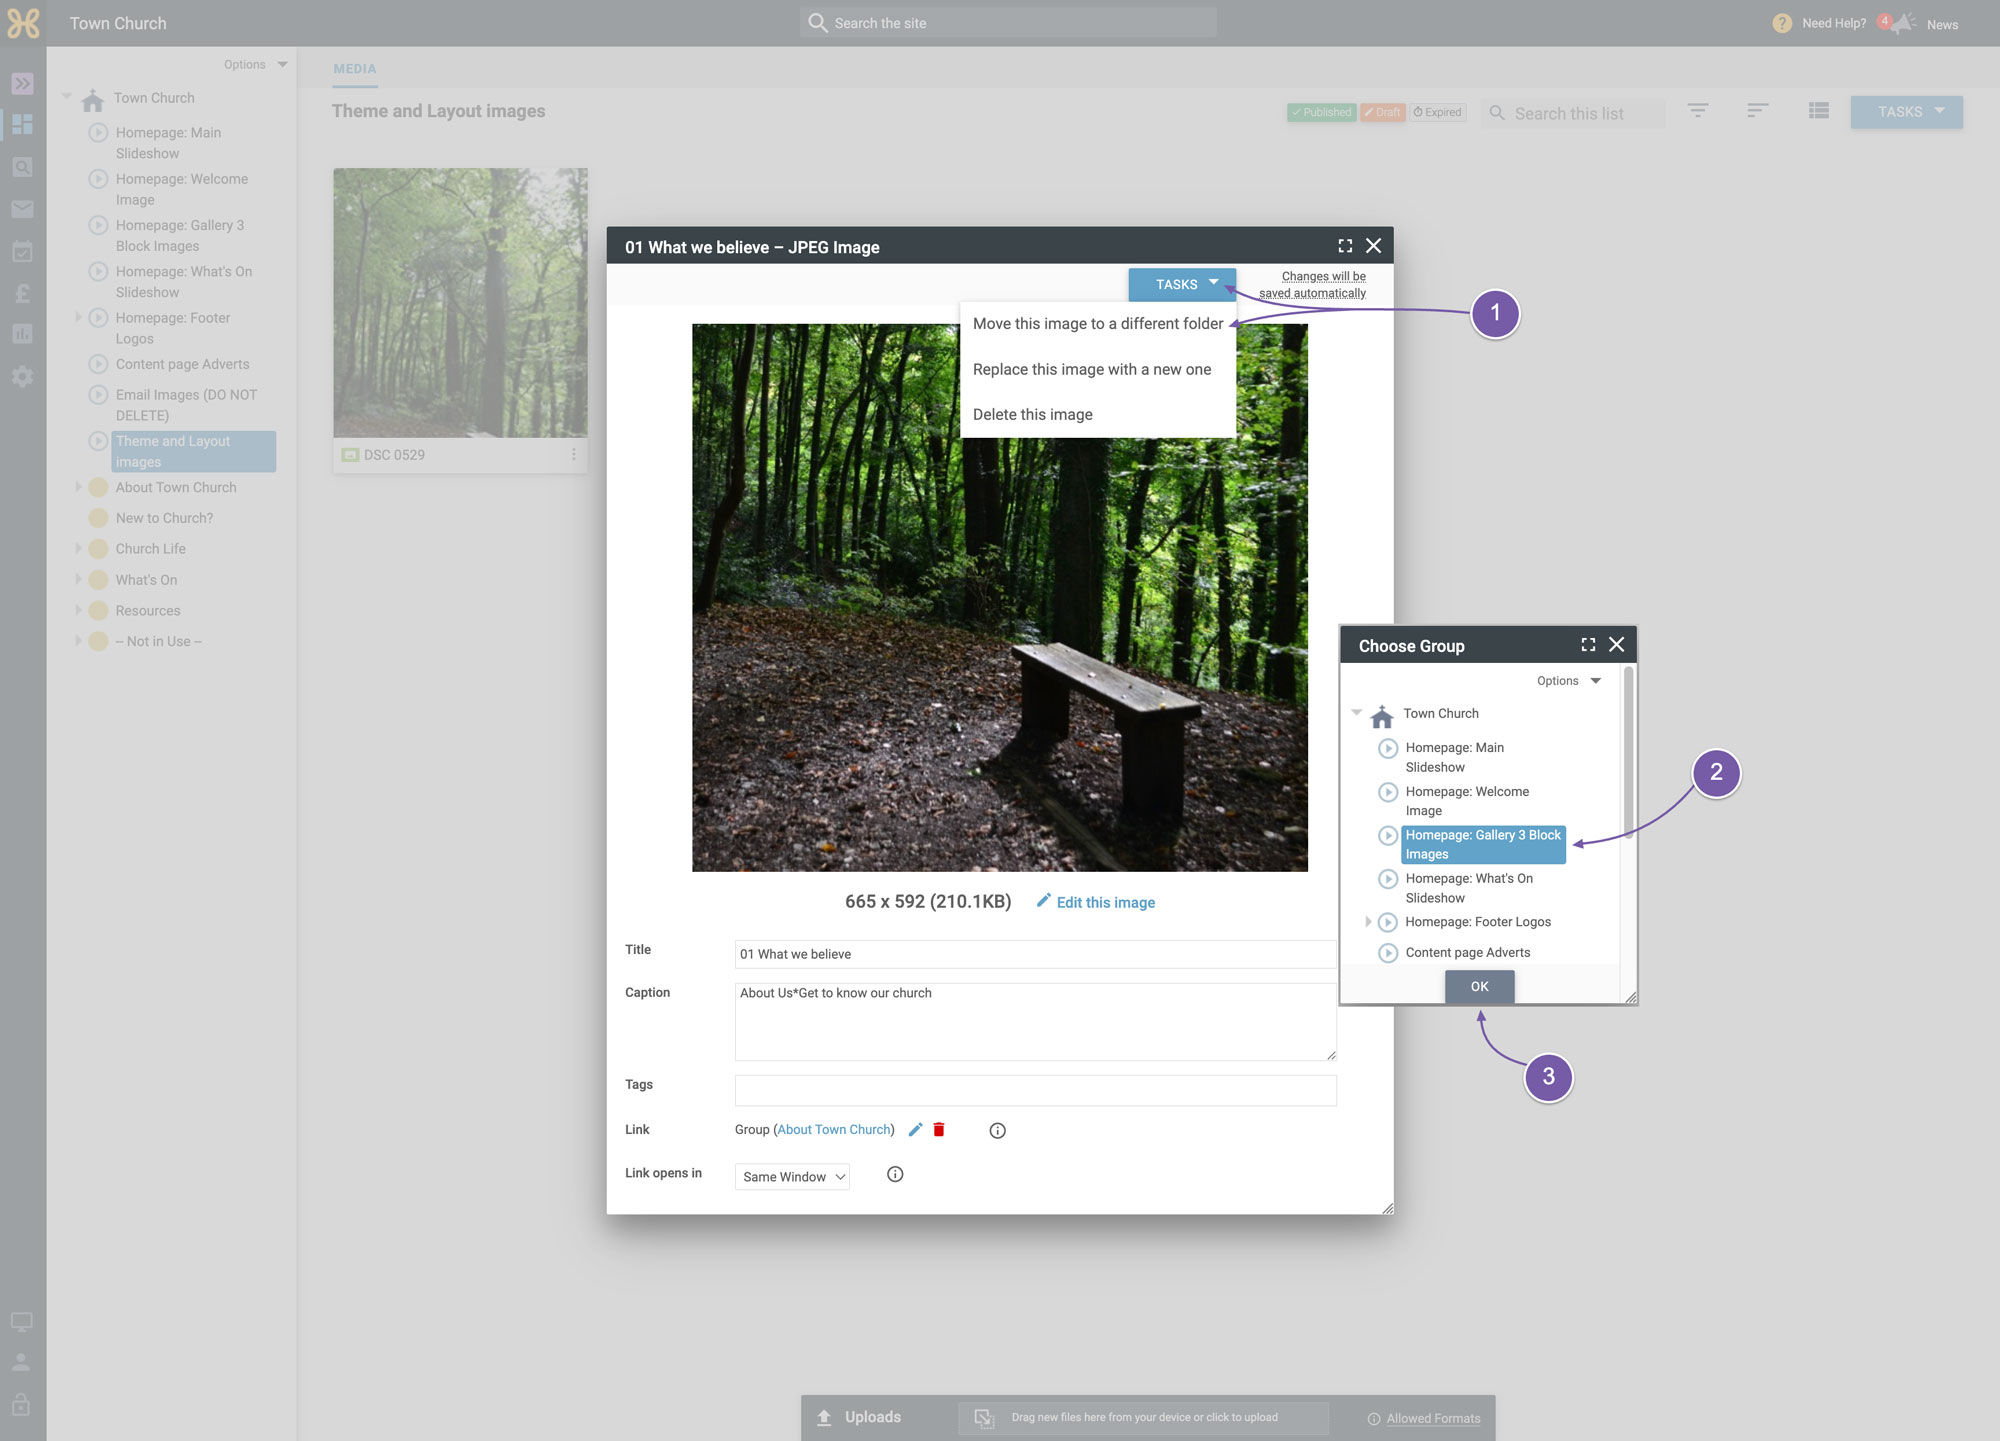
-
You will then see the prompt with a confirmation and a link to go to the images new location.
-
Go ahead and click on that link, where you can do a quick check on the ordering of the images.
-
The first thing to do is to move the image you no longer want out of the group - otherwise, there will be four images showing, and the website will not look very good. To do this just click on the 3 option dots of the image you wish to remove and choose the option to move the image to another group.
-
We recommend that you move it to the “Theme and Layout” group where you can always use it later.
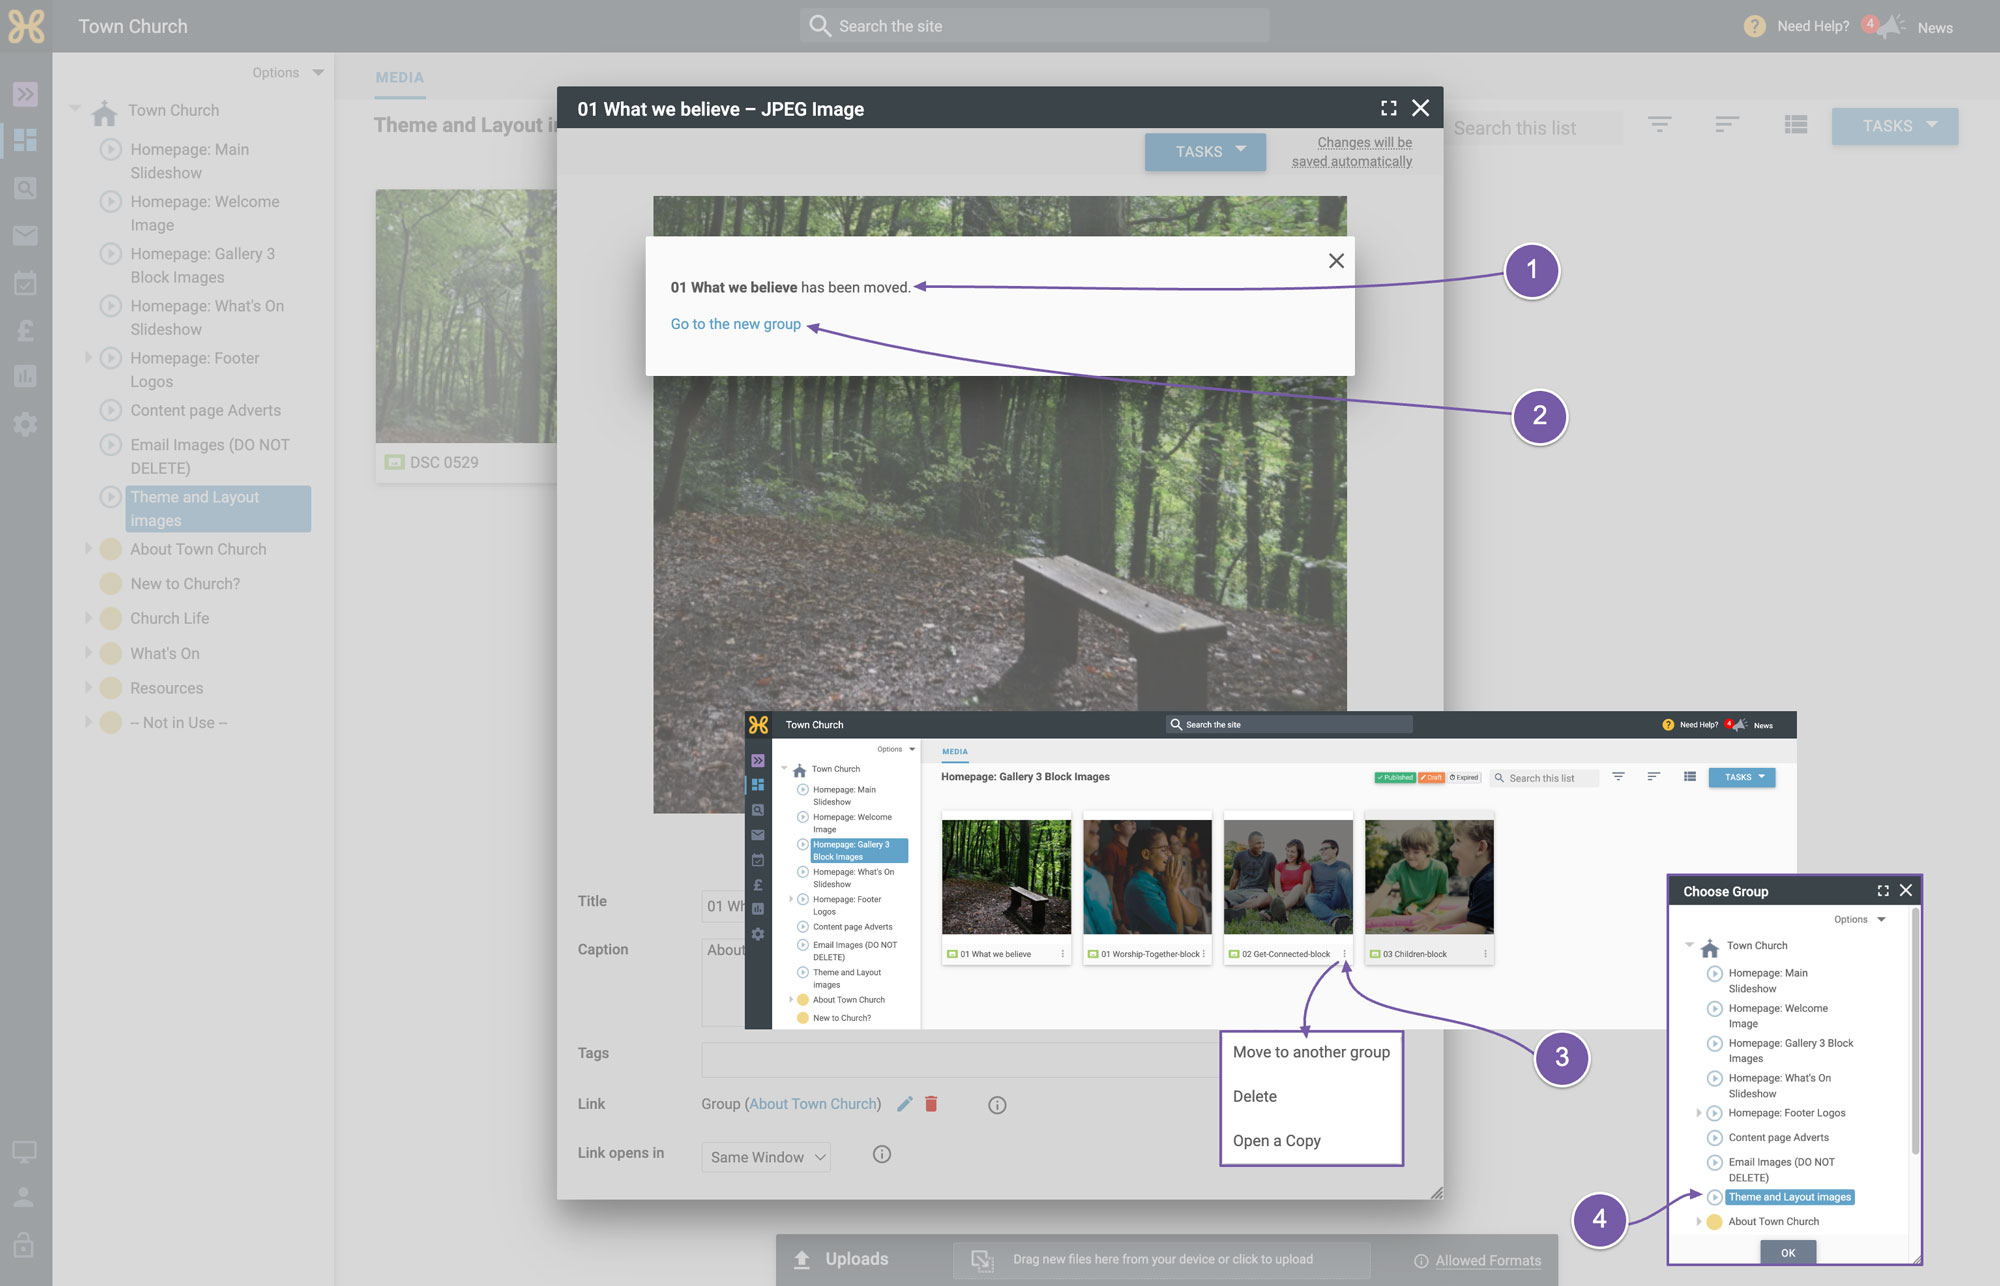
-
Using the sort settings, you can order the images by title, with the lowest number first.
-
Just click on any image
-
Change the title field to set the correct order. You can repeat this to replace the other two block images.