Setting your default event locations
(3 minutes)
Save time when you add events with our preset event locations and keep your church calendar consistent.
Sorry, your browser is unable to play this type of file.
You can still
download it
Many churches have events that run at the church building or the same building as other events. We can easily create these locations and set their properties to be used by anyone who is creating events on your Hubb system. By creating these event locations, you can skip setting up the details of the location every time you add an event, and keep your site consistent.
-
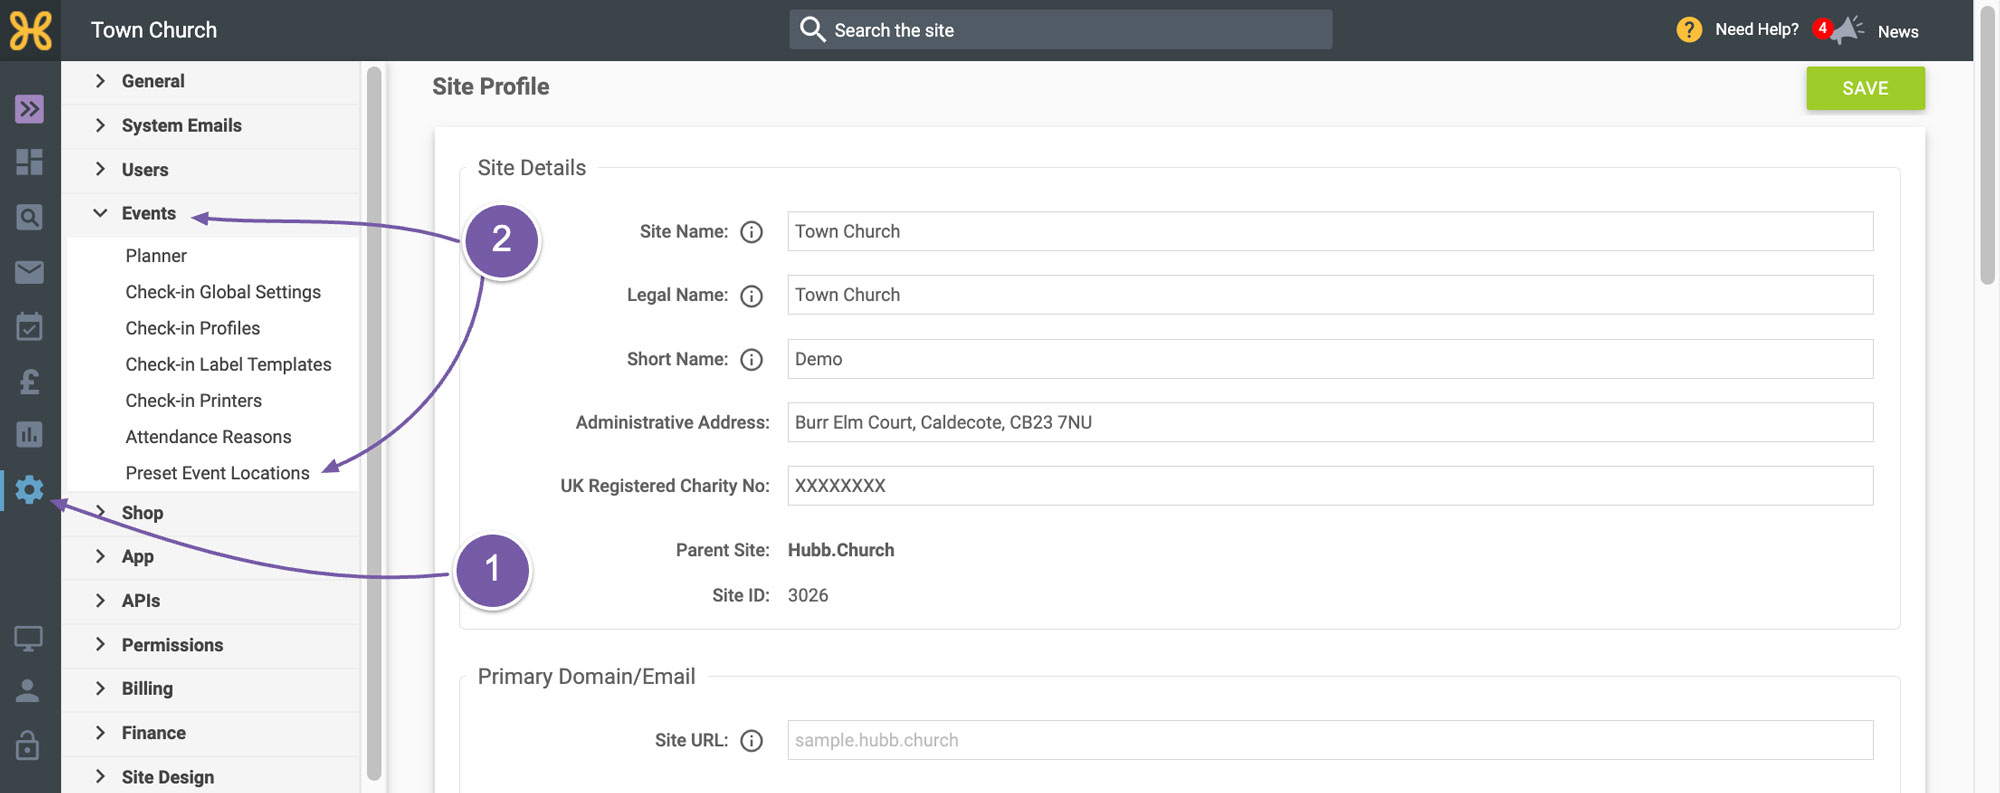
The preset event locations are set in the site settings, which you get to by clicking on the “Settings” cog at the left of the screen.
-
Then go to “Events” and “Preset Event Locations”.
-
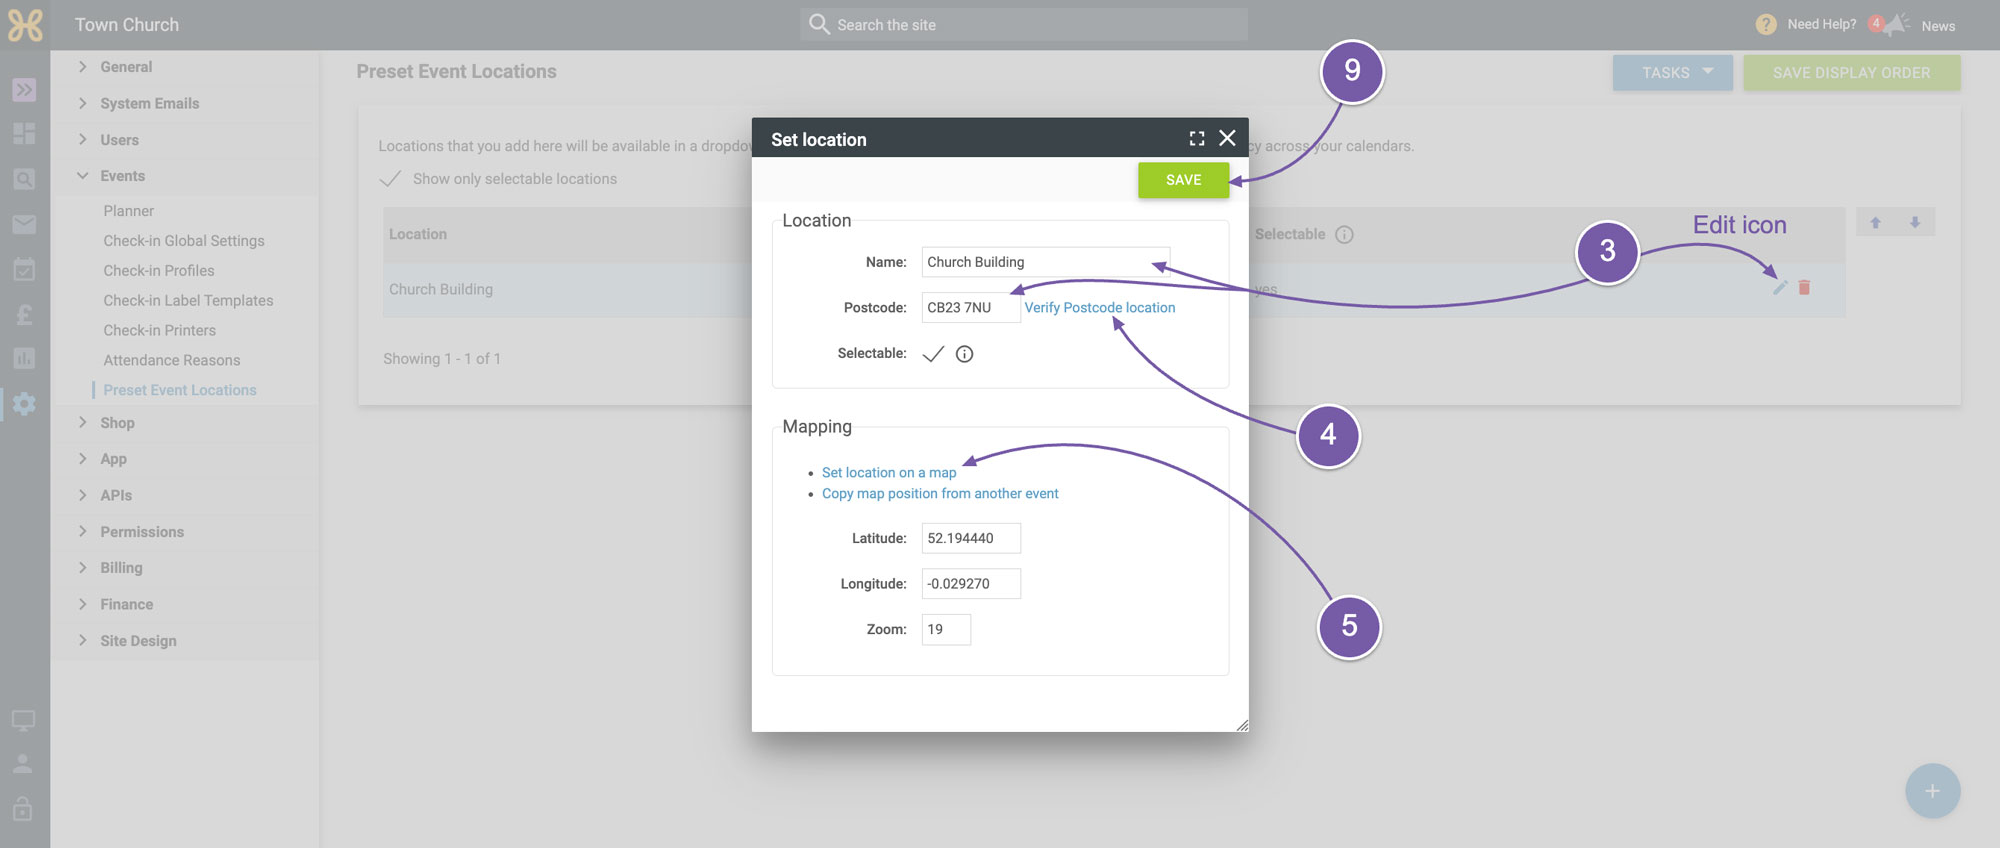
To edit a preset event location, just click on the “Edit” icon and the location properties will appear in a dialogue box. You can edit the name, then change the postcode.
-
Once the postcode has been changed, you can click on verify postcode location to make sure the map pin shows up at exactly the right place. If not, it is a good idea to manually set the map pin that will be shown on the map link to be exactly where your location is.
-
Click on “Set Location on Map”.
-
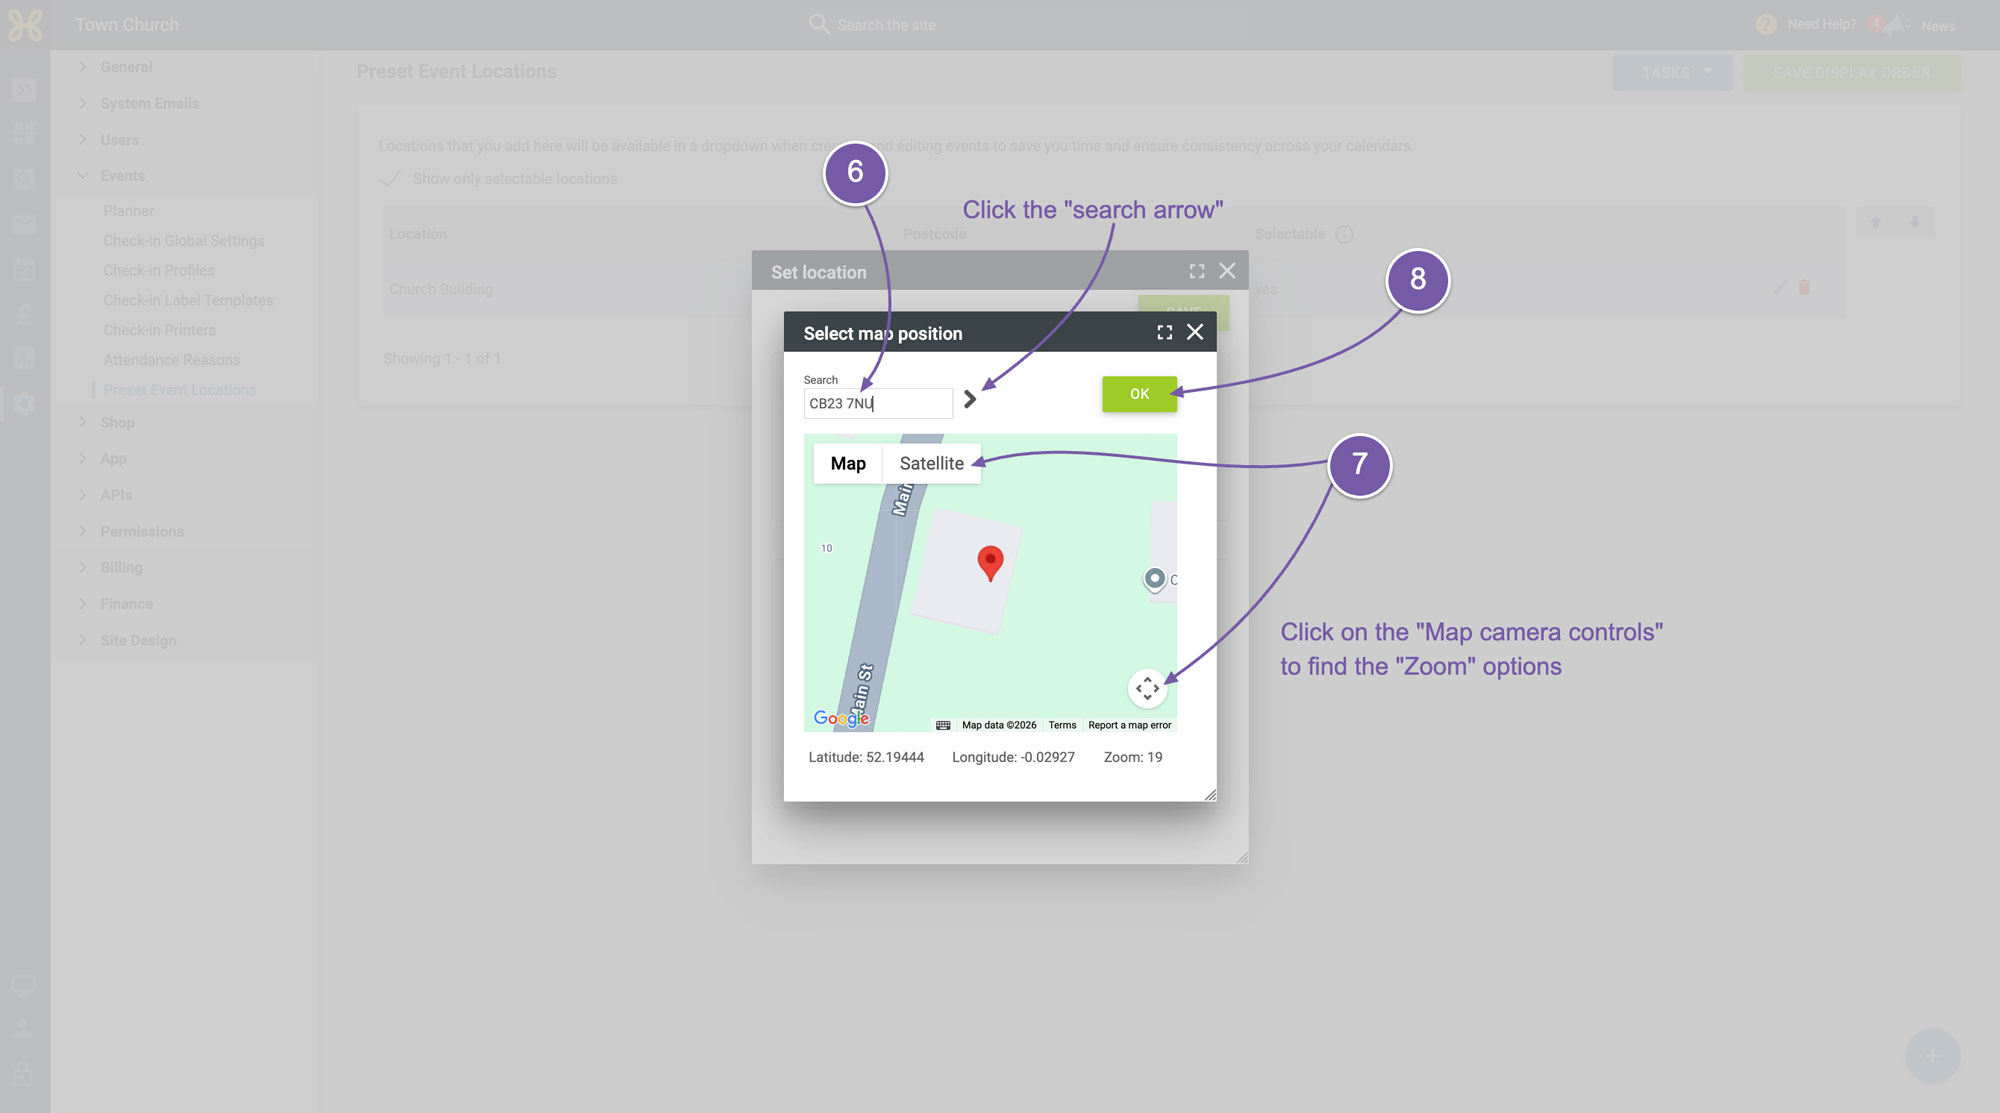
Now you will see the select map position box where you need to type your postcode at the top and click on the “Search” arrow.
-
To get the map pin to where you want, you can simply click on the place you want the pin to be. We recommend you use the zoom in button to get a sense of where the map is showing and then select the "Satellite view" from the map type drop down. Hopefully now you will be able to zoom in and locate your building.
-
The last thing you need to do is click on the map where the pin should go and click “OK”. To set the zoom that the mapping software will use, you can set the zoom level. We recommend using 19 which is the most zoomed in view of the street to show the building. If you find this is too zoomed in when you look at the event location from your calendar, you can come back in here and try any number between 15 and 18 to make it as helpful as possible to people looking at the event.
-
Before leaving, click on the “Save” button.
To
create a new location:
-
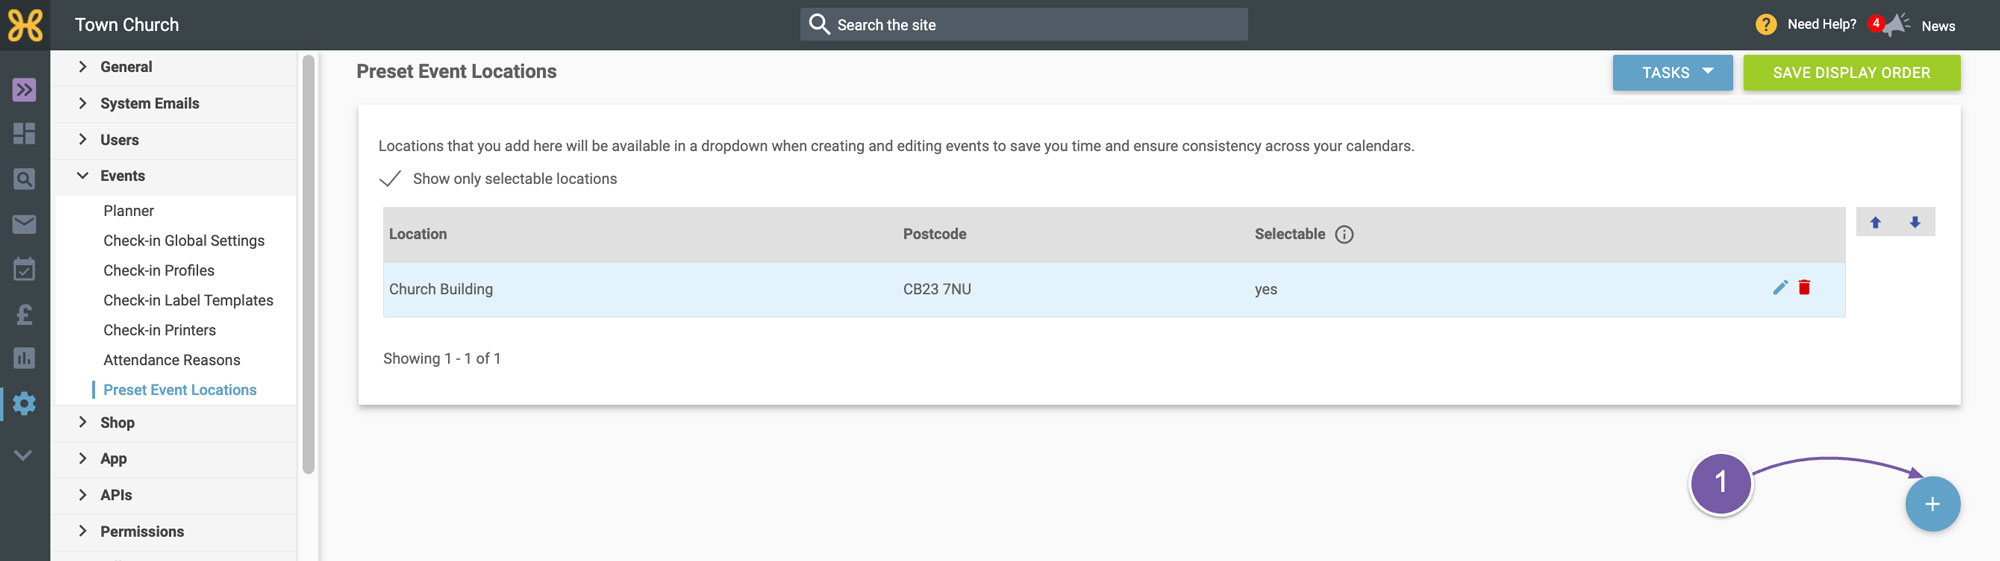
Click on the blue “Plus” icon at the bottom right of the screen and go through the same steps outlined above.
Now you have set up one or more preset event locations, you will save time and increase consistency across your calendar.