Setting up the ASPIRE template
Here’s how the different parts of the ASPIRE template are put together, and where to edit each one. You’ll find the image folders under the Media tab on the root group.
- The main menu in the header follows your web office group structure, so to create a new page you create a new group and add an article for that page’s content.
- Under the Documents tab on the top group you’ll find a set of documents that control the homepage content, which you can edit to change the text. The ‘Homepage Design: Footer Social Media’ and ‘Homepage Design: Seeker Box’ ones are best edited in ‘source’ mode (the ‘source’ button on the right of the second row of icons).
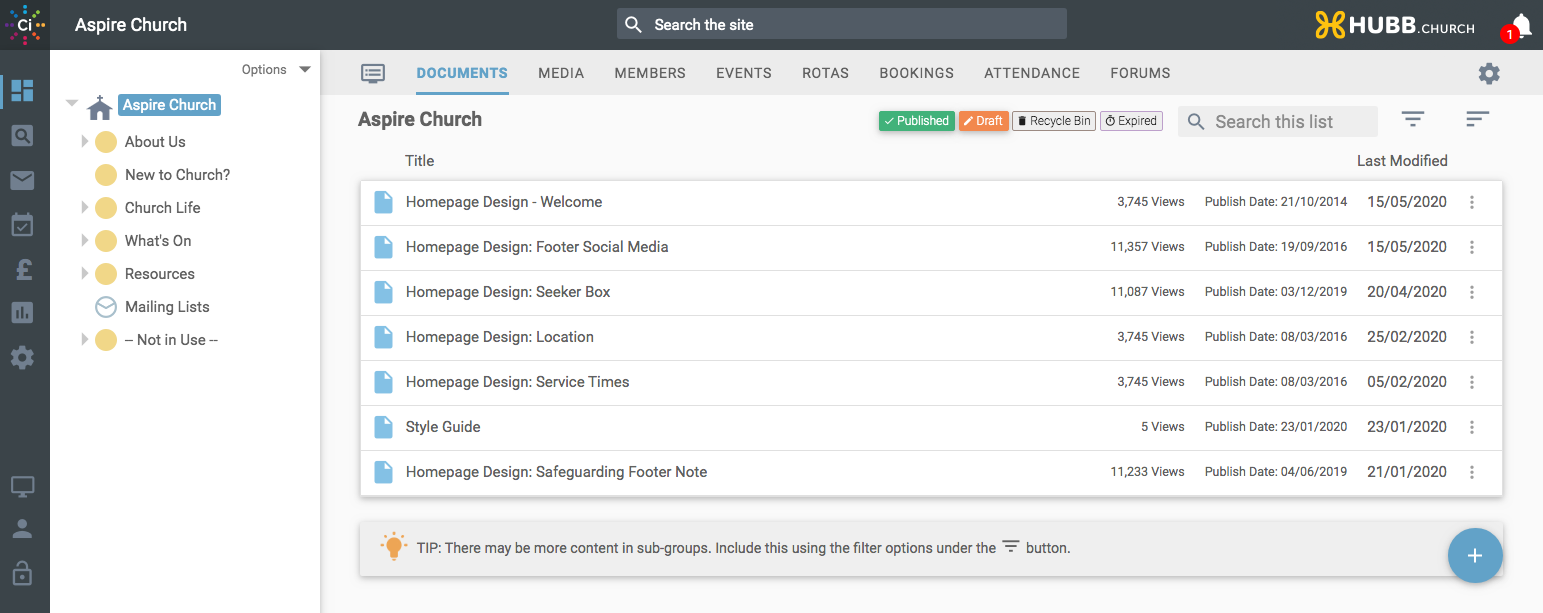
- The safeguarding footer notice runs off the ‘Homepage Design: Safeguarding Footer Note’ article in the root group. Put any text you like in here, or set the article to draft to remove it from the footer.
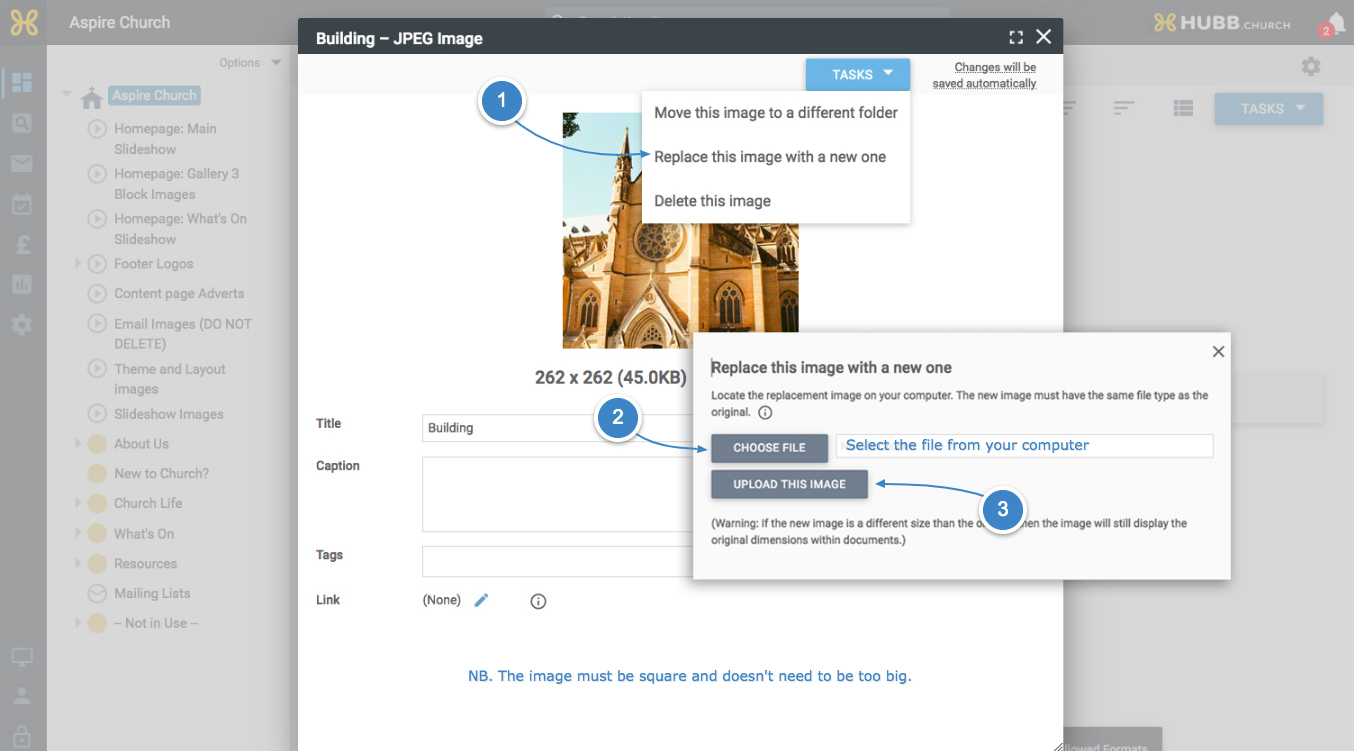
- The welcome article holds a church image you can change: select it and use the ‘Replace this image with a new one’ task. It must be square, as it shows in a circle on the front of the site.
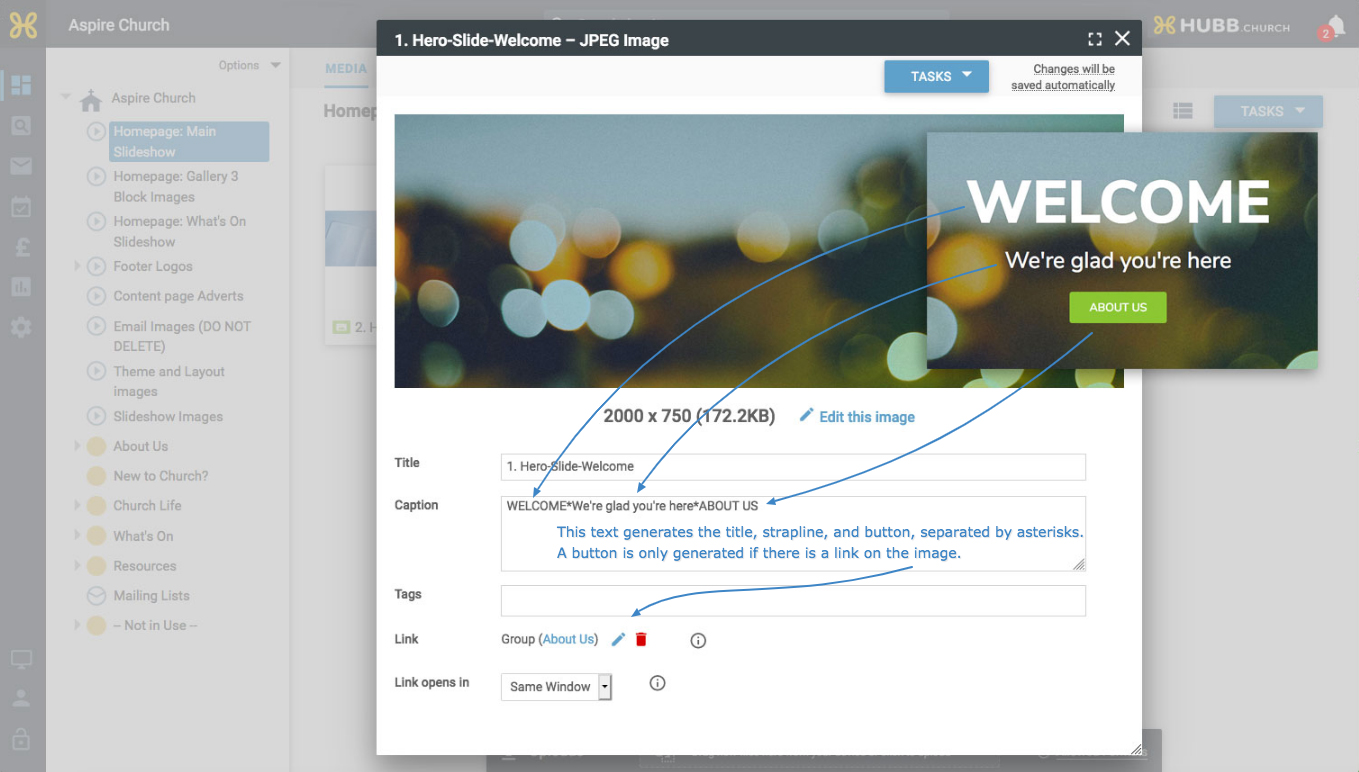
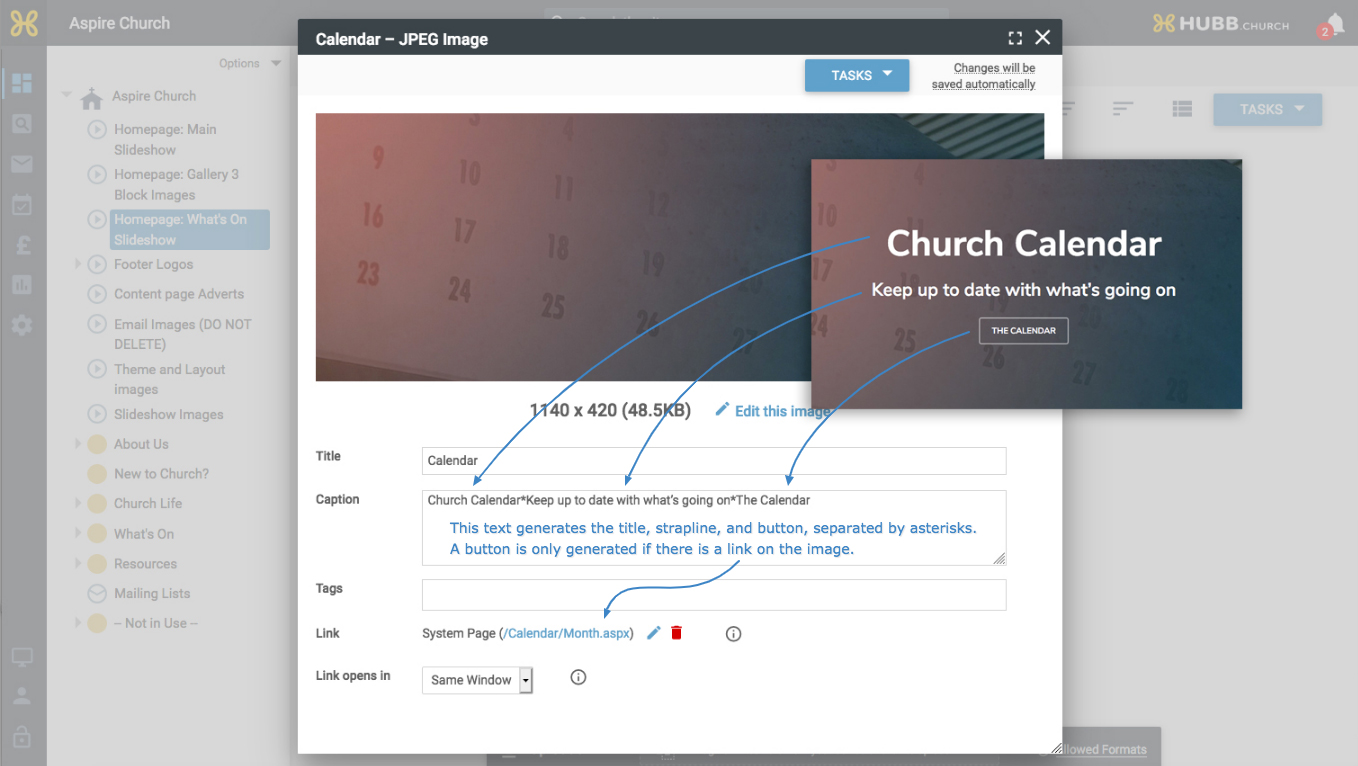
- The ‘Homepage: Main Slideshow’ media folder holds the slideshow images, at 2000 by 750 pixels. Set each caption in its image page in the format main title*sub-text*button-text (separated by asterisks), with the button only showing if the image has a link. They’re shown in alphanumeric order, so renumber or rename to reorder.
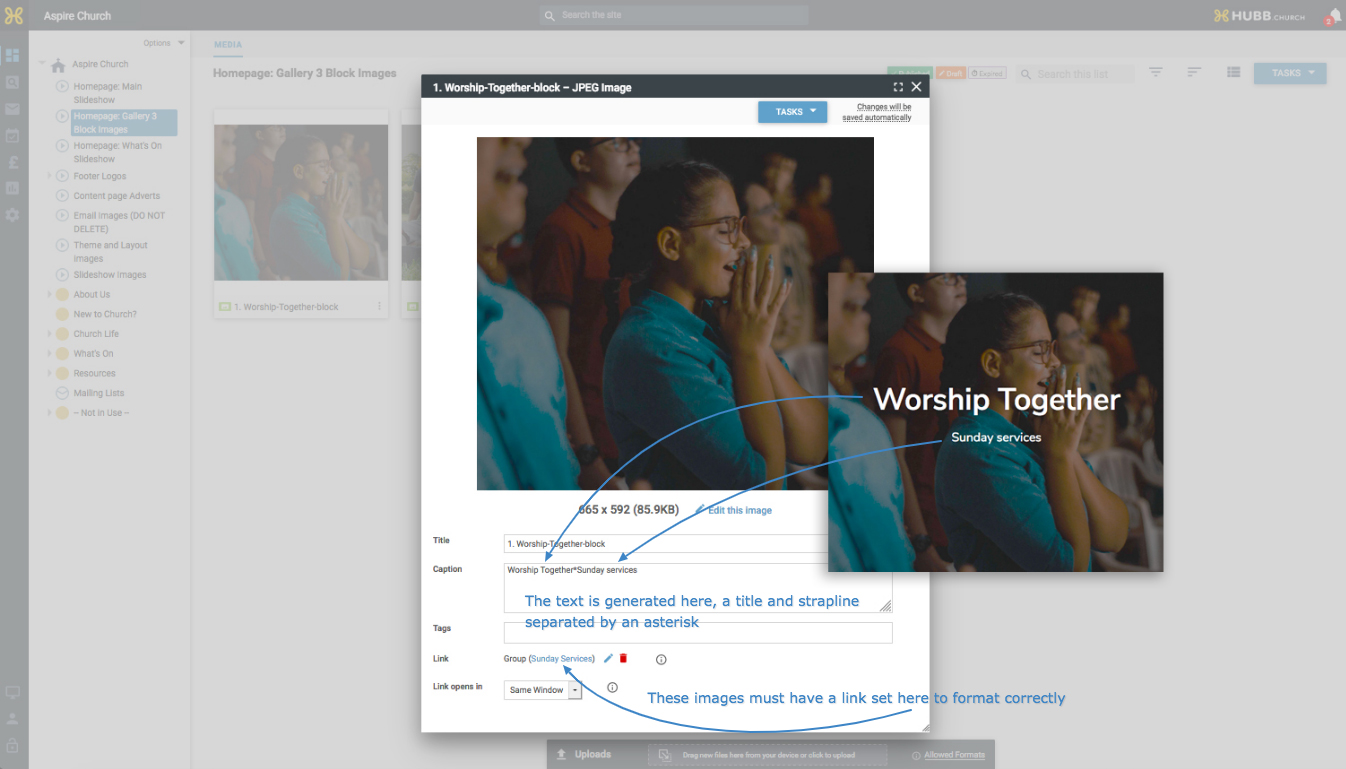
- The ‘Homepage: Gallery 3 Block Images’ gallery holds the three images below ‘Service Times’ and ‘Location’. Links and captions are set the same way as the slideshow. These images are 665 pixels wide by 592 tall, and you can use the built-in editor’s ‘Block Image’ format to resize them.
- The second ‘What’s On’ slideshow works like the main one, but these images are 1140 by 420 pixels.
- Any logos in the ‘Footer Logos’ media folder (below the root group) are shown in the footer. There are some stock logos in the ‘Denomination Logos’ sub-folder you can move in and out, and you can leave ‘Footer Logos’ empty if you don’t want this section to show.
- The new-visitor widget runs off the ‘Homepage Design: Seeker Box’ article in the root group; edit its text and picture in HTML mode. Clicking the widget opens a larger lightbox that draws from your ‘New to Church’ article, and you can let us know if you’d like it to link somewhere else. It won’t show while you’re logged in, so check in an incognito window if you need to.
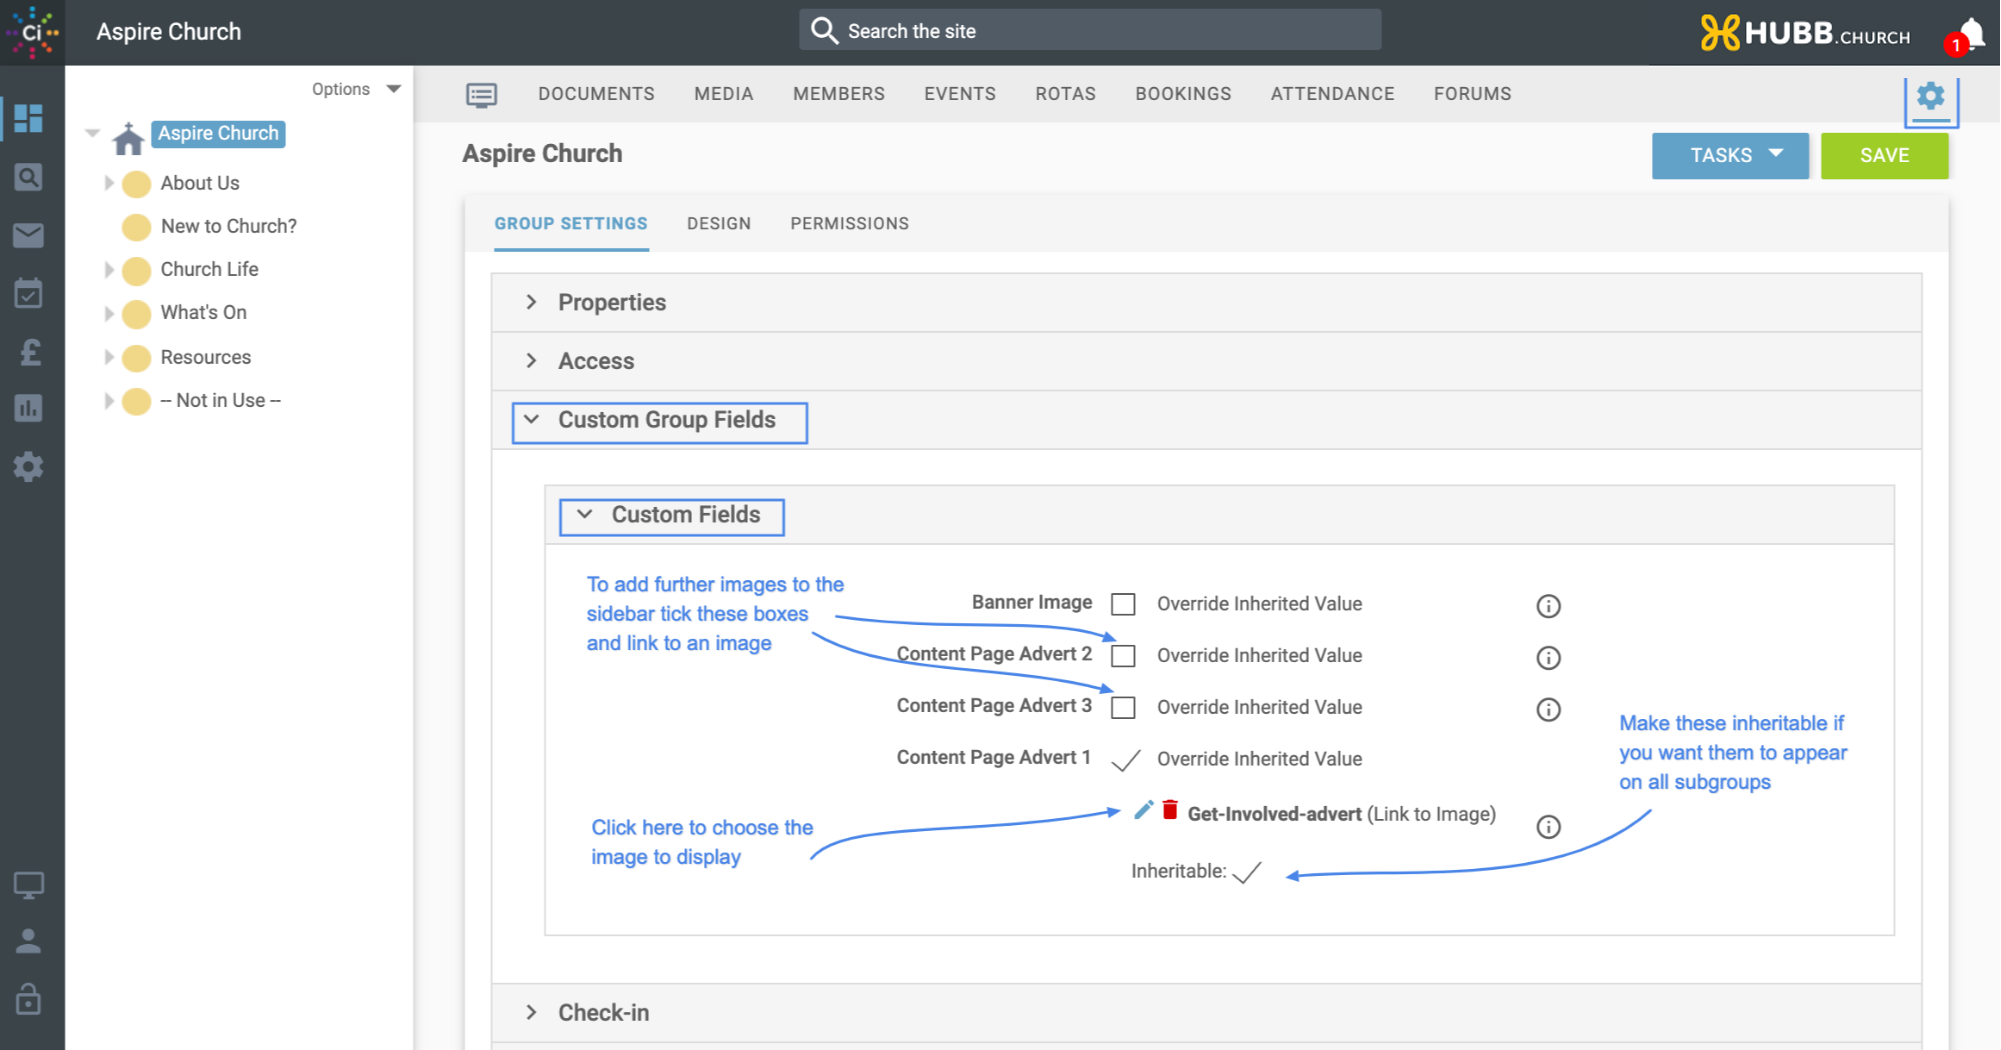
- Up to three image adverts can appear below the side menu on content pages (a ‘Get Involved’ one is set up as an example). Set any image on any group page by editing the ‘Content Page Advert 1–3’ custom group fields under the group’s settings. The root group points at the ‘Get Involved’ image and inherits down the tree, but you can override it on any group. Set where each advert links by editing the image itself.
- There’s a built-in sermon series template. For each series:
- Create a sub-group below ‘Resources > Sermon Series’, with a sub-group for each series.
- Add a group summary image to each series sub-group (recommended size 800 by 400 pixels).
- Add a homepage article with a sentence or two describing the series.
- Upload your media files to each series group.
- Set the banner image with the ‘Banner Image’ custom group field for the ‘Sermon Series’ group, and make it inheritable.
New to Hubb? There are some short getting started guides in our getting started area.
Still stuck? We’re real people.
Raise a support ticket and our UK team will get back to you.
Contact support